(plus side: I’ve finally caught up to some of the snapmark jigs I’d been wanting to make)
Masking question: The paper tape I generally use for masking allows some of the symbols to show through (it’s a bit translucent, I guess is the term?). For anyone who is re-masking their draft board for re-testing, is the stuff you are using making the symbols form the earlier cut impossible to see, or is a little translucence not an issue?
For normal masking, to guard against scorch etc, the translucence was never a consideration. But I’m unclear on if the calibration needs it to be pristine.
I can buy masking paper if needed, I just don’t wanna. 
1 Like
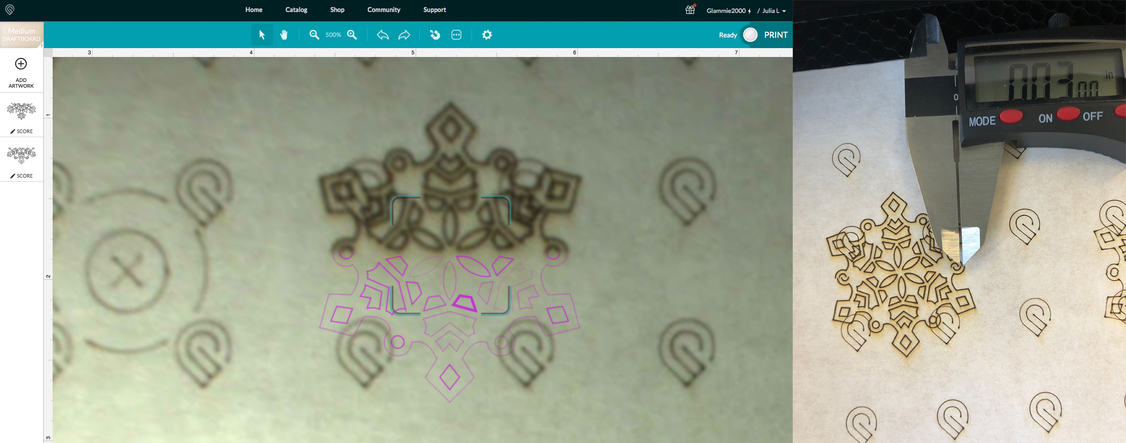
My camera calibration was way off before, and now that I’ve run the calibration software it is ‘only’ 1/32 of an inch off… this is definitely drastically improved but I still can’t really line up detailed prints like I was hoping. Does anyone know if there will still be more improvements on this to come? Thanks!
Also - regarding the translucent tape, what if you spray paint the tape? I know that might involve buying spray paint… but that is always fun to have around for laser projects ![]()
First, you have snapmarks so there is that option for precise alignment. Also, 1/32 of an inch is an extreme improvement over what was promised. Finally, there are jigs. As for knowledge of more improvements, we will know when we are told through a company announcement.
Hello everyone. I did the calibration now 4 times including cleaning all lenses and unplugging the cable, which is attached to the head. I still get the message “Not completed the process was interruped, so no changes were made to you calibration.”. On the right corner there is also the popup " amfter completing measurement, no improvements were found. The alignment of your system was not changed…".
Any ideas?
I think it does have to be pretty pristine. Most paper tape makings aren’t fully opaque. If you put down in a second layer can you still see the old symbols?
1 Like
so i decided to finally take the time to do the camera calibration … and now i’m stuck on the measurements screen. says 84% complete for 30 mins. now … anything I can do?
Probably not. You can test it to see if it worked. It may have. If not, clean the camera, remask the material and try again.
1 Like
Two layers makes it pretty much clear. I hope to test that tonight so fingers crossed!
1 Like
I want to say thank you for all the hard work that I know had to have gone into getting the camera calibration working.
In the beginning, the alignment was terrible. Then I created jigs, and learned how to create scored alignment marks, which made things better. Eventually I got snapmarks on my account, and things got a little MORE better. Then came camera calibration.
I ignored it until I finished the project I was working on. Then I ran it, and immediately tried another cut piece. It was no better than before. I tried the camera calibration again, followed by another cut piece. Still no better. By then it was late, and I threw up my hands in frustration and walked away, thinking at least I knew how to use the method I’d been using. A day or two later, I threw a project up, and cut it, positioning it like I’d been doing before. And Lo, there on the screen, the project and the cut lined up (almost) perfectly, certainly much MUCH better than it ever had before.
Now I can line things up much closer to the edge of the proofgrade, knowing it won’t cut off the edge. I’m making much better use of the plywood sheets that I have, far less unusable scrap.
Thank you, thank you, thank you.
4 Likes
@dan now is the time to start offering service parts for sale
All fans
Belts
Laser tube
People’s fans are starting to die out of warranty. You are missing out on income by not offering them.
I work in the mining equipment industry. Aftermarket parts can bring in more money than the equipment sales per year.
This helps you and your customers.
3 Likes
I finally hooked up my Glowforge this week (I’ve had it for over a year, but I’ve been unable to use it, as the air filter still hasn’t shipped and my workshop has no vents to the outside. I finally knocked out part of a glass block window to make a hole for the exhaust duct).
The alignment was significantly off out of the box, to the point that I had to completely reprint my first two sheets. I ran the Camera Calibrator, power cycled, messed with Set Focus, verified level surface, and have followed every other calibration troubleshooting suggestion I can find on the forums. When I last ran the camera accuracy test it seems to have shifted to being off in the opposite direction, but is still pretty far out of alignment:

Does anyone have any other suggestions? I’m trying to use the trace feature to cut around some artwork, and so far each print is just chewing up material and producing unusable pieces.
Congratulations on finally breaking it out of the box! ![]()
You’re going to have much better luck using the Trace function to capture an image of your artwork and turning it into an engrave on wood that you can then cut out around. Without the Snapmarks, (which haven’t been released yet), there is no fiducial marker on your drawing that can be used to line up the cuts accurately around something that is drawn by hand or pre-printed on an inkjet printer.
If you do want to do a “Print and Cut” style file now, you’ll need to use the method outlined by @cynd11 here:
(*Unless your machine had Snapmarks assigned to it during the Beta test and you were never aware of it, in which case you can read about how to work with them here.)
I believe your alignment is off by more than 1/4", so please email support about it.
I just wanted to thank you guys. This camera calibration process is simply amazing. Its like i have a new machine. Better than new! Its 100x more accurate now than it was out of the box, and now i can complete a whole list of projects that i have been putting off due to alignment. I can’t even imagine all the hard work that’s gone into this, but it was time well spent. Unbelievably happy customer here!
6 Likes
So what do I do about having the same problem as others where the machine goes through the process and gets done and says process was interrupted and no changes were made?
1 Like
Same issue. Tried 4 times, 4 times I failed after measurement. 
@dan Hopefully you can help. I have been through the process four times and it keeps saying
" Not Completed
The process was interrupted, so no changes were made to your calibration."
I completes the measuring and then starts to calculate and then does the error about.
I think you probably should post to Problems and Support so the support team can look at your issue. I don’t think they’re monitoring this thread. 
1 Like
Indeed, P&S will be the best place to get help - they’re more qualified to do so than I!
1 Like