And I like a good challenge, so… off to learn how to make an Inkscape extension! Or, if you know your Sagan, I must first invent the universe (AKA, learn python and like 37 other things).
What it does:
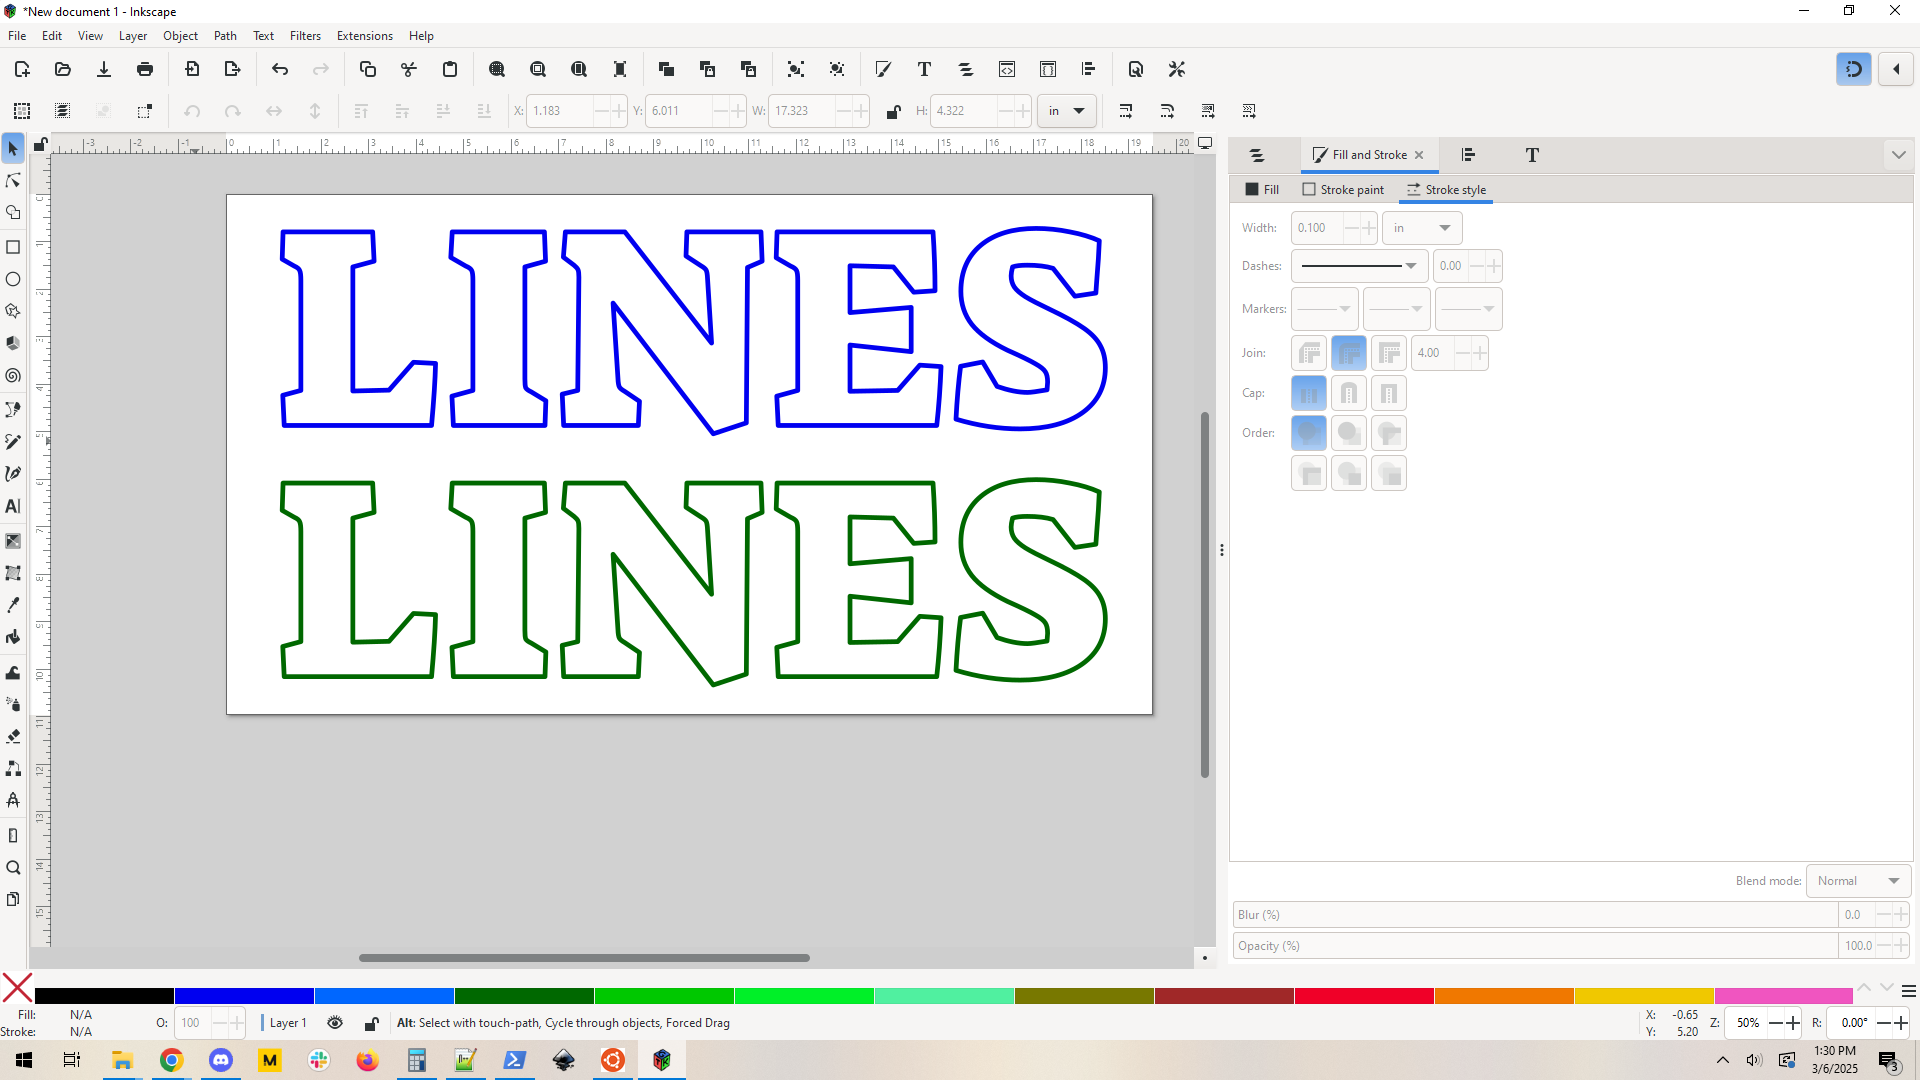
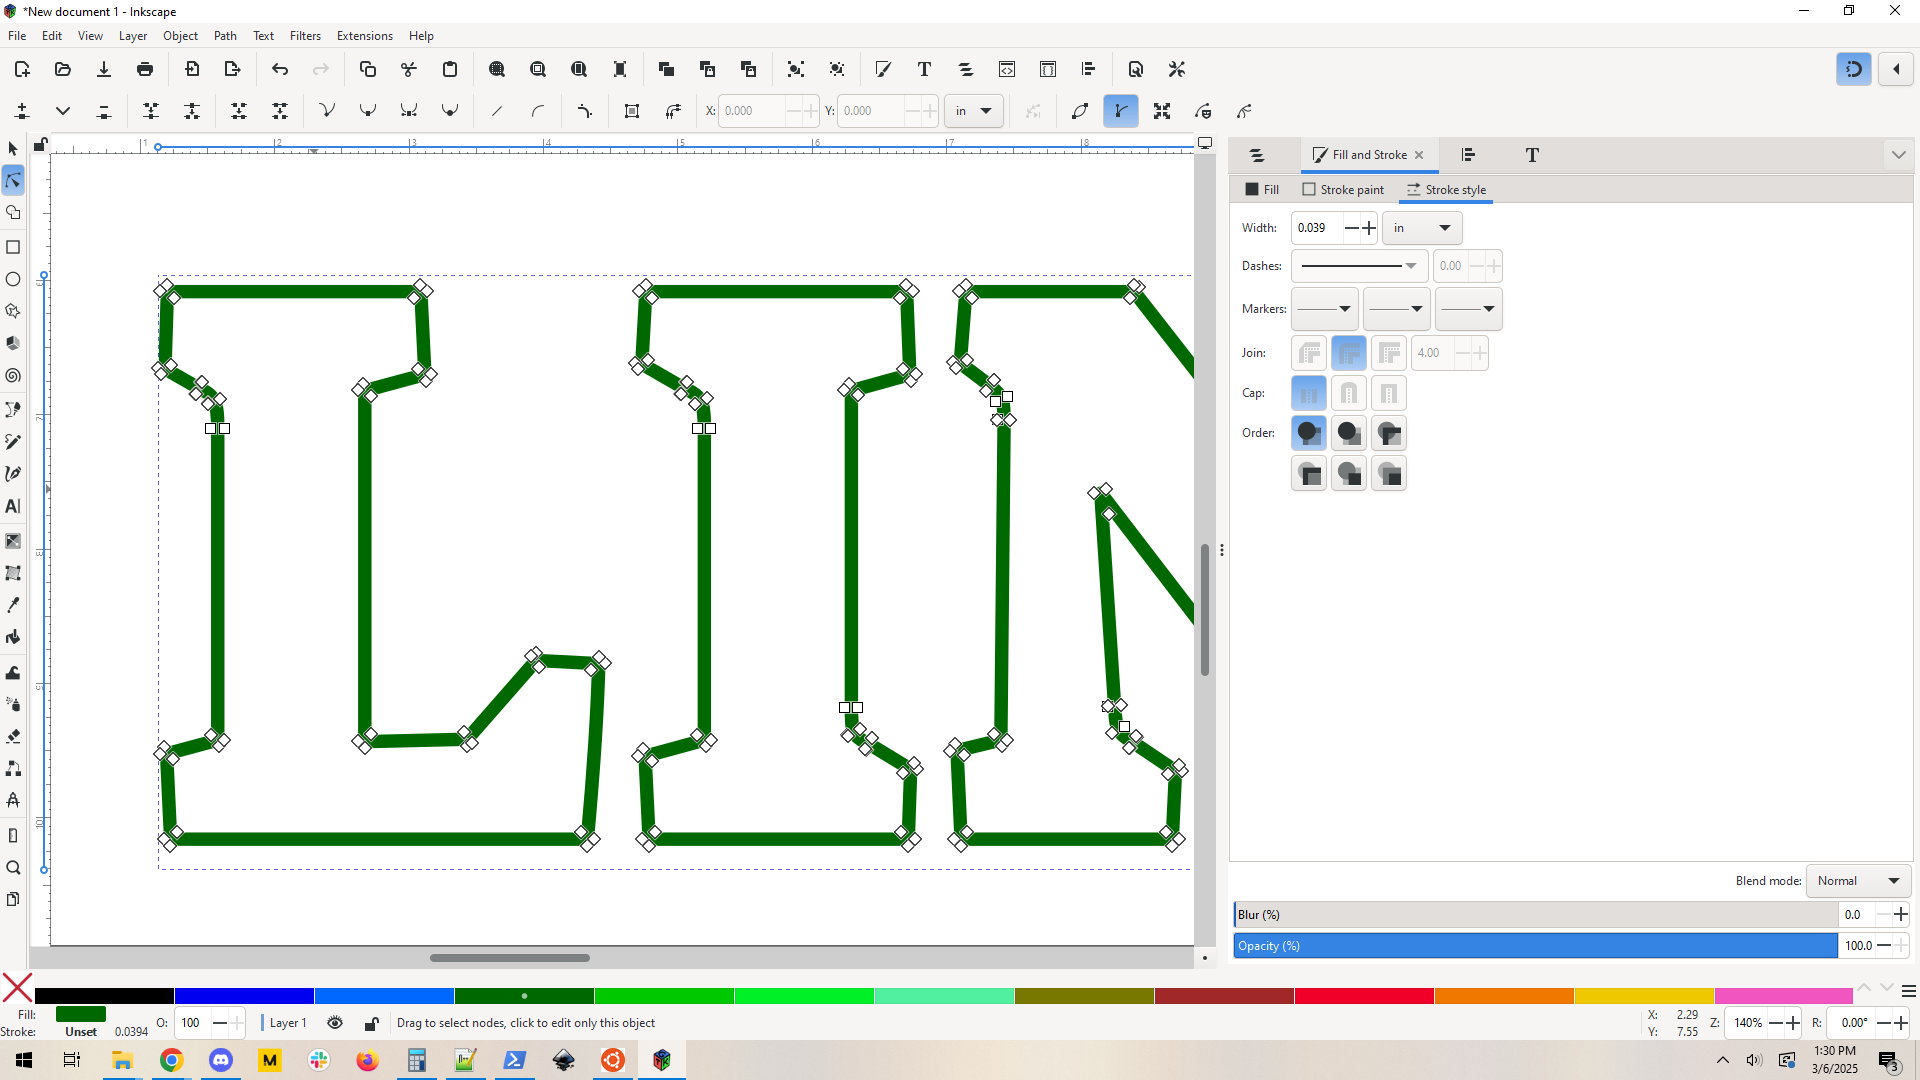
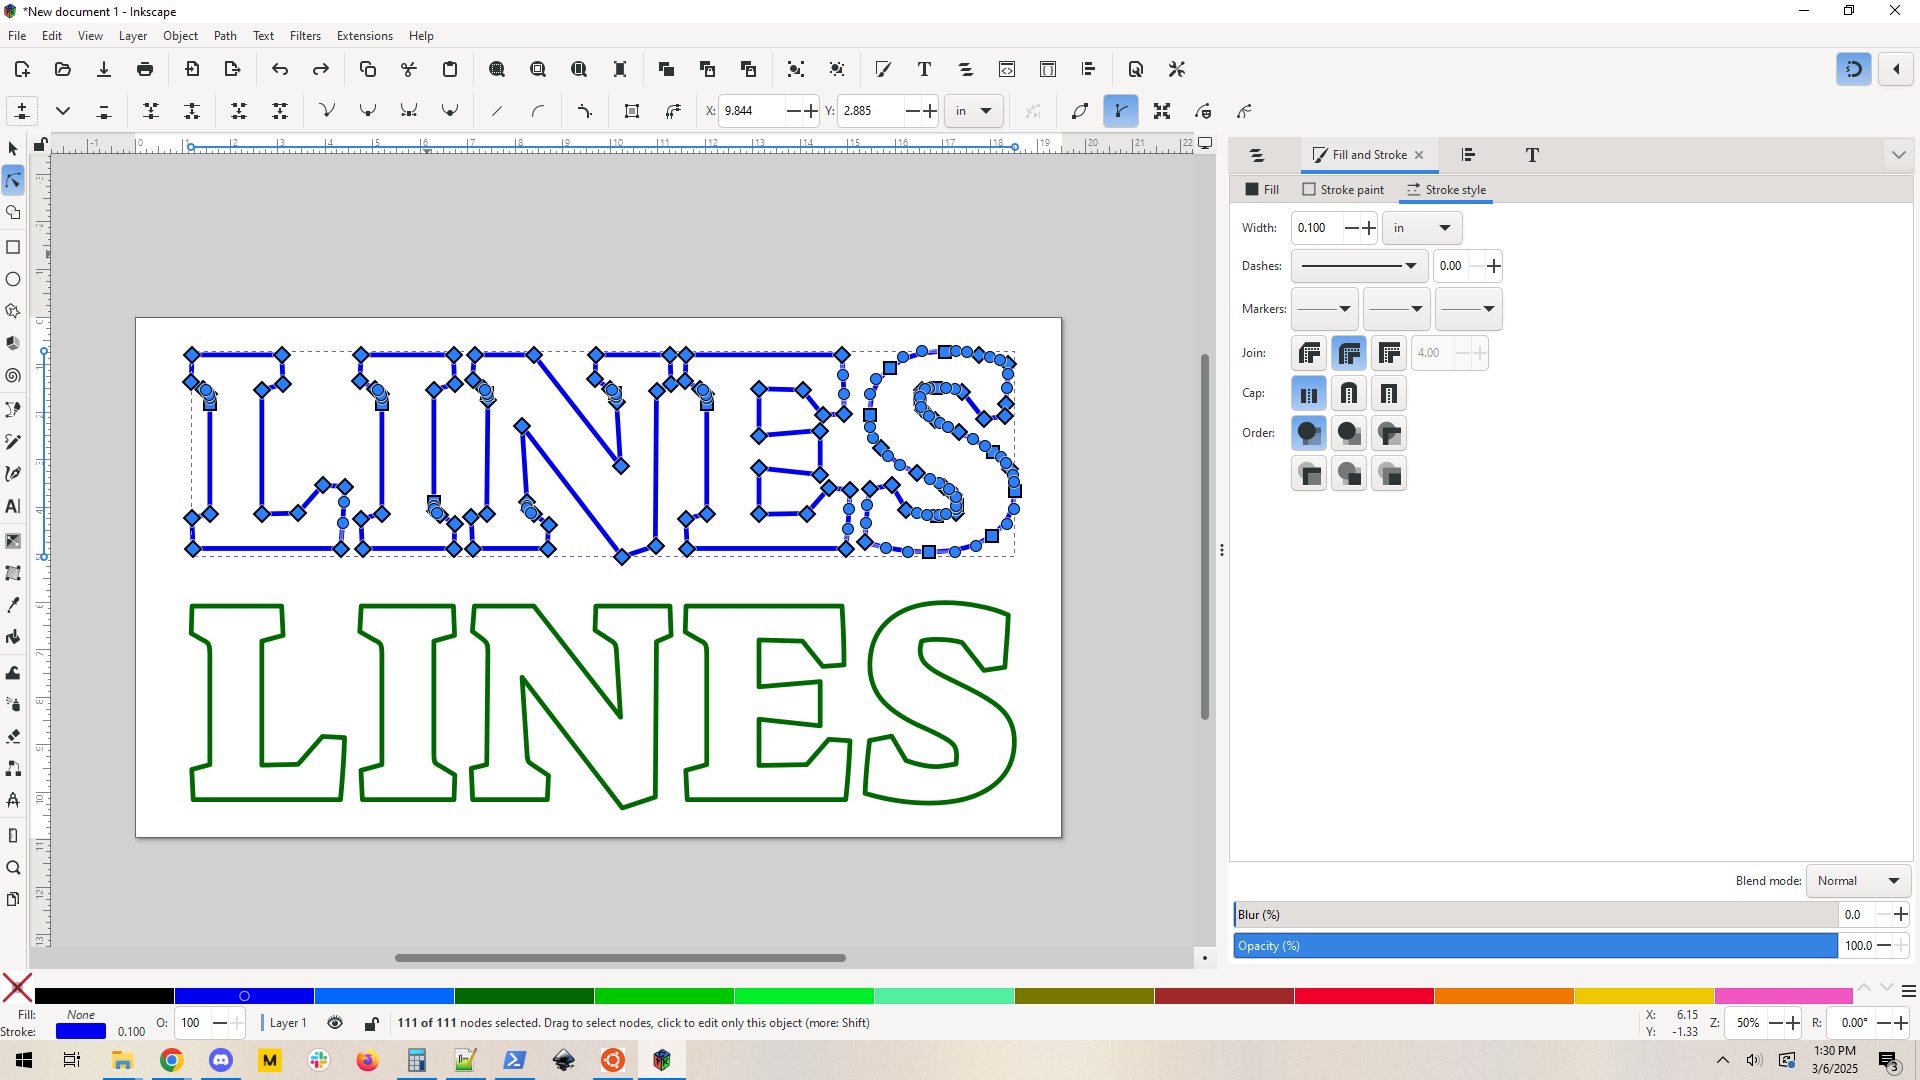
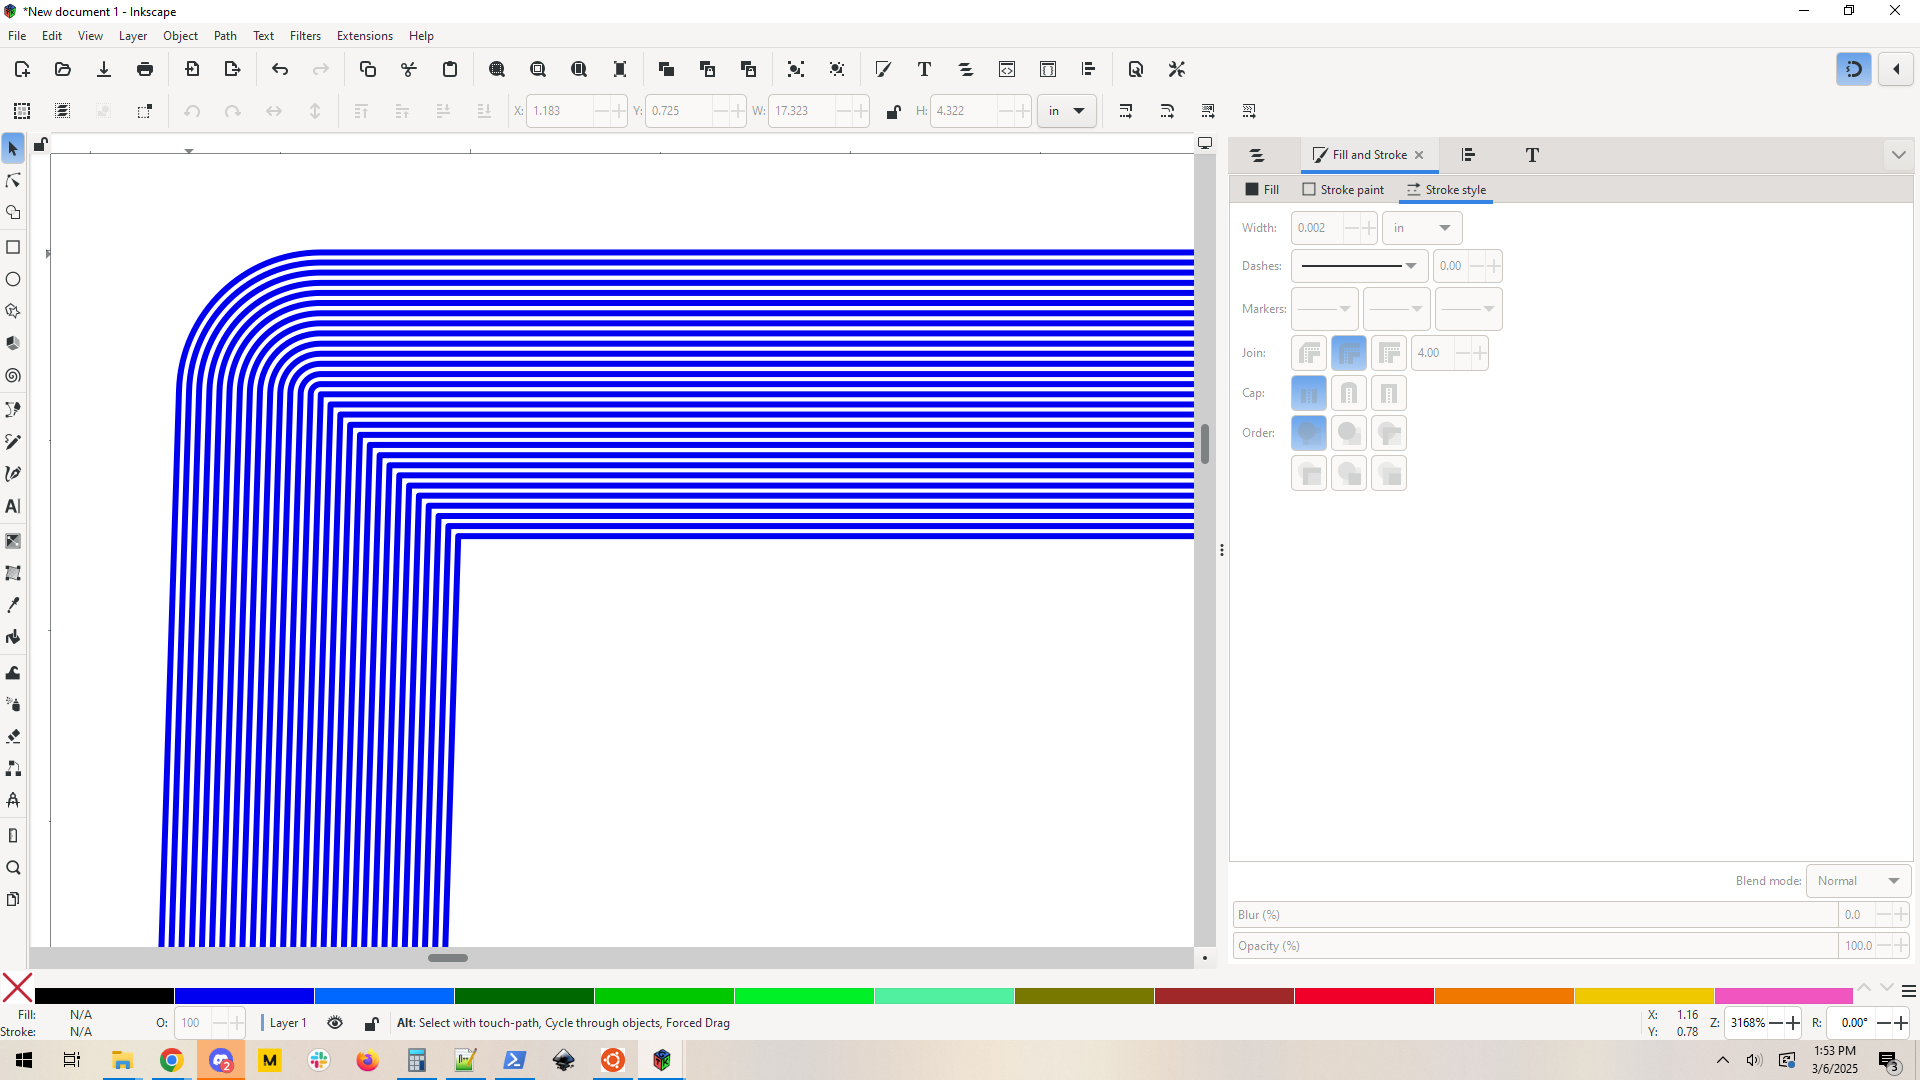
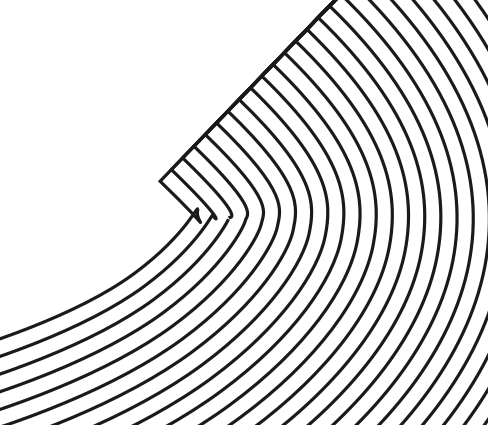
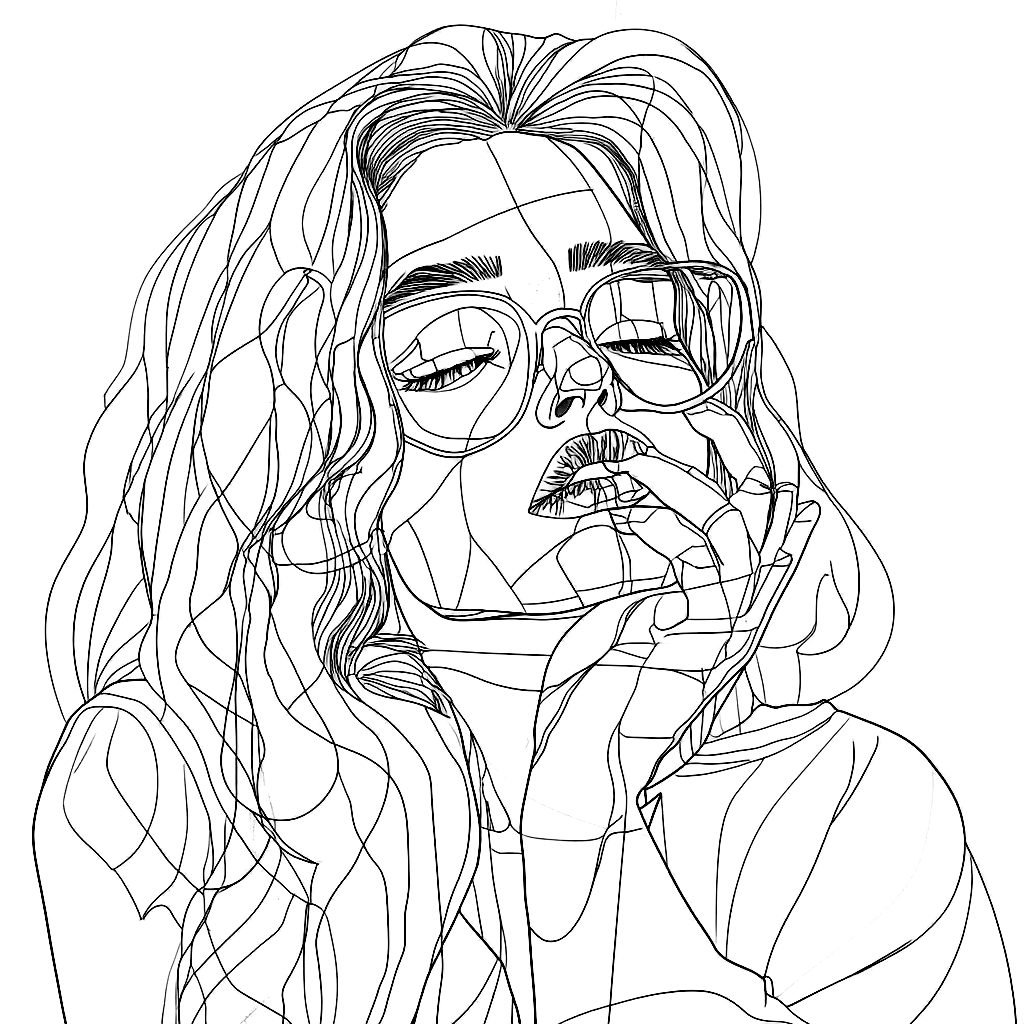
It converts selected stroked paths to be nested paths that fill that stroke, so you can engrave along the path instead of side-to-side.
Thank you for all of the effort you have put into advancing the user knowledge base with this and so many other Glowforge related things. I will test as soon as possible.
Plugins are such a grand way to get improvements to a program that focus on exactly what you want them to do, but I never considered trying to create one.
Ah hah! SO, you have to have it in node mode - but you cannot also have those nodes selected, or you get a failure.
Solved Issue
So I’m definitely having issues. I’ve tried doing straight boxes with no luck. Once I combined two boxes into an O and it worked perfectly, but recreating those steps I find I can’t get it to do it again. Not sure if it’s a chaching issue, but even opening a new design I can’t repeat my success
I note that it defaults to outputting lines at .002" - which at least for me is smaller than the eye can see - if that’s hard coded I’d suggest a .007" minimum.
Also that you have to have the paths in node-mode for it to notice them (otherwise it says “no paths selected”), is worth adding to the readme if that remains true
No idea if you’d get anything from output, but these are the files I made:
Neat - now I’m gonna play with more complicated things
Rectangles aren’t paths. You have to do “object to path” first.
Click on your shape and look at the bottom of your window, it should say something like “one object of type path selected”. That’s how you know it’s a path for sure.
The issue with stroke thickness at the end is that 300 lpi is 0.003333”. If I go any higher than about 0.002 it’ll look like a solid line again.
I could modify the output to make the strokes of the paths increase if you do lower resolution, 100 lpi is 0.01”, so I could go up to like 0.008 and still have gaps.
I might also put text in the output to let people know that it’ll be very thin lines. Hmm this is good feedback, thanks for trying it out.
I’ll collect more feedback and make changes when there are a few more opinions. I need to handle extremely thick lines better, right now I have a hard limit of 500 new paths, I probably need to make it fail more explicitly before it does anything, rather than just stopping at 500.
Ah ok, digging in - if I change it to a path and go immediately to the offset, it failed. If I deselect, and re-select, it works fine. BUT - in both cases when I tried to record exactly what it just did so I could post a video, it worked fine. Rectangle object > convert to path > offset engrave.
I swear, I’m not nuts. It really did fail before! Weird.
Edit 1
Might be that I’m running into that total number of lines limit. I did a .75" wide piece at 300lpi and got the “No paths” error - but that exact same shape at 100lpi and it worked.
Edit 2
Also, I see what you mean about actually crossed lines, but having to rotate a few handles is a small price to pay for everything else being automated!
Sadly I no longer remember which it was, and both things I tried had no issue, so clearly I just need to complain about it not working and you cross through the ether to fix it for me
This is excellent… hats off to you. Reminds me a bit of another plugin for the eggbot which created infill … no idea if this is helpful to you but that plugin is out there.
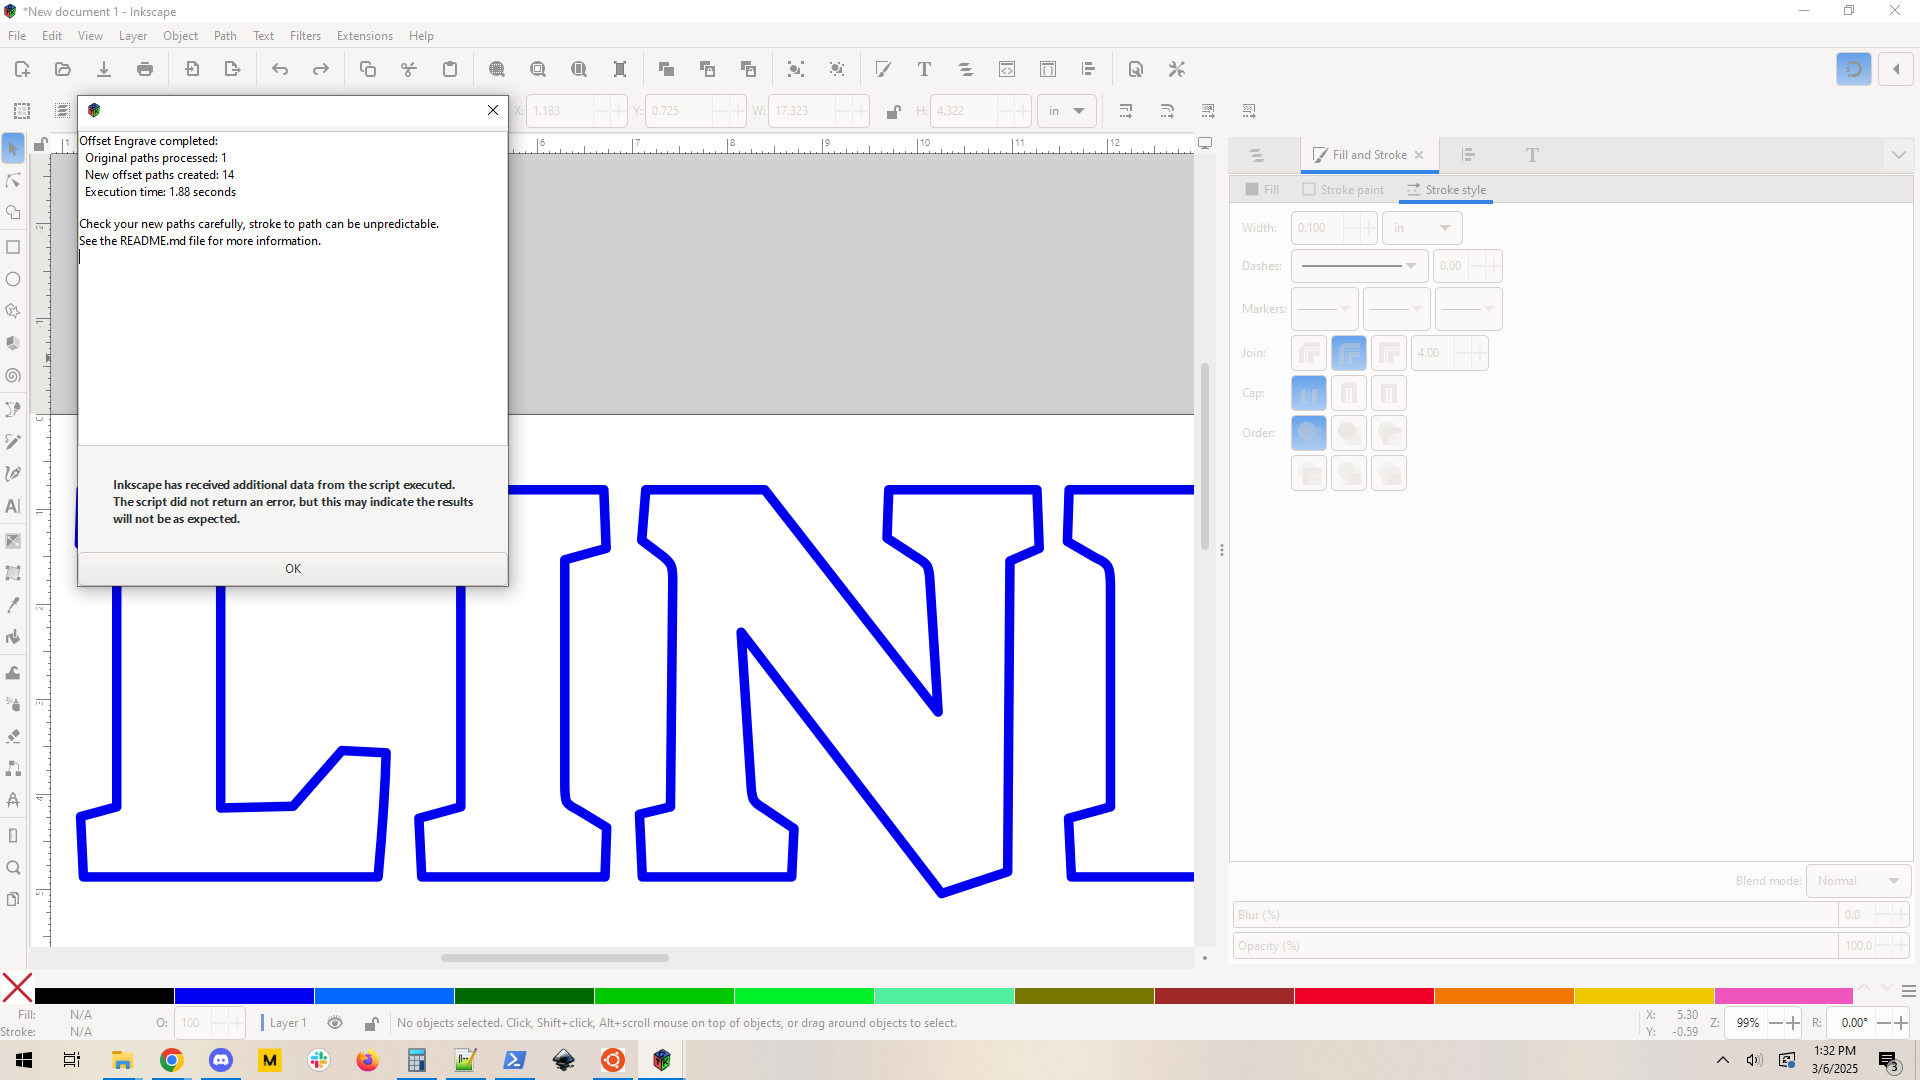
Neato! I got a little dialog that essentially said “inkscape didn’t error out but it said some stuff”, but despite that it seems to have worked like a charm.
Thanks for testing that. Do you have the file pre-extension? Id like to see if I can find out what error it is.
Also it looks like you get weirdness when you have your stroke set to have flat square edges. I think you have lots of lines that overlap on the end there. This is actually a problem.
I did my test with rounded caps. The extended square end would work well too.
Cool thanks. And yeah that spiraling at the corners is a thing with stroke to path. There’s probably nothing I can do with that, it’s part of why the extension says to carefully check your resulting paths.