My Pro arrived about 2 weeks ago. I waited for its table to arrive during our first week together and we built an exhaust unit during the second. I am preparing for 2 back to back trade shows that start in 3 weeks and I don’t have the time to play that I wish I did.
I need a couple of signs for the shows and decided to try etching them on my Glowforge - mostly because I can and I desperately wanted to try making something on it.
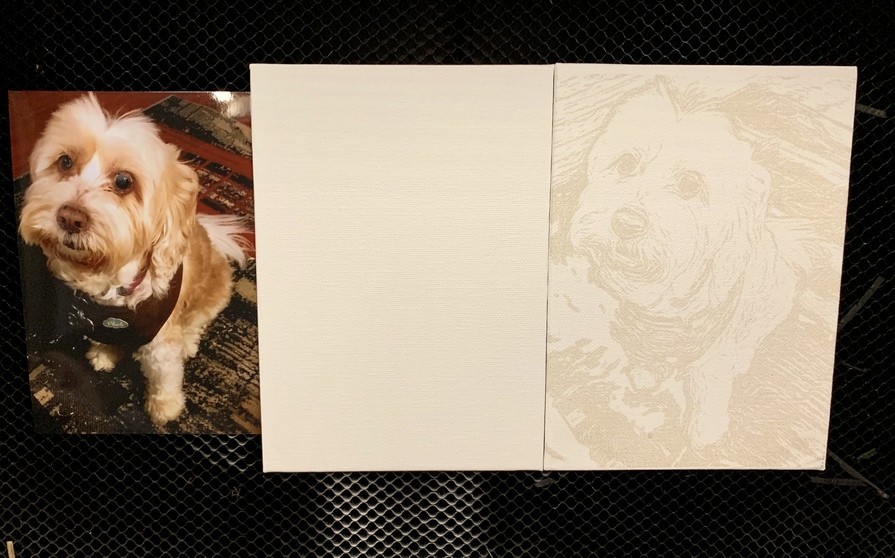
Armed with 8"X10" inch Canvas Panels from the Dollar Store - I went at it and was thrilled with the results. So thrilled, I decided my 4 color laser printer is “so 2017” that I should engrave the rest of the signs I need as well .
I created my art in Illustrator.
While I was going through all of the steps to convert my text to outlines or paths I decided the steps were not necessary if I was only “engraving”. All I really had to do was save the design in a bit mapped format rather than a vector.
Knowing that I didn’t want to carry a background into the engrave I saved my file as a .png. instead of .jpg . This method allowed me to preserve my transparent background which is not possible when using a .jpg.
I then opened the .png in Illustrator and then saved the file again - this time as an svg with the .png embedded.
I uploaded the svg for the Glowforge, set it to go and waited a modest 34 minutes for the process to complete.
Settings I used for canvas:
Unknown material with a depth of .125
Speed: 1000
Power: 50
Pattern Density: 50
LPI: 225
Focus .125
Although I meant to mask the canvas before I started to engrave - I forgot and in this instance - no charring or darkening occurred.
I used these settings on some canvas tote bags. Looks great but it made the canvas too thin for use as a bag. It just tears apart. (Albeit, I am using some cheap canvas totes that are pretty thin to begin with). These are the settings I used for the canvas bags and they came out great.
Settings I used for canvas:
Unknown material with a depth of .125
Speed: 1000
Power: 20
LPI: 125
Focus .125
I’m traveling this week and you really captured my interest as the canvas bags may be a solution to an issue I need to resolve. Any chance for a photo?
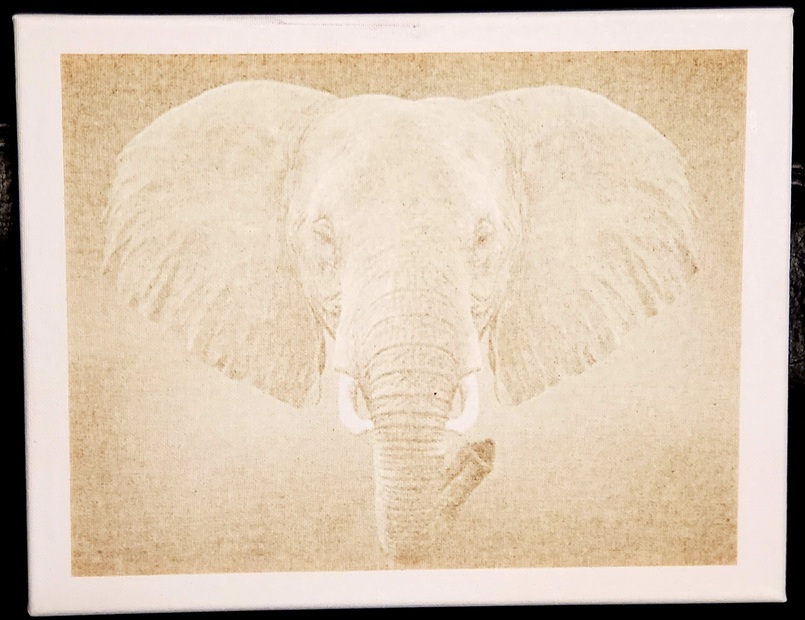
Finally had a chance to try this one myself. Got a smaller canvas piece to experiment with, and used a 40 instead of 50 power setting; 1000 speed. I wanted to create a black and white piece based on a photo, something that could either stand on its own, or work as a template for painting later.
This is wonderful! I just set up my glowforge yesterday, and I’m trying to cut out circles from canvas. I can’t seem to get past the unknown materials screen! Any suggestions for settings based on cutting all the way through? I will try your settings, and adapt, but wondered if you have any advice. Thanks! -julie
Im wondering how thick your materiel was and if you used the grate or not?
I have canvas that is .5 inches thick. I had to remove the grate and it will not print as well as yours. Im using all the same settings accept i removed the grate AND changed the focus to .5
Assuming you’re referring to the honeycomb bed when you say “grate”, your focus is set wrong.
The top of the bed is about 1.4" from the bottom of the machine. That is “0” in terms of focus. Any thickness or focus measurement is based on how far it is above that reference. So a 1/4" is telling the machine the top of the material is 1/4" above the bed. You can go up to 1/2" (just be careful that the fan outlet below the head doesn’t hit your material).
If you take the bed out then you need to bring your material up off the bottom using something to support it. If you really have a half inch and it won’t fit under the fan housing then you’d need to put something under the material that gets its top surface within a half inch of the lens - I’d use something like 5 pieces of 1/4" plywood or MDF.
Then I’d put the canvas on top. Now your new “bed” is only 1.25" from the bottom (vs the standard 1.4") so it’s still below the lowest focus. But your canvas is now 1.75" from the bottom. Subtract the 1.4" and your material top surface is .35" from the 0 point of the machine. Enter .35" as your thickness or focus height and you’ll be good.
Gosh, this is WONDERFUL! I am a bit of an artist myself and I did my first etching of one of my paintings on wood for a trial. It turned out very nice! Now, I would like to transfer some pictures of my paintings onto canvas. I was worried about what settings to use, I do not want a fire or problem with it going too deep. Thank you for sharing your beautiful work AND the settings that seem to work very well for yours. Thank you again.
I am absolutely in love with this!! I’m tempted to try the same thing I was doing with the tiles I was working with and paint it black first? We shall see.