Engraving ripples

All the pictures of raster engraved flat areas I have seen here show coarse ripples, even on the most recent PRUs. These seem to start as soon as the raster lines overlap and get worse as LPI increases. They still happen when the beam is defocussed. This doesn’t seem to be the case on other laser cutters, including K40s. See the thread here: More trial, errors, and fun

This is a question for @dan: Does the Glowforge team know the reason for these? Will it be fixed before production?

Would an interlaced raster scan help?

6 Likes

Those ripples consist of leftover remnants of masking and the adhesive…they can be removed with duct tape. (Just did it last night.)

After removal, you can actually see the cast pattern on the acrylic, which appears to be crosshatched.

Not on mine. Either PG or separately sourced cast. I replied to your other post. Can we trade SVGs to see what we’re doing differently?

Can’t trade this SVG, it was a gift, and not mine to give. The settings I used on it though I can tell you…

I used a light score to clean up the edges - 1/197/0.116 (And it’s still overburning on direction changes, but I actually wanted that for this file…you guys will see it later after I get some strip lighting connectors in.)

Then gave it a fairly deep engrave - 20/200/0.116/270 LPI.

Once you remove the junk, it looks like this, and this is an extreme close up - from a distance it looks smooth:

What looks like a few white streaks at the edges are some little bits of residue I couldn’t get out of the corners, and it looks like I might have missed a patch of streaks in the right side branch.

I can clearly see the vertical hatching lines in the acrylic when held up to the light, and this was engraved horizontally, so it’s curious.

7 Likes

Oh, I think a lot has to do with the material, as well as the LPI.

The picture frame that I made from the GF free catalogue onto PG Plywood was reallllly smooth:

/uploads/db6859/optimized/3X/a/0/a065695bcf20c529431d9de594dea45d3b932901_1_374x500.jpg

Also this engraving on PG acrylic; really smooth

/uploads/db6859/optimized/3X/7/3/73dc230d459835a59614722a2d4e8a867732ab29_1_375x500.jpg

6 Likes

It definitely does – see here, here, here, here, here, and maybe here. That last one might be an intentional texture…

Of the not-professionally-edited photos I looked at, a sizeable percentage had those striations, or whatever they are. On some, you could also see vertical striations on the cut edges, too. I don’t know why some are smooth and some textured (material, file size/resolution, or something else?), but it’s definitely not a glowforge-specific thing.

4 Likes

But it’s much more pronounced on the GF. Especially at higher LPIs where I’d expect it to be less noticeable.

This is on a Redsail, standard cast acrylic.
https://community.glowforge.com/uploads/short-url/2DKLFEPh9tw7tPyyvwQJAXsOahl.jpg
You can see fine lines on the text in the lower right but they’re almost invisible in the body of the sub. (The patterning in the logo is intentional.)

This is Proofgrade on the GF. The photo doesn’t show the extent of the height/definition of the lines so the one after is in black acrylic (non-PG) where it’s easy to photograph.
https://community.glowforge.com/uploads/short-url/dIYv1oqZzg045zMhiGdo3a0zs0I.jpg

I don’t expect from experience that it would be striation-free if I’m not defocusing, but I would expect the GF to be better.

6 Likes

It is very hard to tell with wood because of the grain, but with homogeneous materials like acrylic I expect results like @jamesdhatch’s Redsail gives. I don’t expect any irregularities wider than the line spacing.

@erin, some of your examples simply look like the raster lines due to using a low LPI. The GF can give ripples something like 0.1" apart when engraving at 270 LPI. What on earth happens after ~27 raster lines to give a ridge several raster lines wide? And why does it do the same ripples in the same places when it engraves a second copy to the right as a separate operation with different focus and power?

The reason I said K40’s don’t do it is @jamesdhatch said so in the other thread. I have no experience with lasers myself.

@Jules, when the LPI is significantly less than the kerf I would expect it to look smooth close up as well as at distance. Glowforge boasts 1000LPI engraving. You seem to actually have a choice of 1355 or 677, which are both tiny fractions of the kerf. These artefacts are much wider than the kerf and seem to get worse when the LPI goes above 195. That seems to make higher LPIs pointless.

Low LPIs do show far more spacing between the lines but the effect of high LPIs after about the 195 range just seem to make the engrave deeper - more like upping the power. The lines are closer but they’re certainly much coarser than the LPI would indicate.

I still think it’s related to the minimal control we have on engraves right now. Really want the settings back they dropped and then pulled back last month.

3 Likes

Yes once you get above 125 LPI the raster lines overlap and you are engraving the same area multiple times, so it should get deeper, but the bottom of the pocket should get flatter and any striations should be at LPI spacing, not an order of magnitude bigger.

To compensate for the extra power density yes you do need better power control to achieve the same depth but I don’t see why that would get rid of the ripples. Also one might want to make a deep pocket, in which case the current power setting might be appropriate. It is not as though any of @cynd11’s circles went right through. They might have been deeper than needed for a 2D artistic effect but not for 3D work, which is my main interest.

1 Like

This kind of thing is why I absolutely can’t get anything done, but curiosity drives me like a cat…

/uploads/db6859/optimized/3X/6/d/6decb4a2c5527dfbcb7b26abb3f27c1e55457fb5_1_371x500.jpg

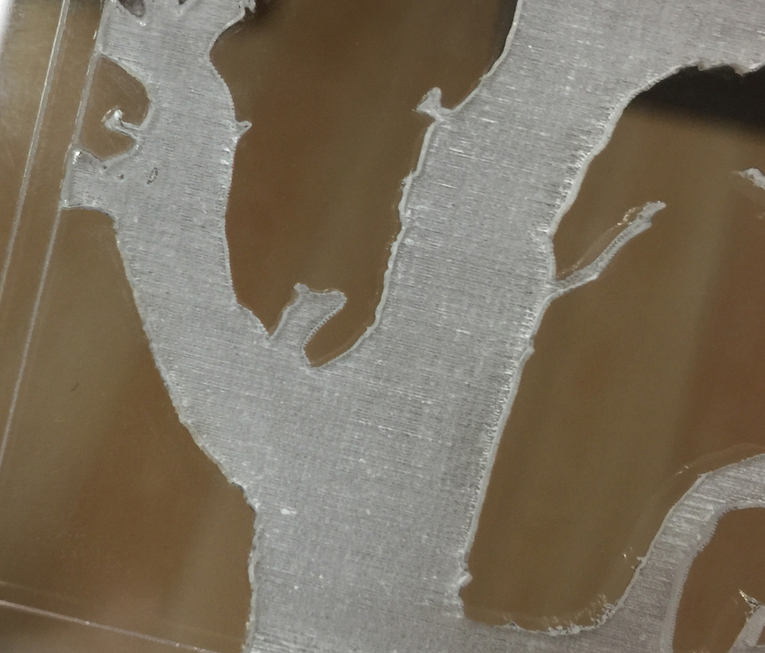
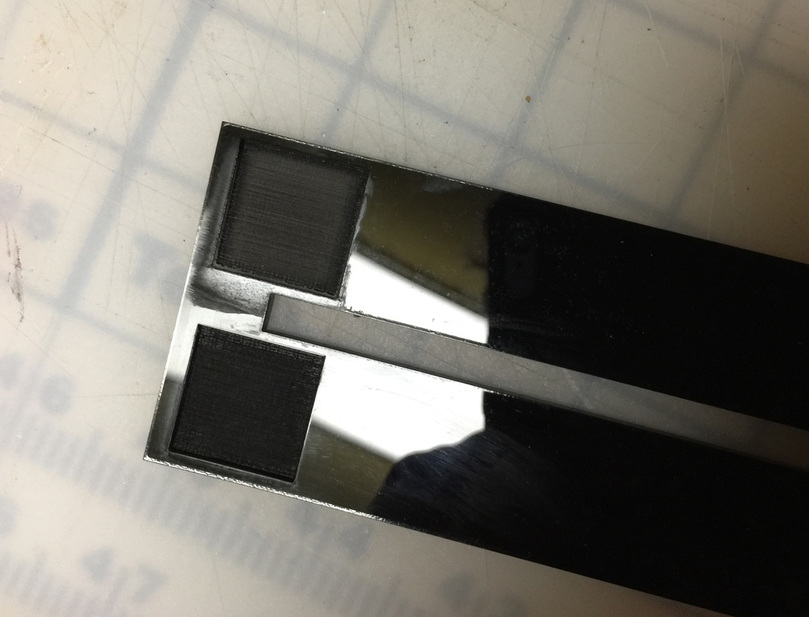
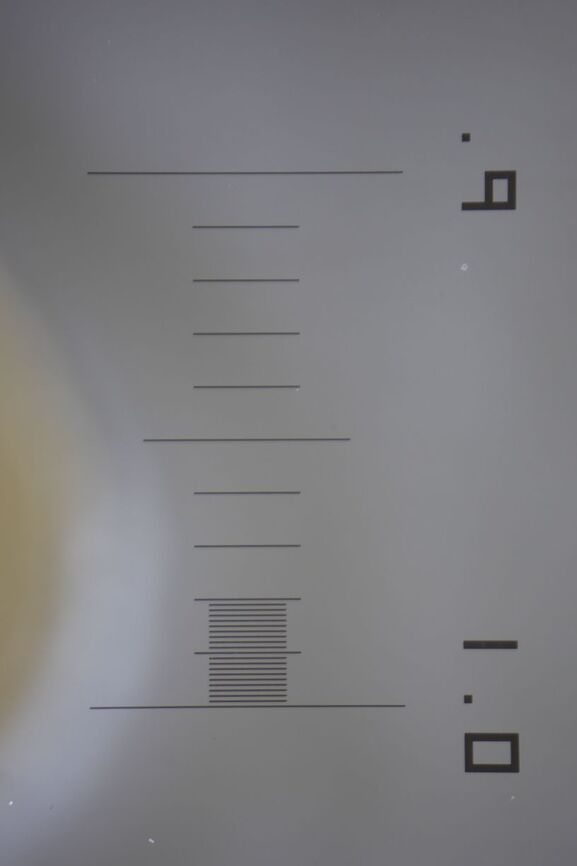
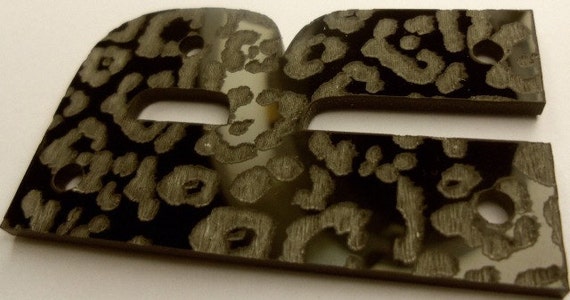
I wanted to see if I saw the same problem with the striations that you saw on that non-Proofgrade opaque acrylic, so I broke out the black Proofgrade and engraved a couple of little squares on an offcut.

From a distance - nicely smooth at 340 LPI. I had peeled off the masking before the engrave this time, and there was a lot less white striations and buildup on the material, but there was still a fine white ashy powder that must have been residue from the acrylic. It was equally distributed.

The good news is, it washes off with an application of 50/50 vinegar and water. (There must be oils of some kind in the acrylic, or it wouldn’t require the vinegar, but it does.)

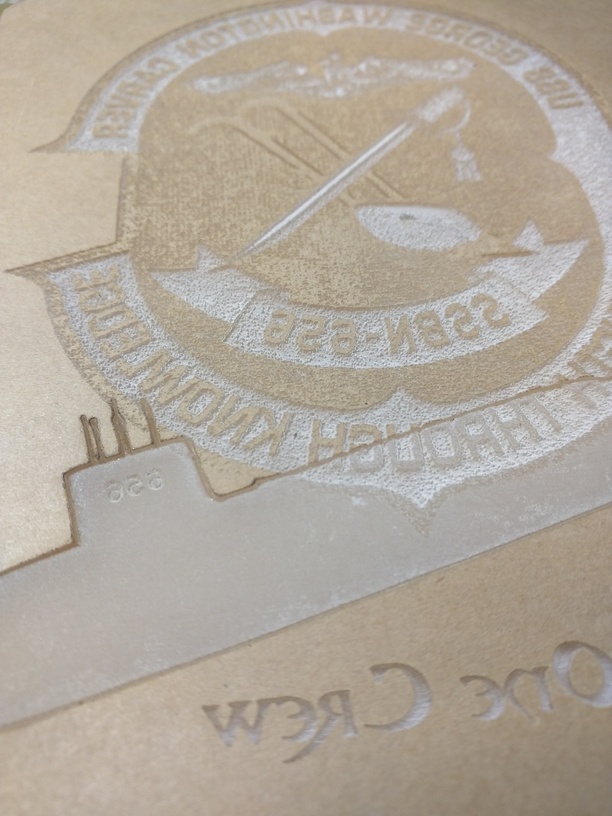
So I washed off the bottom square and left the top one as it came off of the machine for comparison.

This was focused right at the top of the acrylic again. I’m just not seeing those striations. Definitely no ripples. The bed of the engrave is as smooth as the cast pattern allows. (And I still see the vertical lines more clearly from the acrylic.)

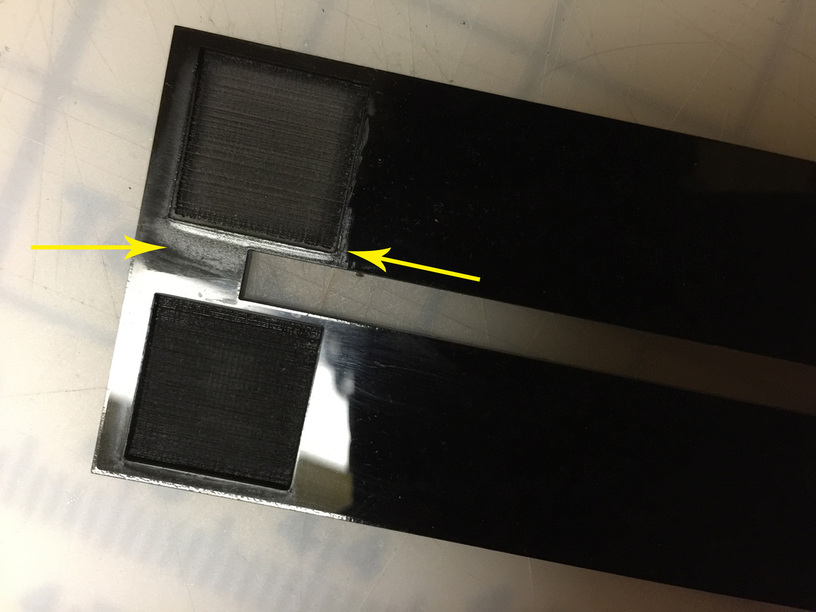
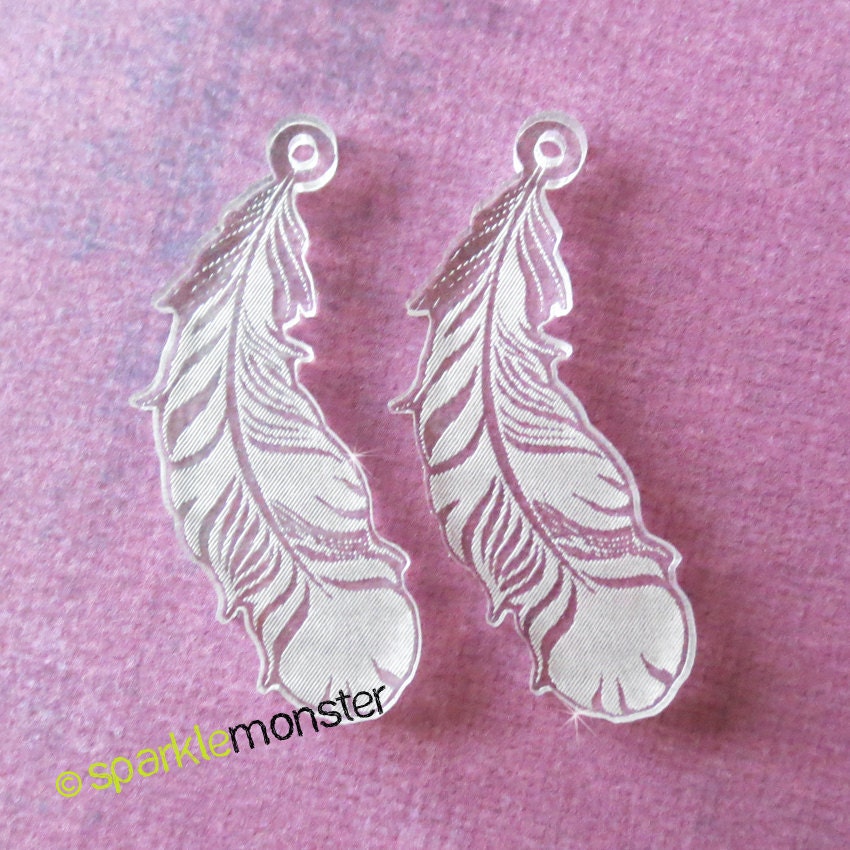
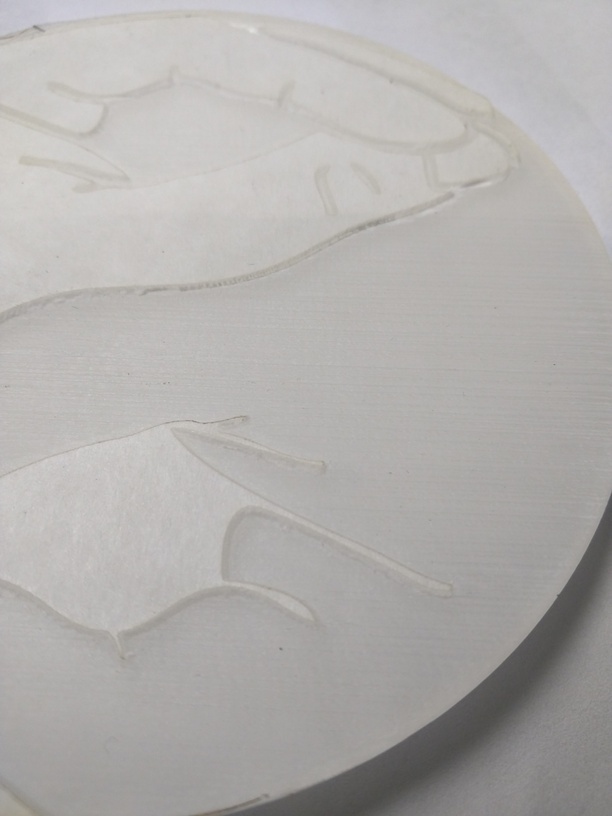
Up close on the bottom square you can see the vertical lines even more clearly. (Still a little bit of vinegar in the edges - didn’t see it, so it’s a little shinier there.)

That smutty smudgy residue on the shiny surface is caused by the air-assist blowing the smoke across it - it scratches off with a fingernail, but it’s stuck on there pretty thoroughly. It doesn’t just wipe off.

I can think of only a couple of reasons why it might be happening on the machine you’re testing and not on the one I’m testing.

It might just be due to differences in the material. The PG stuff seems to work pretty well, even the black opaque. It’s completely smooth. (If you’ve got some left it might work better if you want to try an engrave on that.)

It’s possible that we have different tubes in our machines, and that this one is one of the more powerful ones. (I don’t know.)

(If that’s the case, it’s definitely one of the better arguments for going with the Pro model.) :wink:

If you try an engrave on some of the black Proofgrade though, and you still get the striations like that, you need to hit the GF team up with a report. Maybe the unit you’re testing has a focusing issue or something that they need to know about.

6 Likes

Its late…my eyes are tired but I’m thankful my first read of this topic was wrong…
Its an R…not an N! It’s ripples…:scream:
On my Universal lasers, when the lpi is lower, I can get ripples with a deep engrave in Acrylic…but even with high lpi, there are many woods that dont etch smoothly but that’s due to the material.

13 Likes

@Jules I can still see horizontal lines on your picture that are at a lower frequency than the LPI. Nowhere near as pronounced as @jamesdhatch’s black example but not as good as his submarine that just looks frosted with no sign of lines.

The ripples on @cynd11’s test seem to be tied to vertical position, so I don’t think it can be the tube. It looks more like irregular Y axis motion.

2 Likes

Cast pattern? Are you saying there’s a structure within the acrylic that is being revealed by the laser?

I can’t recall having heard of something like that. It would be informative to engrave a rectangle into a piece of transparent acrylic, then cut a circle around the engraved rectangle to cut it out. Take the circle, flip it over, rotate it (rotate any amount, as long as it isn’t a multiple of 90°) put it back into its hole, and then engrave the rectangle again. It wouldn’t have to be a big piece, just big enough to see the orientation of the ripples.

3 Likes

:laughing: Oh yeah…good one!

Gasp! Can’t breathe. :joy:

I know it’s absolutely crazy, but that’s sure as heck what it looks like to me. I don’t know jack-diddly about how cast acrylic is manufactured, but there are distinct vertical as well as horizontal lines in the engraved bed.

Maybe its a function of the laser pulsing though…I thought of that late last night. (Can probably be fine tuned through code somewhere.)

(Either way, it absolutely doesn’t matter to me one way or the other - it’s very subtle. It was just an interesting thing to observe.)

True. His picture for the Redsail shows no pattern at all that I can see on that shallow engrave. There was some striation in the deeper engraved letters, which appear to be about the same depth as the engraves I displayed.

1 Like

Friendly reminder that these PRUs are exactly that. Pre-Release Units and the final results may be different.

3 Likes

Hence my original questions to @dan

2 Likes

I raster engraved a piece of acrylic today on my Trotec laser cutter and took some pics. I did this at 1000 LPI and the focus was set to the top of the acrylic using the focusing “stick”.

The engrave is of a reversed letter “K” that is 58 x 50mm.

Here it is right after engraving. I did this with the air assist turned off, in case that matters.

And then I blew it off with compressed air.

And then warshed it with dish-soap and water.

How big are those little lines? Here’s a couple shots of the area around the little peninsula on the left side of the K. The scale is a microscope calibration slide, 0.1" is in the middle of the shot, the smallest division is 0.001".

I think I’ll try defocusing next time.

10 Likes

Okay, finishing up the final test - I now believe that extremely faint crosshatching is caused by pulsing of the laser. (Rotating the material relative to the XY axes causes the pattern to follow the XY orientation anyway.)

Also note - they are in the hands of rank amateurs. We have a lot to learn at this point.

I ran two side by side tests, one with 275 LPI and one using the 1335 maximum LPI. As expected, the higher LPI engrave took out the material a LOT deeper, even though the engrave speed was set much faster. (Almost, but not quite, all the way through the 1/8" material.)

The cross hatching was still there, exactly the same size as the lower LPI engraves, and still shows in both directions, so in my mind, it’s got to be related to the pulsing of the beam somehow.

Maybe the lower power range settings will enable us to adjust that somewhat. I don’t expect it, but it would be a pleasant surprise, and they’ve been surprising me all along with this thing.

So I’m willing to wait and see.

3 Likes