Fancy pants fantasy dice tower

I couldn’t resist doing a dice tower (despite never having used one, haha).

It’s the same height as my DM screen, about 9 1/2 inches. The box dimensions with no tray are about 3" x 4".

Disclaimer I did not make that eyeball graphic art, or the banner on the sides, I just searched for something like “mystic sh*t” and adapted it from an image I found. Can’t take credit for that specific part of the design.

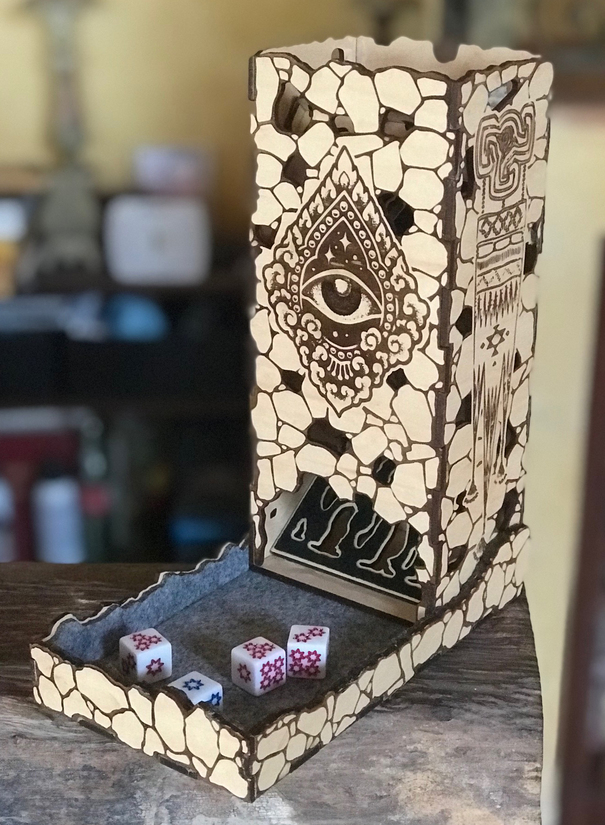
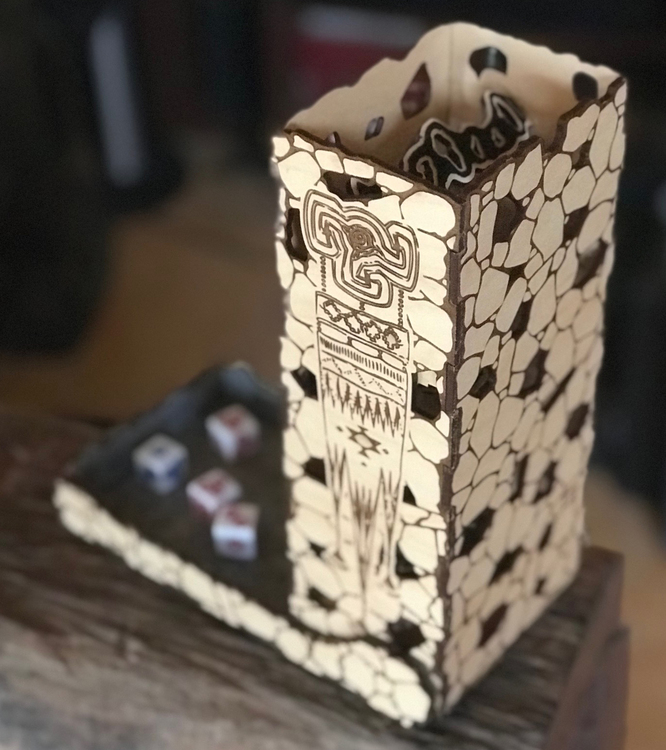
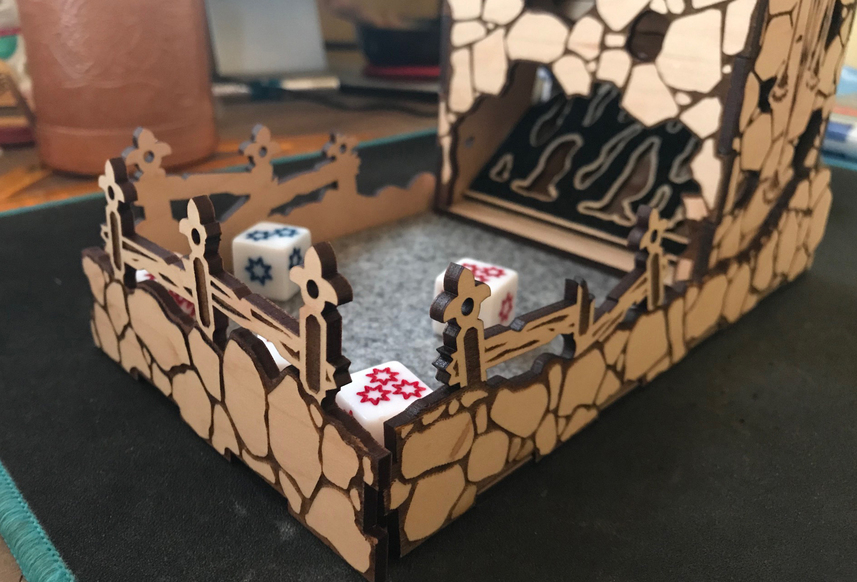
Meticulously shaping the rock pattern so it covered the dovetails was a big chunk of work, but it really paid off. Being a big engraving though, each side was like ~45 minutes of cutting time. I didn’t use the proofgrade settings for it, instead optimizing the settings to speed the whole thing up.

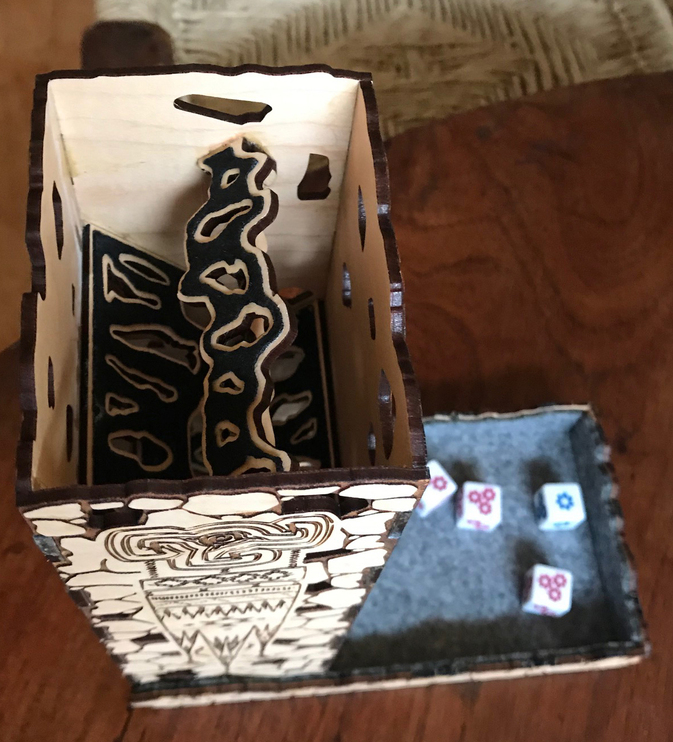
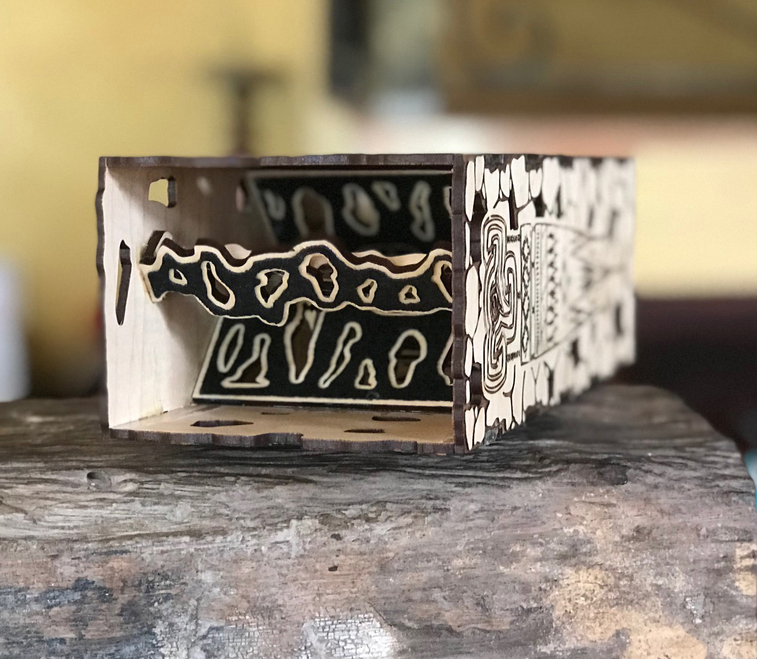
I tried to cut felt lining for lots of it, obviously the bottom tray area, but also the “roller rampy thing doodads” inside.

I’m including the SVG files in case anyone else wants to take a shot at making their own. It doesn’t do anything fancy like the jointed folding ones (although the tray is a separate piece and can nest against the box well) but I’m really happy with how it turned out. It doesn’t look so obviously “LASER CUT BOX!!! WRRRAR!!!” assembled, which was my goal.

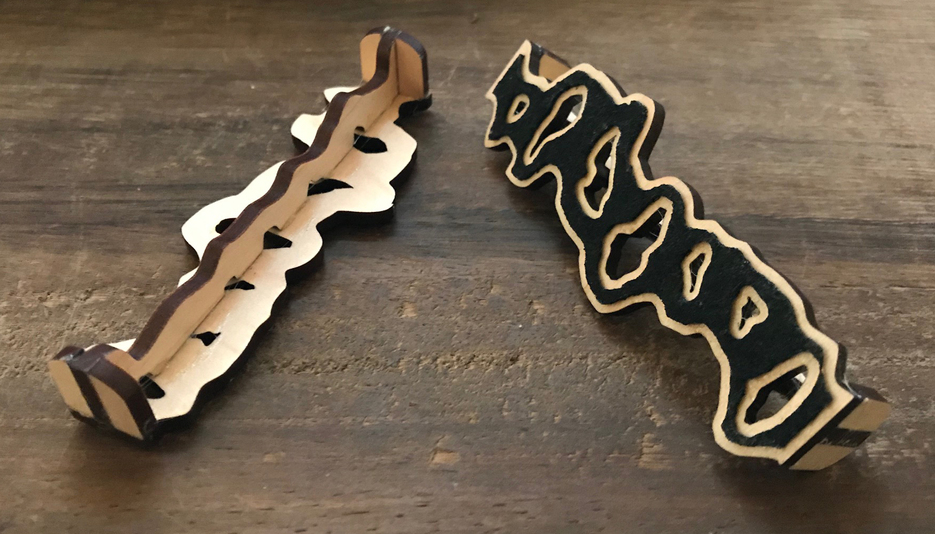
I also had a failed part of the design where I tried to make these cool fence posts at the bottom, but as I dry assembled it I realized how much they obscured the view of the dice, and cut them off. I left them in the SVG file though, in case anyone else likes them enough to leave them.

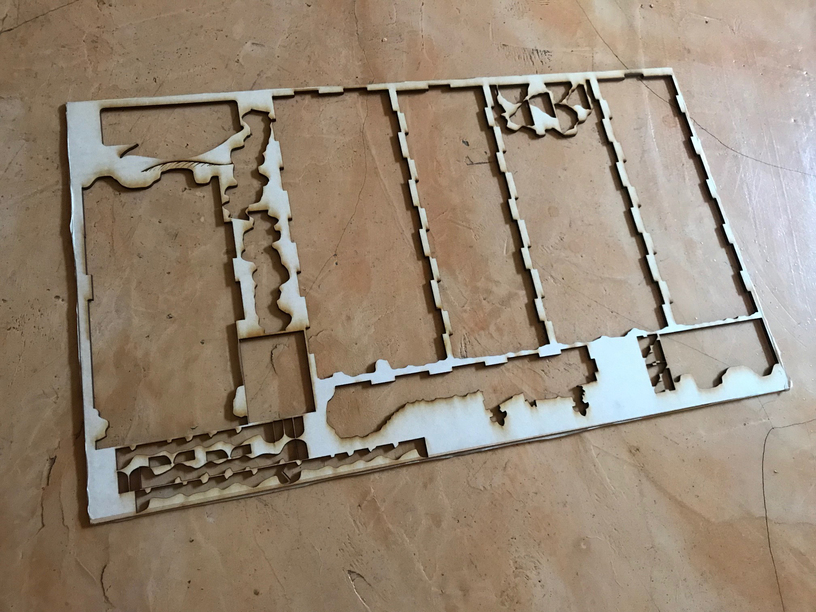
I didn’t get all meticulous with kerf settings and whatever in the box construction. It’s basically slots lined exactly on top of each other, and it works fine for me. I know some people get ultra-engineer on that stuff.

The project mostly takes up one sheet of proofgrade, so that’s cool.

Anyway, enjoy!!!
-Lee

Tall%20Dice%20Tower

105 Likes

Not positive why the SVG isn’t showing up there. Will try to debug it later… gotta go eat!

4 Likes

That’s an anomaly on how a forum post svg’s if you’ll look at it and edit mode to see some numbers, Jack those up it’ll get bigger.

6 Likes

Very cool looking dice tower too! :grinning:

6 Likes

Very nice build and share, thank you! (And you know I had to go search “mystic sh*t” just to see what comes up lol.)

If you want to make the file more visible you can go edit the post. The “690X414” is what mark is talking about bumping up.

6 Likes

Hey, I think I finally found a dice tower that I’ll print. Seeing the offcut and excellent use of a full sheet seals the deal.

Nice work, thanks for sharing.

11 Likes

Thanks for the tip about the preview size! Lessons learned.

I’m fairly sure you could fit the whole thing on one sheet, with the exception of the bottom “floor” which isn’t really visible so it could be draft board.

Mine had a couple experiment bits on that sheet, so I’m guessing mostly.

6 Likes

A very cool looking dicebox!:heart_eyes:
As long as one was engraving the distance anyway, one could bring it into Gimp and roughen the rocks. You can bring the vectors in as paths and then paint to path and blur it a bit and dab a paintbrush sponge pattern about and blur that so you had a gray pattern that you could bring back to the svg.

7 Likes

Absolutely awesome piece.

4 Likes

OOOOOOOOOOOOOOOOOOOOOOOO :open_mouth::open_mouth::open_mouth::open_mouth::open_mouth::open_mouth:

5 Likes

That’s like next level cool! I never felt inclined to make one before - now I do!

6 Likes

Nicely done.

5 Likes

Yup - next level “COOL” for me as well!

5 Likes

Outstanding! I really like that the design hides (or at least de-emphasizes) the finger joints. I’m just not a big fan of laser-cut finger joints. The zig-zag patter is too intense when a light colored wood is involved. This design adds enough markings to make the edges blend in. I’m going to remember this concept in my future designs.

5 Likes

one thing to keep in mind when designing with finger joints, you don’t have to keep them all. and they don’t have to all be the same size. so you can edit the box file, if you have it created on a box site like i do, and change how the finger joints are set up on the box. that can be as simple as removing a few (matching up what you remove on parallel pieces) or even resizing matching fingers.

or, you could do something more like @evansd does and round your corners. if you over-lengthen your fingers a little so they stick out just a little bit, and then sand them down, you lose the char contrast. if you then round them a little, you de-emphasize them even more.

or combine both of those to make the finger joints more of a design that works with your object instead of against it.

8 Likes

That’s great advice, I should try that rounded edge technique. Very cool idea!

1 Like

when you’re ready to graduate to insane joints, browse through this thread.

10 Likes

Man, those years are intense! Thanks for sharing.

(Another heads up to anyone cutting this puppy… Prepare for a TON of weeding the masking material off, haha! My finger tips are going to be brown a while!)

1 Like

Use gorilla tape or a plastic razor: weeded in a few easy minutes.

6 Likes

Nice! Love the custom dividers.

2 Likes