Variations of finger joints

Finger joints are practical and boring. Rather than fighting against them as a constraint, I tried to imagine them as design elements. I only had one general rule: Anything added should actually be part of the joint. This is about finger joints, not inlay projects. This is what I came up with.

The techniques came in a few varieties:

  • Obscured: I tried to implement them in a way that would minimize or distract from the inherent blockiness.
  • Highlighted: Run toward the light. Incorporate elements that would call attention to the fingers.
  • Altered: Change the shape or thickness of the finger joint to give it a bit more interest.

Each of the following is an example of one or more of these techniques. All are done in 1/8" solid hardwoods. It should be noted that these are proofs of concepts. Some of them are kerf adjusted and better fit, others are rough. I was moving quickly and wanted to get a variety of ideas done in a short time.

skinnyfat
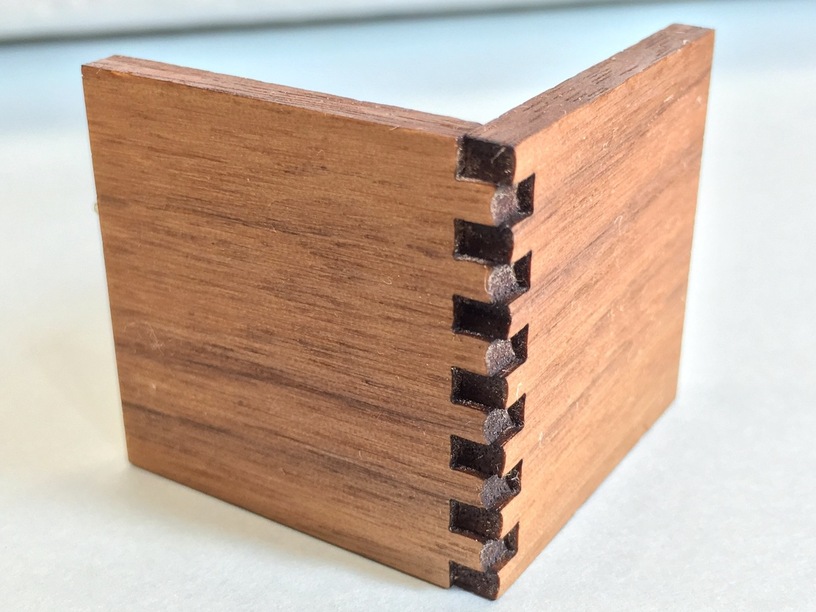
Walnut, thin fingers on one side, thick on the other.


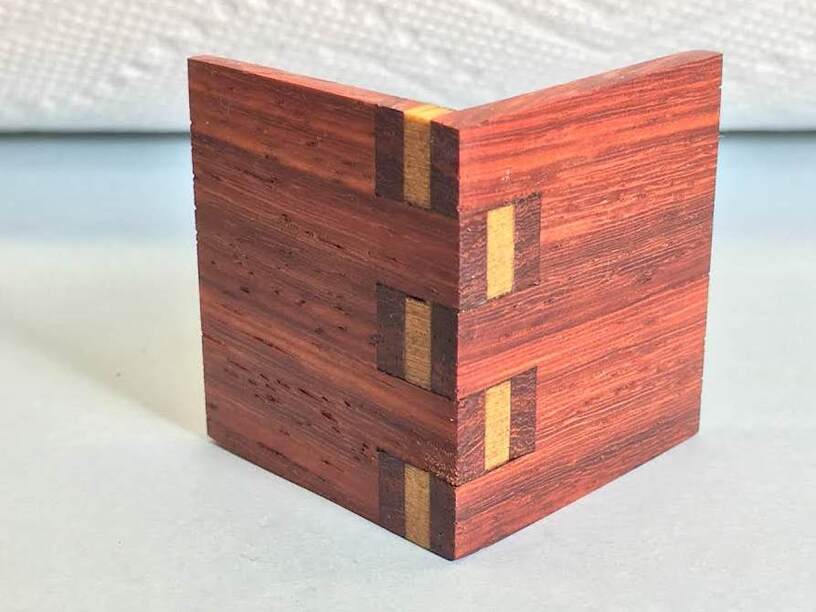
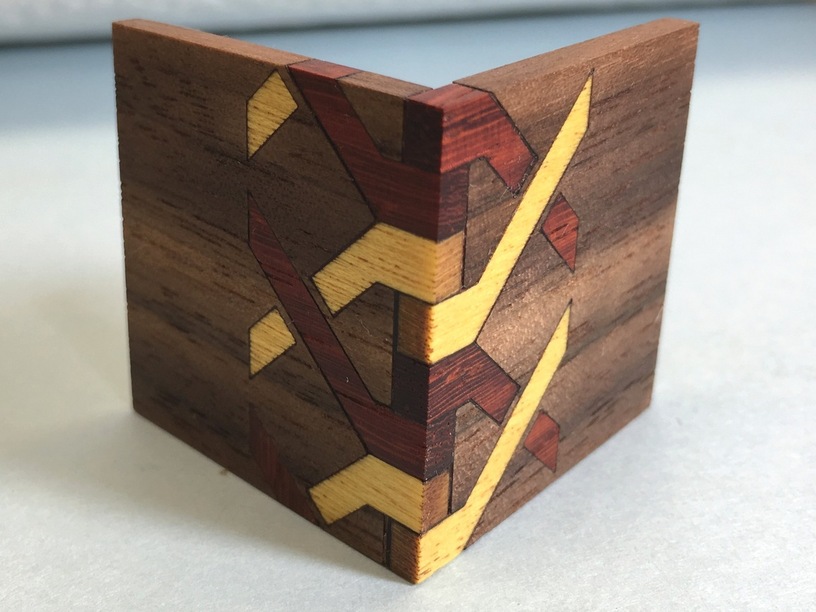
Padauk and yellowheart. Stack the joints with cutouts of contrasting colors.


Walnut. Extend the fingers in a radius. Adds a nice dimensionality.


Padauk/yellowheart. Half depth finger, finished with “studs” of yellowheart.


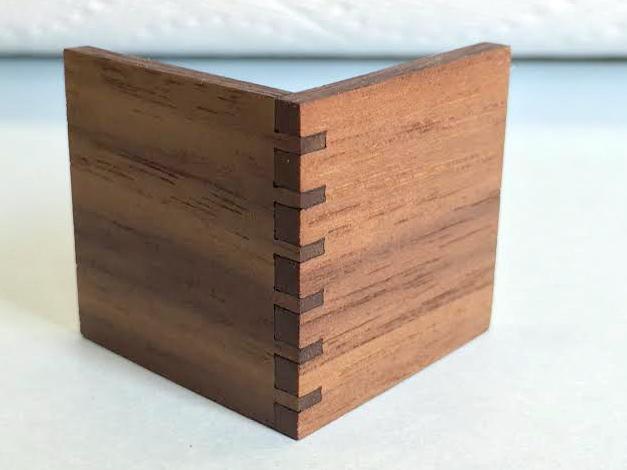
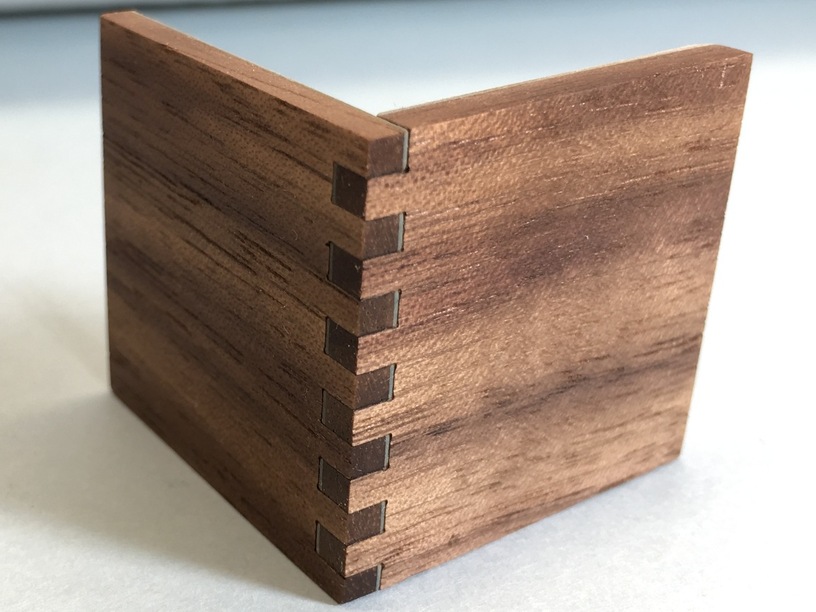
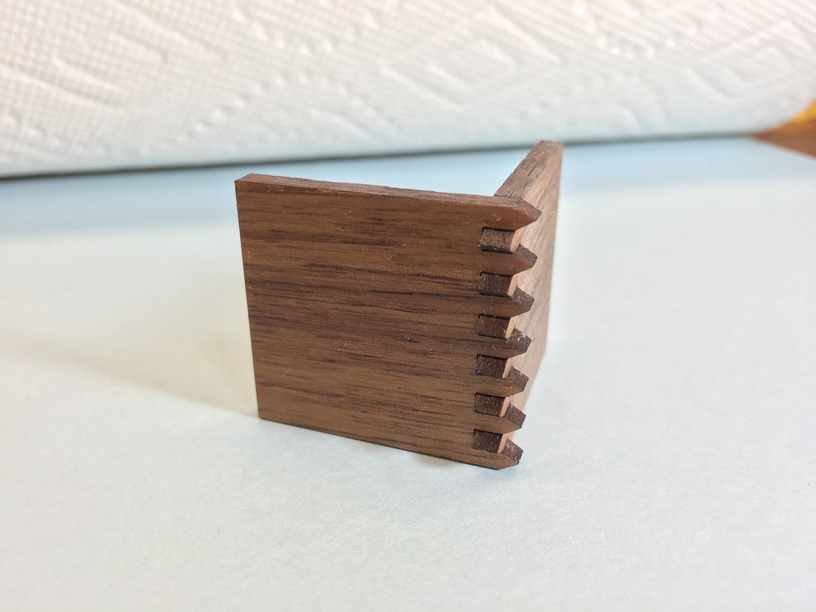
Padauk. Each finger is 15% thicker than the one above it.


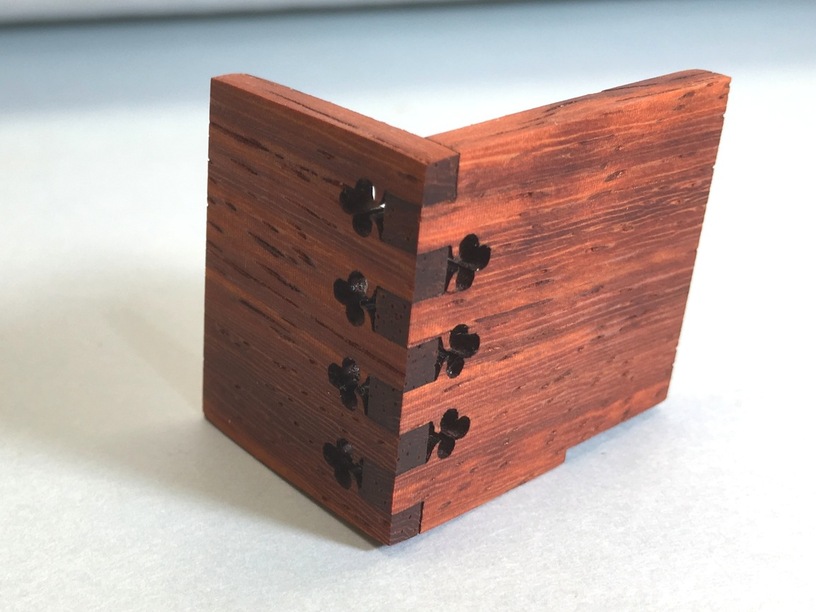
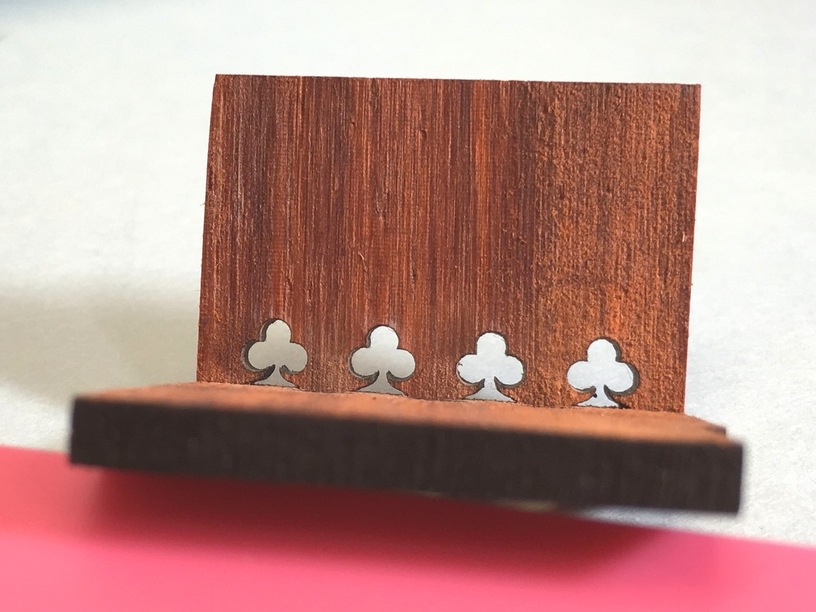
Padauk club cutouts. Two views. Could be great in a playing card box and have the added benefit of letting you see if the deck is in place without opening the box.


Walnut with blue cardstock behind. Make for a little “peek” of color.


Walnut. Tiny holes in each finger. I didn’t sand these flush, I wanted greater contrast.


Walnut. Scalloped finger ends, adds texture to the joint.


Walnut, Padauk, Yellowheart. “Woven” inlay fingers. The woven portions are the actual fingers in the joint. Labor-intensive and fiddly, would adjust this before trying again.


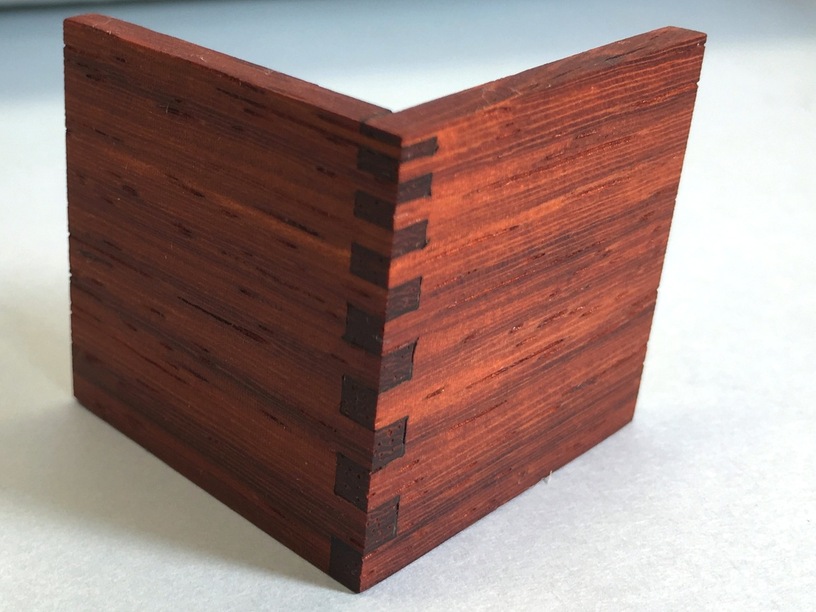
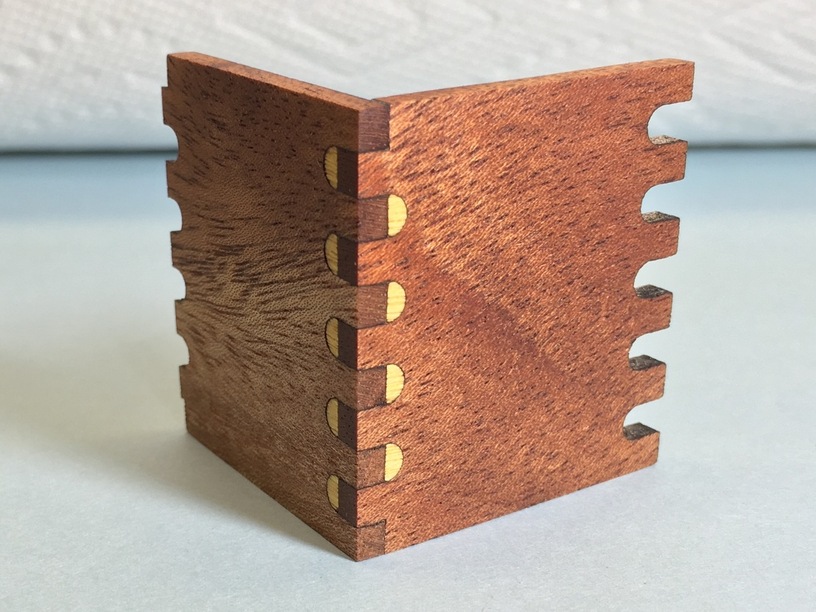
Mahogany, Yellowheart. Hollowed-out finger slots filled with yellowheart.


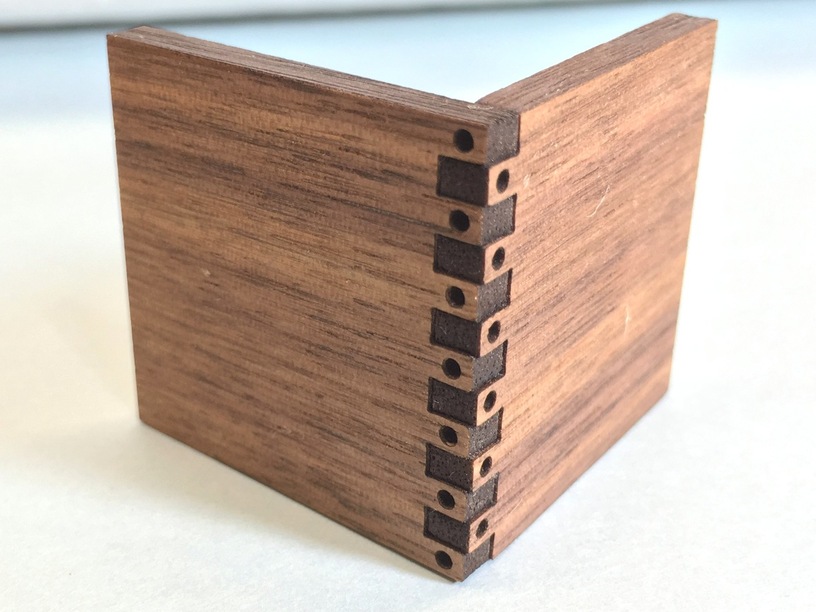
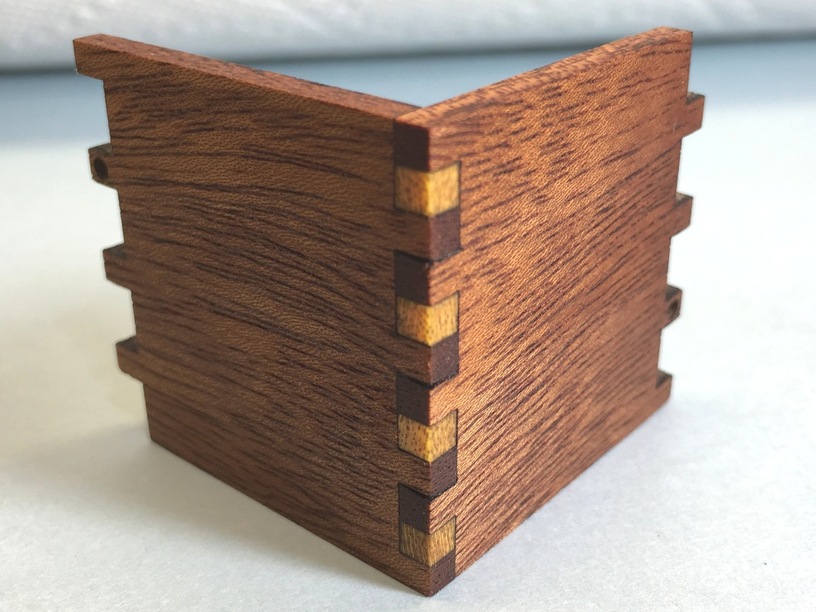
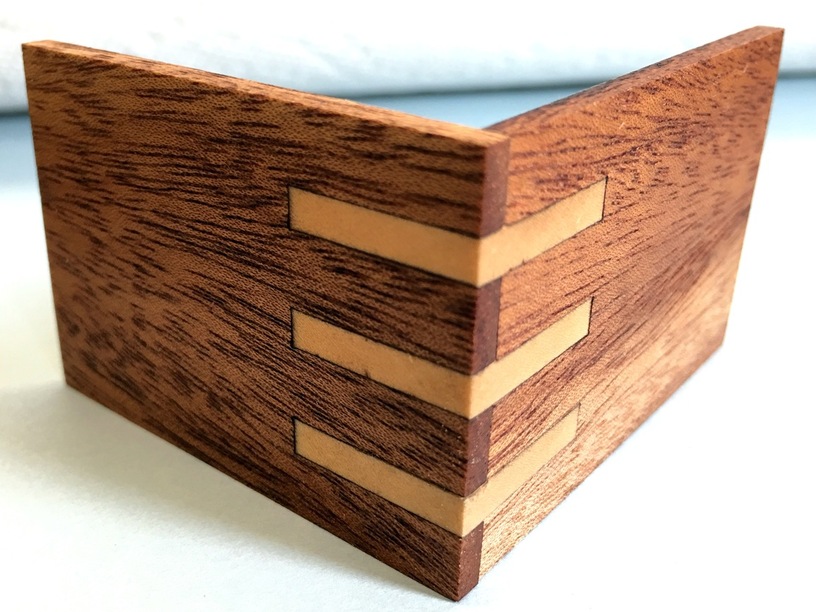
Mahogany, Yellowheart. Extra gaps in the fingers filled with yellowheart studs.


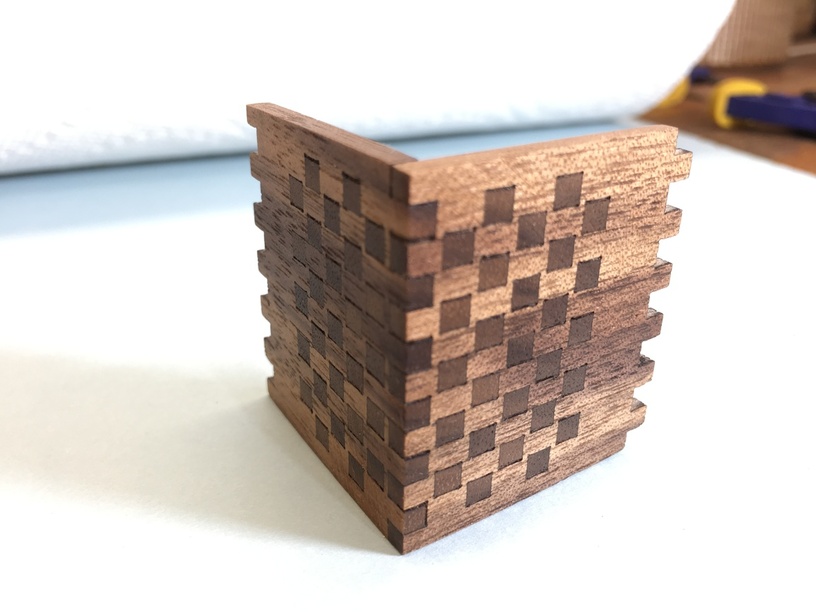
Walnut checkerboard. Extra “fingers” hide the end fingers.


Mahogany, maple. This is acutally a butt joint, but could be adapted to be a finger joint easily by extending/reducing the middle “fingers” between the maple layers.


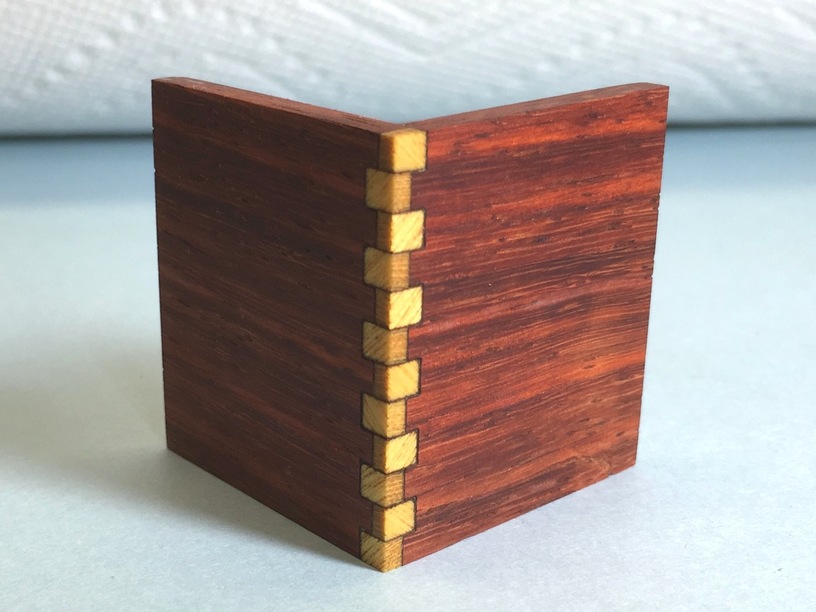
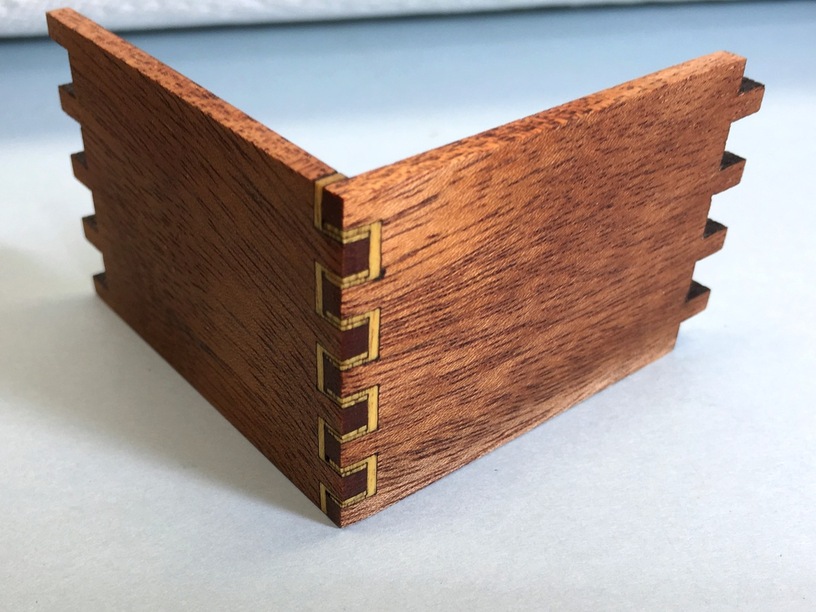
Mahogany, yellowheart. Yellowheart borders around the fingers.


Walnut pickets. Extending the fingers to points beyond the joint. Picture doesn’t do this justice, it creates an interesting optical illusion.

I haven’t even gotten into the possibilities of engraving the pieces, but that’s a whole other rabbit hole. Hopefully this gives people ideas and we start to see some more unusual joints.

(previously: Experimenting with thin finger joints)

265 Likes

Nice job!

4 Likes

Thank you for sharing this. These are really beautiful and interesting.

4 Likes

Soooo many options. beautiful. Thanks!

4 Likes

Thanks! I feel like I barely scratched the surface of what’s possible. All of this came tumbling over the course of three evenings. Hopefully I’ll get our creative hive mind going on this and even more ideas will surface.

5 Likes

Pure unadulterated awesomeness!!!

Thanks for sharing. I especially appreciated seeing the ones that extend past the corner.

5 Likes

I could see some long fingers at the bottom, shortening as you go up - kind of a V effect

5 Likes

Some great ideas there!

4 Likes

That is fantastic.

My favorite is this one:
Padauk/yellowheart. Half depth finger, finished with “studs” of yellowheart.

Although I’m not sure if the half fingers will substantially affect the strength of the joint.

Thanks for sharing.

4 Likes

Clearly you’ve got the “design” part down. These are really beautiful! :slight_smile:

I’m curious about the actual joinery side of some of these though. I mean, that’s the whole point of joints, right? I have to imagine that some of these might not do the job of joining as well as others. Did you find that to be the case or are they all as snug as you’d like?

7 Likes

Thanks! This is definitely one of my favorites too. A weird optical illusion happens in person, it looks dovetailed a little. It might be due to the v-shaped laser cut, I can’t decide.

As for strength, I did a pretty thorough glue up of all the pieces, all surfaces are pretty well adhered. I can’t imagine it adds any strength to the joint compared to a traditional joint, but I also doubt it significantly reduces it.

In the end, we’re talking about 1/8" wood, so there’s kind of an upper limit to strength.

I think the weakest one is probably a tie between the maple layered butt joint and the woven inlay.

I suppose the thing to do is setup a complicated stress measuring scale puller thingy and yank them all apart and see which breaks first :wink: Anyone got Adam Savage’s number? I bet @dan does…

9 Likes

I think a lot of it comes down to your patience. Kerf adjustment is key. Take the walnut checkerboard… I didn’t adjust it and you can see tiny gaps in all the checker squares. I considered recutting it and doing it again, but decided nah we get the idea, and will leave the production perfection to the end user. Let’s put it this way: if I were giving this as a gift, I’d have recut it to get it perfect.

There’s a balancing act between ease of assembly/glue up and perfect tight fits. All depends on what you need.

I find that the wood tends to compress to fit a tight kerf-adjusted slot really well and can make an apparently seamless joint. After that it’s down to your glue and how well it adheres to lased surfaces versus bare wood. They all feel pretty sturdy, though. If you made a box of it with a third side to stabilize the L joint, they’ll probably be about as strong as a traditional finger joint.

5 Likes

I enjoyed seeing all of the different ways that you made your joints. I enjoy using all of the types of exotic woods that you chose. Did you have trouble cutting through the different types of wood? I tried to cut through Sapele without any success. :face_with_raised_eyebrow:

4 Likes

Yeah sapele is a bear. Rosewoods in general are tough. Bocote also gave me hell, and Ipe.

Walnut is a piece of cake. Mahogany and padauk and yellowheart are a bit tougher but about the same.

Of course, this all depends on the exact thickness you have and specifics of your planks. Wood’s super analog. The good news is that it’s pretty consistent, I got them all pretty well dialed in to cut with almost no flashback. I didn’t mask any of this, just quickly sanded to 600 grit and hit with a light coat of feed n wax.

6 Likes

Do it! (and post pics :slight_smile: )

2 Likes

Yes! If you can’t hide it - Highlight it.
The different thickness fingers, the clover leaf, and the checkerboard are my favorite.
Very nice work there, thanks for the inspiration!

2 Likes

Absolutely awesome design work. I like the club cut outs best.

3 Likes

I see you at the bottom of the rabbit hole, shining a light out for us, to help us see the way !
:+1:

John :upside_down_face:

9 Likes

Pieces look Great! Without someone giving the scale one would guess they were 1/2" inch thick wood. It looks to me like in 1/8" wood they would all be very fiddly, In looking about there are so many inlay patterns that emulate various finger joints. They could well be additional inspiration for ideas for real ones.

At first, I wanted to hide them by not cutting all the way through but after seeing the added strength of small fingers I have made little else.2mm fingers may become boring but I am not there yet.

EDIT: some confusion due to tablet typing

3 Likes

This:

That:

1 Like