Faster Engraving Experiment

We’ve all thought it: Why doesn’t the laser just follow the shape when engraving?

So I thought I’d manually try to make it happen. I made 2 shapes, line art with 0.025 stroke width. Traditional filled shape in red, parallel lines in blue:

I’m calling the blue technique a “score engrave”.

Details:

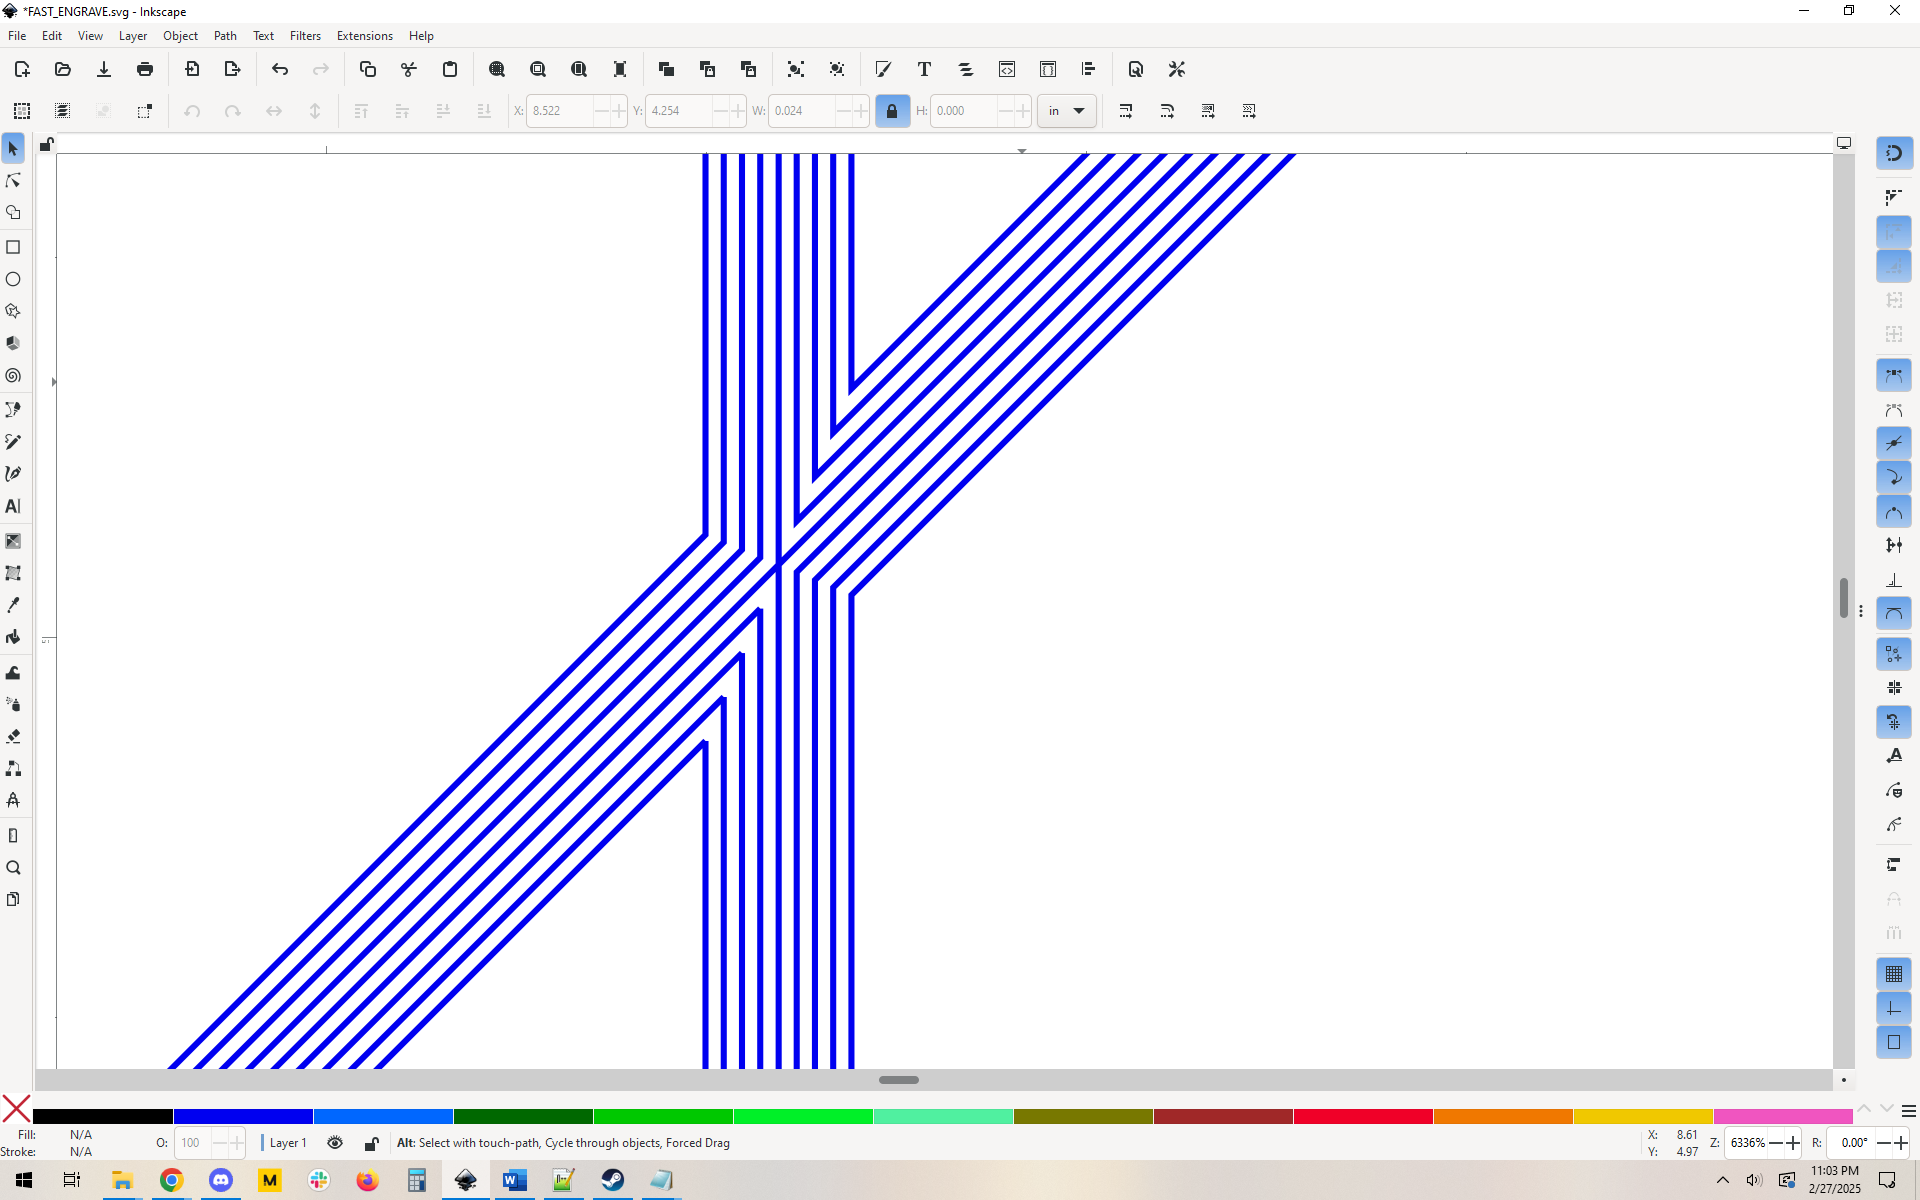
These are both “engraving” at roughly the same LPI: 340 for the traditional and 333lpi for the score. (In the score engrave, the lines are 0.003" apart)

1000 speed for the traditional engrave and cut 400 speed for the score engrave. These are kind of guesses, but they seem fair.

The short version: The blue method is far faster.

I ran it in two sizes, about 3" tall and about 6" tall.

Here’s the result:

Size 3 inch time 6 inch time
Traditional Engrave 9:25 32:12
Score Engrave 2:13 4:12
Time Ratio 4.29x 7.67x

The results are pretty clear, in terms of time. What do the results look like? I cropped the test images down and engraved Baltic birch.

Side by side:

You can see there’s a little difference in how dark the engrave looks, that’s just me not getting the settings exactly matched. What is more important is the slight overburn in the corners. It’s more pronounced in sharper corners, but not too bad either way.

Also of note: The right side “score engrave” is slightly wider than the engrave. I think this was my fault, I didn’t take kerf into account, so I would expect the score engrave on the right to be about 0.006" too wide, so 0.025 versus 0.031. I haven’t measured it but that looks about right. Next time I would adjust for that.

Traditional engrave detail:

Clean, but you can see the clear “U” shape of the engrave. The edges are not as crisp as you get with a score engrave. See the next picture.

Score engrave detail:


Flatter bottom, more consistent depth.

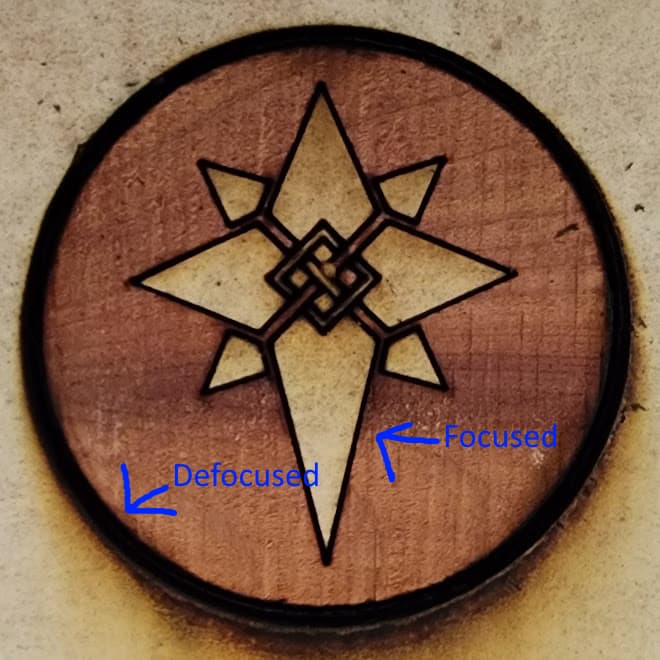
Score engrave detail (2):


Sharper edges, the points of the tight corners are sharper than the engrave. Not by much, but it’s there. Might matter if rendering text at small pitch.

My conclusion: the technique has merit. Whether it is worth the work to expand the strokes depends on your use case and aesthetic needs. I think they look pretty good, and at larger sizes the speed increase is profound. I’ll be curious to see if anyone tries to replicate this and uses it in a high volume workflow.

Why not just defocus to get wider lines? Defocusing does exactly that: defocuses. YYour corners will be softer by definition, the laser isn’t in focus. Also, it’s not the most predictable technique – with practice you might get a dialed in line width with a defocused engrave – but this is 100% consistent. I think this technique has an edge on those two points. Defocusing will be faster because it’s just one pass or fewer passes depending on how wide your desired line has to be, but this may be worth the tradeoff.

25 Likes

Thanks for sharing! Interesting!

8 Likes

But does it take a lot of time to turn everything into multiple lines to do the score engrave? Especially if you’re doing detailed designs or words. And I never have figured out how to defocus to get wider lines, even though I’ve seen it mentioned in here a lot! It’s just one of those things I can’t wrap my brain around. :roll_eyes:

10 Likes

Not really.

  • Select original path.

  • Set stroke to desired width, in this case I wanted a 0.003” gap so the stroke was 0.006.

  • Duplicate the path. I use copy and paste in place.

  • Stroke to path (inkscape). Some pathfinder command in illustrator.

  • Paste in place the original path again. Set stroke to 0.006” more (0.012). Stroke to path.

  • Again at 0.018.

  • Again at 0.024.

Done. The line sort of grows outward from the original path as you go. I chose 0.25” width to make the test reasonably simple and fast, you’ll need to do more iterations to get wider lines, but it’s a pretty fast workflow.

12 Likes

Thanks!

6 Likes

Sorry I accidentally hit save and had to edit and resave. You replied when it was only half done.

6 Likes

Hmm just thinking about it you could do it in fewer steps with a clever binary approach. This means that it would be pretty simple to make engraved lines of almost any thickness.

It’s hard to write up how it would work but you’re basically taking advantage of the fact that every time you do stroke to path you convert one line to two. With a little forethought you can make colossal lines with few operations:

Operations Number of Paths Width (inches at 0.003” gap)
1 2 0.006
2 4 0.012
3 8 0.024
4 16 0.048
5 32 0.096
6 64 0.192
7 128 0.384
8 256 0.768
9 512 1.536
10 1024 3.072
11 2048 6.144
12 4096 12.288
13 8192 24.576
14 16384 49.152
15 32768 98.304

So yeah in 8 operations you could get a line that’s a bit over 3/4” thick, which would take 128 passes. I can’t say what kind of time savings you might get, it’s depend heavily on how much white space your design has. Essentially large hollow ring-type designs are where you see the biggest gains, as you’re saving the wasted time that the laser traverses across the open space.

Also I don’t know what hardware you’re working on but step #15 would cause my computer to absolutely combust and it tried to make 16,000 paths at once. That being said if your path is 98” wide I don’t think even passthrough is going to help you.

In reality step 7 creating 64 paths would probably make inkscape pause. Step 8 making 256 would probably make it pretty sad and I don’t think I’d ever attempt step 8 with 512. It just doesn’t like things that are that complex.

9 Likes

Thanks for conducting this experiment and sharing the result. I know that many users will benefit from this clear explanation of the trade-offs between engraving and scoring with regard to time and appearance. Very helpful, as usual.

9 Likes

I have always preferred scoring over engraving. For those exact reasons. But I hadn’t considered trying to convert an engrave into a series of scores like that before! Thanks for sharing; this is very interesting!

9 Likes

if you’re doing it in illustrator, you can use the offset path to do this.

use path/offset to create the first additional line.

then you can repeat that action until you get all the size you want. maybe it’s 5 at +0.001 and then 5 at -0.001" to expand both directions.

unfortunately transform again doesn’t work on this. buy adobe is flexible, and if you needed to do this a lot, you could set up a shortcut key to bring up the offset path dialog and just hit that key/enter for every time you needed to repeat, which could make it quicker.

9 Likes

You can use offsetting in inkscape as well (called inset and outset) and you can use interpolation as well, but none of them are as accurate as stroke to path.

And even then you should follow best practices for getting good results with stroke to path:

7 Likes

There is also a blur function with a variable number of lines and distance, and fades each line a bit going out, but all can be reset to black.

Probably the fastest method.

4 Likes

It’s honestly simpler than it sounds - it took me far too long to wrap my head around it too, and now I use it on the regular :slight_smile:

1/8" material
Go into manual settings and set the height at .5
Voila, defocused line.

or

1/2" material
Go into manual settings and set the heigh at .01
Voila, defocused line.

Basically manually get the focus as far away off from your material height as you can (1/4" being about the minimum and 1/2" the sweet spot IMO). A score line will go from .007" wide to about .07" wide at the 1/2" variation, and about half the normal depth.

You’ll see it accidently if you misfocus something too :slight_smile:

7 Likes

For more tests of defocus…

Extreme defocus including no lens:

And traveling salesman:

6 Likes

Well you certainly know how to make an entrance. :slight_smile:

5 Likes

Welcome?
Sorry you don’t like the UX, but what does that have to do with this topic??

5 Likes

I believe the point is that Lightburn has options when it comes to filling your engraves differently.

Not to speak for the newcomer, but that’s how I read it.

Looks like their post has disappeared. I hope they didn’t get flagged because I don’t think they did anything wrong.

5 Likes

Could be, no idea. I’ve mostly heard people who came from “real” art programs complaint about Lightburn so it was funny to see someone so in love with it!

4 Likes

Oh thank you! That really does help me understand how to do it now. Yay!

4 Likes

Cool testing. Now just develop an inkscape plug in to automagically convert your engraves to tight score lines.

6 Likes