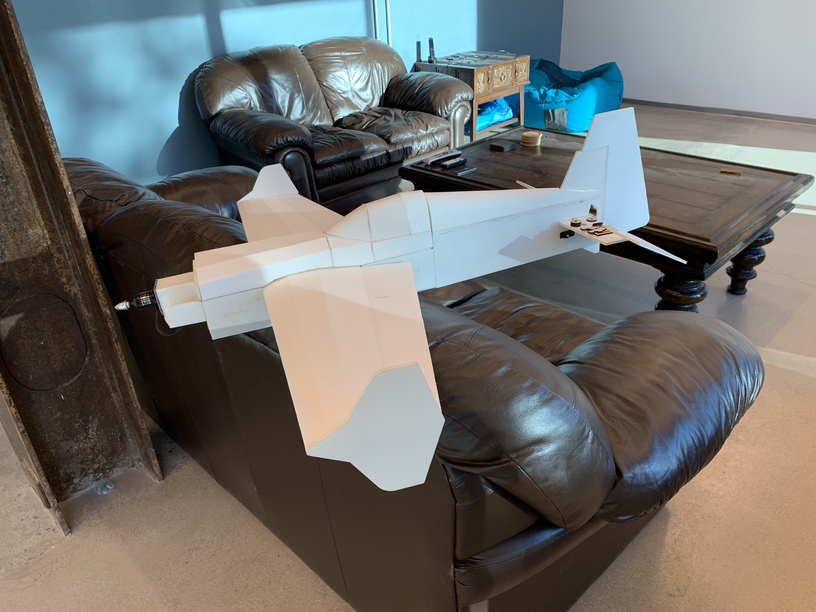
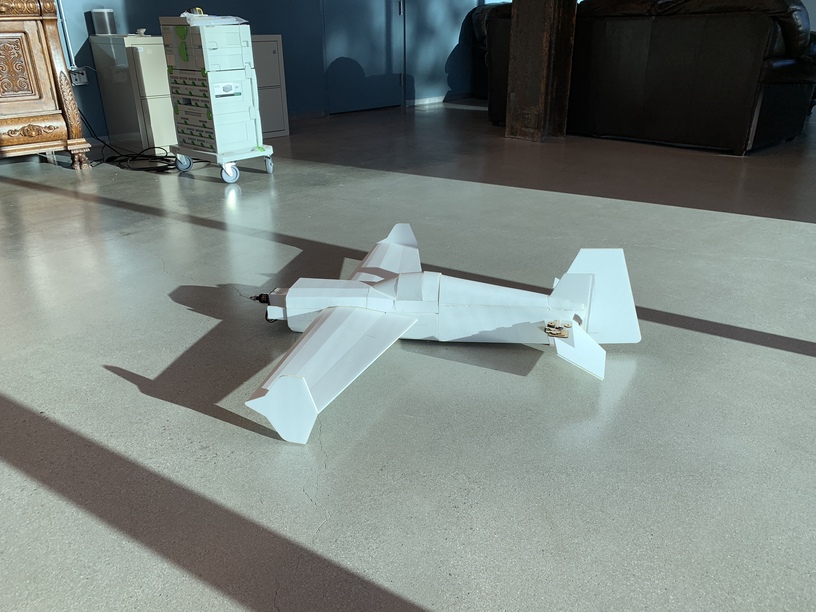
This posting deserves a little background. In 2016 I found a channel on YouTube called FliteTest. They are a group that are passionate about flight. They have designed ways to build low cost RC airplanes from dollar tree foam board, popsicle sticks and other inexpensive materials. I was instantly engrossed and spent hours watching their videos. I ordered some of their speed build kits (let’s be honest, quite a few) and have had a blast building them with my kids. When I received their kits I noticed that they seemed to be cut with a laser and that got me to thinking. Not long after this I found an add for the Glowforge project. I read about the passthrough slot on the Pro and became hooked on the idea of cutting as many designs as I wanted.
FliteTest is an amazing company that I love supporting… and they are also the reason I own a Glowforge today!
After I received my Glowforge I spent a lot of time figuring out how to cut the pieces out of foam board. The complicated part was cutting out the larger pieces. FliteTest uses much larger lasers so they can fit an entire 20x30 inch sheet of foam board on the machine at once. For me I needed to be able to rotate the designs sideways and then move everything towards the center since we can’t reach the full 20 inches wide.
This article by jcarff was an excellent write up and I studied it for hours. I ran through a bunch of test cuts and worked out a system to mimic his results.
Around this time Glowforge announced the implementation of their “Snapmarks” which would keep the process exactly the same but standardize it and leave less margin for error. Although I did not immediately receive the Snapmark functionality, I began designing my files with Snapmarks anyway. I would just fully cut the shape out in the first step instead of engraving it for future orientation. After a few months of working on the process this way I received the Snapmark functionality and it is incredible! I can print pretty much any design that FliteTest has shared after some editing. There are a few exceptions… I haven’t quite figured out how to cut out a Kraken, but I will!
For those of you interested, I thought I would share the steps I take to turn a FliteTest design into an airplane cut with a Glowforge. For your reference: I do use a Mac and my software of choice is Illustrator. Everything I do, though, can be done using many different tools.
First, I would recommend starting by watching Christopher Masto’s video on creating a Glowforge workspace in Illustrator. Having this foundation will be very beneficial.

I created two Glowforge workspace templates for myself: one the same size he recommended which reflects the volume of the Glowforge, the second one I sized 40 x 40 inches to allow me ample room to move items around and get them organized without having to work with them outside of the art board. Once they are ready, I copy and paste them into the smaller file.
Now that you’re ready to get started with a design, download the full size PDF file from FliteTest. It will be easier to work from the full size version instead of having to reassemble the sliced up parts on the tiled version. Right click on that file and choose to open it with Illustrator.
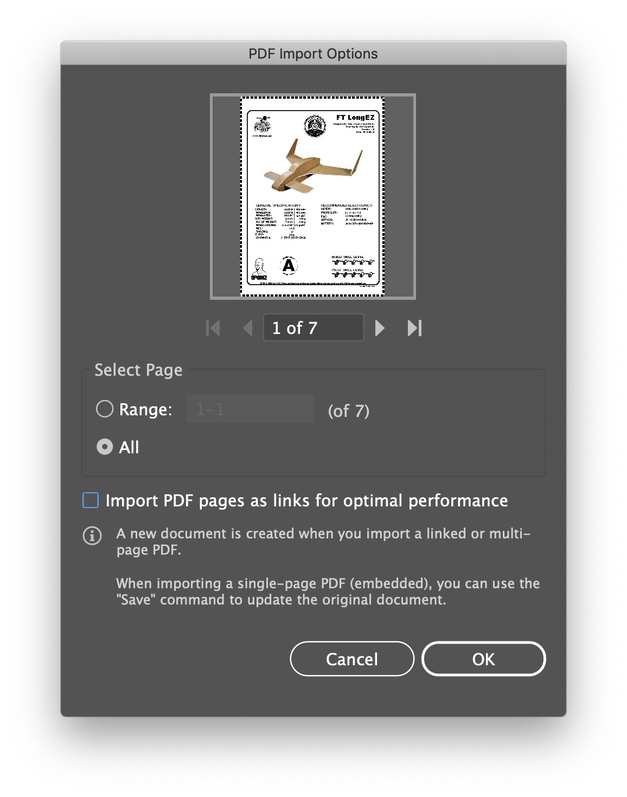
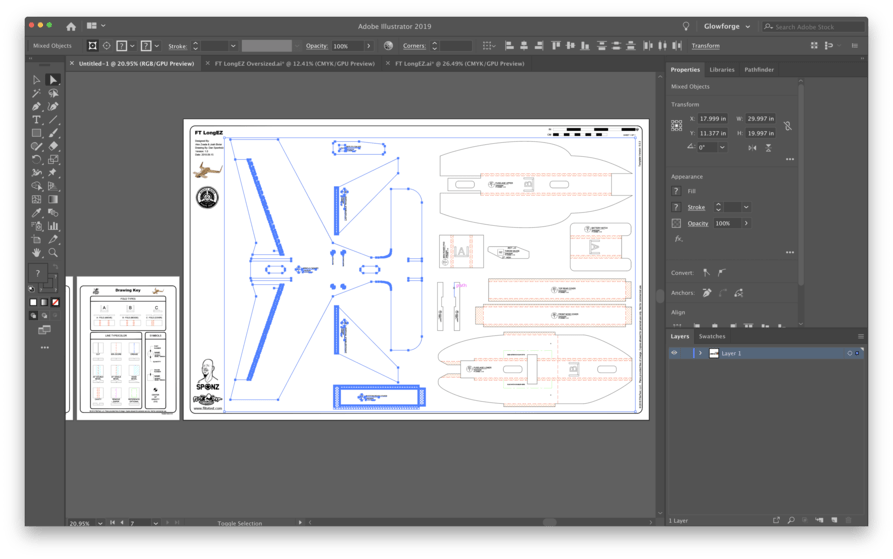
You will be presented with a dialog box that asks you which page you want to open and has a couple of other options. Make sure to mimic the settings I choose in the image above. This will enable you to have all of the pages open together and not embed links to the underlying file. You should be presented with a sight similar to this:
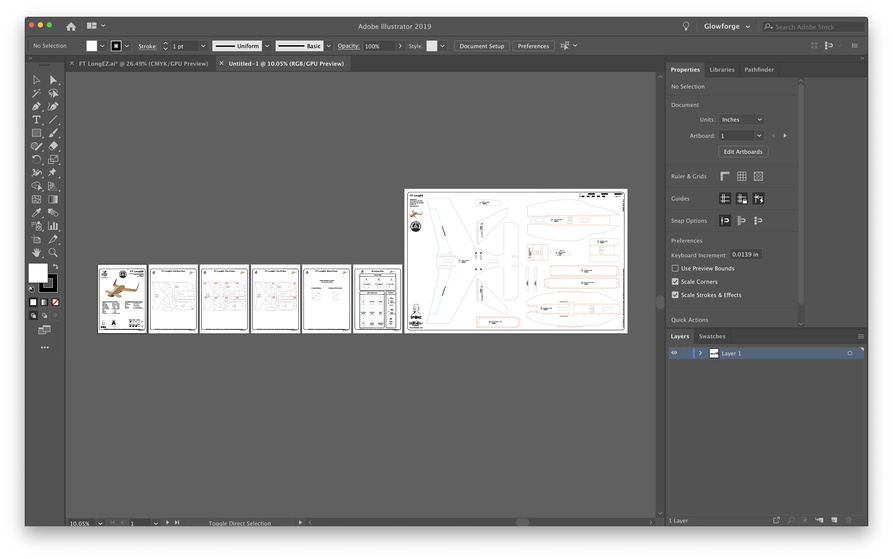
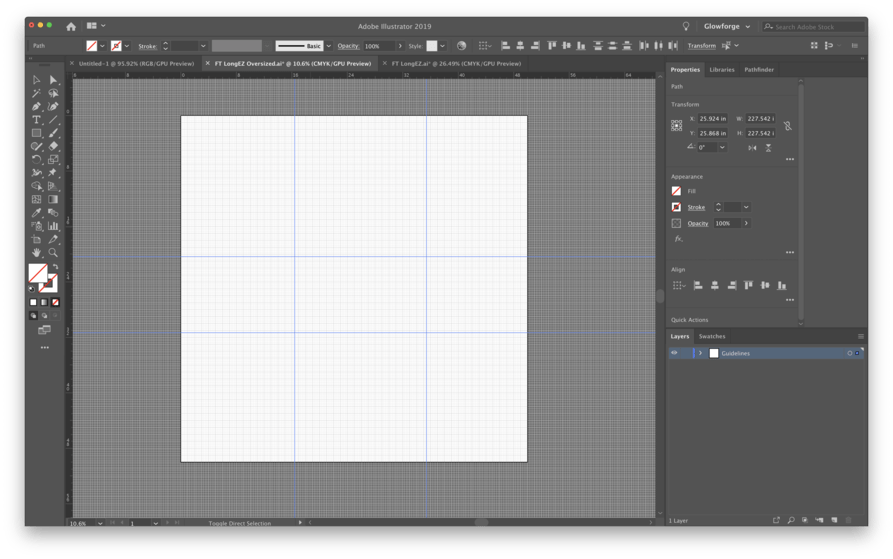
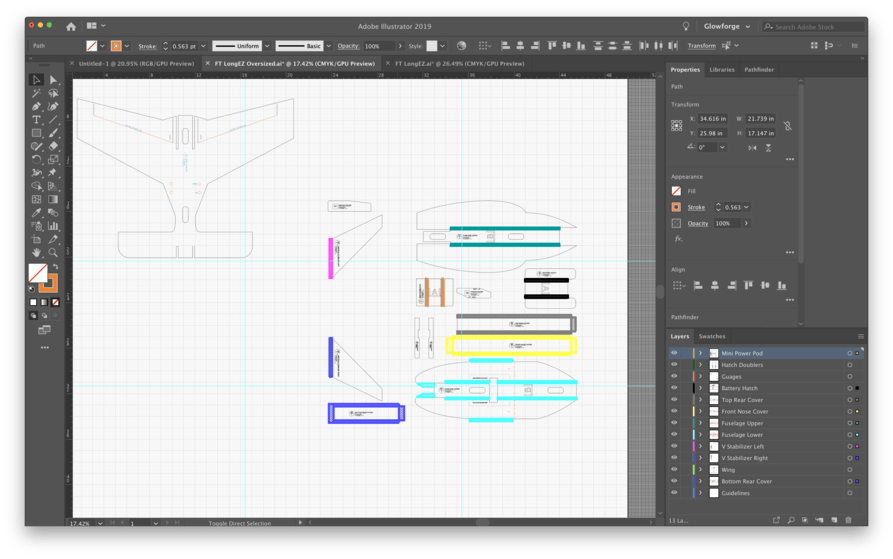
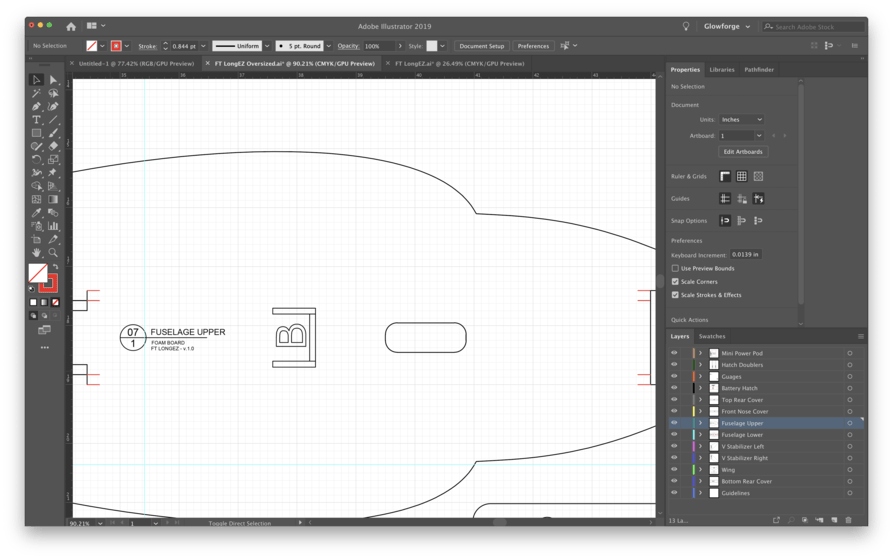
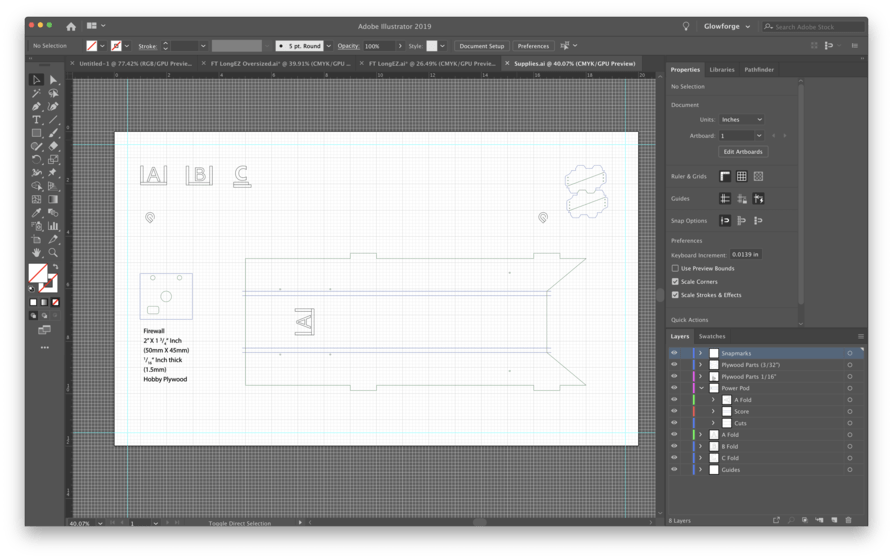
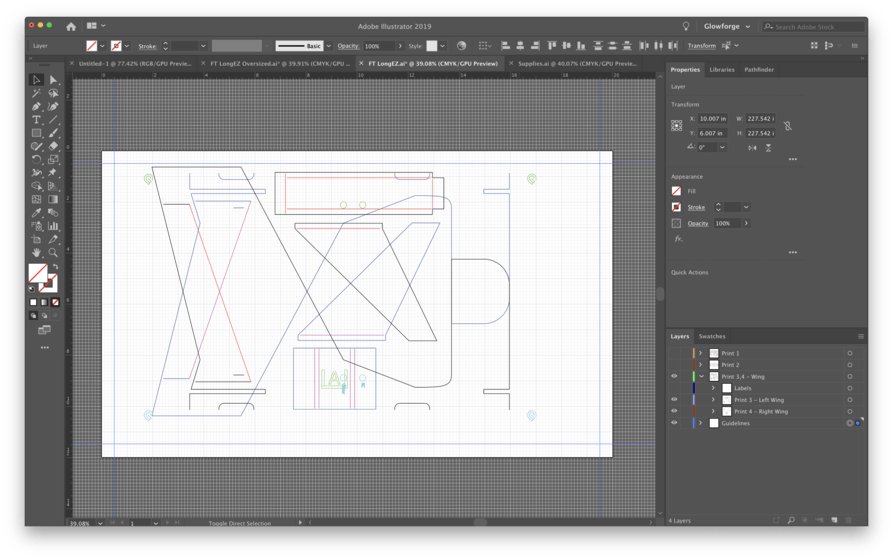
All of the pages will be present and you can highlight anything you desire. Now create two new blank workspaces and save them. This is where we will be moving all of the artwork we want to work with. I personally create the files named “Plane Name.ai” and “Plane Name Oversized.ai”. In both files make sure that you create the guidelines that show the actual cut area of your Glowforge. You will be using this to move parts around to fit into separate “prints”. Below is what my oversized workspace looks like.
Next use the direct selection tool to select a part or two. We are going to separate these parts into individual items, but sometimes it is easier to grab a little group and move it over.
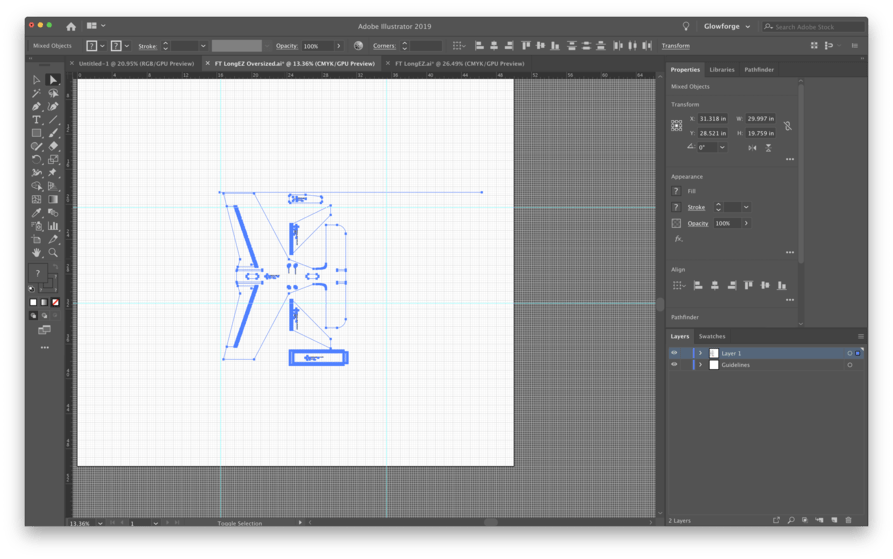
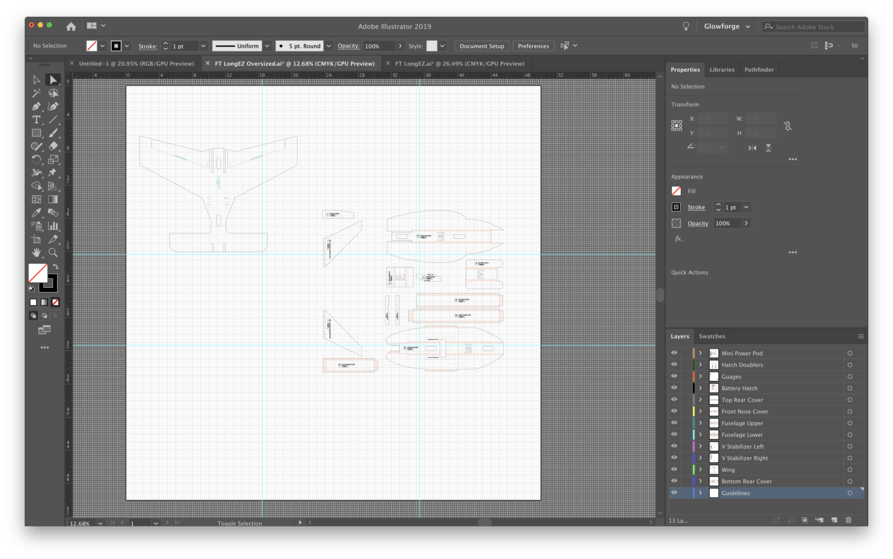
Now we need to spend some time dividing these up. Select each part separately and place it into it’s own separate layer. Name the layer appropriately and then move on to the next. Repeat this until all of the pieces are located on the oversized workspace. They may be on top of each other, but that doesn’t matter if they are individually selectable and if the separate layers can be hidden.
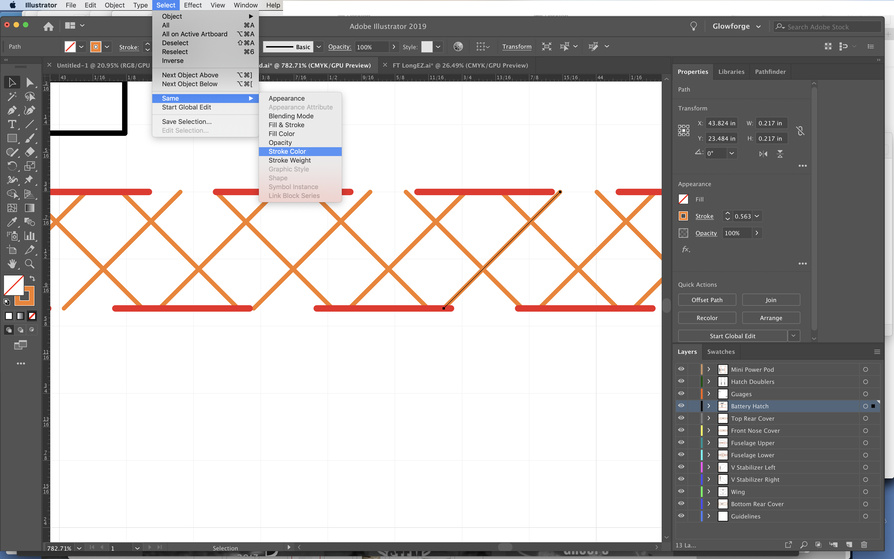
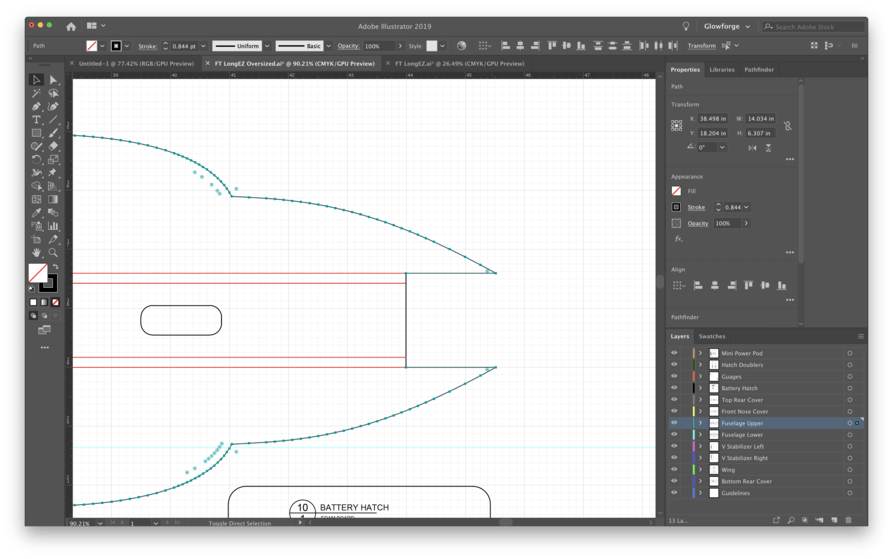
Now we’re in business. Let’s clean these up a little. First off, there are some lines in these files that are very helpful for instructions, but not helpful as actual cut marks. We are going to remove all crosshatching and any other symbolic color that we do not need to print. If you like, now you can also remove the labels since there isn’t a need to cut or engrave those. If you prefer, you can instead place the labels into a sub-layer which you can then individually hide. Totally up to you. Let me show you how I remove these items. The color schemes are very helpful here. Select a single line of the crosshatching and then have Illustrator select all of the rest.
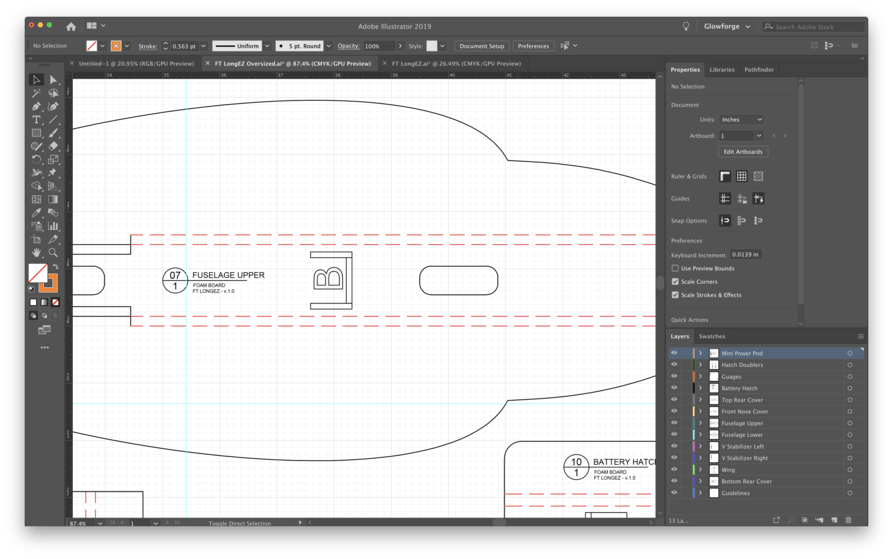
Repeat this for all other patterns that are not necessary: bevel marks, remove paper marks, etc. Now we need to clean up each pattern. We do not want the laser to cut a score as a dotted line, so we need to change all of these. Begin by deleting everything but the beginning and ending dotted line in a pattern.
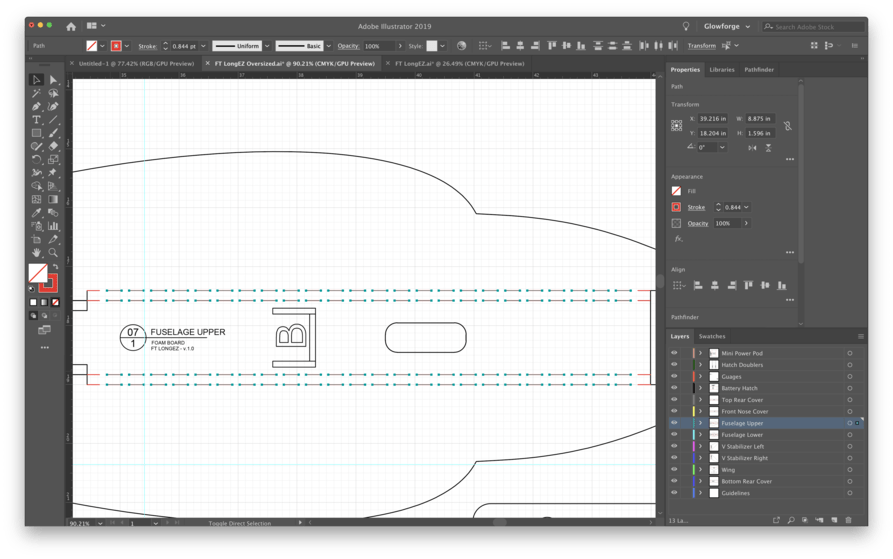
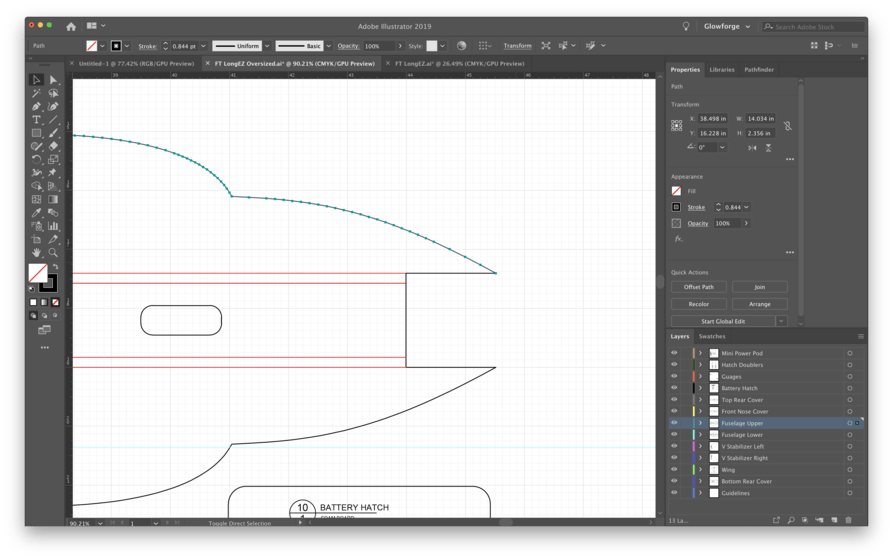
Now using the direct selection tool, select the two endpoints of the two dotted line sections you want to combine and then perform a Join command, then repeat.
Now to clean up the other lines. For each section, go around and make sure that a pattern is made up from as few individual lines as possible. Wherever a line starts and ends there will be a dot from the laser starting a cut and/or ending a cut. What I do is go around a pattern and join all of the sections together that can be. When you are done, the cut line for a pattern will hopefully a single line instead of a ton of small little line segments.
Some of the parts are repeated in many of FT’s files. The “A Fold”, “B Fold” and “C Fold” diagrams are examples. For those items, I have created a separate “Supplies” file with all of these repeated parts cleaned up and ready to be used. I copy the appropriate item, paste it onto the part, orient it as necessary, and then I’m good to go.
This takes me to the next step. Colors. The Glowforge uses colors to separate operations. The order of the colors determines the default order the cuts are organized by the Glowforge. Knowing this is the case, I change the colors of every line to better align with the order I want the action performed and the type of action to be performed. Engraves are first, scores next, and cuts last. Cuts may be divided up into multiple colors so that I can further distinguish which cuts should be performed in which order - this allows me to cut out small pieces first and then outlines last. This doesn’t take long - just select one line similar to how you selected the crosshatching and then select all of the same stroke color. Once you have everything you want to change to a new color, change the color. Repeat until complete.
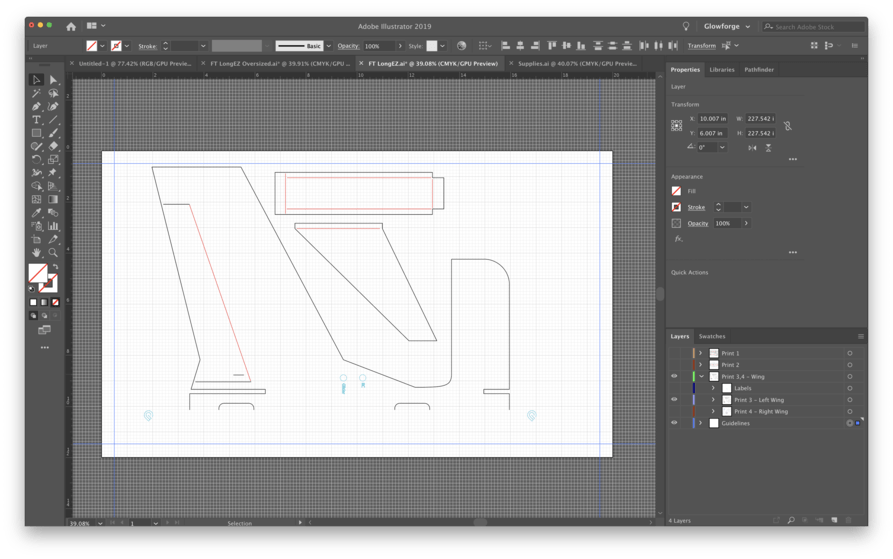
Next is organization. This step is just putting the puzzle together. Begin moving the parts to the smaller file and combine them into new laters. I organize them into layers called “Print 1”, “Print 2”, etc.
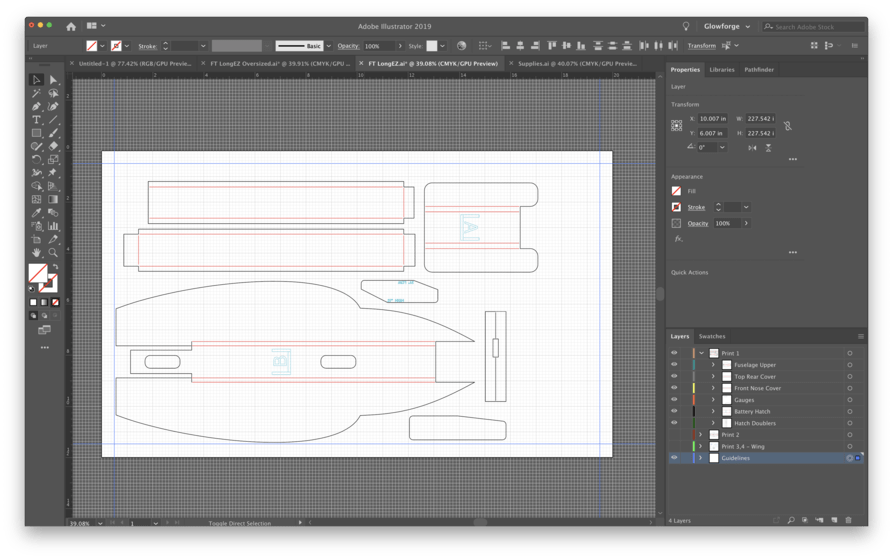
For small planes, this is where you finish. Each “Print” can be exported as a separate SVG to be sent to the Glowforge and you are ready to go!
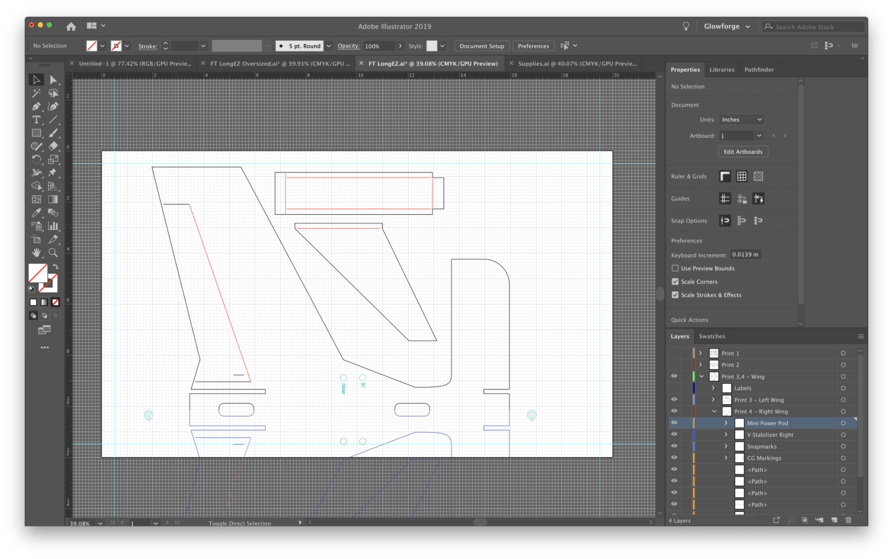
For the larger planes, though, we have a few more steps to complete. Some of the parts will not be able to be cut within a 12 by 20 space. These need to be organized a little differently and then carved up. First you need to grab a set of the Snapmarks. I keep these in my Supplies folder so I always have them available. Grab a set of them and place them towards the bottom of the allotted space within the Glowforge boundaries. Now that the marks are there, make sure the line color you have chosen for them is the correct color for an “engrave” task. As soon as that’s done, duplicate the Snapmarks layer, but keep them in the exact same location so that they are either directly on top of or underneath the other Snapmarks.
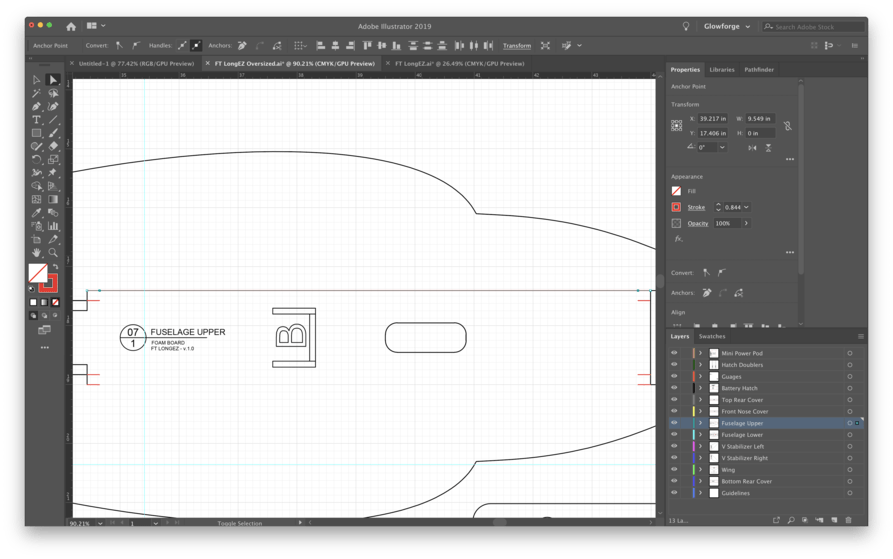
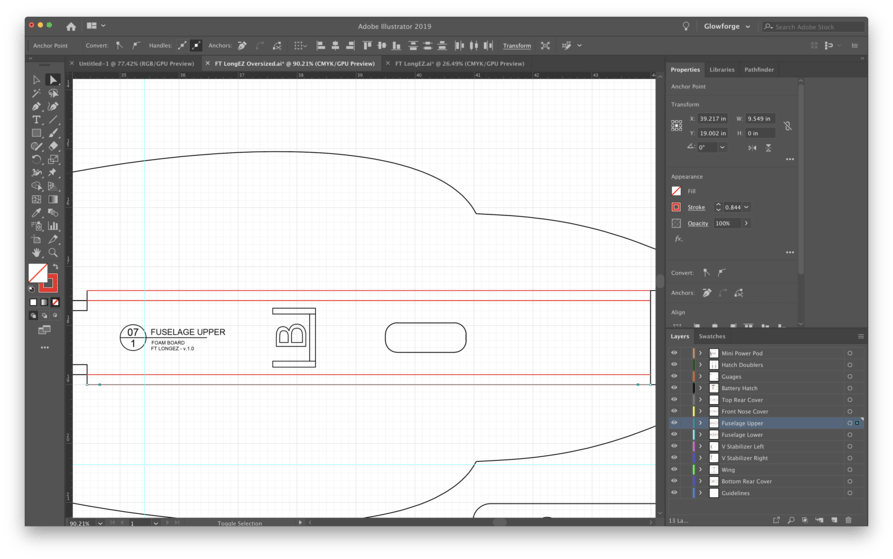
Ok, we are ready to divide up the pattern. Try to find a logical location to split the pattern and then cut the path at that location. There are lots of guides online, but basically you want to select a point with the direct selection tool and then cut the path at that point. You should need to perform this action at least twice - once at each point where the path crosses the line at the bottom of the space. You need to repeat this for every path that crosses the boundary.
Next you want to organize these new parts. Select the bottom half including the duplicated Snapmarks and place them into a new layer. Once they are all nicely organized, grab that whole selection and move it up so that it fits within the space the Glowforge allows. Lastly, change the color of the Snapmarks you have moved. I use a color separate from everything else that falls at the end of the color spectrum. The reason for this is we want the Glowforge to be able to see them to align to them, but we want to ignore them and not perform any action on them.
These files are now ready for individual export as SVGs and you can cut as many foamies as your heart desires. I’m going to include the sample files I used for this project and I have more. If you’re interested, let me know.
Happy Forging and flying!
FT LongEZ.ai (1.0 MB)
FT LongEZ Oversized.ai (1.4 MB)
Supplies.ai (1011.9 KB)


