![]()
![]()
![]()
![]()
![]() I am thrilled to report that this tutorial is no longer necessary. If you use the default Draft Photo engrave setting for large sized engraves, the image should process without needing to be split.
I am thrilled to report that this tutorial is no longer necessary. If you use the default Draft Photo engrave setting for large sized engraves, the image should process without needing to be split.
(I guess I’ll leave the rest of this up in case anyone wants to know how we used to have to do it.) ![]()
_________________________________________________________________________ ![]() ___________________________
___________________________
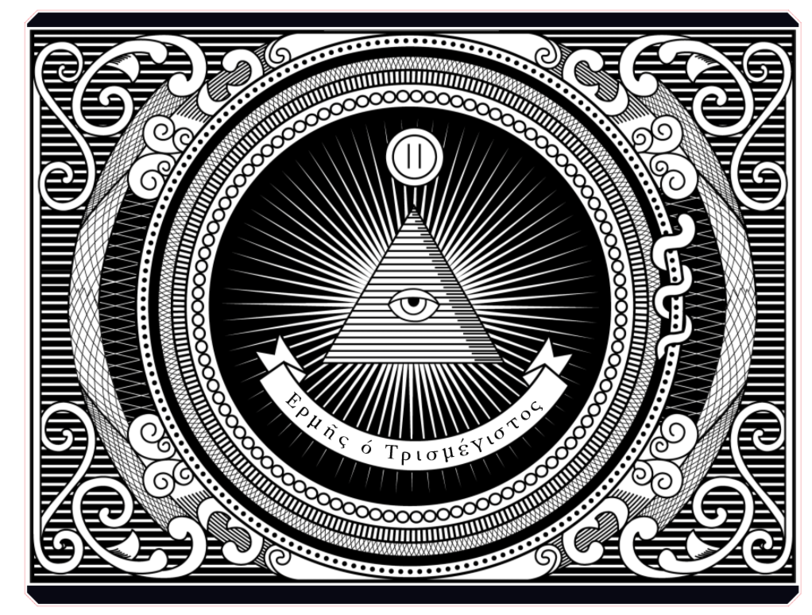
One of the owners wanted to engrave the large sized PNG image shown below and was having trouble getting the interface to accept it.
The Glowforge Interface currently has trouble accepting bitmap engraves with a large surface area, and Glowforge recommends splitting the bitmap into parts and engraving them in stages.
The problem with using the image splitter (Imagesplitter.net) to cut a design like this into fourths is, there is the potential for doubling up of the engrave at the edges, or not getting the engrave to extend far enough, and then you might have lines in it.
(There’s just not a good place to split the engraved part of the design.)
In the Glowforge Interface
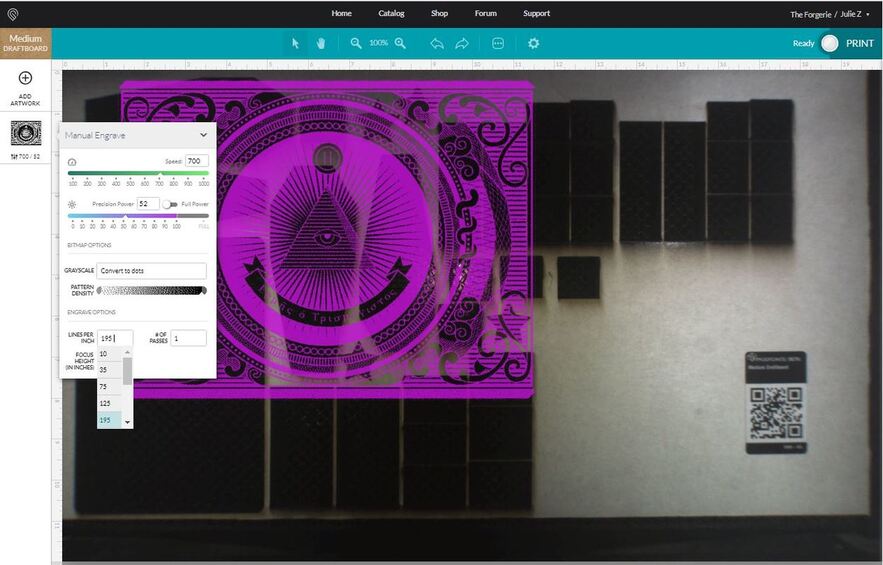
- The first thing you always want to try is to reduce the LPI on the engrave, by choosing Manual Engrave in the Glowforge user interface, and see if you can get it to load up that way. You can get really good solid coverage as low as 195 LPI, and if the engraving part (the black) is not quite full bed size, that might be enough by itself to take care of the problem.
.
.
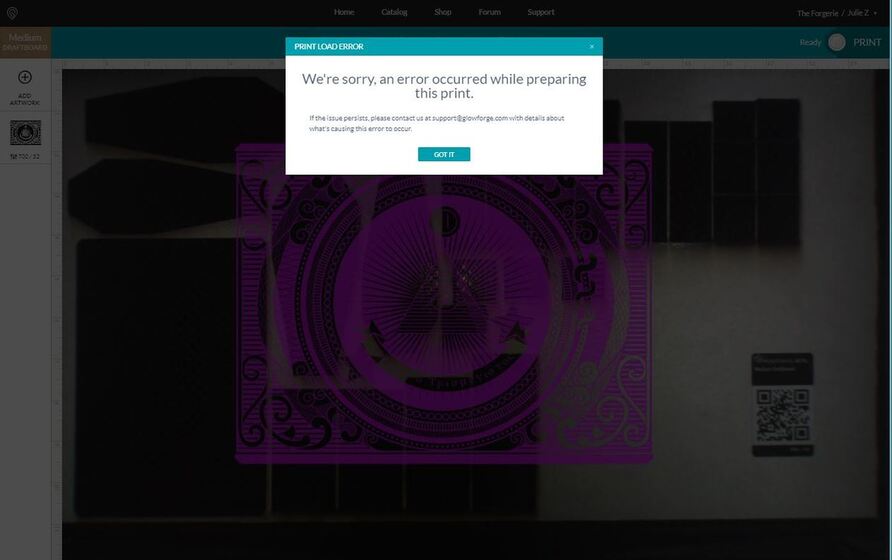
This one was still a little bit too large though, and generated an Unspecified Error after about 15 minutes.
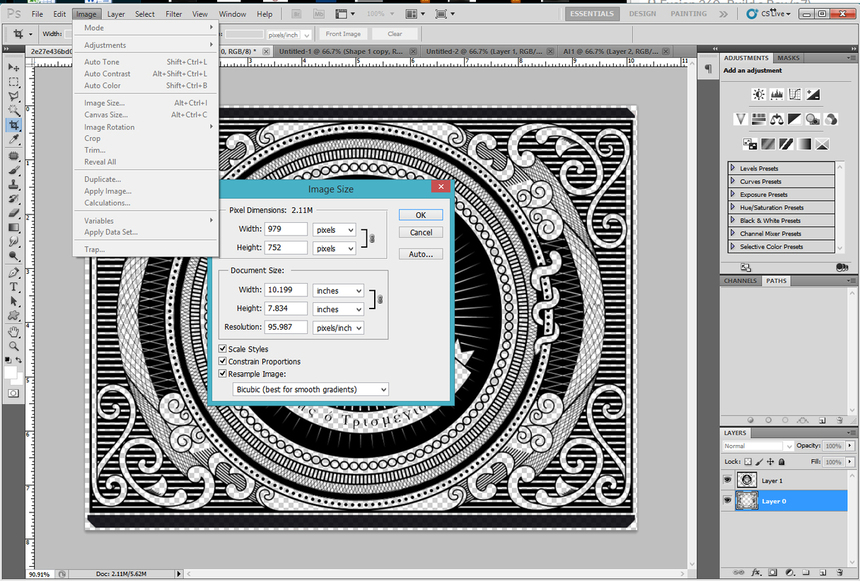
Okay, so we have to split the bitmap file. I’m going to take it into Photoshop to split it, since I don’t want to use Image Splitter.
In Photoshop (or equivalent)
- Step one is to check the resolution on the image - this one is 96 ppi, which is pretty low, and doesn’t need further reduction.
.
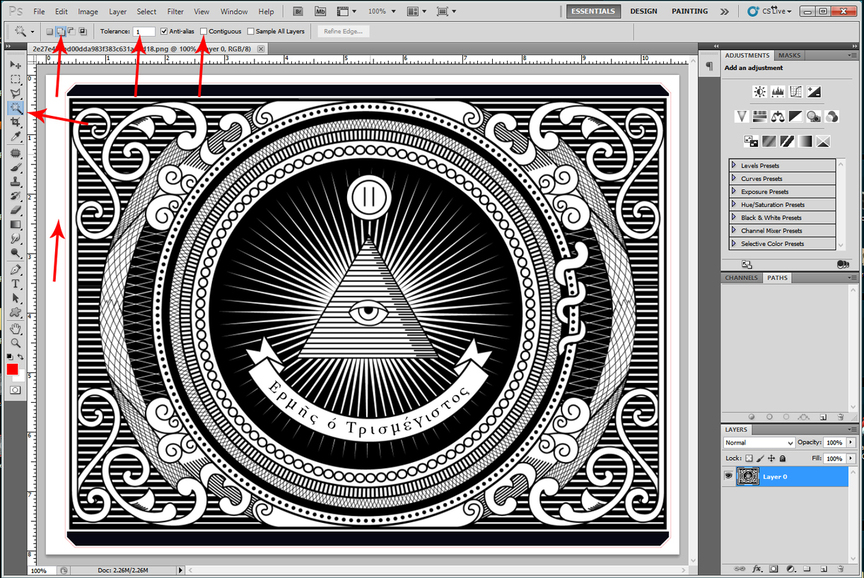
2. It’s a PNG file, but it’s got white fill in it…I’m going to start getting rid of some pixels by removing the white background.
Click the Magic Wand tool, set the Tolerance to 1 as shown in the slots below, uncheck Contiguous, and click once on something white. Then hit the Delete key on the keyboard.
- Crop it close to get rid of any little stray bits outside of the main engraving area.
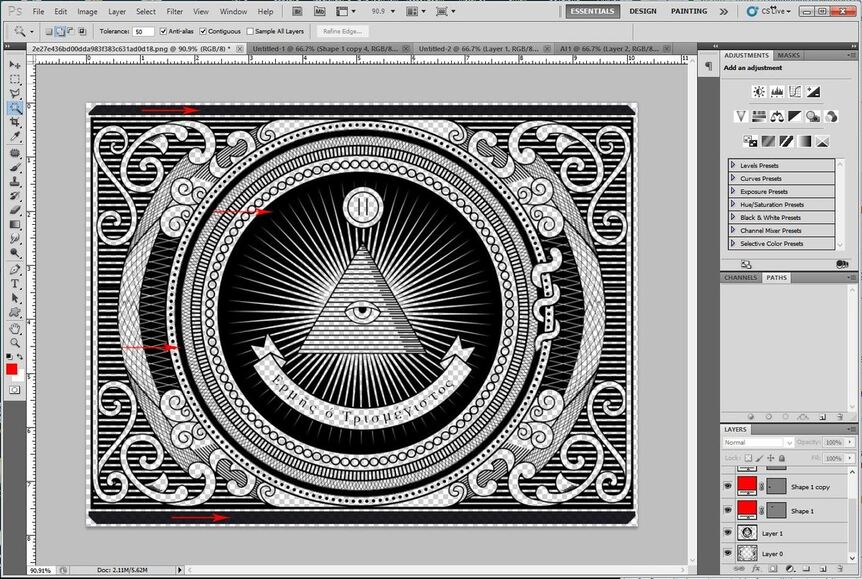
Now we want to split up all of that black engraving into a couple of chunks, so that if it’s still too large for the interface to handle in one go, we can do them one at a time if needed.
I’m just going to pick the big solid black sections that I can easily capture with one or two clicks:

- Click the Magic Wand tool again, but this time you want to change the Tolerance to 50 and check Contiguous. Then click a few places in the artwork.
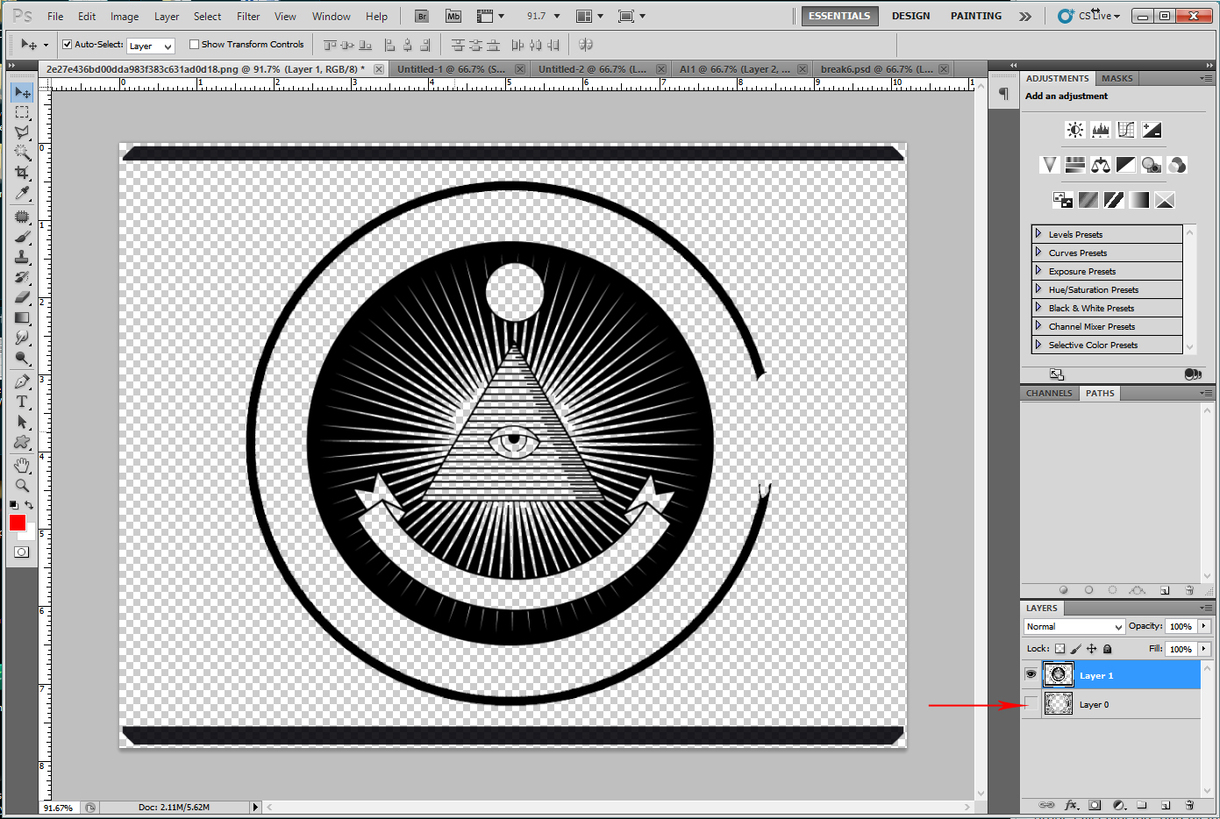
- With these areas selected, CTRL+J to copy the information onto another layer. You will see it appear as Layer 1 in the Layers Palette above the first layer.
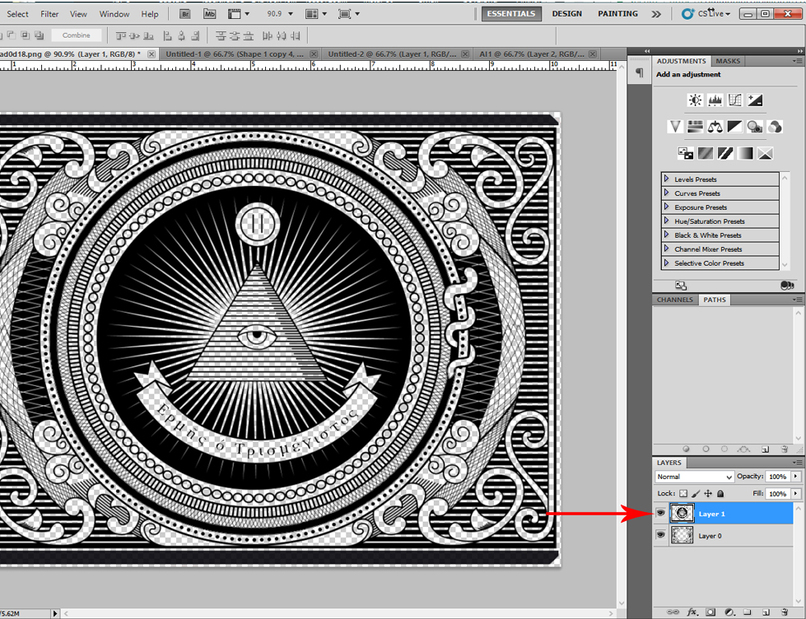
- CTRL click on the icon for Layer 1 to select everything in that layer.
Then click on Layer 0 (the bottom one) in the Layers Palette, with the same areas still selected, and hit the Delete key on the keyboard. You just deleted the duplicate information out of the original drawing.
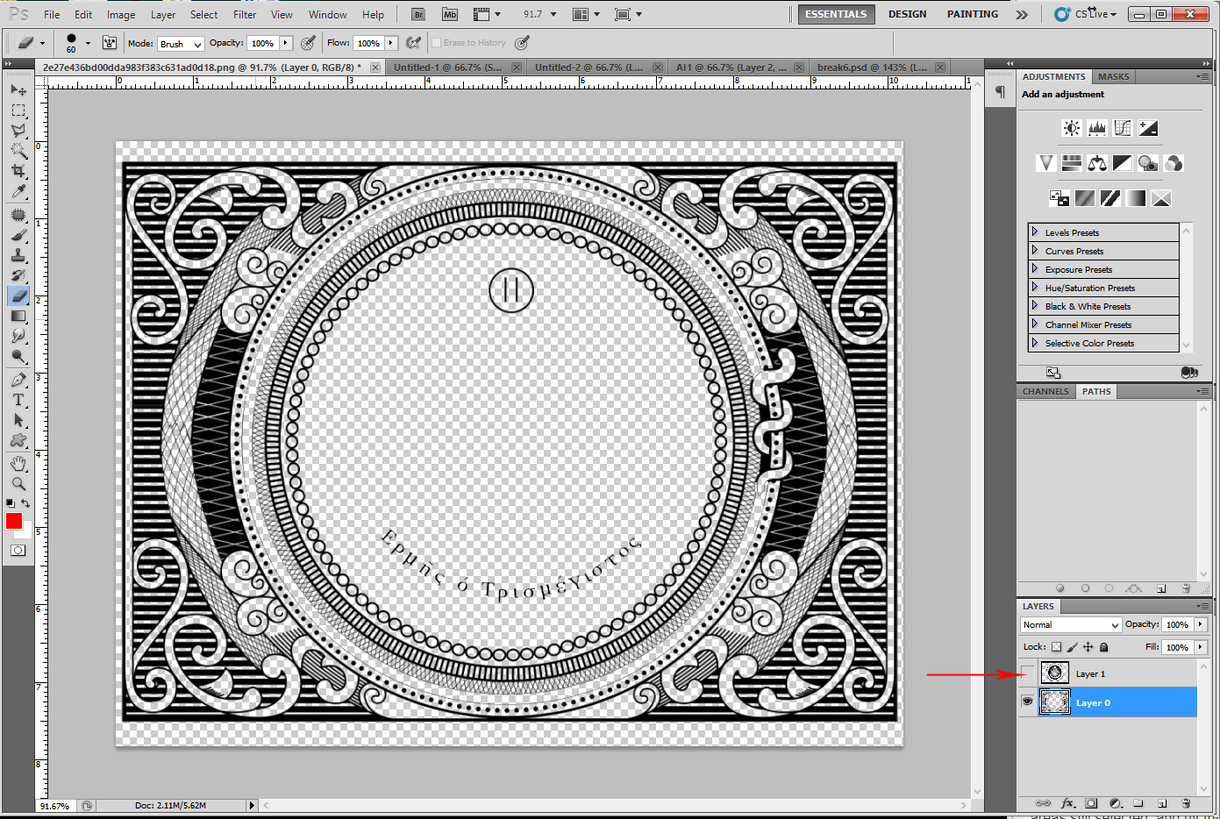
- Okay now you’ve got two separate layers in the Photoshop file, each of which has half of the information for the total image in it. Turn off the visibility on a Layer by clicking the little eye next to it.
.
- In order to export two different jpegs or PNGs that you can use for the next step, just turn off the visibilty for one Layer, Save As a .PNG file, then switch and save the other Layer as a separate .PNG.
In Adobe Illustrator (or equivalent)
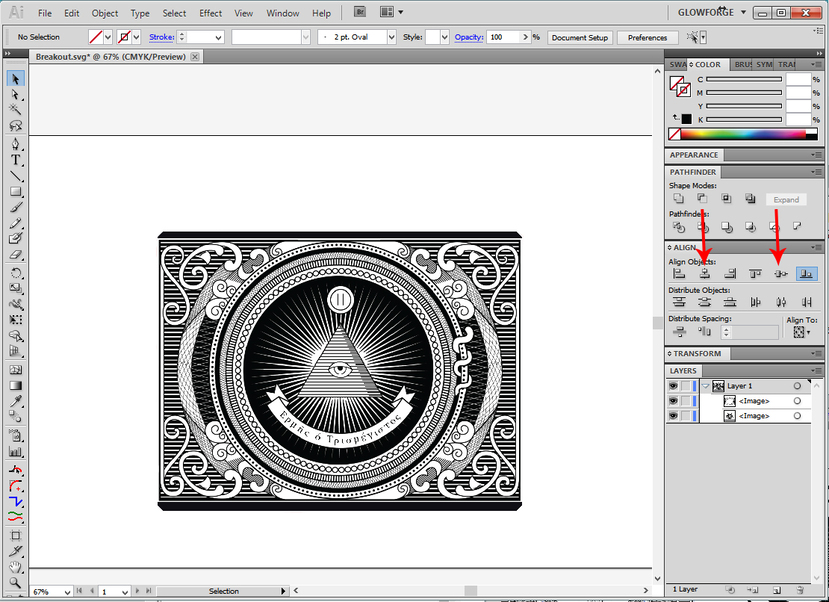
- Drag the two images onto the artboard, and click them to select. Embed each image.

- Select both images. Align the images using the Alignment buttons.
-
Add a cutting rectangle if you want one. (optional)
-
Save the File as an SVG.
Remember to Embed the images in the SVG popup.
.
In the Glowforge Interface
-
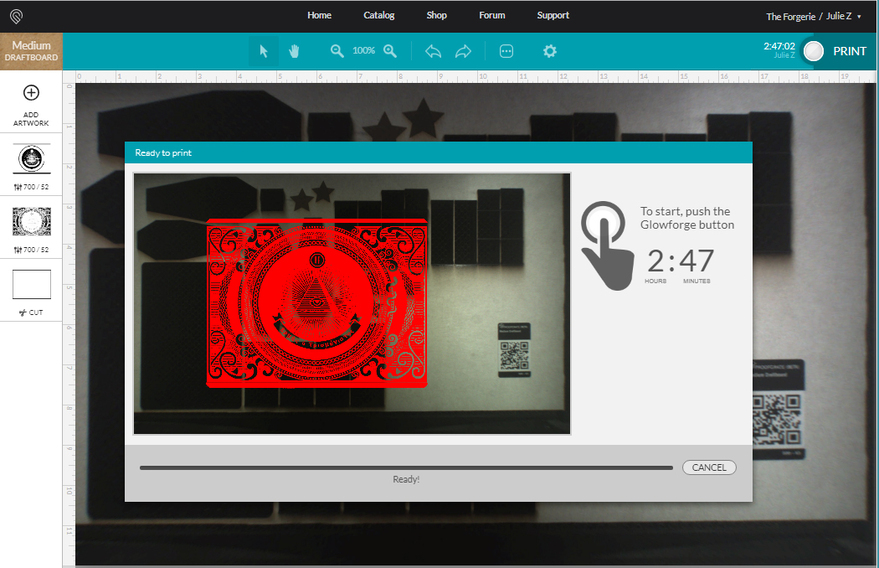
Drag the SVG over to the catalog and let it render. It should give you separate operations for the two bitmap engraves in the file.
-
Change the LPI in each of the engraves by setting the LPI to 195 in the Manual settings palette.
Note: If you absolutely can’t live with 195 LPI, you can set one of the Engraves to Ignore, and try to process them one at a time at a higher LPI. Totally up to you. ![]()
Click on Print to process the engraves.
Note: Give it about half an hour for full bed prints to process before you throw in the towel. Depending on the complexity of the file, it can take a while to process all of the data. (I usually set them running and go fix dinner.)
Success! And no ugly lines breaking up your engrave!
Is it worth the trouble to do it this way? Totally up to the individual. If I needed to do one that had no breaks in it for splitting, I’d do it this way to get a better result on the finished product.
And you can split one up into as many small parts as you need to, to take the engrave in small enough steps that the interface can handle it.
The benefit to setting the files up in Photoshop as layers is, they will all export as the same outside dimensions. When you use the alignment tools in Illustrator to align them, they re-align perfectly.
Okay…I’m done again. Thanks for reading. ![]()
 on the bed.