I would like to create a puzzle picture type of ordeal where when you put the 20-30 puzzle pieces together it makes the picture. I need some advice on if you’d think it would work.
My plan is to print a picture on thick card stock. Use super strong adhesive glue spray to glue the picture onto the piece of wood, and then cut through the wood and everything all at once with the various puzzle pieces.
The wood used is 3/16 maple wood (the purebond maple wood from home depot) so it isn’t very dense. The settings I use to cut through it regularly is 180 speed and full power.
What I am asking is what are the chances you think that the paper will catch on fire if I attempt to cut through the card stock, dry glue, and the maple wood all at once to create this picture puzzle?!
I would probably use the settings of speed 170 and full power.
Lots of people use their Glowforge to make puzzles. I suggest you use the search function and learn about their trials and tribulations. Also, testing and refining your process will be key to your success. Take your maple and clue the cardstock to it and do some testing. You will probably have to mask the cardstock to get an unsmudged puzzle. 170 speed seems fast to me, but may be a good place to start. Testing and modifiying is the only way to get it dialed in.
@dklgood has good advice. I would say particularly to search for posts from @jbmanning5, who is a professional puzzle maker and has shared a lot of his tips in the forum.
Pretty much zero increase of risk compared to the plain wood. @dklgood is right about the masking. I basically did this with some of my mandalas, like this one:
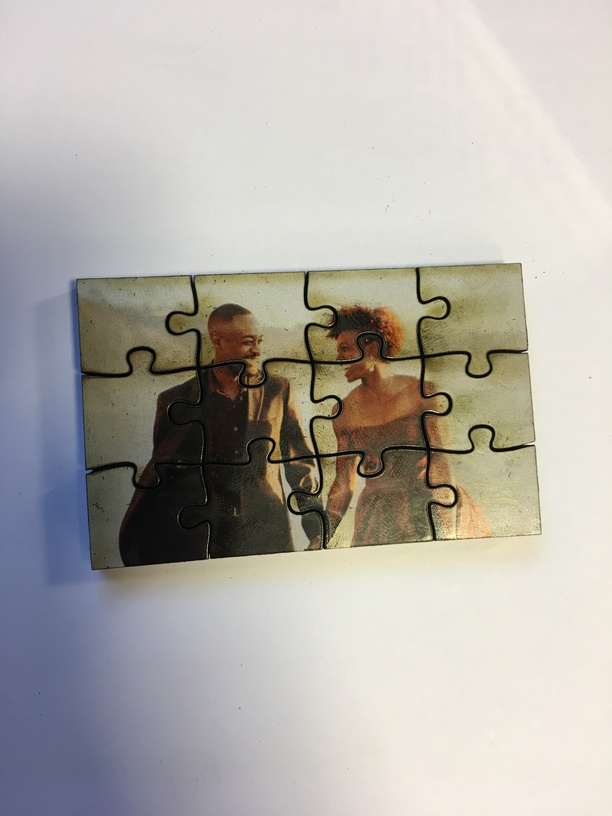
Awesome thanks for all the help! After seeing what everyone wrote I did a little test run. I have attached a pic of what the picture is and my first attempt at making a puzzle out of it (I only did the top half, used the bottom half for tests). I did this one with it facing up.
You can see some burning on the picture itself but only in the lighter areas. I used speed of 170 and full power ( I have the pro model). There was some flame flair ups but I actually just now looked at the spray adhesive bottle I used and it says the glue is flammable LOL. But, no real flames that I was concerned over. I am pretty satisfied for the first field test, more tests to come!!
Thanks for the help everyone! IMG-8500|375x500
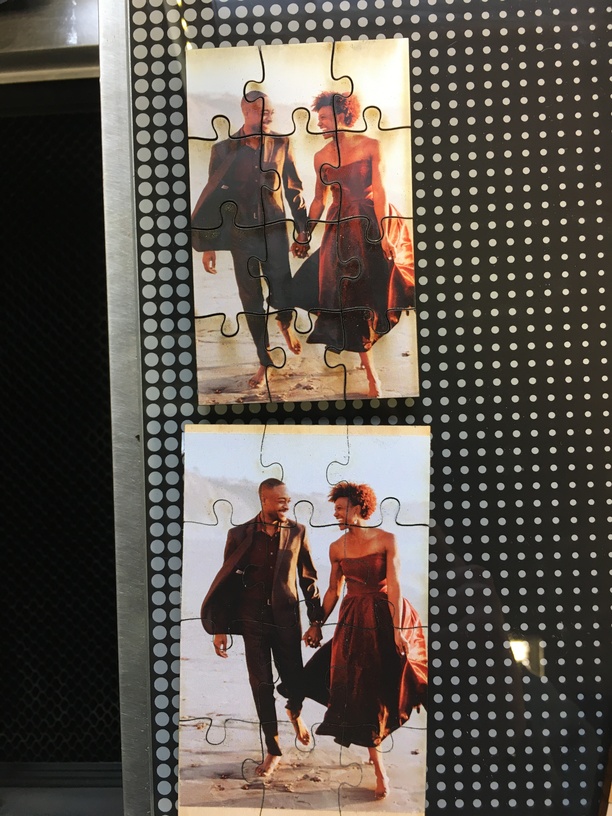
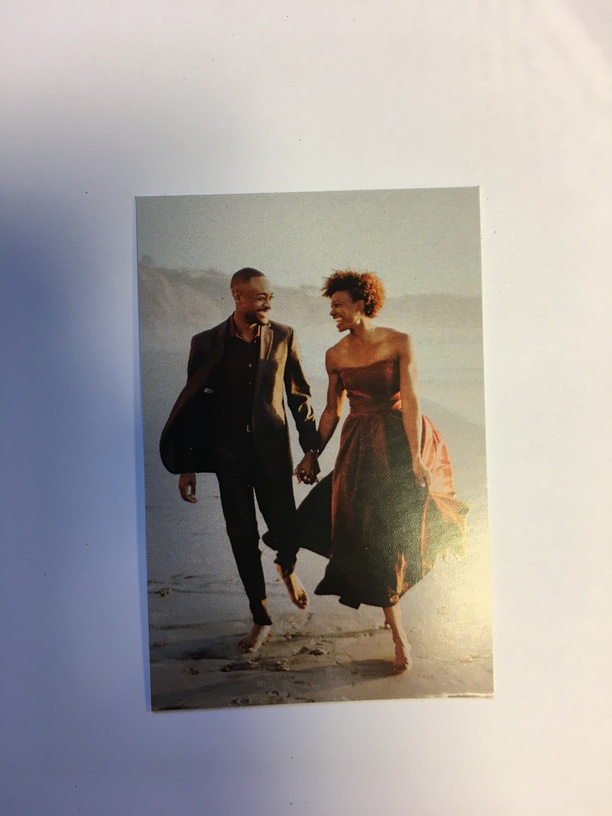
After more trial and error, I have come up with the best looking one! In the picture attached, the top was my first attempt with all the burn marks and the bottom is what I’ve made today. I used a lighter paper stock and cut it with the picture side facing down.
Speed= 175 and full power.
Nice. You have the settings dialed in. It’s hard sometimes not to get flashback burns on the underside of things (I’ll usually use a piece of copy paper or something sacrificial to keep that from happening when I don’t have the underside masked).
