I’m sure there is information, but, I’m having issues. I was getting very flustered last night so I needed to walk away for a bit. Here’s my problem:
I need to engrave a bunch of coasters. They are all over 1/2" so I need to remove the tray. I would REALLY love to be able to engrave 4 coasters at a time, as they are all the same image, just with different names on them. My problem is getting some sort of jig or marker set up that will allow me to do this…Keeping things lined up for multiple engraves but having to deal with the tray being removed is messing with my brain and I’m getting very discouraged. Any help would be much appreciated
OK so a couple of key questions: How accurate is accurate enough?
The simplest thing to do is remove the tray, stack up some stuff in the bottom of the machine until the stack plus coasters is in the laserable height range (1.5" or so is perfect).
Leave your stack of scrap stuff in the machine, take the coasters out.
Make a SVG with 4 coaster outlines and your engravings. Set the outlines to score, ignore the engraves. Run that score. It’ll make coaster outlines on the stack of materials. (I like to use cardboard as my top layer for this purpose, it scores nicely)
Carefully put your coasters on the newly scored outlines. Turn off the score, turn on the engrave. do an autofocus on a coaster, and you’re good to go.
Ignore the camera view, it’s likely to be dorked up. Trust your score lines. Seriously, trust them. Do not give in and try to manually move the coasters to correct for them… the score lines are absolutely authoritative.
A book makes a nice prop for a jig. Obviously, with something on top to protect it, like a sheet of ply. Of course, a few sheets of bed-sized material stacked up works perfectly as well.
However, 1/2" is perfectly acceptable for engraving on the bed. I’ve worked with 0.59" material without issue (it won’t officially focus at that height, the engrave was a little defocused but that was not an issue for my needs.)
OK so you might not be out of the woods yet. Sometimes the glowforge will refuse to work because your stack of support materials isn’t the correct height. To solve that problem lay a coaster off to the side on your stack and focus on that. Then run your scores. The trick there is to be sure the scores don’t hit your “focus coaster”, you know?
Also, I have a file with all the files together, and a score line, so I was at least right on that part haha. My question is though, what do I set my height to when I do the score?
The further off the focus is from your support stack, the wider your score line will be. This leads to some play in terms of accuracy, which is why I asked at the beginning how accurate is accurate enough here. This method can get you pretty close, but if you have extreme accuracy needs there are better techniques. The only trouble is that those techniques are considerably more involved and more importantly harder to describe, so I didn’t dive right in.
This method all comes down to how careful you are aligning things visually. Shouldn’t be hard to get 0.5mm if you take your time. I like to use a flashlight to be sure I can see exactly where the scores are as I align. Shadows can mess with your perception.
BTW this method works well on the tray too. I usually lay down blue painters tape, score that, then align items on the tape. It’s quick and dirty, but very effective.
I wish these stupid coasters weren’t so tall so I could just run them with the tray, but, alas, they are too tall. They hit the fan port on the laser head
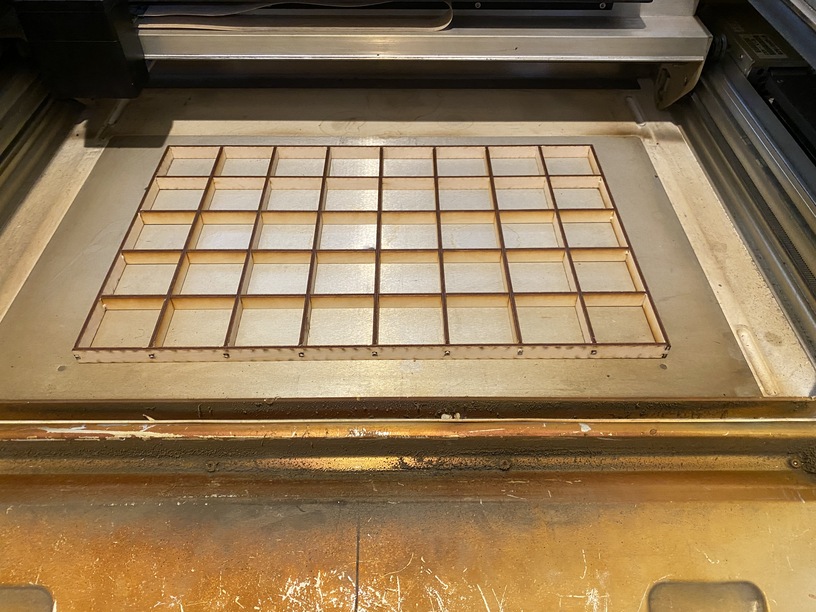
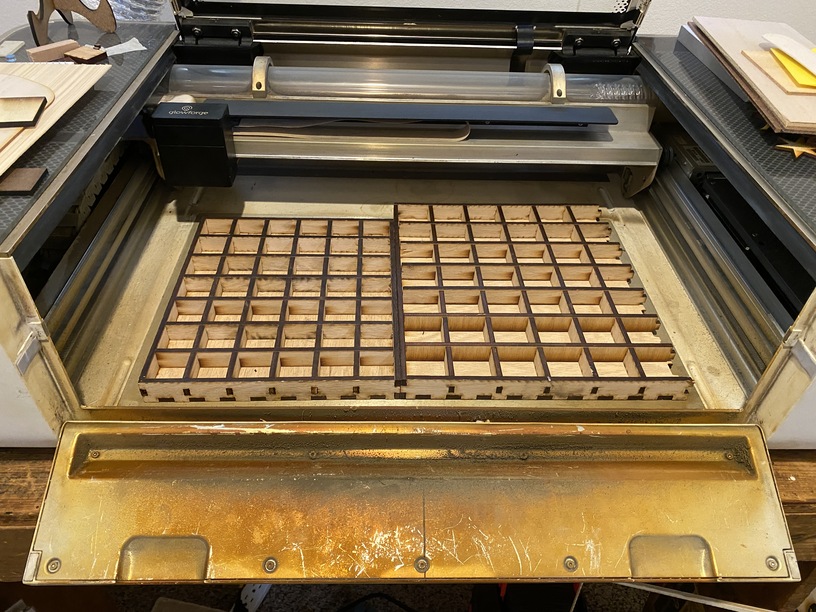
I used Box-O-Matic to create these two risers for when I remove my tray. One is 1 inch tall the other is 1/2 inch. I have placed jigs for coasters (and other things) on top to do just as you are needing.