Just seeking some pointers/help with a project I’m considering undertaking. Please bear in mind - I’m very new to the Glowforge and some of the more design oriented aspects of this medium (.svg, design software, etc.)
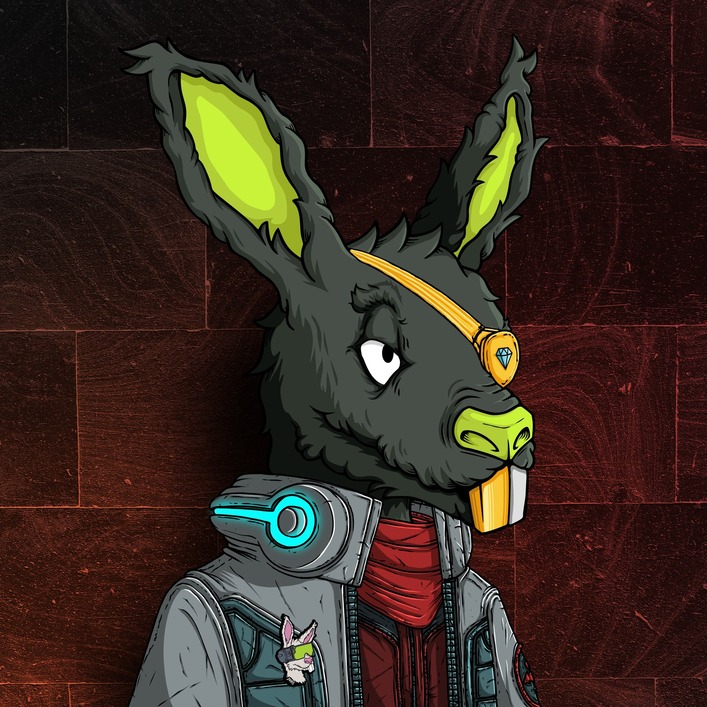
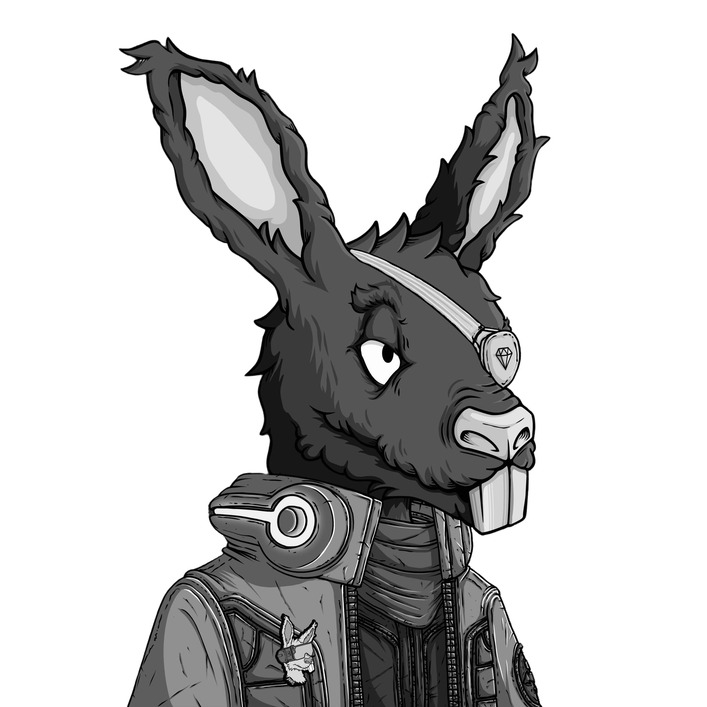
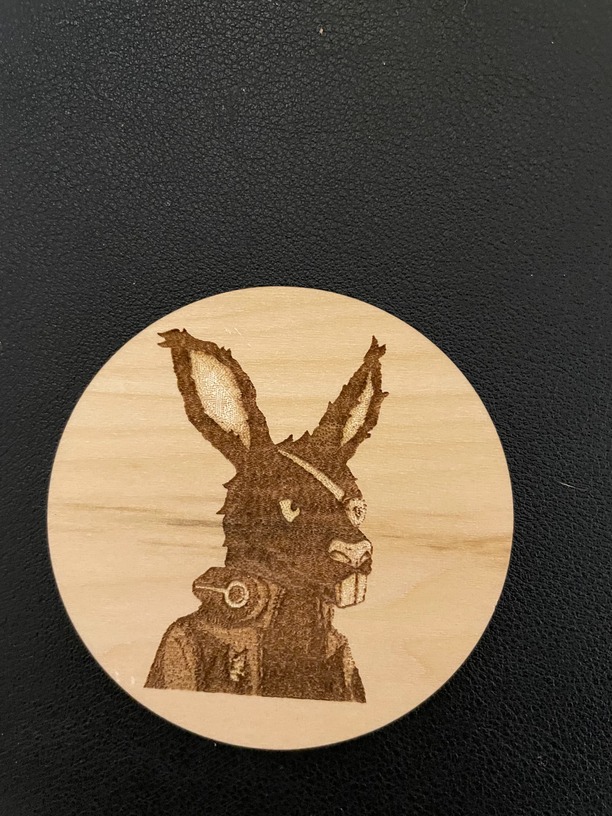
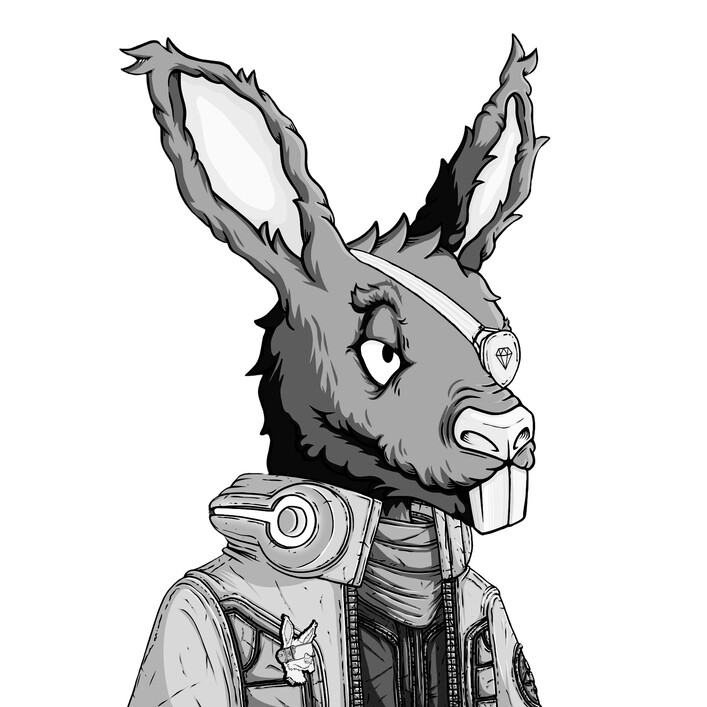
I have a digitally drawn image that I’d like to make into coasters (along with several others that are similarly styled). To do a test, I removed the background of the original image shown below, then turned it black and white (simple iphone edit), saved and sent as a .jpg to the glowforge. I used the default settings to try an engraving on PG medium basswood hardwood. The image came out ok, but without detail and just looked muddy. Any tips and tricks to improve picture engrave quality for this and going forward would be much appreciated. Also, if theres anyway to actually keep the background in the first image and still have good detail, I’d love to hear it. Thanks!
That is one cool design. How did you choose your engrave? Vary power? Convert to dots?
The gradients are pretty subtle but should be clearer. I’m wondering if you could tweak the greys and make them a bit more dramatic between them. I am not a graphic designer and pretty much stick to spot color art. But someone who actually can help will come along soon. Your design really deserves something special!
Thank so much! I am not the creator, but a friend of mine is…which is why I’m trying to make a cool gift for him. I think it’s awesome too, and I’ll let him know others think so as well!
I didn’t mess with any engrave settings, just went with the default for the particular material that Glowforge suggested. I’ll do more research and mess around, just wondering if anyone here had specific suggestions so far. I’ll also do some further tweaking on a photo editor of some sort. Thanks for the tips!
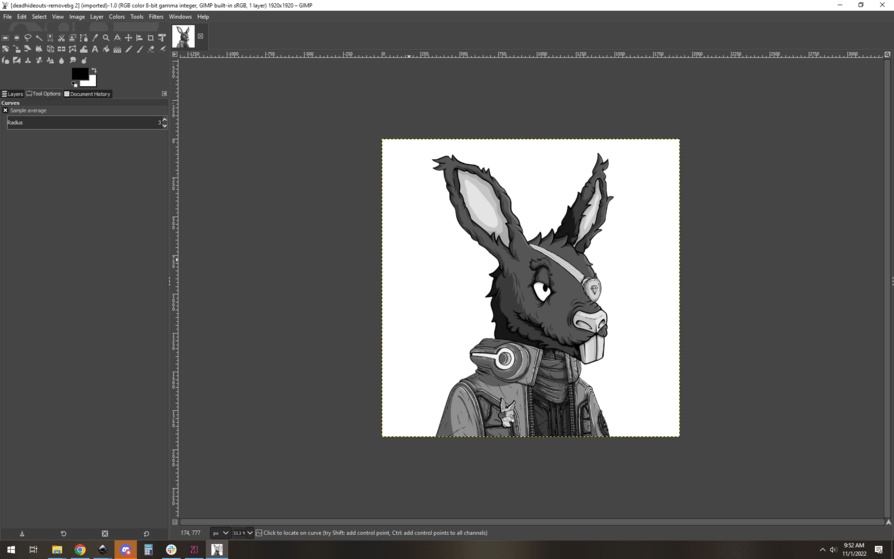
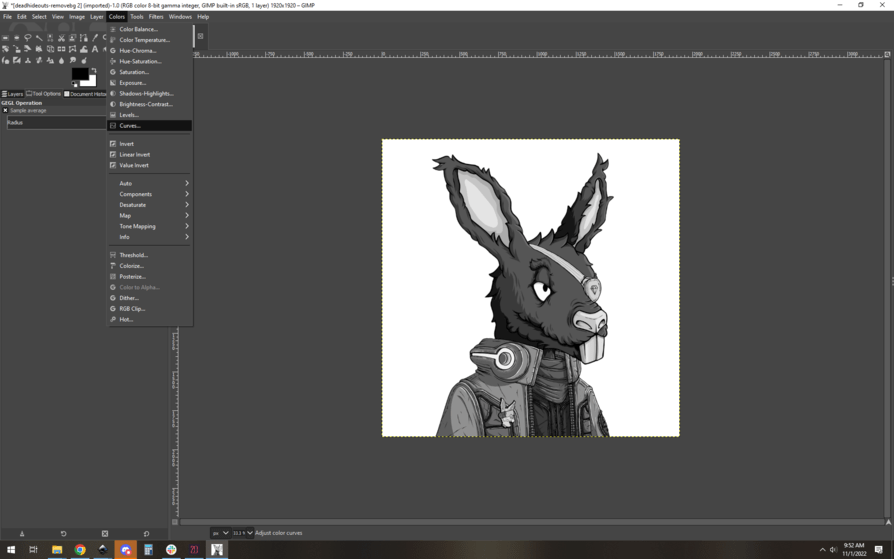
You’re very close with that final image, you only need to use curves to separate the greys.
I use GIMP but you can use any number of higher-end image editors to get the same effects. What you’re trying to do is take advantage of the full range of black to white, while also separating the various greys here by enough that they don’t bleed together in the final engrave.
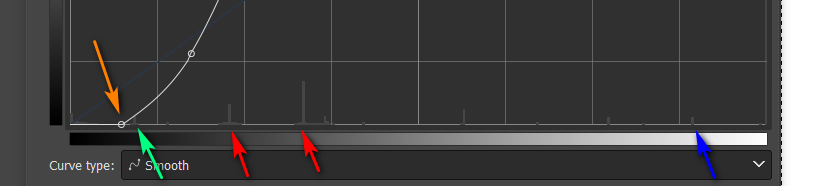
In the curves dialog you’ll see these spikes at the bottom (it’s a histogram if you know that term) The spikes are a measure of how much of your image is a specific shade of grey. Taller spikes means there’s more of that grey in your image.
The thing to notice is that your leftmost (green) and rightmost (blue) peaks are the darkest and lightest greys in the picture. To maximize your dynamic range of the image and use the most of the range of black to white you move the endpoints of your curve in closer to those points. I’ve already done that here and moved the black point closer to your darkest grey (orange arrow)
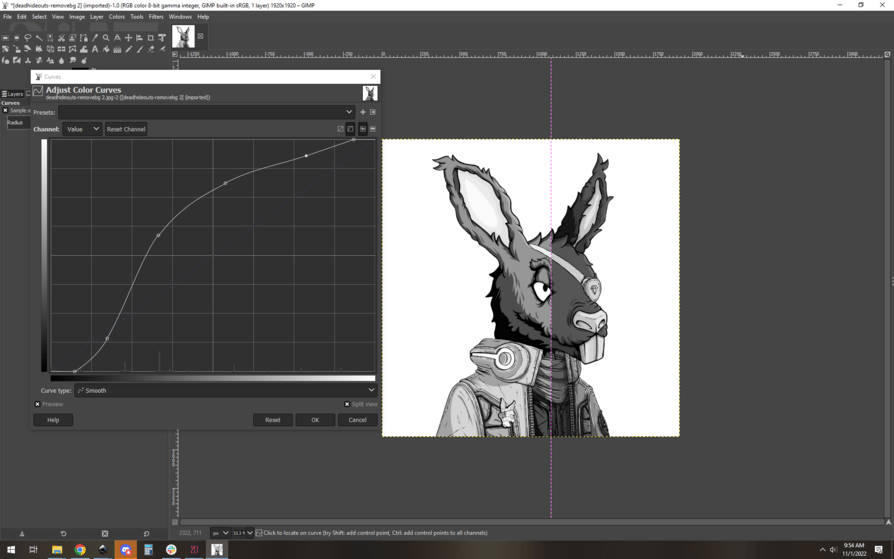
And here I am after moving the curve around to lighten the darker greys pretty significantly (the “hump” on the left side of the curve) and then ensure that the other greys are differentiated. Side by side comparison, mid-edit:
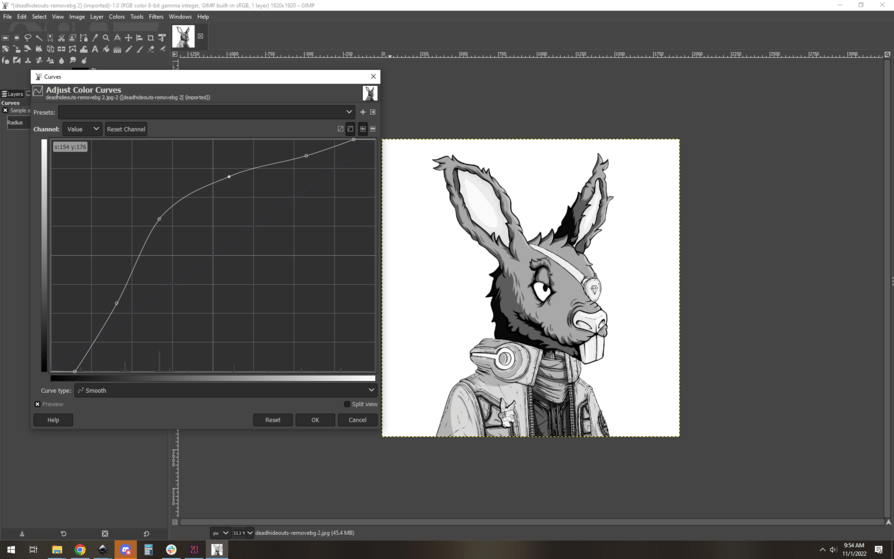
Save your image out, then engrave it using either dots or 3d engrave (aka “vary power”). I prefer 3d, but depends on materials and specific aesthetic taste.
Here’s my final version if you want to give it a whirl as I edited it:
The advice above is spot-on but I want to add, there is no one method for reliably producing images suitable for engraving on every material. There are general techniques but the resulting image often needs to be tweaked to produce acceptable results. Without fail, I always use a small representative portion of an image before engraving on the material I am using. Greyscale is especially tricky as the density/texture of even different sheets of the same material can produce very different results. I avoid it like the plague and choose black-and-white whenever possible.
Yes, this! This is exactly why I don’t usually give much advice about specifics when it comes to engraving. So many variables, and it’s all subjective in the end.
Wow, thank you so much. I really appreciate the time and effort you put into helping me find a solution! I have some VERY limited experience with Lightroom, but have really only done a little tweaking with the color curves. And that was with full RGB, not grayscale. I’ll have to get back into practice!
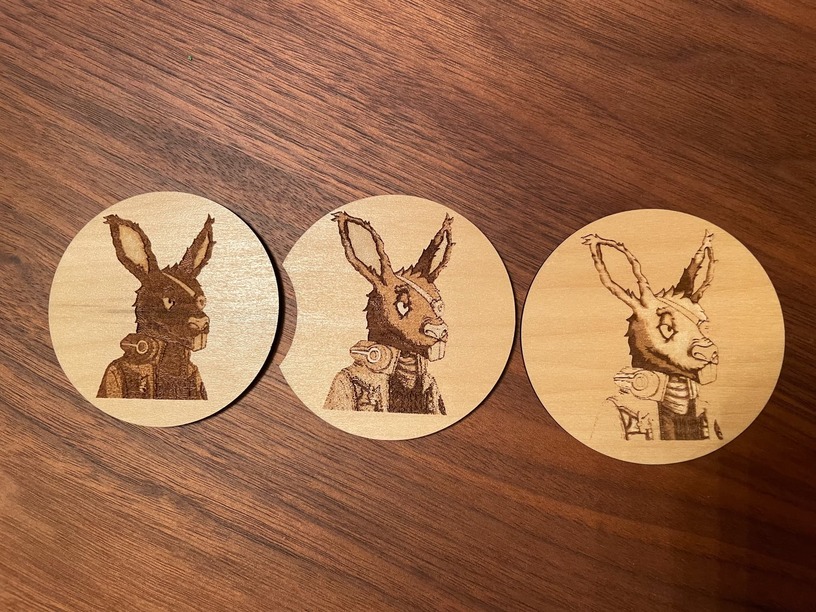
I ended up using your image and tried both the “covert to dots” and “vary power.” I think dots came out with a better image on the material (basswood just to test), but, like you, I prefer that way the 3d engrave looks with regard to the actual way it engraves. I’ll try additional tweaking to improve the washed out look of the highlights on the vary power.
Ive attached an image showing all three engravings. Far left is the original I wasn’t happy with, then the dots engrave, and then the vary power engrave.
I can’t tell you how much I appreciate the insight. I totally understand what you and the member below mentioned about each engraving being different with no universal, hard set rules. But its very encouraging to see what a little editing can do to drastically improve the engrave quality.
Ply is tricky because if you engrave a bit too deep you hit the center layers, which usually gives you a different color. In the case of PG wood the center is mdf, and that’s completely different from the basswood veneer that covers the faces.
I’d suggest using solid woods if you’re going for a deeper darker engrave, especially if using 3d engrave settings.
Im PRETTY certain it was medium basswood hardwood, but I’ll have to confirm when I get home tomorrow. Ultimately I want to use some thicker stock maple hardwood (I’m assuming lighter woods are going to work the best), so finessing the image for that will be the next step.
I’m assuming going for a deeper darker engrave also involves messing with the power settings of the glowforge and finding the right amount for that too, correct?
So there are three main variables with engraving: Speed, LPI, and power.
As speed decreases engraves get darker and deeper.
As power increases engraves get darker and deeper.
As LPI increases engraves get darker and deeper.
So if you’re doing 1000sp/100po/270lpi and adjust it…
500/100/270 will be significantly deeper and darker. Shifting to 500/50/270 you might think that the power decrease will offset the speed decrease and you might end up near where you were at 1000/100/270. Maybe you will, but it’s hard to say without testing – applying laser to organic material like wood is just a little too complicated and analog to break down to easy arithmetic like that.
Another thing to consider is that speed affects the engravable area, (higher speed, wider margins) and that due to the physics of the laser extremely thin vertical lines don’t engrave as well at high speeds.
And beyond that, materials are wildly variable. Things like cork turn jet black with extremely low power engraves, while something like walnut can be hard to get any contrast at all.
It’s all down to your tastes too, so nobody can tell you what “looks good” to you.