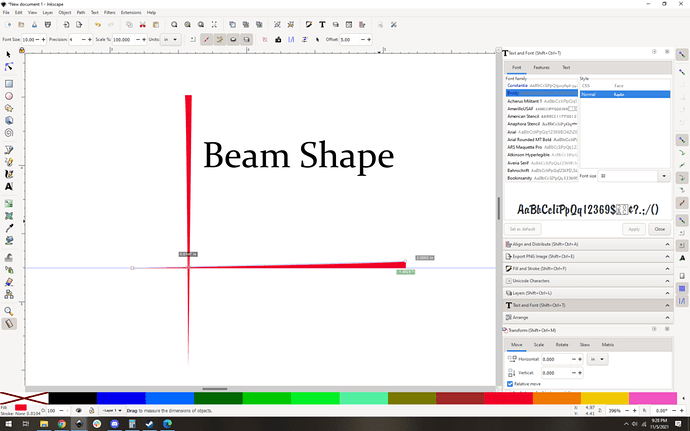
Kerf wider at the top? Surely everybody can't be wrong?

Every discussion I’ve seen online — and I’ve read many — says that the kerf should be narrowest at the top (at the focal point).

That’s the result I desire (for jigsaw puzzles), but it never happens for me. For me, the kerf is always wider at the top. Tinkering with the settings (multiple passes, manual focus, different materials) never changes the result; it’s always wider at the top.

Am I missing some technique? What’s causing this?

1 Like

It’s always wider at the top. Not sure what you’ve been reading but that’s backwards.

5 Likes

…just to be sure since most puzzle folks cut theirs upside down - are you cutting yours rightside up? Cuz yeah, the point of focal point is smallest kerf, but if you’re focusing on the surface and cutting upside down then you’d definitely see your result.

I’m cutting them right side up. The kerf is always wider at the physical “top” (facing the Glowforge lid) not the “bottom” (facing the crumb tray.)

I’m not sure how to reconcile that with your comment that “the point of focal point is smallest kerf”. Surely the focal point is at the “top” (facing the Glowforge lid)?

There are several drawings on here that help explain it. I didn’t have time to find the one I was looking for, but this thread has some drawings that show it pretty well.

2 Likes

Thanks, tjones! … but all those diagrams are apparently pointing out that the kerf should be narrower at the top, if it’s shaped the same as the beam, regardless whether the focus is accurate or too high.

2 Likes

I bet you and I were looking for the same one! I couldn’t find it either :-/

1 Like

And again, that could be a focusing issue. If it focuses that point lower than the surface, then the triangle is upside down. A lot of people do that when they use thicker material. Set the focus halfway deep and the top and bottom have about the same kerf. I would guess that you should get the best (narrow top/wide bottom) by using Set Focus and not putting in any numbers manually. Not sure if there is a way they can check your beam “height” remotely, but if set focus doesn’t work, you might cut a Gift of Good Fortune and then contact support.

1 Like

I’ve seen that advice too — set it halfway down to get the top and bottom to have the same kerf — but that doesn’t work for me either; the kerf is always wider at the top.

1 Like

I don’t know either - it’s just not how it works, unless you’re setting the focal point off from where the actual top of your item is! Very odd. Can you cut a few lines off the edge of a piece and then take a photo off the edge? That should pretty clearly show the kerf triangle.

It occurs to me that if you’re overpowering your cuts, you could literally be burning a trench in your material - which could definitely look like a wider-at-the-top kerf…

2 Likes

This!

“overpowering your cuts” … I get the same result if I use barely enough power to get all the way through to the bottom … in fact, with that minimal power, the kerf at the bottom is almost zero.

I tried taking a photo but it’s kind of hard to see it in the photo.

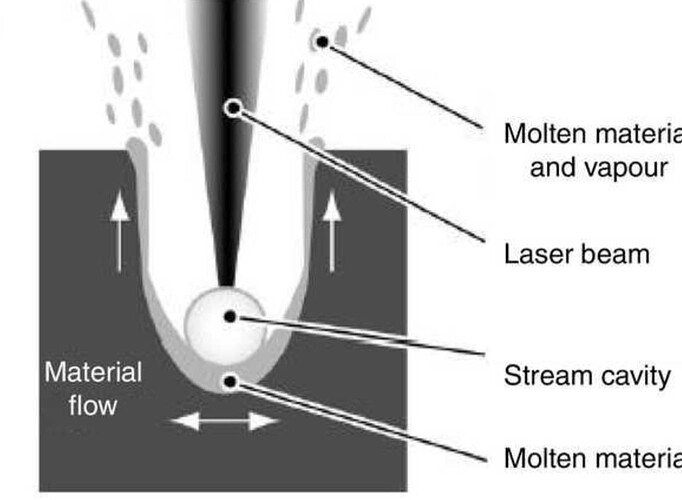
The escaping gases and materials end up widening the top of the channel as the laser penetrates.

2 Likes

Yeah, I guess that’s what’s happening… though obviously other people are getting the “right” result…

Getting to a kiss-cut takes a lot of experimentation, but I imagine if you tried you could find one that more closely matched your expectation. The PG settings are designed to succeed every time so they are most definitely overpowered - but they are dependable!

Yes, by cutting face down.

(laser theory follows)

There is no way to get a inverted kerf profile with the glowforge, focus height won’t do it, nothing will. It’s all down to the physics of the laser and the circular cross section of the light beam.

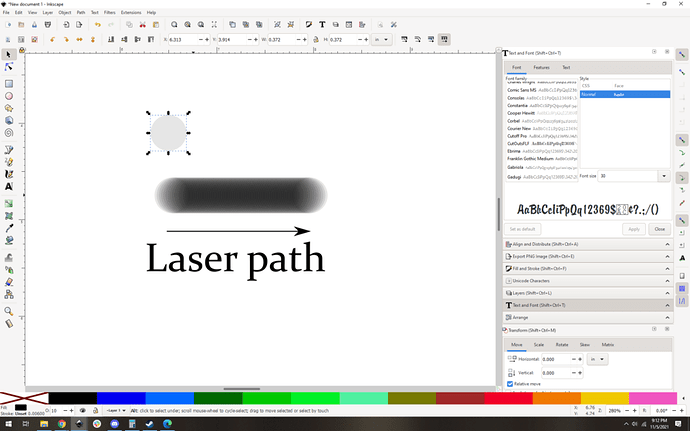
It can help to think of it like a series of “dots” of light. You can model it pretty effectively with semitransparent circles in your favorite image editor:

Imagine the laser is a circle of uniform light density (it is, mostly), you get this sort of arragement. The one circle at the top is a representative laser beam. As you run that beam left to right, the “circles” overlap and you get a natural gradient of how much light is hitting the material as the laser travels:

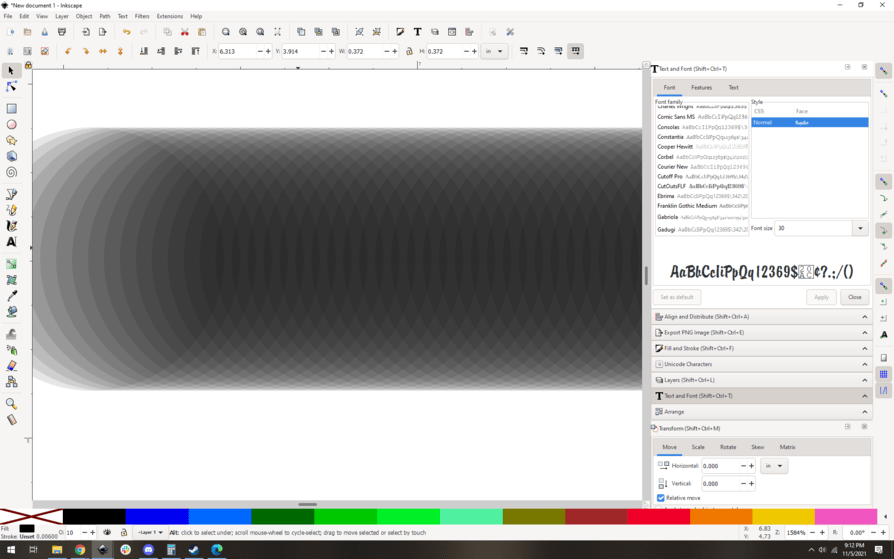
Zooming in it’s easier to see:

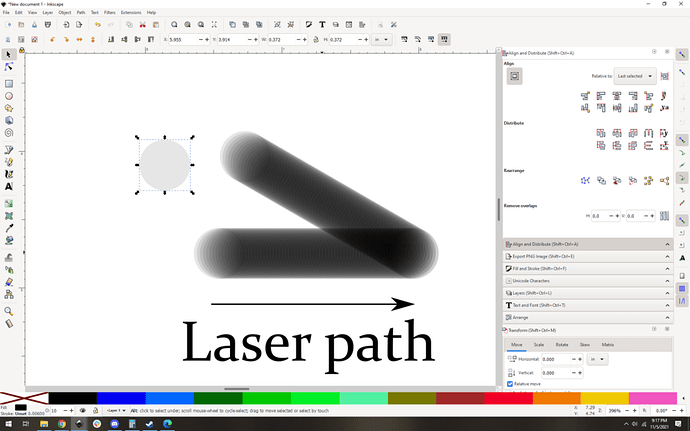
You can see that the amount of power that hits the material drops off on the edges of the laser path. The top and bottom are lighter, which is roughly our model for how much laser energy is actually being applied. Also of interest is the ends of the paths, they get significantly less energy. Sharp corners get a lot more, check it out:

That significant overlap plus the acceleration effects that make constant speed through corners impossible was a tricky thing for glowforge to improve… they worked hard on this problem to get what they call “clean corners”.

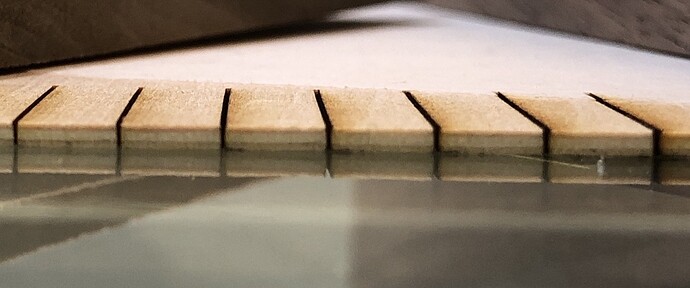
Anyway, long story short, the center of the path always gets more laser energy, and so it’ll always be “deeper”. This effect outweighs the hourglass shape of the beam, as that is very slight 1. Since you’re trying to just barely cut through, you will always notice an angled cut profile. Physics!

And we even have empirical evidence to bear it out, from @kittski:

So, case seems pretty closed, yeah?

1 We can calculate the hourglass angle. From this post, we see that the beam is about 0.05" wide without a lens. The lens height above the tray is roughly 2 inches, so that leaves us with this sort of arrangement: You can see that the rough angle of the hourglass (represented by the red triangle) is about 1.4 degrees or 0.7 degrees for each side. That’s less than the observed kerf angle, so the hourglass can’t really reverse it even in ideal conditions.

Supporting research:
Extreme width scoring
7 Likes

You can cut upside side and the visible separation will appear to be smaller, but you’ll have an ever looser fitting piece despite the appearance.

3 Likes

That’s pretty cool. Never thought about it like that really. So those exaggerated drawings showing the X shape made by the beam focus is really irrelevant? And it basically just has to do with the beam shining “on” the top surface longer than the bottom? ::mindblown::

2 Likes

It’s theory, since I can’t really measure it… but the theory fits the data as far as I can tell.

2 Likes

I think evensd2’s explanation is pretty compelling. Thanks everyone for helping out!

2 Likes