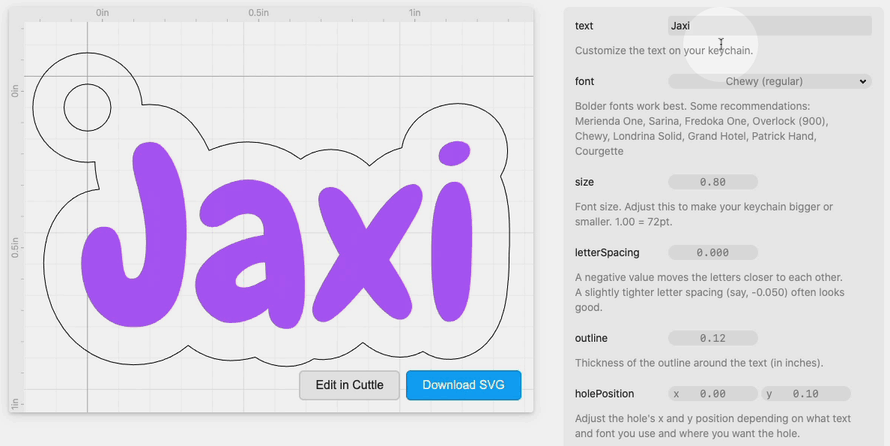
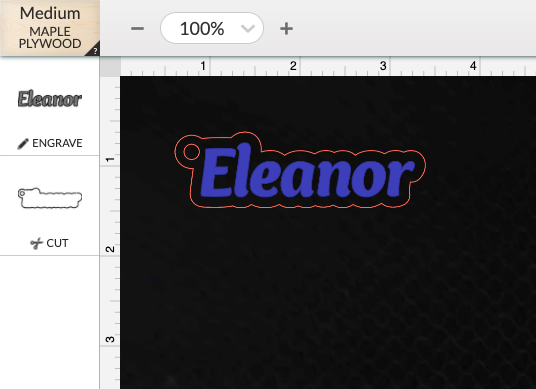
You could also cut the text out from another material and glue the pieces to the outlined background. There are notes on fonts, materials, and cut settings in the above link.
Let me know if you find this useful!
Updates
There’s now a new Emoji Keychain Generator
I recorded a 10 min tutorial video showing how to create a design like this from scratch in Cuttle. It also shows how to make a design like this starting from an arbitrary SVG
In response to @thecreativehedgie, this video shows a variation where you can “smooth” the edges of the keychain:
In response to @dlewishstn, this video shows how you can join together two words:
In response to @photographee2000, this video shows how to make an “inverse” engraving — so that you engrave on the outline and leave the text not engraved.
That’s great Toby! I really need to get back into learning Cuttle. I’m going to have to start all over from the beginning again because I’ve forgotten most of what I learned. Thankfully you have great videos for teaching!
Toby, I’m going through the first tutorial on Cuttle, the “Dodecahedron tea light,” but my screen seems to be different. For instance, when I did the original rectangle, it put it above the pentagon on the right (I found I could drag it down beneath it), and now when I went to find the “Project” section to rename it, I find it in the center above. It doesn’t really matter, as I now know where it is, but I don’t understand why mine is different? Here’s a screen shot. See how my copied polygon is above Group 1?
I will be sure to check out Federico’s tutorials as well.
I am happy to see that you now have a box generator! But I’m going to go through these tutorials step by step first. A lot of language (like boolean) and how-tos I need to learn.
Thanks!!
Ellen
Me again. Also, on Dodecahedron tea light part 2, I don’t get the “handles” when I click on the pen. I can make all the points and stuff I want, but when I click on the points, although I can add and delete points, it just makes straight lines. What am I doing wrong?
@ellencadwell There’ve been a few changes to the interface since I made this video. Notably the outline on the right is now in the opposite order, so shapes “on top” in the design are on top in the outline. (It used to be the other way in Cuttle but we changed it to match every other vector editor.)
With the pen tool, you can click and drag to create curved anchors. Though I like to actually make straight paths, like you have, and then edit them to be curved afterwards. Several beginners have told me they like this flow better too, as have some of Federico’s high school students. Please check out this short video on how to use the pen tool and work with paths:
Also thank you for the feedback about “booleans” (and “handles”). There’s so much vocabulary that one eventually takes for granted, but really should be explained! Maybe we should make a “glossary” section for all these words…
Thanks Toby. As I usually just use designs that I get on Glowforge, Etsy, etc., I’ve really not made much of my own designs )although I did make an earring display that I was really proud of and put in the “Made On a Glowforge” section).
I did find that if I double-click on the point, it will show the handles on them. For some reason, mine don’t just automatically appear.
At any rate, I appreciate all your help. Someday I’ll get this stuff learned!
Let me know if there are other things you make manually like this where it would be nice to have an automated generator. It’s pretty easy to whip these up in Cuttle.
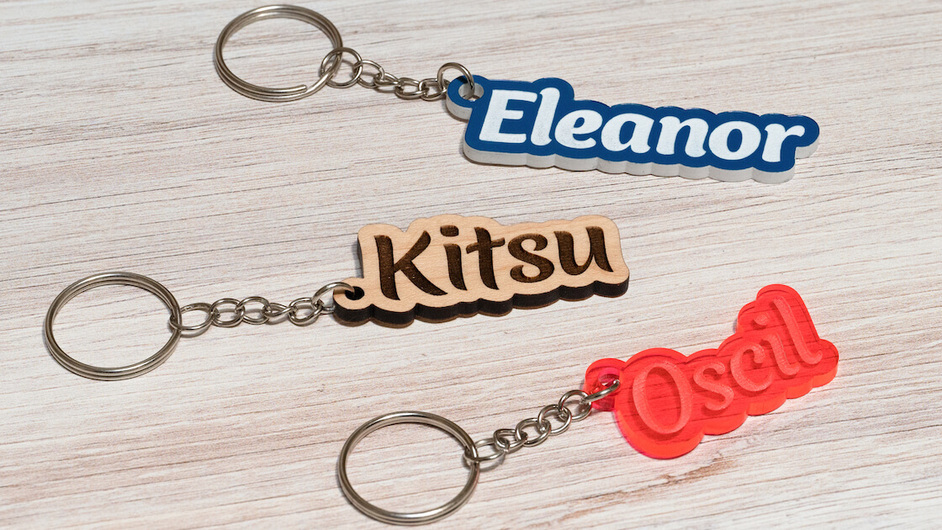
Incredible, and easy enough to grasp. If you’re taking requests for future additions to this, being able to somehow implement our own fonts would be nice. Obviously wouldn’t want to upload paid fonts to be used by other people, but if it could be a localized upload that would be great. I don’t comment on very many things anymore but this was certainly eye catching, good job!