I had hoped that maybe there was something I was doing wrong, but now that it has happened for a third time, I’m beginning to suspect that it’s on the glowforge side. I’m referring to me placing my design into the UI and seeing where it should cut on the proofgrade, but when I hit print, it has started to engrave about an eighth to a quarter of an inch to the right of my “placement”. I’d prefer to not have to restart Harrison every time this happens, and am hoping for a cure. I tried searching to see if this was a common problem, but no luck.
Hopefully a forum member has some answers, but I would gladly take advice straight from the wonderful staff.
I’ll start with what I have done, so we can narrow it down a little.
Every other time I turn the machine on, I have had errors where it states that it needs to cool down, and I’ve not done any printing all day. I’ll turn it off, unplug, and wait, and resituate the head to under the camera. This seems to fix the cooling prompt, but it has taken a couple of tries and hasn’t worked on the initial restart.
I’ll let it do its calibrations, and not print anything for around 10 minutes until I’m sure I like the way my design is going to be done. This includes leaving the UI to update my design.
It seems as though it has happened after leaving the UI. I try to rescan the bed as often as I remember, but it’s not as though I move anything within the bed itself or any physical items.
I’m just looking for any help I can get, but am hopeful that we can figure this out!
If you look for camera alignment, this has popped up from time to time. Apparently there are some significant improvements that are still in the works (scanning material height before starting, for example). If I understood correctly, at the current state of the software, anything within 1/4" is within the currently expected error: Camera Alignment
While you’re waiting for support, it is “known” that the GF is of by up to a quarter inch for placement the further you get from dead center. Search for Kentucky windage for one method to place items.
With that said, I lay everything out on a 12x20 artboard and that is very repeatable for placement. That of course means you’re doing a lot of placement outside the machine which is great until you have scraps. I like making coasters and other repeatable designs and have been known to use one last-out file to make cardboard highs and then run one or more filled to make sets of coasters or the popular “1 offs” during a session. I throw away my tempt after each session so I don’t have to worry about putting it back in the machine just right
I’ve gotten to know my machine and don’t have many misses placing items at this point inside the interface but I never rely on that if crucial placement is required
Not dead center, no. I haven’t used one of the larger boards yet, just one of the smallest ones that was included. So I haven’t been more than a couple of inches from center. I had considered that with a wide angle camera that there may be some distortion/correction, but as I said, I had only assumed that that may the case in the furthest edges of the bed, rather than just a couple of inches from center.
@hansepe
Thanks for the advice, I’ll look into that! I was wanting to use every usable millimeter of my material, but I see that that may not be possible at this stage without a few hiccups.
I’ve only ever noticed misalignment to the right and slightly up. What you can do is start using up your board from the lower left, so there is no danger of mis-estimating the gap and cutting into a hole. That way, if your outline in the preview is on wood, it should be okay.
Mine has been more to the right whether it was on the left of the camera, or the right. I’m currently going to do a test that @hansepe is suggesting where I place my work in illustrator where I want it to print within the machine and seeing the variance with the resulting print vs what the camera sees. This wouldn’t be the only machine that I’ve had to do this with. It seemed that when I did a similar process with my vinyl cutter (resizing and moving within the application, rather than having the work done before the upload) I would run into something I wasn’t expecting.
Unfortunately every machine is different. Some go slightly left, some go right, up and to the right, etc. Some are reasonably accurate.
From what I’ve been reading, you’re right. If this were more consistent across all machines, then I would be hounding a software update, but I’m beginning to believe that this may be a semi case to case situation. I’ll continue to do tests and find what I can, and I appreciate the replies I’ve gotten so far!
Frustrating
I have only experienced ‘image drift’ three or four times in the months I have been using this pre-release unit. Subsequent attempts always succeeded.
Since it’s a mystery to me which variable may be responsible, Cycling the power to the machine, clearing browser cache and restarting Chrome are my attempts to have any influence on performance.
One thing I notice is support is working hard for us, Jaz was posting last night around 11:00PM. Mountain time.
I think those guys are earning their pay in spades since shipping began.
The heart like isn’t enough to convey how much I actually like your reply!
Looks like I’ll be ordering some graph paper. After running my micro test, my bottom left corner is printing close to a 1/4 inch to the right, whereas my top right corner is near 1/4 to the right, but also about an 1/8 lower. Under the camera is what appears to be dead on, so I’m comfortable printing single items within that area.
Currently I’m considering just cutting my larger proofgrade into smaller pieces so that I can just always cut under the camera
A question I have is for batch printing, though: Are you adjusting each individual print? Finding where that particular print within the batch will print by grid points, and then adjusting in your editing program accordingly (illustrator or whatever it is)? It seems very time consuming to do it this way, so I’m curious if this is actually what you’ve been doing or the specific method you do use to be able to print more than a handful at a time.
My concern is that it’s not consistent throughout the bed, where the one corner is a horizontal change, and another is diagonal. I apologize if I’m not entirely grasping the concepts, I’m just wanting to be able to utilize other’s experience as well as my own.
Not sure I understand exactly what you mean by batch printing, but I do all my final placement adjustments on the bed of the Glowforge directly under the camera, not in Illustrator.
In the particular case of the sheet of cats that I cut out, I had a print file with the cat line art, which I printed on cardstock using my laser printer. Then I had a cut file with just the outlines, where the location of each outline matched the location of the corresponding cat in the print file. I put the printed art on the bed of the GF, centered under the camera and as level as possible (an L shaped ruler helps with this). I pull the cutfile into the GF design software and align over the print as closely as possible. Then I zoom in to the image closest to the camera lens to a level of 450% and fine tune the alignment until it looks perfect. Then I apply the number of clicks previously determined from the graph paper experiment (in my case 2 clicks to the left and 3 up using the arrow keys). Then send the file to the GF, and I usually get very good results.
With my machine I’ve found that if I get the alignment right in the center, it is also good at the edges of my design–although I’ve only tested on a letter sized piece of card stock. YMMV. Also, once the offset is determined, it is consistent day after day, I’ve only updated it once in about 4 months.
Regarding the cooling alert: Is it warm where your Glowforge resides? The Glowforge Basic is designed for use between 60 degrees Fahrenheit (16 Celsius) and 75 degrees Fahrenheit (24 Celsius) and the Pro is designed for operation up to 81 degrees Fahrenheit (27 Celsius).
If it’s too warm, your Glowforge will pause during the print to cool off, then finish the print. We’re continuing to refine the operating temperature for your Glowforge. We err on the side of keeping your unit safe rather than risk operating temperatures that could damage your unit.
As for alignment, thanks all! We’re still improving layout and alignment, so your print may appear offset from where you put it by up to a quarter inch. For the most accurate results please:
Use Proofgrade™ materials
Enter the thickness of the material if it’s not Proofgrade
Use material that is not warped or tilted
Place your design near the center of the bed
Reboot the machine if you see the alignment drifting
(Leaving the thread a bit longer since you’re getting great suggestions!)
I see! When I say “batch” I mean a group of images prepared to be engraved/cut. From what I understand you aren’t copying and pasting in the GUI an individual, in your case, cat, and then continuing to do that until you have the desired amount of cats. You pre-printed on a sheet of paper that was full of cats, and then ran your test after finding out what your variance was and adjusting it.
My new question is: Your misalignment sounds as though it’s consistent, and I’m wondering if when you did your initial manual calibrations were you basing it off of a single cross being in the “center” of the bed? I ask because my center is good, but I get the weird drift on the edges and so if I’m adjusting my entire batch based off of one manual calibration, I’m worried that by the time the head gets to the other end, my prints will have some strange results.
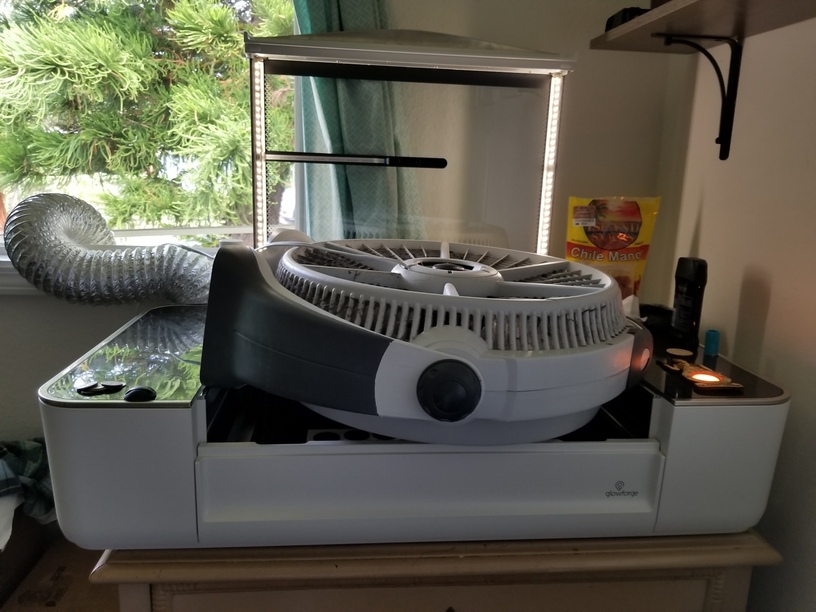
In any case, I’ll have to run some tests for my own machine when I can (Hawaii day temps are not within safe operating boundaries ) this is my current fruitless setup
I also need to procure a tabletop printer, so another item added to the list!
@Rita It’s definitely too warm for where I am! I’m sweating just sitting here typing this out haha Unfortunately the cost of living is high, and we go without the wants of life (A/C included) but maybe I can convince my wife it’s a need now that Harrison is a part of our family!
Oh, I see what you’re saying–yes you are right. I’m pre-printing the whole page of designs.
Yes, I did only one calibration in the center of the bed. But it seems to me that before I tried this graph paper calibration I was getting variable offsets further away from center. I know that doesn’t make sense—why would everything suddenly line up better just because I’m aligning the center. All I can say is, give it a try–what have you got to lose? Except time–haha.
The motion system should be very accurate even if the image alignment isn’t, so if you’ve got something lined up properly where it aligns well (center say). Everything else should come out correct since the relative dimensions from that alignment point will all be very accurate.
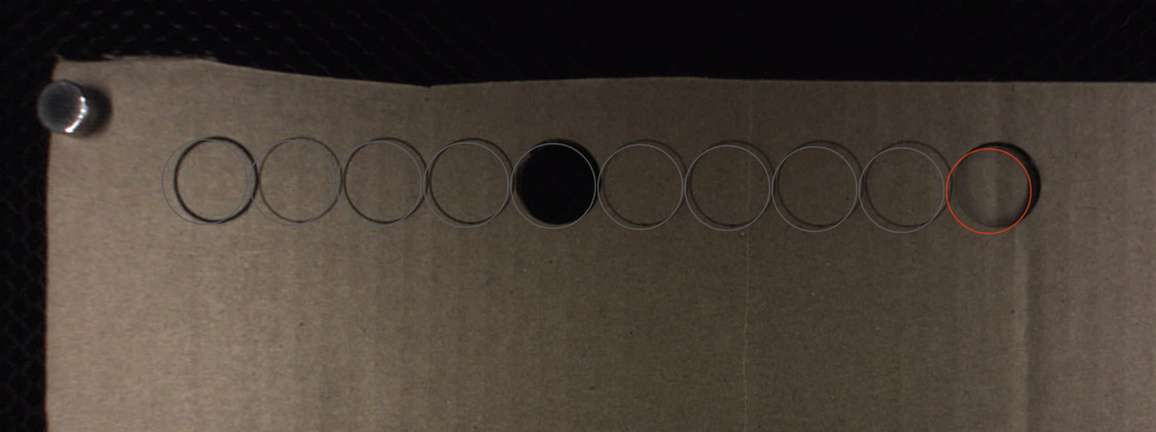
I’m also getting some mis-alignment that’s very easy to see while I was messing around with some cardboard to familiarize myself with speed/power settings.
Thanks to your tutorial, I’ve had some success! I need some glasses or something, because I had thought that my center had been center, but it turns out that my prints were actually printing down and to the right.
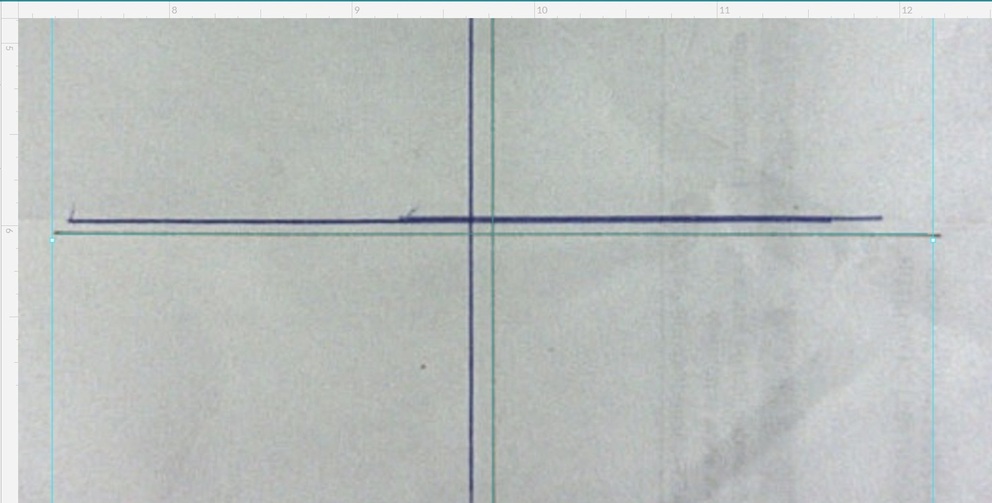
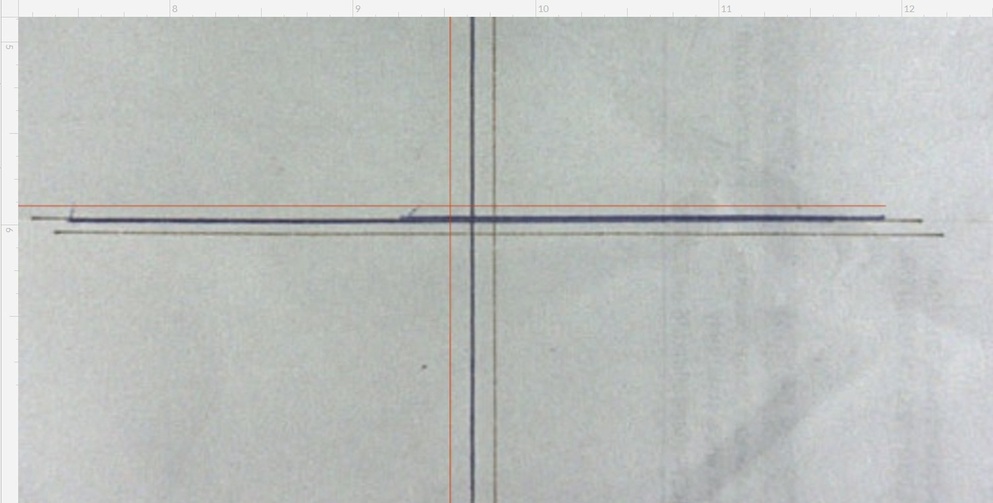
I decided that graph paper may not be needed, and that simply drawing a cross on paper would suffice so long as I didn’t open the bed and move it. Turned out that was an accurate assumption. The first image is of when I placed your svg file over my ink. By using your method, or what I guess is more commonly called the Kentucky windage method (thanks @hansepe for the heads up on that one), I was able to count how many arrow clicks off it was. The second image shows where the gforge “saw” I wanted to print, and where it actually did (the drawn cross). You can see at the end of my line the thin score mark that was made.
This may not be a cure all, but it certainly puts me on the right track! I’ll have to test out the method some more on a larger scale as you did with the cats, but for now, I think I am happy and comfortable enough with the results!