At the end of my write up for my 6x6 pinhole camera I mused that I might make a 6x17 camera next. I thought I would go one step further and make it panoramic. For non-photographers, what this means is curving the film plane so that a ray of light from the pinhole will travel equidistantly to any point on the image. If the film plane was flat, the distance from the pinhole to the film will be the shortest at the center and will get further away at the edges. Given that light falls off in intensity at an inverse of the distance squared this means it will get dark very quickly and noticeably at the edges.
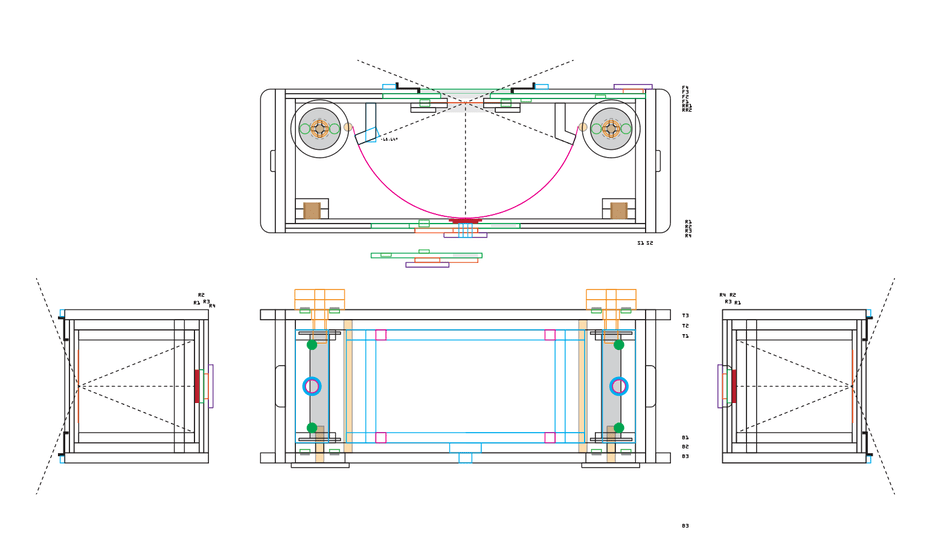
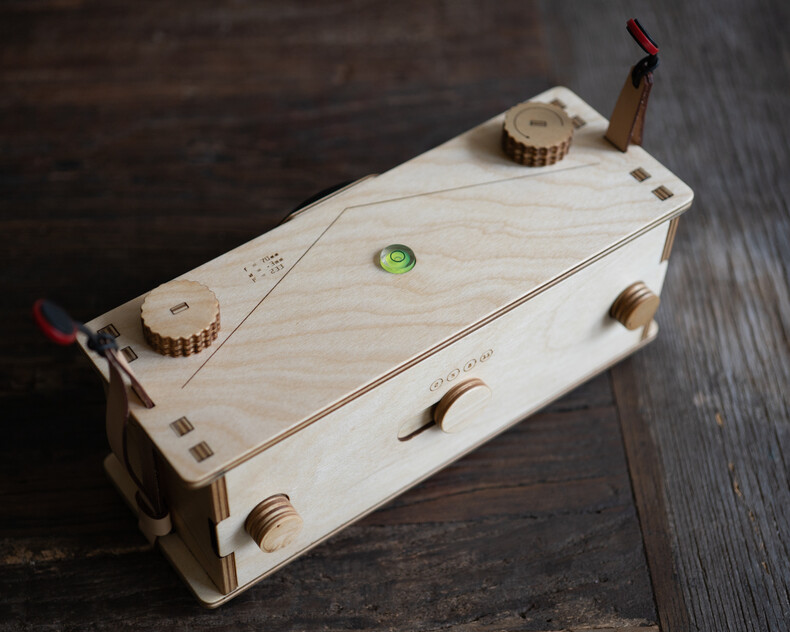
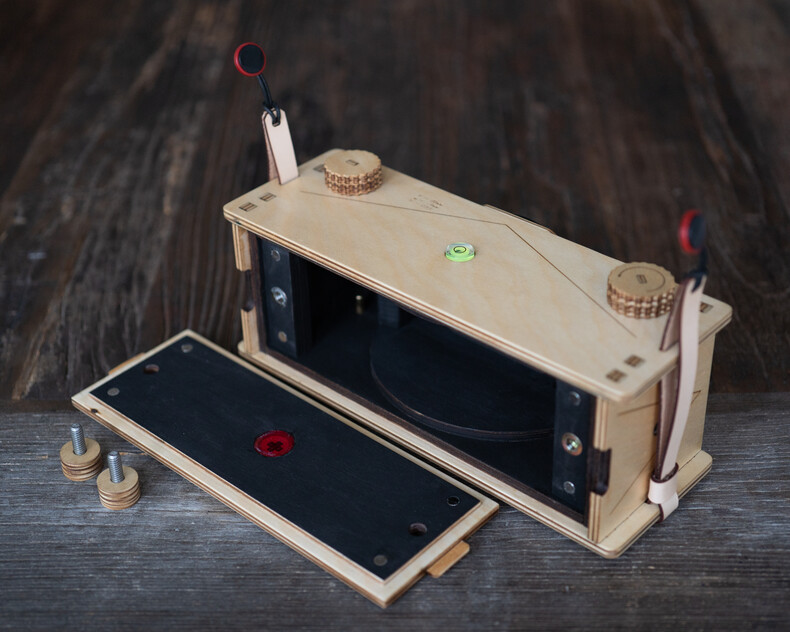
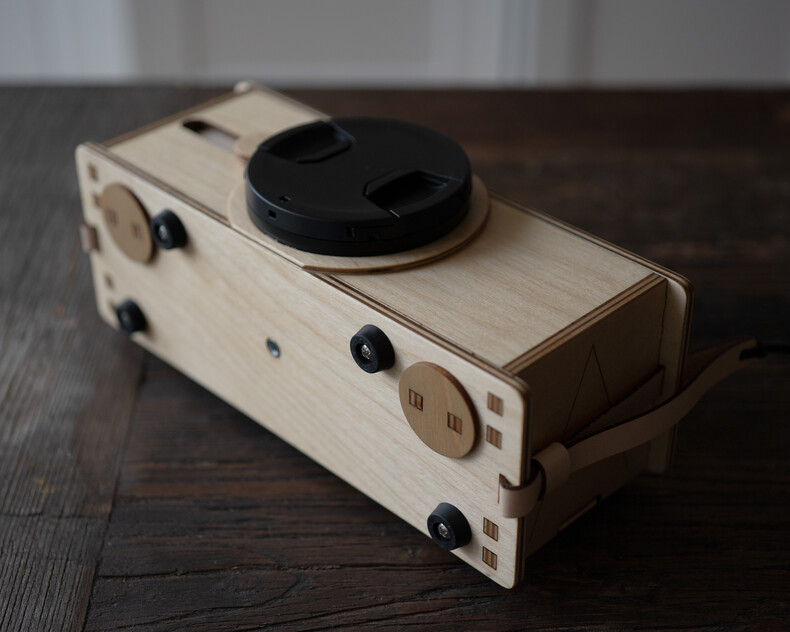
This proved to be a bigger challenge than I thought, especially because I wanted to create a shutter. Normally shutters are simple slides but because this camera would have such a wide angle of view and the material, a 1/8” sheet of plywood was so thick, the hole had to be gigantic. I’m also a nut for compact designs so it was a lot to squeeze in. Long story short, I got it done. Sort of. The features of this camera are: .3mm pinhole, aperture of f-233, 70mm focal length (which, on a panoramic camera is gonzo wide), curved image plane, magnetic winding knobs and spool pins, magnetic cover with screw in locks (as a backup), shutter, exposure indicator window, tripod mounts on bottom and side, strap lugs, field of view guides, and spirit level.
The build was much like my 6x6 camera so you can refer to the write up if you want the nitty gritty details.
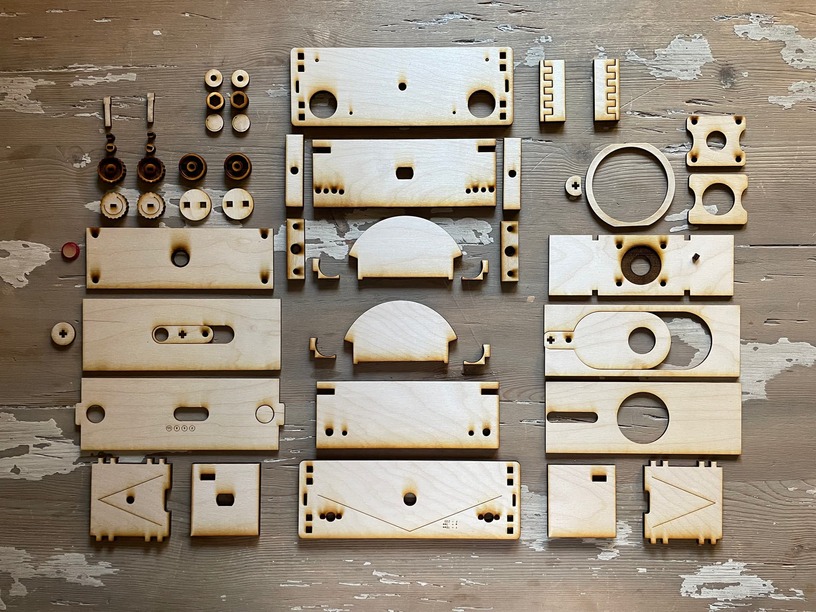
Straight out of the ![]() . I just love lining up the parts after they are cut. Something so satisfying about this moment. How many of you do this? There were a few goof-ups so not everything you see here ended up in the camera but overall it went pretty much as expected.
. I just love lining up the parts after they are cut. Something so satisfying about this moment. How many of you do this? There were a few goof-ups so not everything you see here ended up in the camera but overall it went pretty much as expected.
It was my most complex design to date so the build order had to be right on or it would never fit together.
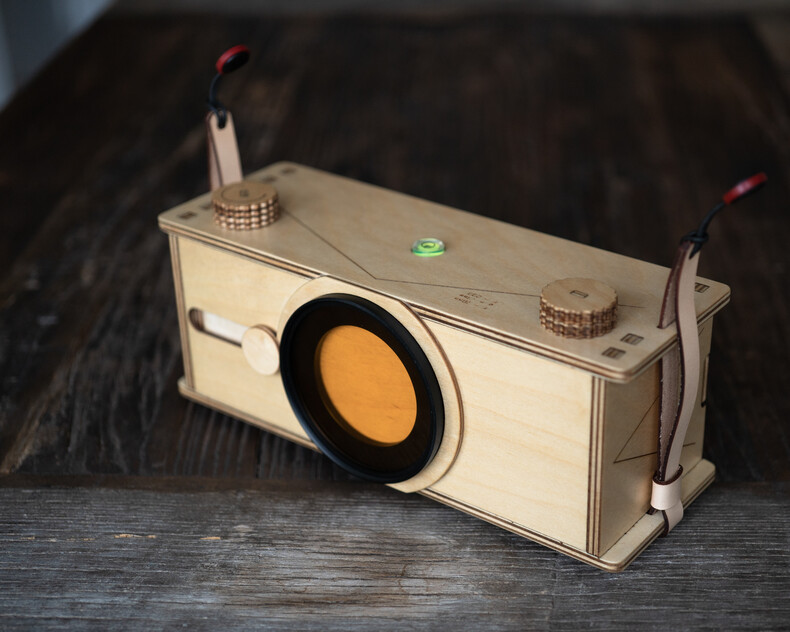
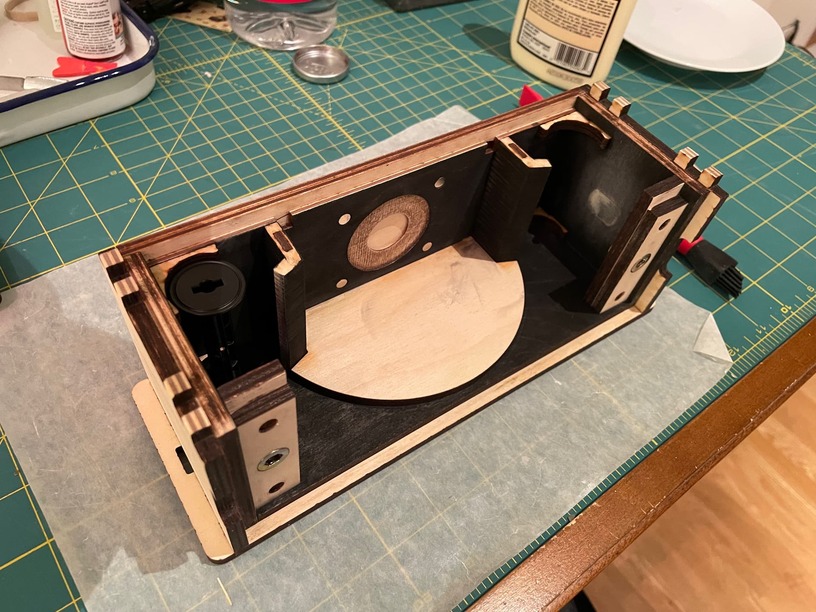
It ended up looking pretty much like my 6x6 camera but beefier in every direction! It’s evolving, I suppose.
Unfortunately I made the design so compact that it was very, very, very difficult to load. I had to make some tools just to make loading easier. If that wasn’t bad enough, the winding mechanism generated too much friction because everything was so close together. It was very, very, very hard to wind. Later, I’m going to put teflon tape on the frame so that the film will glide smoother.
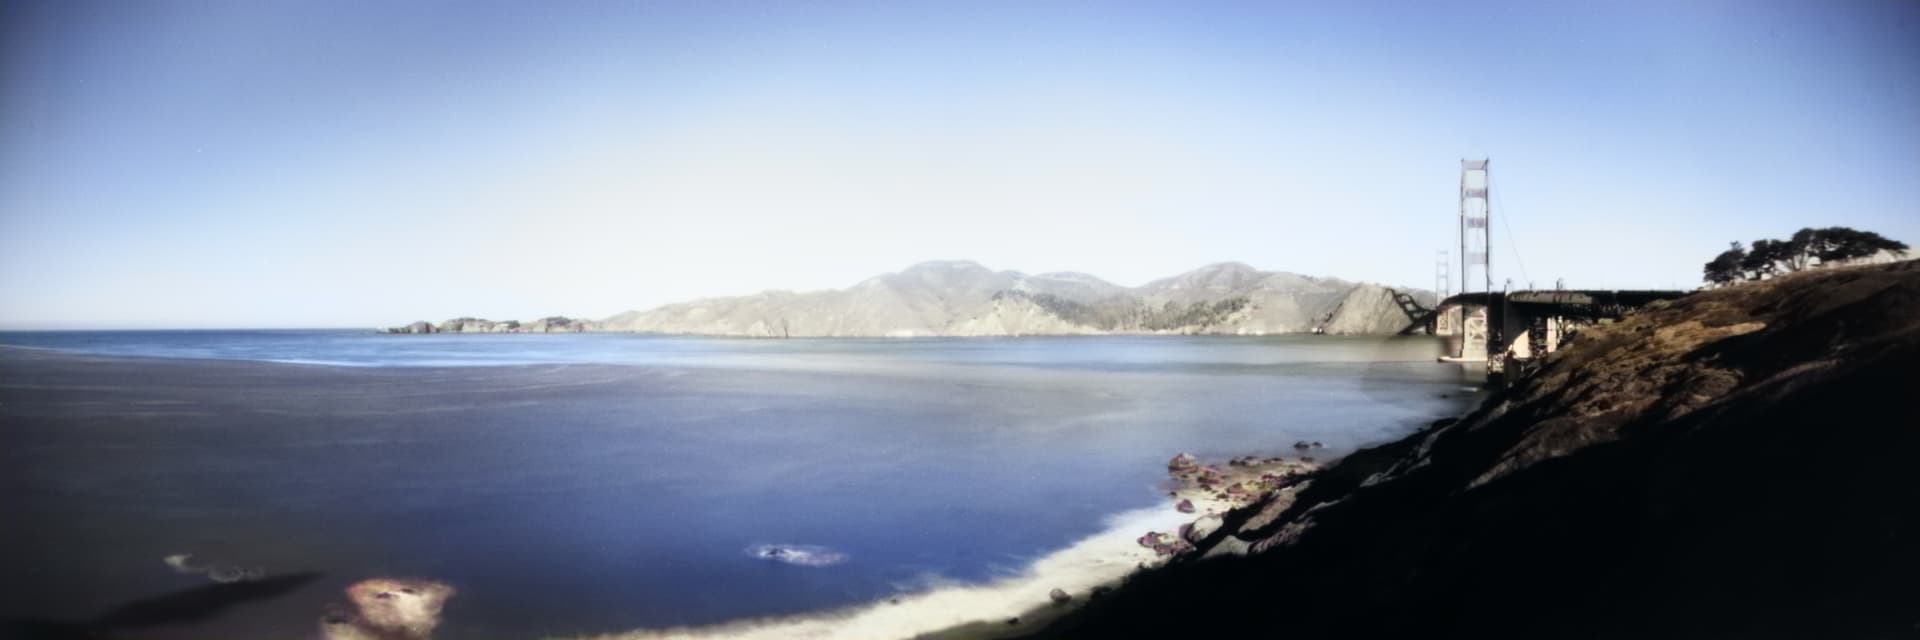
But for now, I could not wait, so I took it out for a quick test. A single roll of 120 film gets you 12 shots on a 6x6 camera. On a 6x17 camera you get 4. To remind myself how far I need to advance the film each time, I engraved the numbers 2, 5, 8, and 11 on the back near the window. I took two shots and then I sheared the winding knob because it was so darn tight and it was just a tiny 1/8” sliver of plywood anyway. Worked fine on my 6x6, but the high tension of the mechanism and the increased friction (I’m dragging 17cm of film across a wood frame not 6 cm), meant it was just too much for the original design. So, I remade the winding knob with a Delrin core and managed to slice my thumb open with a chisel in the process. Blood everywhere. Still, exactly 24 hours from when I broke the winder, I was back in business and took last two shots on the roll. Yes, I had to do it one handed. Yes, I forgot to bring the tripod plate. Yes, I almost fell off a cliff. But I got it done. Nothing was stopping me.
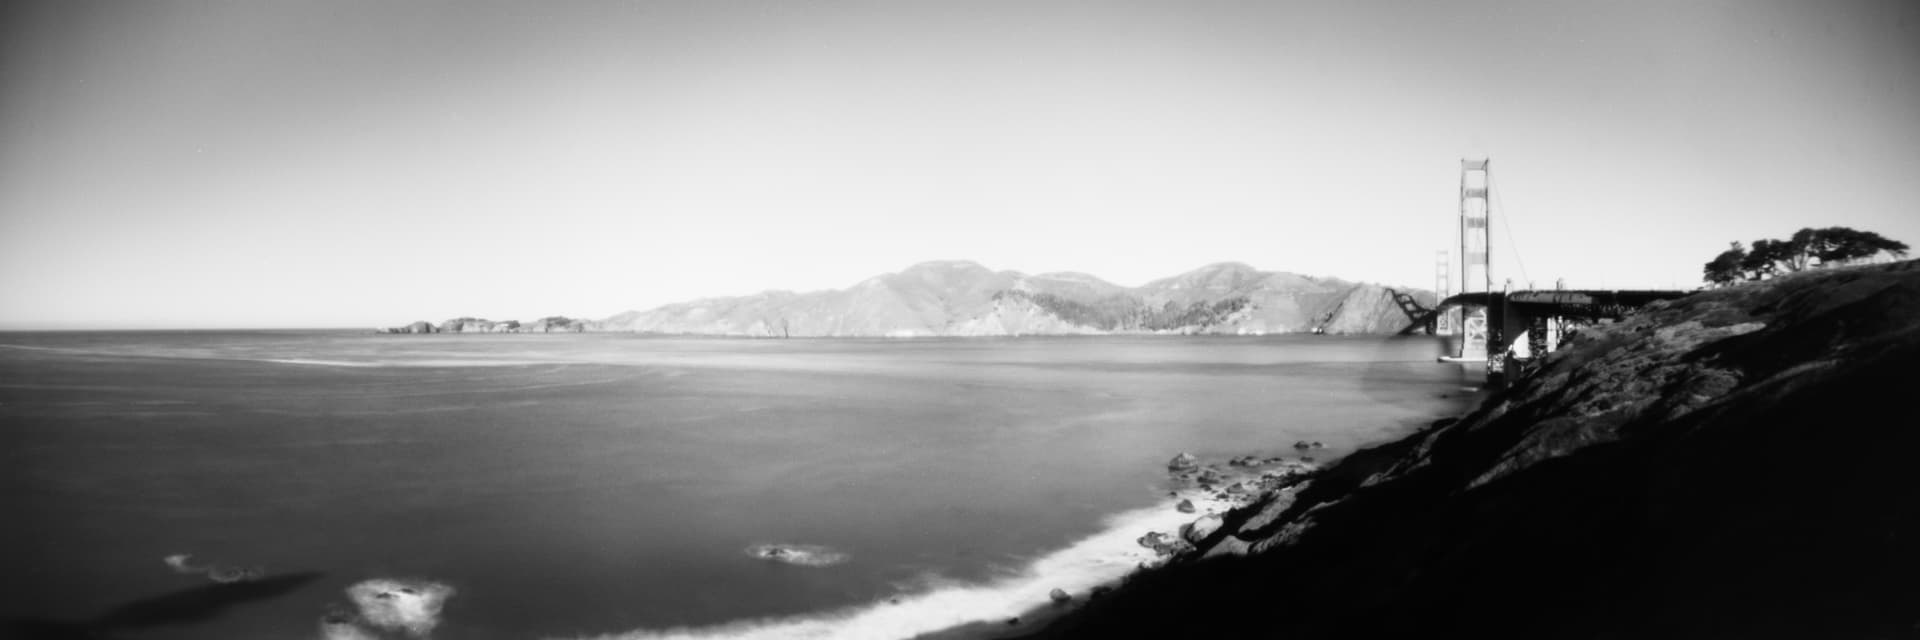
This shot was taken near one of the abandoned artillery batteries in the Presidio. The film was Kodak TMAX 100 at box speed, developed in TMAX developer for 7 and 1/2 minutes at 20˚C.
All in all, I’m happy with what I got. This is the first type of camera I built that I did not already have as a lens camera. A “proper” lensed panoramic 6x17 camera is easily several thousand dollars. Now I have one and all I paid for it was 30 bucks worth of scrap plywood, hardware, and accessories. It’s hard to load but not anymore than my Barnack Leicas. The winding system is stiff but not anything some teflon and muscle won’t solve. Eventually I want to redesign this camera to solve all the above issues but that will make it bigger. Maybe that’s why my heart is not totally into it doing it right away but it may also be because I have another camera design in mind. This 6x17 panoramic build was supposed to be my personal masterpiece but I think this next one is going to really be “it.” No spoilers.

 ).
).