I’ve been so grateful to this community and the ideas shared here, so I wanted to point that out at the very beginning of this post.
With that said, I’ve had encouragement by family and friends to do a laser engraved portrait. I’ve been wary to do so, because I didn’t exactly know what to do to get the results I wanted. I knew that I had to play with B/W as well as brightness/contrast, but I wasn’t exactly sure how the picture I was editing should look.
I decided (my wife actually pushed me to do it) to start with one of the fox designs in my other post: Fantastic Mr. Fox
After successfully doing one of those, I felt brave enough to try a portrait. I grabbed one that my wife had taken the other day, as I felt the light levels would make for a good laser template. Played around with it, and then added it into the GUI. Boy, you sure do learn fast that what you’re seeing and what you get can be very different in these specific projects…![]()
The original print was very light, everywhere except for in the dark details that is, which it did a stellar job at. So my original results were a washed out face and background, with a very detailed sweater and dress. I thought, maybe if I do a second pass, I could get those details even better. This was not the case! It came out pretty bad, and then I washed it in my sink thinking maybe I could salvage it…nope.
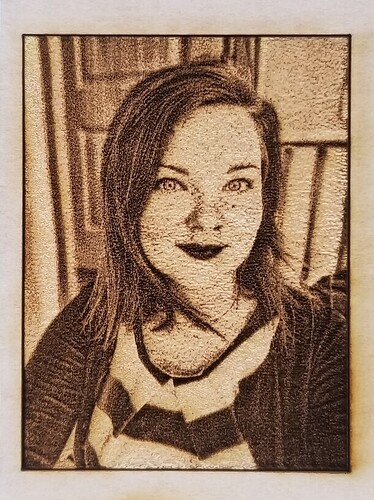
I was a little discouraged, but I knew that it was possible. I was willing to do some homework and wait. Flash forward to today. I see this post Photos of engravings of photos by @jbv and become excited at the results. By reading into the comments and finding out about the Nik Collection, I played around with the filters until finding on that I liked (the Silver Efex Pro #23 filter specifically). It’s true that to get a good print, your image has to be overexposed/sharpened/contrast etc. I was almost unsure to hit print after readying this image
But I knew that this was probably my best bet. And the results are spectacular!
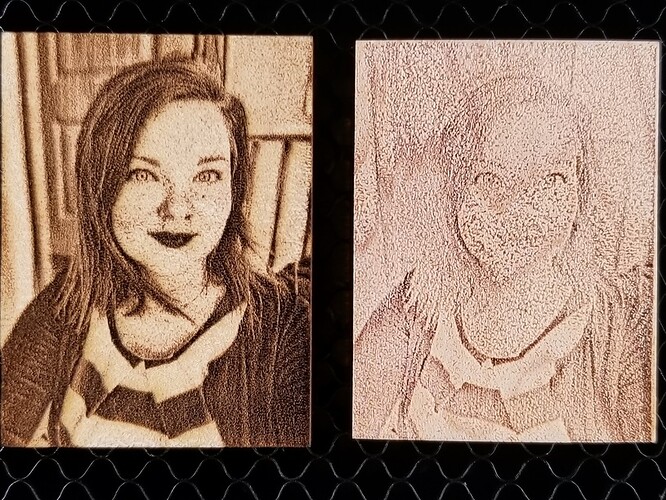
Here’s a side by side comparison with my original print…![]()
To be fair, I did wash out (literally) a lot of the details in the first one, but the comparison is mind blowing. I hated thinking that I wasted material with that first one, but in the end, the experience far outweighs the materials used.
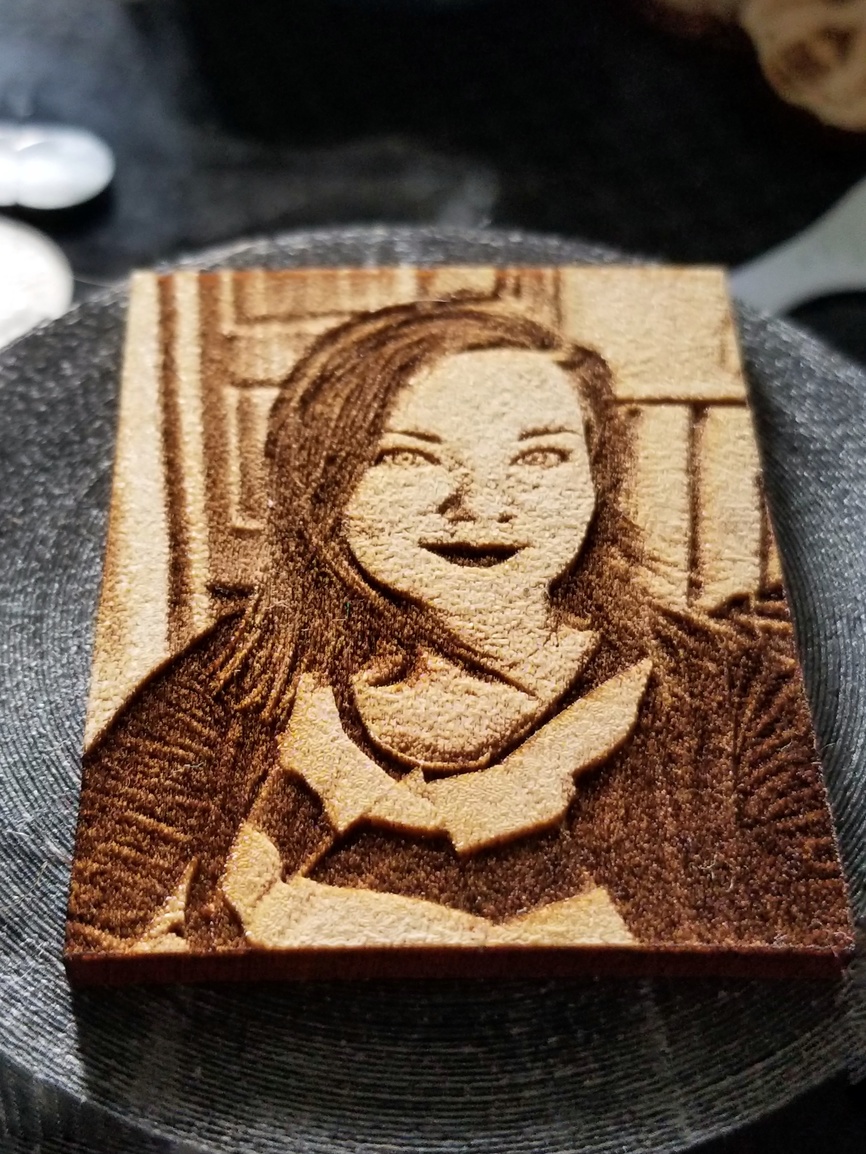
Edit: Here’s another pic of the details of the engrave. It was late last night when posting this, so I didn’t have much light to work with to emphasize the details.
PS
As you can see, my wife has freckles and I had to at least get some of them printed, because I love those freckles. I may adjust my image some more to try and get more to show, but for now, I am pleased with what I’ve got! Again, special thanks to @jbv because you gave me the hope that I needed to try this again so soon after my failure.
PSS
My suggestion for getting good results is deep blacks/grays on anything you want visible, and being comfortable with blowing out to near white with the things you don’t mind losing. If there is any hint of color, it seems that the glowforge will lightly engrave the material you’re using, which is what you can see in my rough draft.
PSSS
Im also considering doing a light coat of epoxy in order to preserve the shape and details, but that will be for another day of trial and error. Perhaps that first print will still come in handy after all ![]()


 Wife to the store.