My Glowforge says that what I’m trying to cut has to be at least .5" thick with the tray in. It won’t let me start a project unless i put in the thickness at .5". When it doesn’t give me that warning it scans but never goes through to the point where the button ends up blinking. Putting me in an endless loop of starting the scan and it stopping
I need to finish a few designs by sunday to ship monday so I appreciate any info.
The thickness entered into the Unknown Materials slot is the thickness above the normal level of the surface of the tray, if it were in there. (That generally runs 1.37" to 1.4" from the bottom of the machine and can be measured accurately using the techniques described here: Cutting without the Crumb Tray.)
You have to prop the object up so that the surface to be engraved falls into the range from 1.4" to 1.9" from the floor of the machine, and then subtract 1.4" from the total height of the object. The top surface of the tray is considered zero height. That means that you can’t enter a negative number, and the only acceptable range for the Unknown Materials thickness is from 0 inches (1.4 inches tall from the bottom of the machine) to 0.5 inches (1.9 inches tall from the bottom of the machine.)
I have the tray in and am trying to cute leather that’s about 1/8th of an inch. I get a warning that with the tray in the material has to be .5" high and without it 1.5" (approximately for the without. I’m not buy the machine at the moment.)
I had cut a lot of 1/8th inch leather, acrylic, and wood but I hadn’t used the machine for a good month or two because of business travels. Upon using it again it worked fine about three times and then this fun game started.
Oh I’m sorry, I thought you were trying to cut without the tray…that’s usually when you get that error message.
If the beam is falling off the edge of the material when it takes it’s reading, you can also get that message. I get around it by putting a layer of wide masking tape down on the grid around the material. Then the measuring beam isn’t going to fall into a hole in the grid. Just enter the correct material thickness…0.125".
The leather piece is a sample about 1.5" by 5" and is placed right in the center. I was having it cute slices off to test speed settings. To make sure it cut all the way the cute does go off the edges of the material. I’ll put a piece of paper under it and see if this fixes it. Thanks for the quick replies
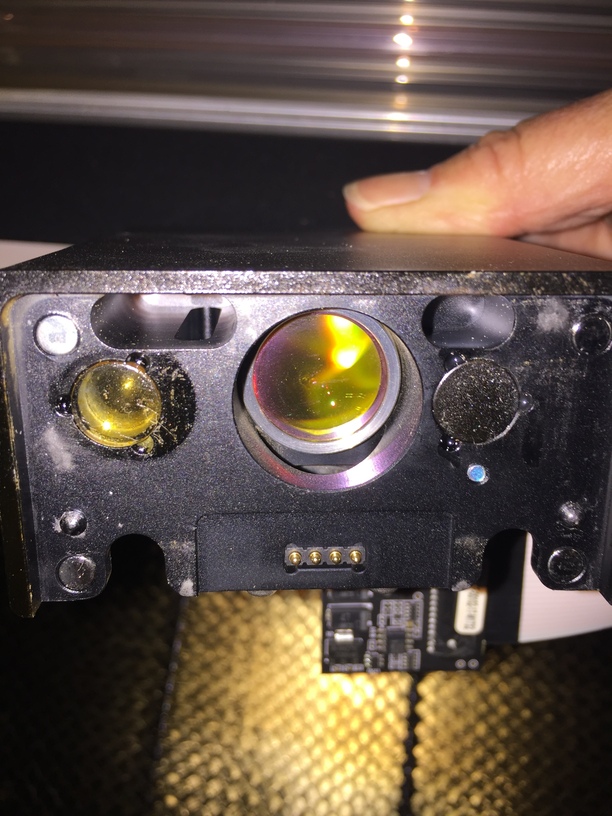
Make sure the little windows on either side of the lens, on the bottom of the head, are clean. One projects the laser diode red spot and the other is the head camera that measures the spot determining material thickness.
I posted a couple of weeks ago that I get no red beam. After reading this comment of yours, I photographed the bottom of my print head. Could my problem be that one of my “windows” is covered and always has been?
Your little window on the left looks OK but the one on the right has a visible electronics chip in mine like what @marmak3261 has shown. Something seems missing to me. Either way, your windows need wiping. The lens also seems foggy but can’t tell if it’s real or just the picture.
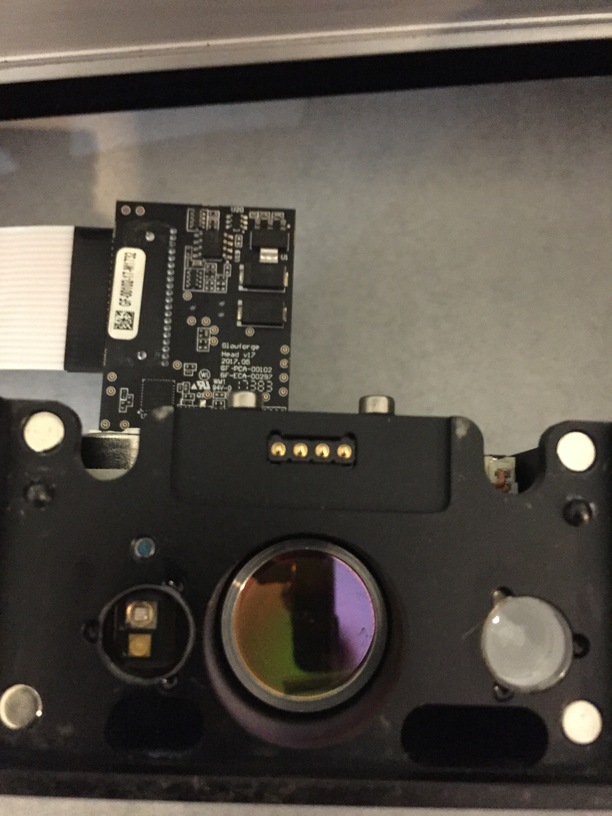
Thank you for the picture. I have cleaned my lense many times, but only looked at these windows today. After seeing your picture, I cleaned the area around the lense and look what I found! Support had told me I was going to have to send in my machine and now I see I just have to be a better housekeeper. Love this community.
I tested it out several times yesterday and everything works fine now. tried it with paper under the leather, just the leather, and even no leather at all. Worked fine every time, just like before. I had wondered if it was a server error or something wrong with the website and now I’m pretty sure it was. Hopefully it was a fluke.
It really depends on where that beam hits. The head comes out to take a measurement at what it determines is roughly the center of the lines being cut. But since the red dot measurement beam hits about 1/4" left of where the laser beam will hit, if you are trying to cut too close to the left edge of the material, the red dot can fall off of the material and you get an error message.
I had nothing on the tray and it proceeded to let me run it. I manually put in the thickness of the material though. I did notice there is now an automatic option but haven’t played with it. I’m assuming it has to do with the red dot automatically measuring the material on the tray.
You’d basically need to make the designs for different height objects as different operations (different color) and then set the focal height manually for each. It will set the focus, run one operation, pause for a second and adjust the focus, and then run the second operation.
That’s unfortunate. Hopefully it means the function is close. Seems like they’ve completely given up on the Pro’s feed through slot being automated, as any mention of that has been scrubbed from glowforge.com
I don’t recall that it mentioned it would be automated, but they are indeed working on the passthrough software and functionality. Snapmarks were a derivative of that work.
I think originally the plan was continuous autofocus and I have no idea if that will ever come to pass. I believe multi-point focus is something they are also working on.
IIRC, the website itself was updated a while back to illustrate the current shipper capabilities since the machine is not in pre-order status but in production status.