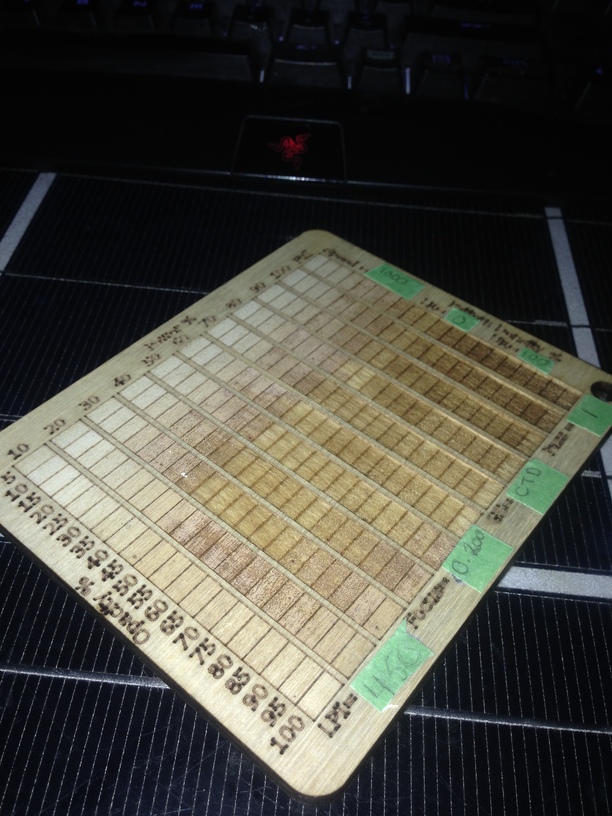
I was thinking of a possible tool or template for people to use to see how power and opacity effects engrave depth. so i took a few mins and created this lil bit of overkill.
The way i have it setup the best order is.
-score on the numbers/info
-Engrave 10->Full
-score grid
-cut hole
-cut out plate
Do not rotate it 90 degrees unless you want it to take 5 times as long lol.
Hope someone finds it usefull.
Not a waste. Different folk prefer different looks. I was operating with a lot of unknown woods that were only 3"x 12" and needed a test that would use a really minimum amount of wood, and I can store them all in a small box.
Yours is something that you can hang on the wall and glance at and thus ideal when using just a few types of plywood and make interesting decoration as well.
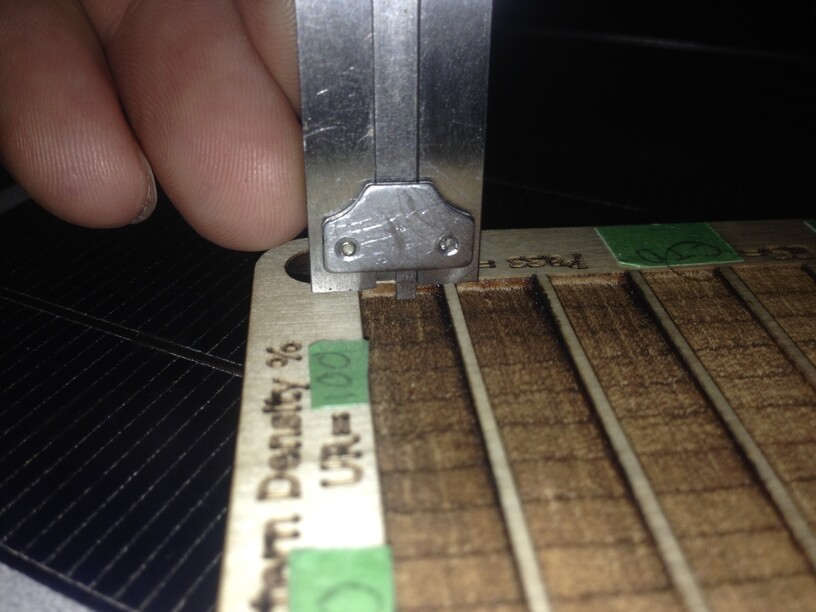
I just wanted to add more info to the stock I buy. designed it so that I can use the back end of my calipers to measure the depth resting on the rails I left between the sections.
For when i wanted to shoot for a specific depth of engrave for something other than making an image like a hidden tab or something like that. In theory i may be able to find a way to make it happen with less trial and error. That and the way it is laid out helps me get my brain around how the settings work with one another. and i tend to buy a 4’x8’ sheet of material at a time so it helps for me anyway to make stuff like this a 5"X4" section for me can usually be found in my scrap pile.
The problem is that the grain of the wood and more and less laser resistant and thus leaves a strongly raised grain at the bottom. I was making some lamp bases with a bayonet fitting and setting bent wood in a groove to keep it strong and round. in both cases it took a lot of sanding to have the bottom of the engraved area flat enough for smooth operation, this from my scrap so not yet sanded.
I agree with @rbtdanforth this is a test file that is a great setup for quick reference and anything you have a stockpile of (which I do). Other versions like @evansd2 pointed out that exist serve their own purposes.
That base was using filled vectors that are much more useful if you are trying to have an even depth of cut. I only use images when I want variable effects, using dots for photos and variable strength for 3D sculpting.