PG Cherry Not Cutting or Engraving Properly

Hello GlowFolk,

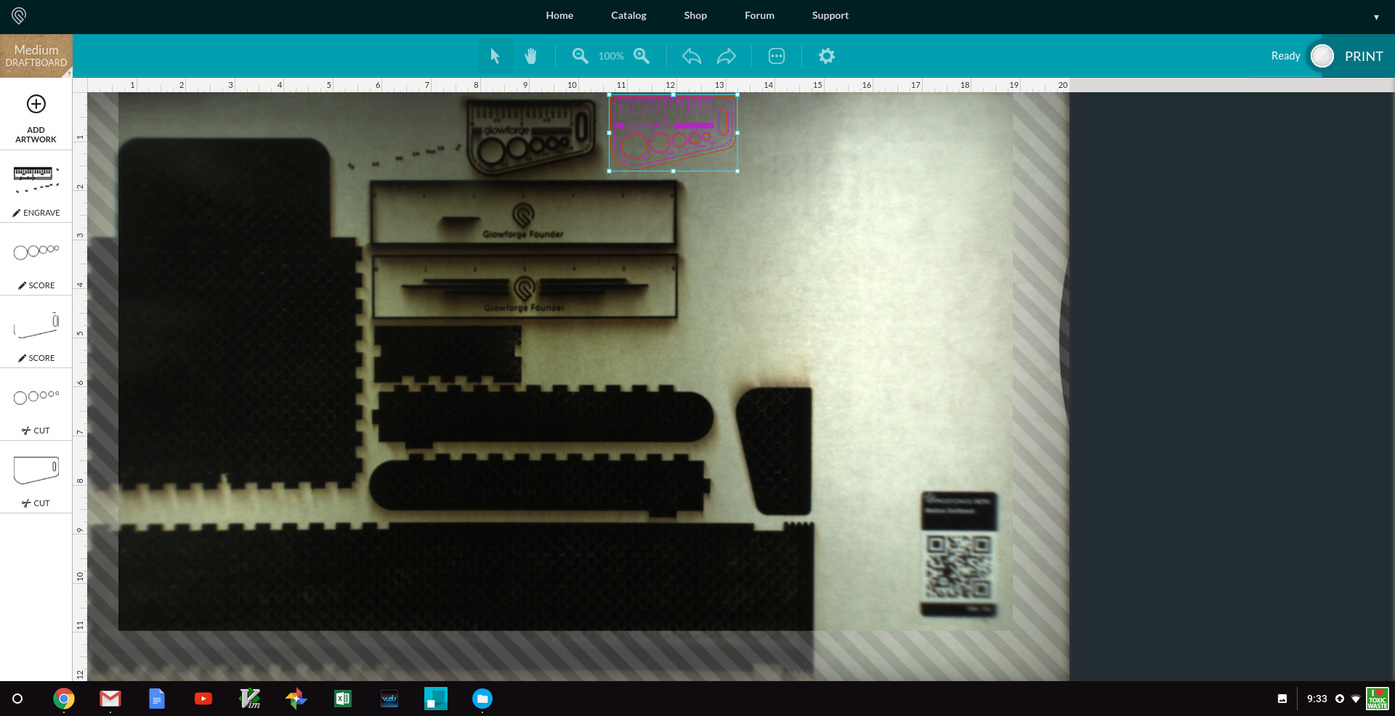
I placed a piece of PG Medium Cherry Plywood (PG-MCP) that came in the original toybox onto the crumb tray and tried to cut a custom design. I located the design in the upper left of the bed. There were several issues encountered.

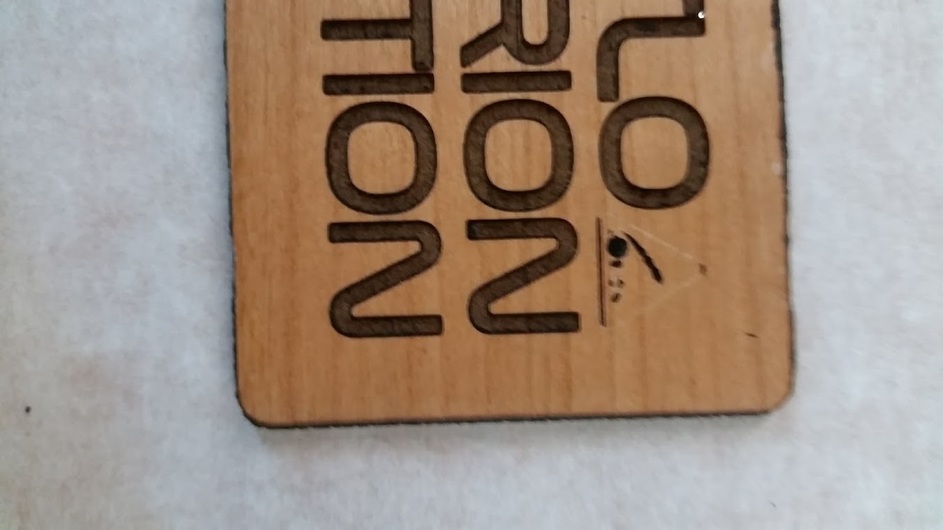
First Issue - Engraving

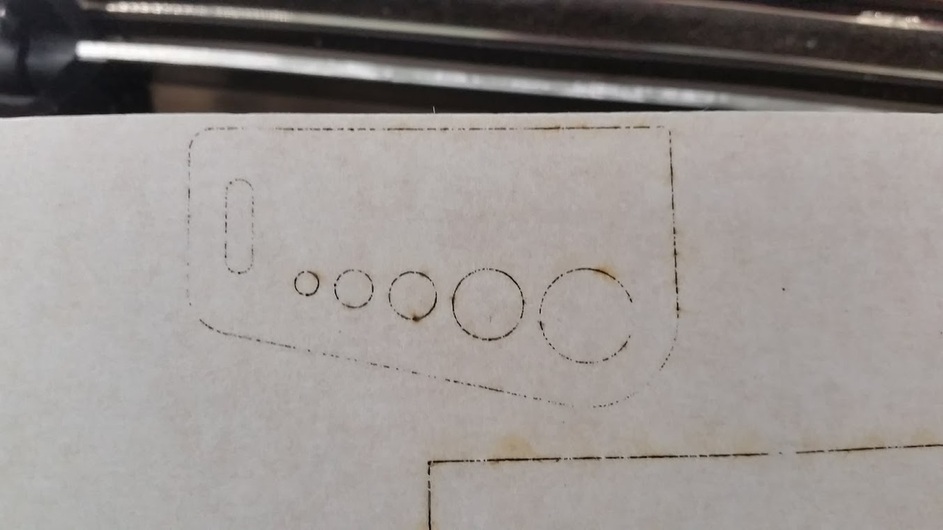
  1. Selecting HD engrave resulted in images that barely got thru the tape. When I switched to manual engrave it showed the power sent to 23 pews. That would do a good job scoring paper but it did not do a good job engraving PG-MCP. This is the smaller problem although please note that it appears the SD Engrave setting is FULL/1000 speed. That part came out pretty.

Second Issue - Cutting

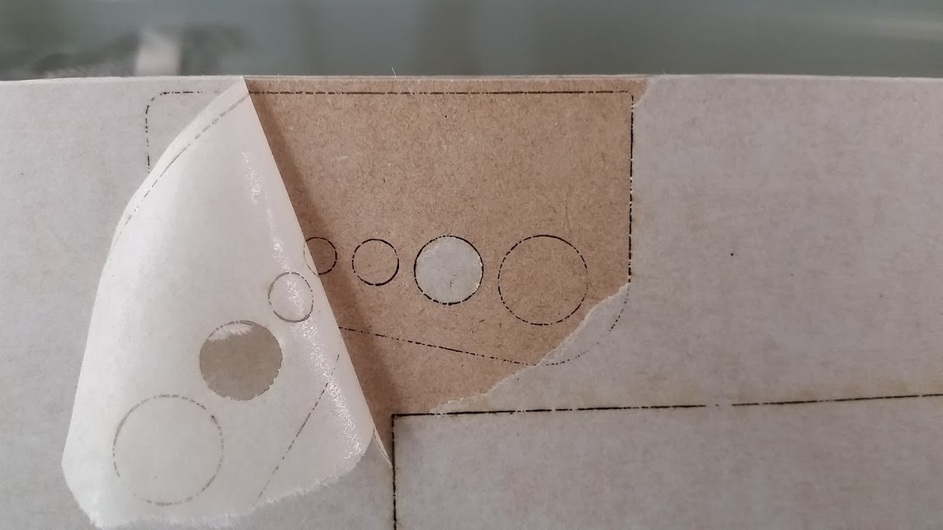
  1. Using PG cut. No joy.
  2. Second pass using PG cut. No joy. Enough soot to look like a chimney sweep was sloopy.
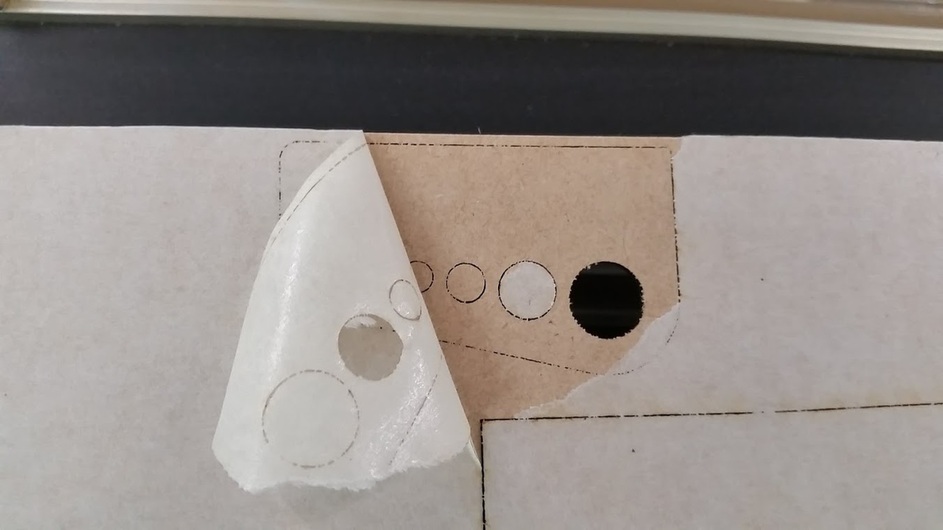
  3. Decided I must be almost thru, so went manual and selected 100 power, 2 passes. No joy.
  4. Decided to go again, 3 passes on previous setting. No joy. You can verify this pass from the logs.

Printing was around 11:30 AM EST.

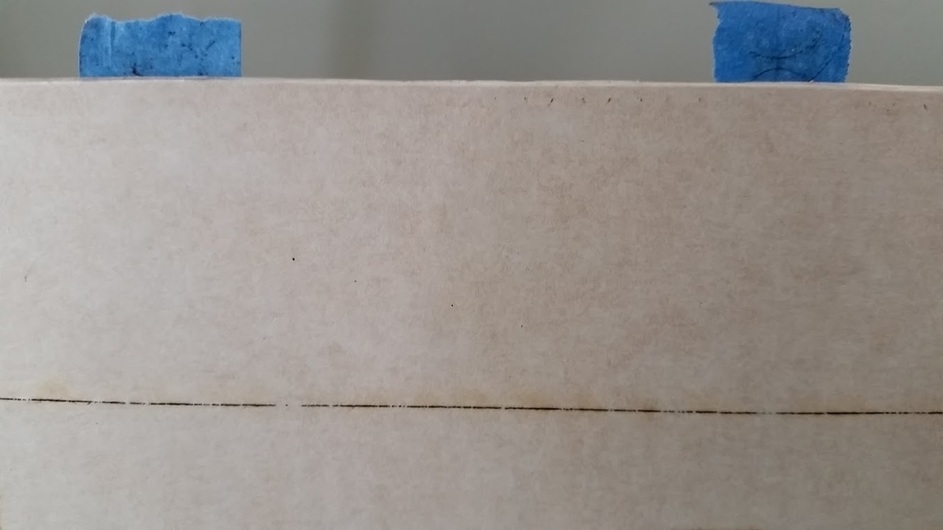
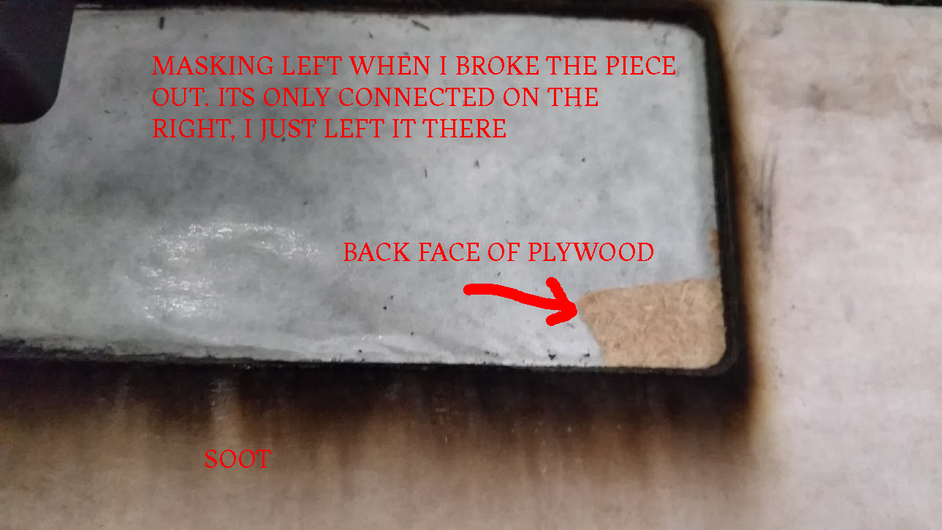
I pulled the part out of the GF at this point. There was the barest pinhole in one or two places on the back masking. I pretty much just used brute force to remove the part at this point, leaving a little of the back cherry ply layer still attached to the big board. The multiple passes pretty much baked the masking on in several places and it was “interesting” to remove.

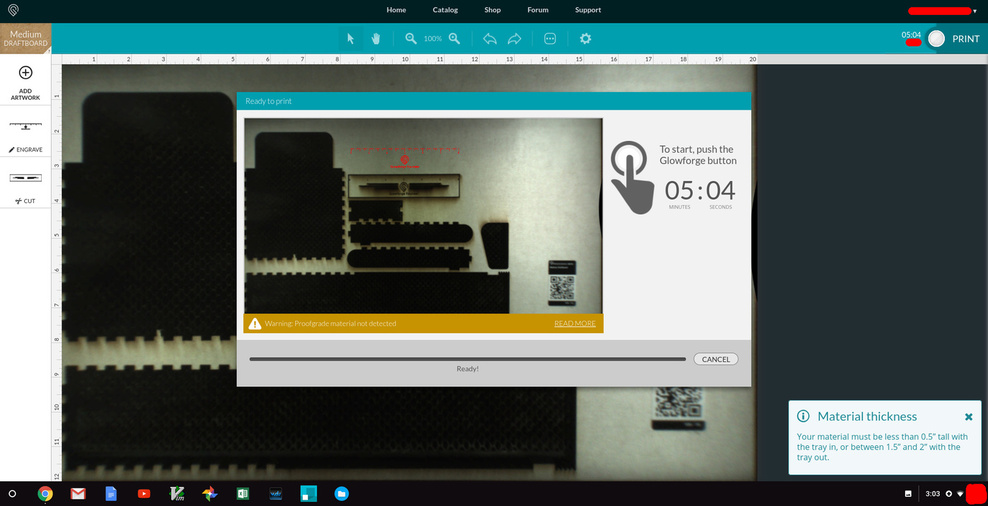
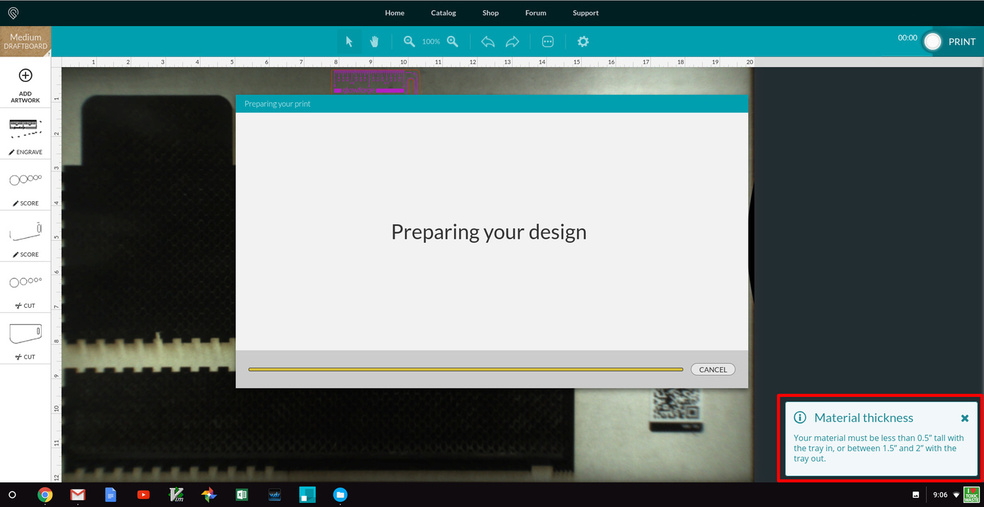
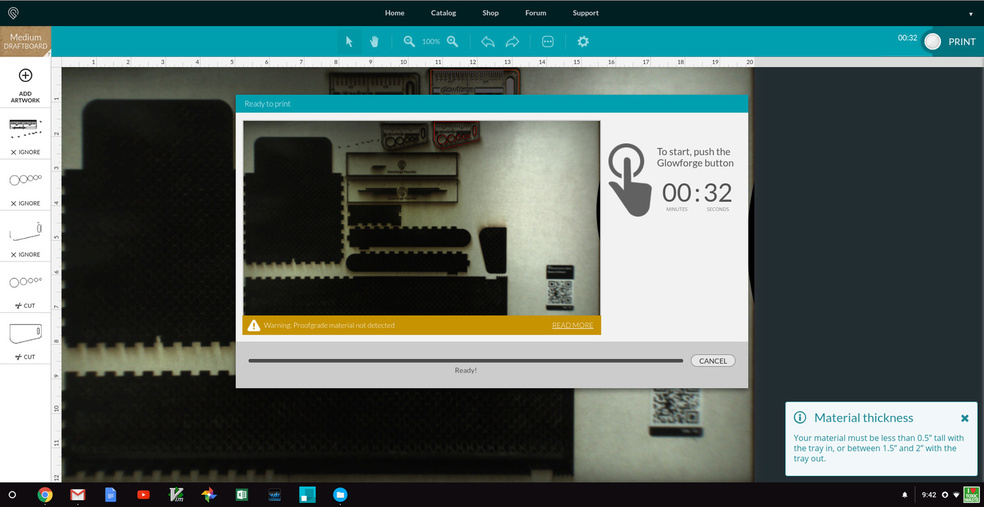
I waited a couple of minutes and decided that perhaps it was the position of the part in the bed. I moved the design to the lower left, re-enabled the ignored engraves, and pressed the Print button in the APP that resulted in an error message. Tried again because why not? Error message again (Can’t process part… contract support if persists)

Returned to the home screen and reloaded the part. Same result aka error message.

Killed the browser, reloaded. Pattern continued.

Back to the home screen, found and loaded the founders rules. Same result as above.

Turned off GF.

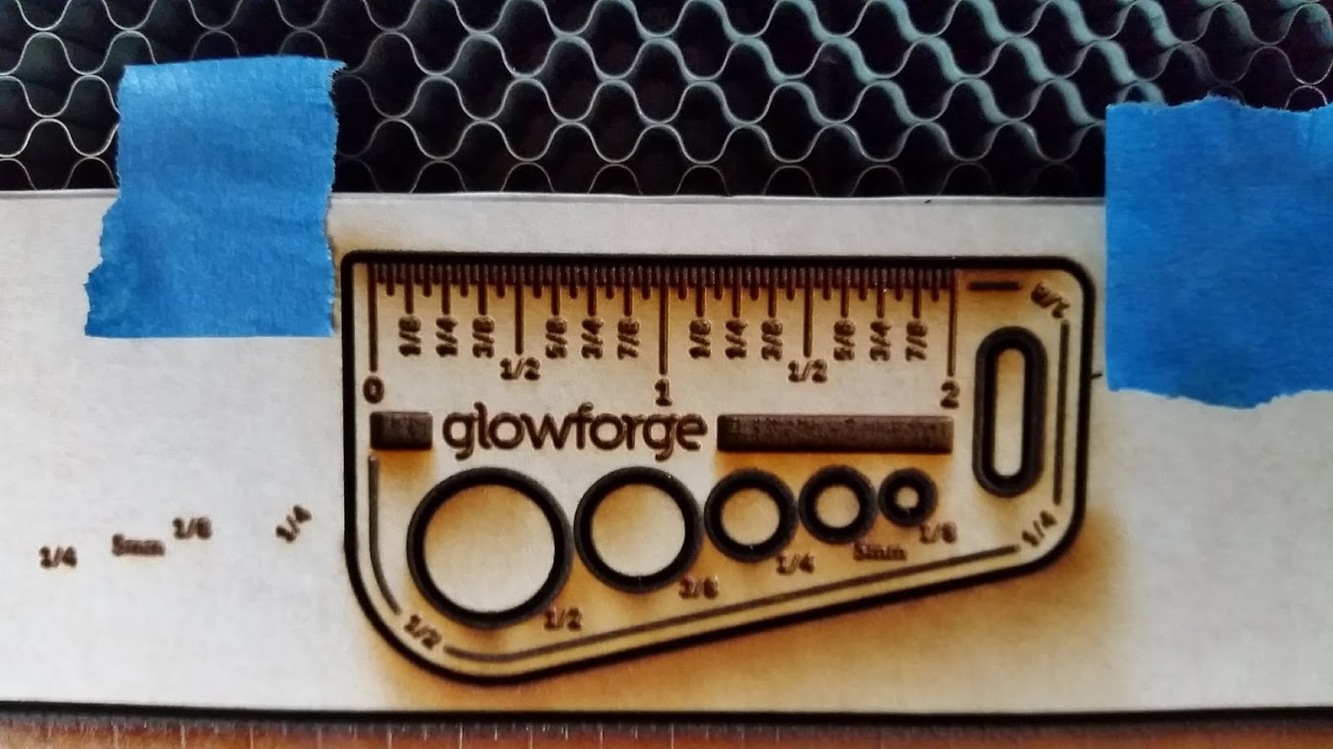
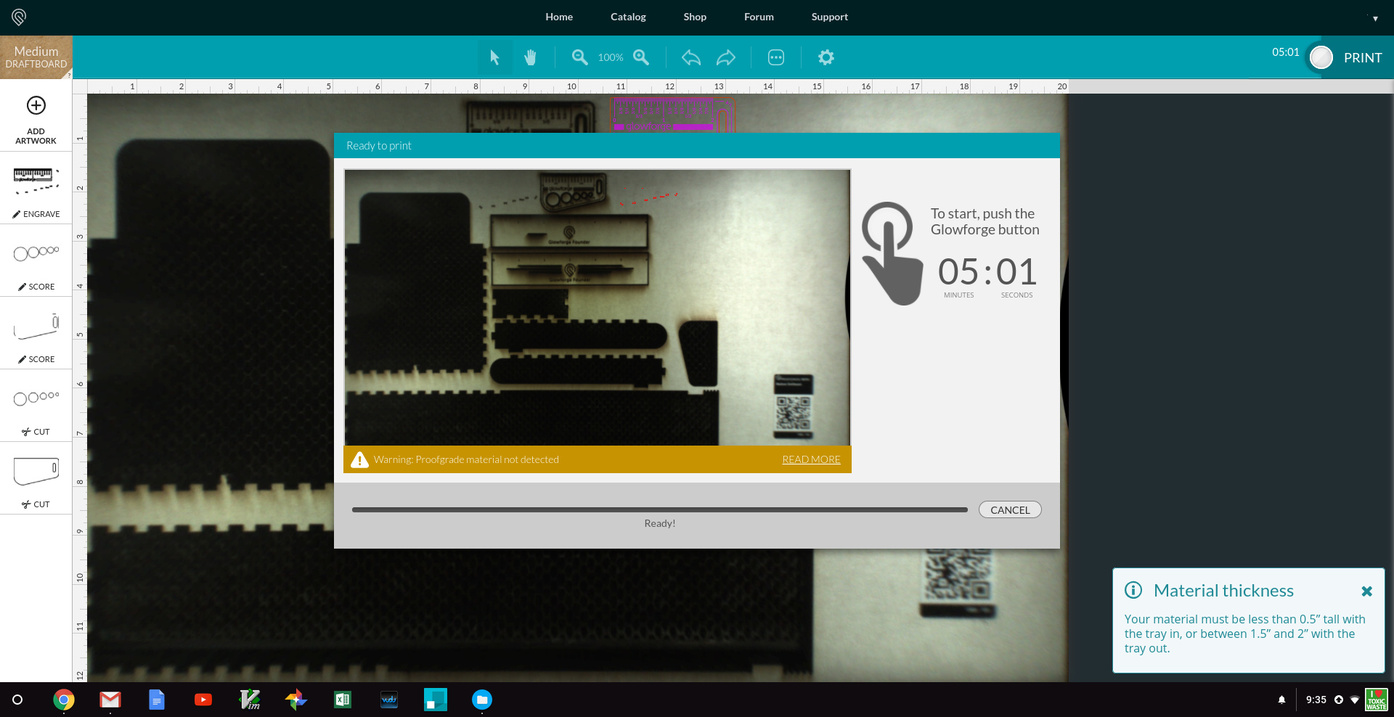
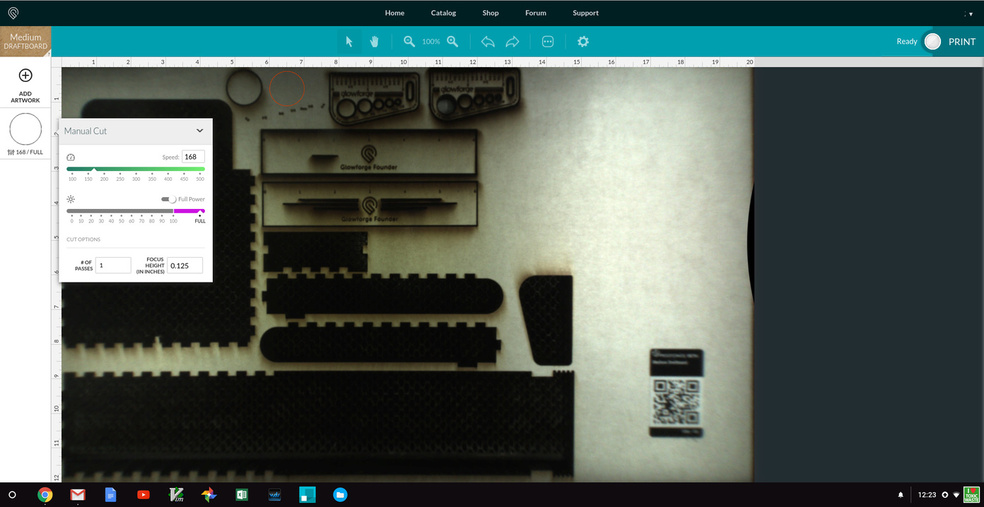
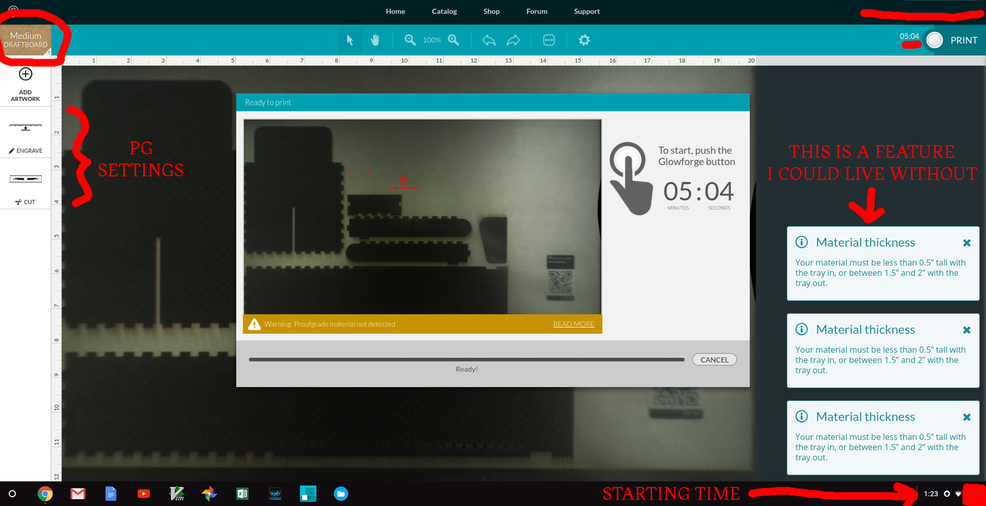
Came back around 12:30 EST, loaded the Founder’s Rule again. Changed the order of cut and engrave, pressed print. hit the glowy button when time and…
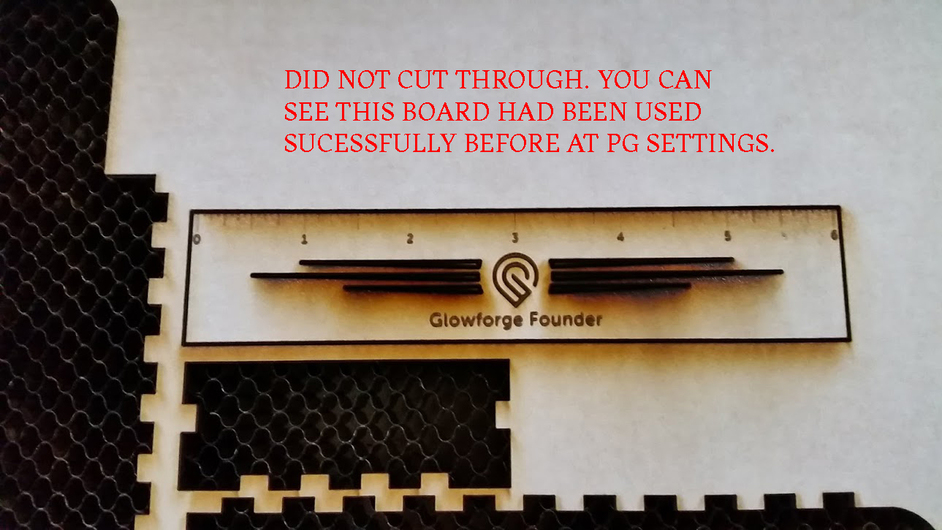
It didn’t cut thru either.

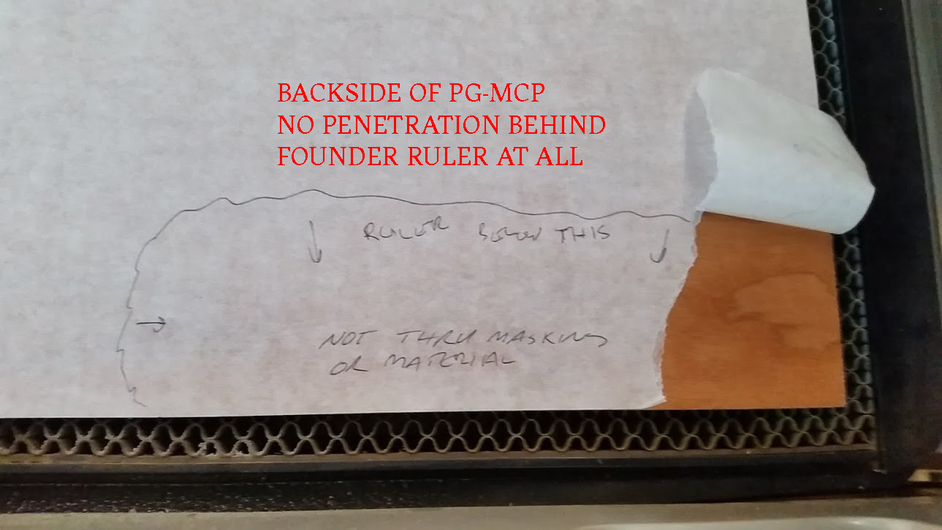
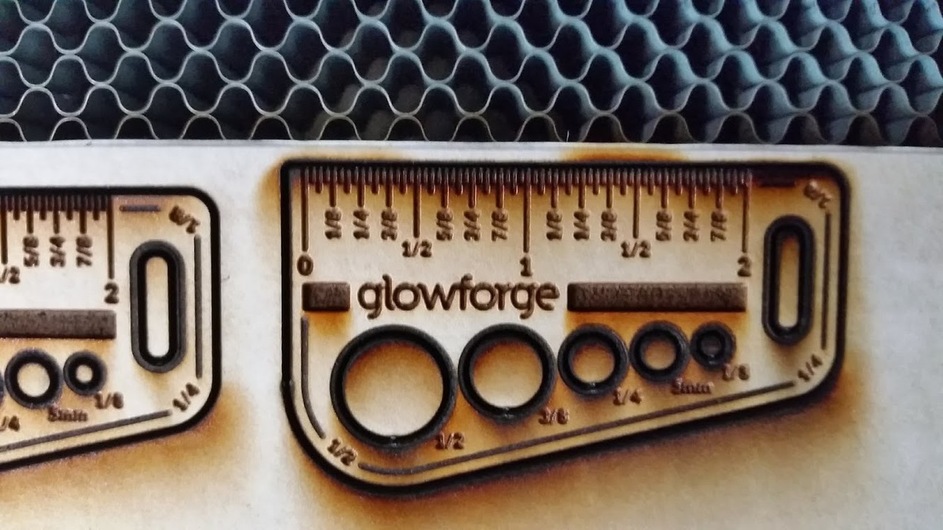
Gave the FR a second go just above previous attempt, Changed cut to manual, 100/FULL. No joy but very charred. Still PG-MCP for reference.

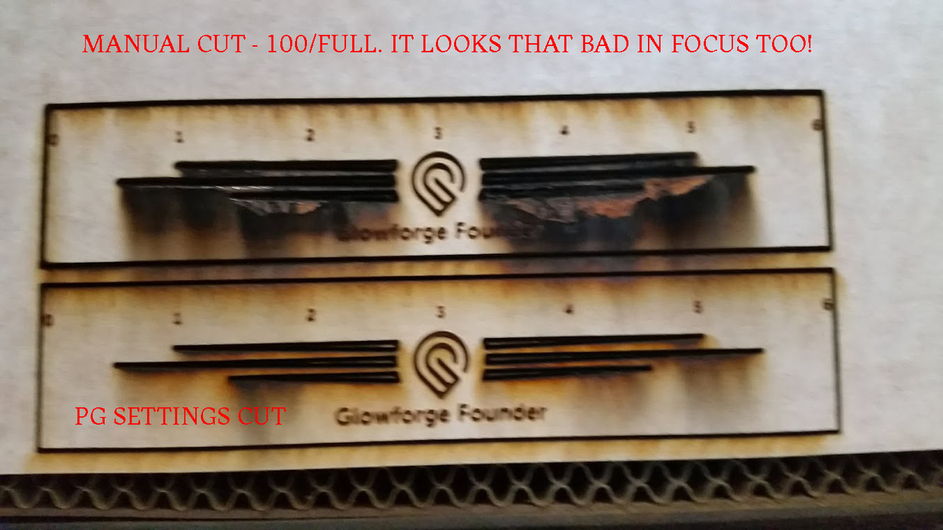
And to finish the testing out. 1 EA Founders Ruler on Medium Draft Board, PG settings. 1:23 PM EST Jan 20, 2018

Thanks for reading.

1 Like

I think the feature you could live without might be the clue. I don’t get that message unless I type a number outside the range 0-0.5. You got three which matches the number of operations. You didn’t type focus numbers because you’re using PG settings. I wonder if that means they’ve got the focus setting mangled internally under some set of steps perhaps if you set the focus manually it sticks when you switch back to PG?

Or it could be your lenses and windows need cleaning.

Yeah, I had the same thoughts about cleaning. but with the power settings it should have just about cut thru the crumb tray itself with that many passes. :smile: I’m also leary about cleaning being the fix since the SD engrave came out great.

And the 23 pews on the HD engrave is definitely a problem. The joys of beta software I guess :slight_smile: Perhaps I misinterpreted the HD Engrave as High Def when it should be Hardly Defined for this material.

I doubt the thickness sensing is playing a role for that new message feature although I guess it could be. The .125 PG material thickness should override the initial scan (or we’ll never be able to defocus the beam when we want to). I’m interested to see the official thoughts and answers.

1 Like

Just a quick update.

I cleaned the GF based on our convo figuring it couldn’t hurt. It also didn’t help.

Then lens didn’t look bad, but it all looks better now.

I still got the material warning dialog (feature I don’t like) twice: once with putting the PG cut and once after specifying a material thickness and doing a manual cut that I slowed down to 150 at full power).

Now I have 2 “deep engraves” where cuts should have been on my draftboard piece.

The weirdest thing is the only successful cut I’ve had was running BB using Thick Maply Ply settings and doing that cut twice.

Oh well, will wait for our friendly GlowStaff to get here now :slight_smile:

This looks like a possible focusing issue to me. Is your tray seated properly? Hope staff can get it sorted for you.

Bump since I see issues from 12 hours ago being addressed but not this one from a week ago.

@Rita

I am so sorry that you had to wait - thanks for the bump. I’m looking into this now.

1 Like

You’ve given us a very helpful report - thank you for the tests and photos! I have a few questions for you today. Would you please:

  1. Make sure the Crumb Tray is clean and flat
  • If the Crumb tray is mispositioned or holding bits of material from packaging or printing, it could keep your material from lying flat. Even a millimeter difference in height could affect your laser’s ability to cut.
  • To remove the crumb tray, lift the lid, then swing down the front door. Lift the crumb tray slightly and slide it towards you to remove it. Be careful not to tilt the crumb tray up, or it will knock into the printer head and rails.
  • Remove all dust and debris from the bottom of your Glowforge.
  • There are four dimples for the feet of the crumb tray to sit in. Wipe them with a damp tissue or cloth.
  • There is a slot in front of the crumb tray, under the handle. Point it towards a garbage and shake the tray so that debris falls out. If debris is stuck in the honeycomb, gently push it out. Debris can force the honeycomb to be uneven, or prevent your material from resting flat against the honeycomb.
  • Replace the tray. Make sure that it’s facing the right direction and that the tray’s four feet drop into the small dimples. When the four feet drop into place, the tray will no longer slide freely.
  1. Send us a photo of each part you cleaned the other day: https://glowforge.com/support/topic/cleaning-service-and-moving/cleaning#things-that-need-wiping
  2. Clean and take a photo of the mirror inside your printer head according to these instructions:
  • While the head is off, set it on a table (or on the honeycomb). ​
  • Lift up just the very top part of the head, and it will come off like a cap.
  • Pull on the little greenish handle, and you’ll see a mirror.
  • Wipe that with a lens wipe.
  • Take a photo of the mirror and attach it to your reply
  • Put the mirror back down so that the little green part is more or less parallel to the ground (so you can see the Glowforge logo easily)
  • Put the cap back on. It’s designed to align properly without you needing to do anything else.

Thank you!

2 Likes

I apologize for not responding sooner. I managed to get sick and am just now starting to feel better. Perhaps tomorrow.

I’m sorry you’re not well. I hope you feel better soon, and don’t worry about us! Also, we’re continuing to research over here…

1 Like

Thanks again for your patience, @hansepe. We’ve made a change from our end that should resolve the issues you were seeing.

When you’re able, could you please reboot your Glowforge and try another print? Let us know how it goes.

Thank you. I can try a print today or tomorrow. I just haven’t been steady enough to trying cleaning the optics again yet.

Good morning @Rita and @Vee - thank you both for your patience. I am now back among the living. Finally.

I did three tests this morning. Short story, my GF still isn’t working properly.

I turned on the GF for the first time in approx. 2 weeks. No issues noted during start-up and cal.

File used for testing: Gift of Good Measure on Medium Draftboard

Test Run 1:
Loaded artwork and positioned in GFUI.
Selected material (medium draftboard - this was after a false start choosing Thick Maple which apparently was next to my target the firs time. I aborted that print when I noticed the anomaly).
Selected the Print Button - Scanning - Error Message for Material Thickness
Time = 9:06 AM EST 2/12/2018


Proceeded (with low expectations due to thickness error message)

Result - did not cut through :frowning:
20180210_093052

Backside - no penetration (blue tape marks bounds from front side, see above photo). The line is from the failed ruler prints 2 weeks ago)

Recycled machine in case there was something queued to download. Nope

Test Run 2:
Repeated test run above. Started with positioning artwork
48%20AM

Selected Print. Received Material Thickness error during preparing design phase.

03%20AM
Print time 9:35 AM EST 2/12/2018


Same result as previous.

I proceeded to ignore engraves and scores and repeated the cuts.


Print time 9:42 AM EST 2/12/2018

Here are the results:

Backside with masking showing after second cut attempt. Note outline but not really cut

Better(?) view with masking peeled back. Definitely not fully cut.

I was able to apply some force and pop one of the holes out. This just shows that while some penetration on 2nd cut pass it still didn’t cut to any quality previously displayed by the machine.

I await further instruction. Thanks for your attention.

1 Like

Even though I ‘liked’ this…I don’t like it at all. I’m really glad you are feeling better, but sorry that your Glowforge is still sick. Hoping you get a fast resolution.

1 Like

Thank you. Things happen, we’ll figure it out. Just weird she was bulletproof and then all of a sudden not able to cut anything.

It all seems tied to the advent of the thickness error message.

Does the red laser fire when it scans the material?

What happens if you switch to manual settings and enter the focus height?

Thanks for taking a look @palmercr

For this testing I’ve swapped to a simple 1 inch diameter circle

A) The red laser does fire when checking material height. There were 2 pulses when using PG settings, 1 pulse when using Manual.

B) I’ve included a screen shot of the manual settings. I just changed to manual and didn’t touch any of the other settings, so the .125 height was inherited from the PG settings.

Short story, no difference between the two settings as far as outcome.

Print time was 12:23 PM EST 2/10/2018 (or 10/2/2018 for anybody not in the US :slight_smile: )

Thanks.

1 Like

Odd, it normally ignores the height measurement when you set the focus manually. Perhaps if it thinks it is out of range it doesn’t ignore it. It looks like it is focusing as high as possible.

2 Likes

You could test that theory by raising the material so its surface is about 0.4" above the tray and see if it cuts.

Just to be clear, raise the material and leave the setting to .125 or change it to .400 (or whatever the new height is) when cutting?

Give me about 30 minutes :slight_smile: