Hoping to get a little help from folks that have successfully made jigsaw puzzles. I think I’ve read through every thread I could find, but being new to both GF and puzzle making, could use a little push.
What I did:
Russian Birch 3mm ply. Test cut cleanly at 230, full power (pro)
Spray mounted an 11x14" photo from Wallgreens, J-Rolled it and gave it 15-20 min cure time
Slowed to 220 since I had added the photo (a guess)
Watched the cut for problems. After cutting the border, the first row cut (I split rows and column cuts) showed flame that I hadn’t seen in test cuts. I opened the lid out of an abundance of caution
Read forums about “candle flame” being okay, but couldn’t find any images or videos to see what was acceptable
Leanred that opening the cover doesn’t “pause” but cancel. So, I restarted the job
Watched the entire cut to make sure nothing happened. The flame seemed to happen more in one than the other direction, assumed this was because of the airflow inside
What I got
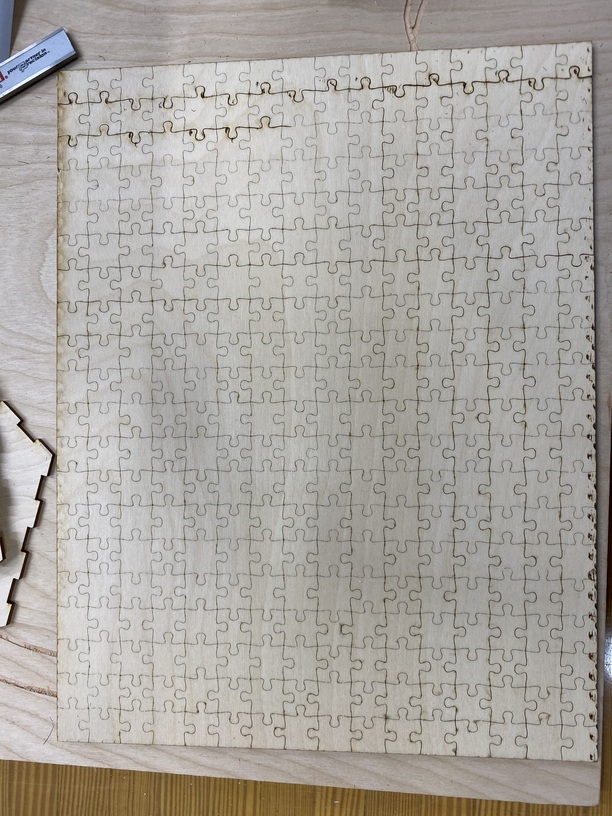
Didn’t get a clean through-cut. Very little burn on the backside, but the puzzle didn’t break cleanly
“Burns” on the image. Some scorching wiped off, but a most stayed. There was also a “tack” to the image when touched
Scary(?) flame
My questions:
I’m guessing that the flame was because of something in the print or the adhesive. I checked several sources about spray mount (and photos) with laser, but found that many people use this and didn’t see any ingredients to cause alarm. Is the flame in the video below “acceptable” / expected?
I’ve seen that people both seal and mask the photo. I was afraid to seal it because I didn’t want to add too many additives to the equation. I did plan to mask it, but all of my tape was of too-high tack and would have wrecked the photo. I plan to try both tomorrow with spray-on minwax polycrylic and low-tack mask
I’m wondering if anyone has a terrific recipe for the puzzle sandwich to get great results - what type of wood (i’d probably like to go up to 6mm), what brand adhesive, any guidance on printing (paper / ink), how much sealant. I saw the thread on masking → horizontal → remasking → vertical which makes a ton of sense and plan to follow.
Any advise would be helpful. Unlike the inexpensive raw materials, this process is a little more expensive and time consuming to get dialed in. Looking to get some coarse adjustments to speed up my tuning of this type of project.
Thanks much!
(note - the “fatter” cut at the top of the image was the result of the re-cut after aborting when I spotted the flame)
I haven’t really dipped into puzzle-making yet, but search specifically for posts about puzzles by @jbmanning5. He’s our resident puzzle expert, and has shared lots of his secrets here over time!
I don’t have any suggestions for you, but I just had to say I like the picture! Agree that JB is a good one to search, he’s posted a lot of helpful puzzle tips!
Sadly I can’t see your video - wrong format. If you load it to YouTube and then link that here everyone will be able to see it. That said, you can get a noticeable flame (up to 1" long) - but as long as it’s visibly blowing forward (from the air-assist fan) you should be good.
As for the not-quite perfect cut I’d lower the speed another 5 and test again - you can test just a few pieces you don’t need to go through the entire puzzle. Figure you’ve added thick paper, as well as glue, so it’s not a surprise it was a harder cut.
Masking - I didn’t see you mention it - you should mask your puzzle to avoid burns. Put masking on - run the first cut. Pull off the now strips of masking. Apply new masking. Run cut two. (This is also a @jbmanning5 trick)
Do not reposition your art, or allow the puzzle to move while you’re doing the masking. Make sure the border is tightly held down, this will ensure the 2nd cut lines up with the first.
Yeah, that’s not outside the realm of a normal flame. I’m betting masking will help. Remember masking is pressure activated (unlike masking tape) so you need to rub it down quite firmly (using the edge of a credit card or piece of wood) or it’ll pull off just as the heat/fan hit it.
so… definitely seal your photo first. my process is pretty similar to @jbmanning5’s (probably because i stole it from him).
spray mount image to board (and i spray both the back of the photo and the board itself first before laying down the photo).
allow adhesive to dry.
seal the photo after mounting. i use windsor & newton, which was @jbmanning5’s recommendation.
allow that to dry.
then masking will protect the image. if you do it in two separate operations, you can make the masking less of a hassle. do all the horizontals, then peel it off still pinned to the honeycomb. reapply, then cut the verticals and the outside edges. that way it peels in strips, not individual pieces.
not sure what russian birch is, but plywood can often have voids or resin or other issues in the ply. baltic birch is a little more reliable, but you can still run into issues with places it doesn’t cut thru.
JB has done 1/4", i’ve stuck with 1/8, he may have better advice for the thicker wood.
last, get yourself a bin and some salt. you can shake the puzzle pieces in there to remove edge char.
Tonight’s test went better… I sealed and masked the photo, added cure time and there was nearly zero flame and no damage to the image. I screwed up my placement and didn’t do through cuts on the vertical cuts so I could easily de-mask and re-mask… pulling seared mask off 200 pieces will cure you of that mistake!
I did look at MSDS sheets for the spray mount and didn’t find any alarming contents in terms of byproduct, but wasn’t able to find anything in any of the laser forums saying “77 is totally safe”. Obviously the can has a ton of warnings about the risks of the aerosol/can but nothing of real note on the contents. Have people found that any one spray adhesive is safer for humans or our robots?
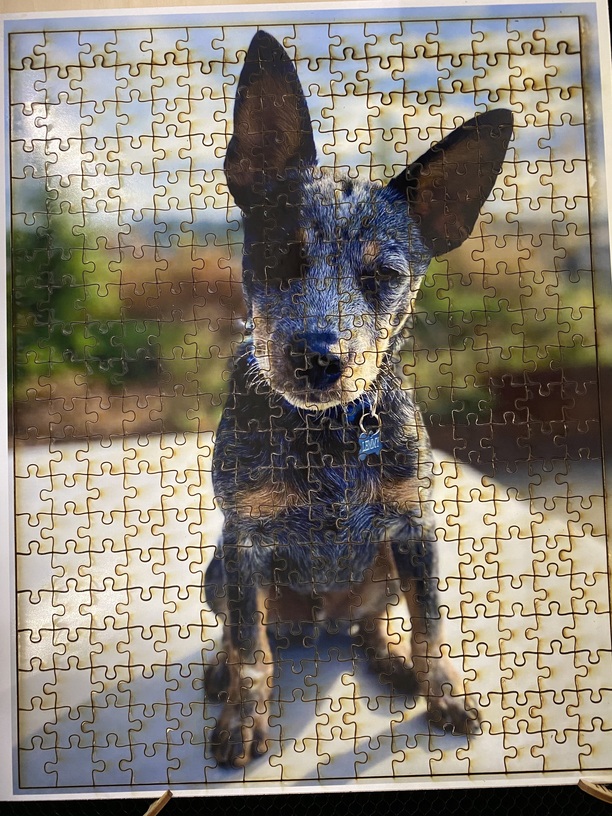
Following up for anyone curious who searches puzzles.
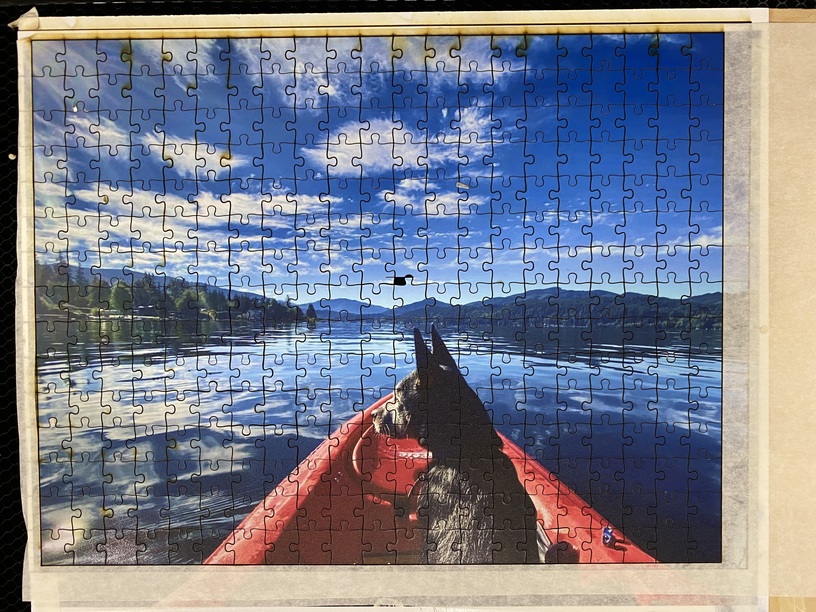
Last night was a lot more successful. Here’s the completed puzzle. showing no scorching and a video showing that the flame basically disappeared. Unclear whether the flame disappearing was a) cure time (about 2 hours vs. 20 minutes), b) sealing (2 coats minwax matte poly) or the c) masking (which I only did on the image side)
I was using 1/8" Russian Birch at 190/Full/.12" focus and had very little scorching on the verso. It’s definitely the case that you want to have a straight a piece of wood as possible as warp cuts get a little strange.
I screwed up and setup the image in a way that made it really hard to think about unmasking after the vertical cuts… next time I want to solve that. I’ll probably simply extend the horizontal cuts a quarter inch past the border and score a second border to make it easy to weed the mask after the first round of cuts w/ low risk of material shift.
Has anyone successfully done an oversized puzzle using either some type of registration trick and tile printing or with the pro slot? 11x14 is a nice gift size, but difficult to get more than around 200 pieces. Given the kerf, feels like you really don’t want to shrink much beyond that size.
Any tips on focus that might help minimize the kerf appreciated. I’m happy with the outcome, but I’d love any tips on how to tighten it up.
Salt on the shopping list. Looking forward to seeing how that works out.
Link to non-flame video. Same wood. Setting shift from 220 to 190 feed rate. Primary difference is the addition of mask and 2 coats of sealant.
More kindling and experience to share with some questions people might have some experience with.
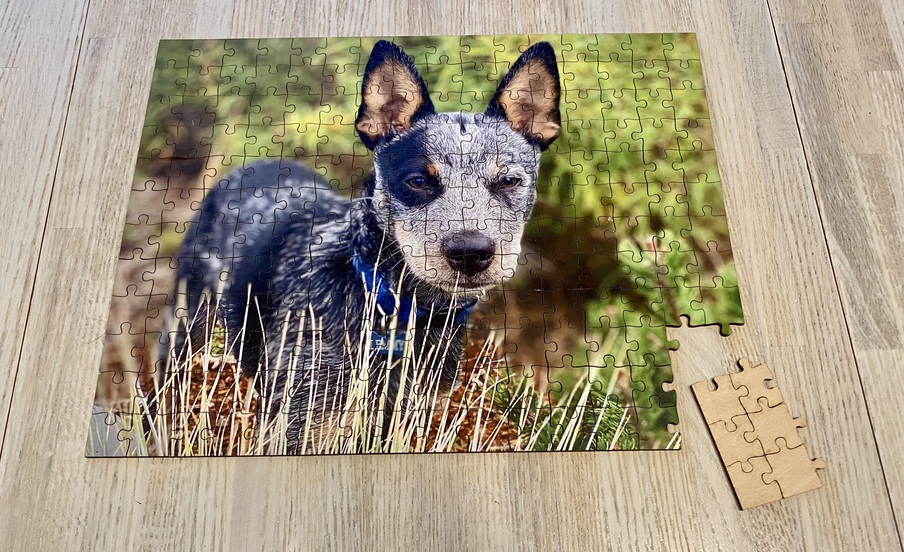
Okay, apart from a rogue stroke in the middle of the puzzle, this one was going to go well. I mounted and sealed it, curing it overnight. I masked it (squeegied) and broke up the hor/ver cuts with overcutting so that I could de- and re-mask.
Despite this using all of the same materials as the other print, a number of things came out differently
I got some image charring. The only thing I can think of is that I didn’t squeegie the second round of mask because the first was difficult to remove. Could that be the culprit?
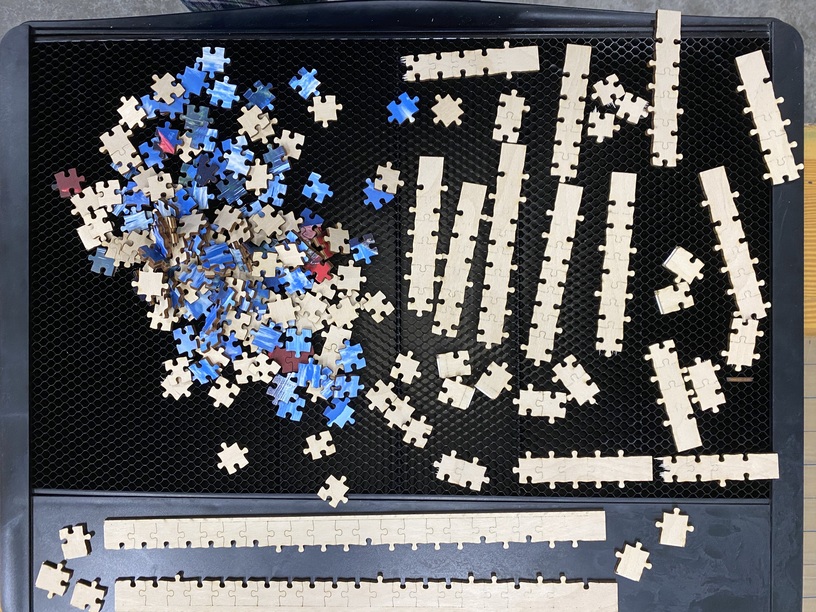
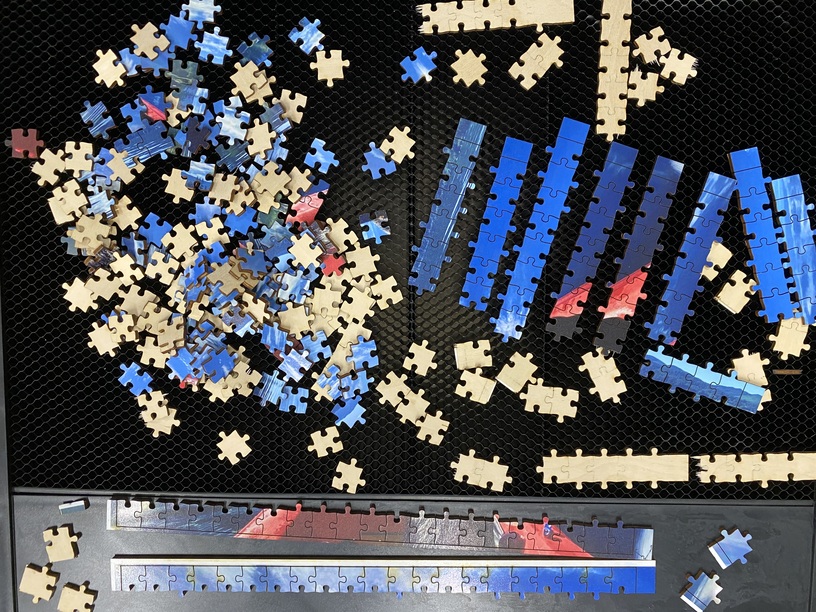
I didn’t get clean cuts all the way through (perhaps this is related to the charring to?). I was using 190/full/.12 just like previous puzzle. Sure, there was some minor warping, but I did have the stock pinned down and there was a LOT that didn’t get fully cut. 80% were perfect and the other 20% weren’t just one area (see photos)
I didn’t have the horizontal and vertical perfectly aligned b/c GF got confused. I had two “groups” in the artwork. Setup one to cut (horizontal) and ran the job. Opened the lid and de-masked the strips, remasked the piece. Closed the lid. It re-scanned and I setup the second “group” (vertical) with the same cut parameters (weirdly I cannot seem to figure out how to remove the group already cut - i could not remove it from the art, nor could I “zero” the cut parameters). Then I got a pair of errors and had to reboot - which meant that I had to re-place the artwork visually (not ideal).
Any thoughts on the scorching, how to ensure a good through cut (just subtract 10 on speed?) , how to do multi-pass without resets and how to minimize scorching appreciated!
Here’s the SVG for those curious about my inability to remove the first pass group, or interested in an 11x14"-ish puzzle setup for easy two part weeding (just be sure to cut horizontal first pass) . Pieces are probably the smallest I’d choose to deal with.
One thing I forgot - another variable that I just thought of is that I calibrated the device last night using the ~30min process with the patterns on chipboard verso. That did happen between the garden and kayak puzzles, so perhaps my improved calibration affected things? One thing of clear note was that the straight border edges didn’t all cut through, so I’m wondering if straightline speed is a little “higher” in the sense that there’s no overlap like there’s bound to be on cuts with curves or angles? Like I said, it was pinned down, so maybe the edges were tightest to the tray?
This is absolutely true - in fact one of the big improvements they released was to get rid of overburning in tight corners, but anytime the laser has to adjust belts it slows down ever so slightly, so you want to test for straight lines and curves and find your happy place between them.
Notice your scorching is on the edges. That even more points to your masking not being down as well there. No scorching in the middle because it is well adhered there.
I think you will really be pleased with how well your edges clean up with the salt trick. Somehow my salt container recently disappeared so I picked up some new coarse sea salt today.
I’m new but puzzles are part of my focus as gifts for family and threads like this are very helpful. I just have a thought on the wood backing for the puzzle. I debated backing material, spoke to a couple of personal friends about it and they asked why go the extra expense for wood. I did some looking around and pondering and finally found a good solid medium, mat board like they use for mat and lining of pictures.
I bought some via Amazon and found it to be rock solid and a lot cheaper without losing the quality of a firm backing.
 . Pieces are probably the smallest I’d choose to deal with.