So getting my ![]() just before the holiday weekend before the 4th, I had a lot of time to tinker and experiment with projects, as well as document those here on the forums. Unfortunately, by now life has caught back up and I haven’t had that kind of time so I’ve only been doing the random small projects here and there—still something coming out about everyday, but nothing earth shattering. Here’s a few of the projects, just to catch you up a little.
just before the holiday weekend before the 4th, I had a lot of time to tinker and experiment with projects, as well as document those here on the forums. Unfortunately, by now life has caught back up and I haven’t had that kind of time so I’ve only been doing the random small projects here and there—still something coming out about everyday, but nothing earth shattering. Here’s a few of the projects, just to catch you up a little.
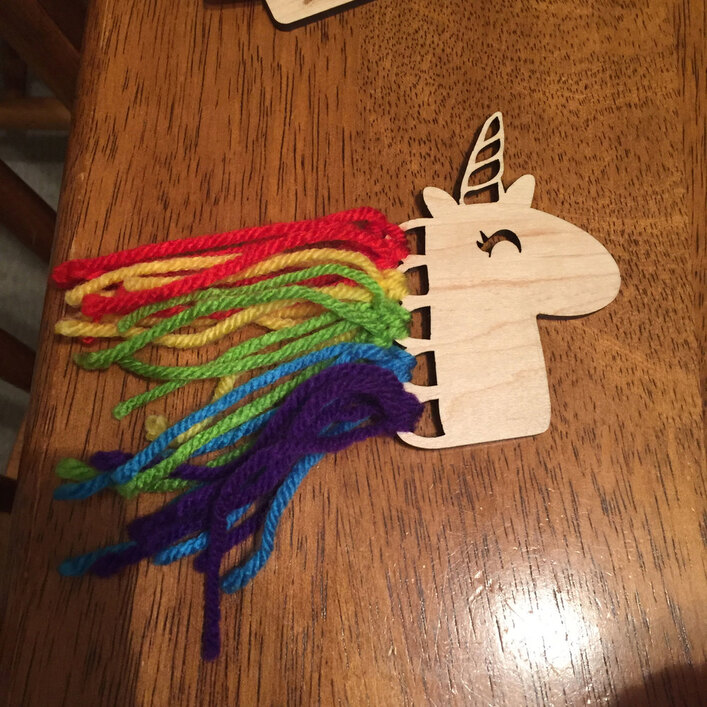
My daughter was begging for a unicorn (and one for her friend) so I quickly pulled up something I saw on pinterest for her (again, I can’t take credit for the artwork on this, and I don’t have the rights to use this, but as a free gift for my daughter and her friend? It was quick and easy).
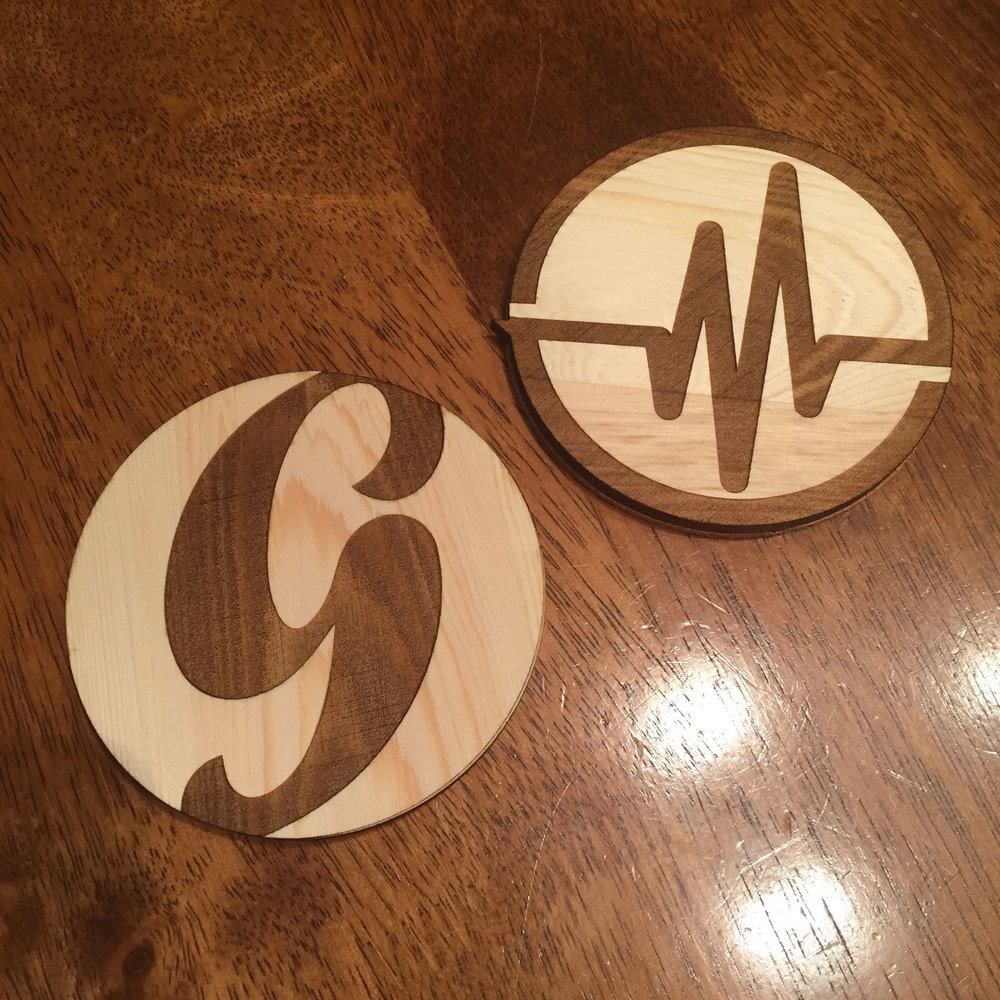
Also, made a couple more logo coasters (an extra for me since I made one for everyone else at the office—which they all seem to have loved by the way. One guy even told me his disappeared already because his college-age daughter saw it and stole it for herself she loved it so much—and one for a friend’s birthday of his business).
And, we moved into the realm of acrylic! That’s right, I literally spent the entire first week with my Glowforge only using maple plywood and hardwood. Wasn’t really sure what to do with the clear acrylic—I mean I have pinterest boards of all kinds of ideas, but without going into some big crazy project right off the bat I didn’t really know what to do with it. My son wanted a dragon and my daughter wanted a mermaid so I figured we’d just start with those.
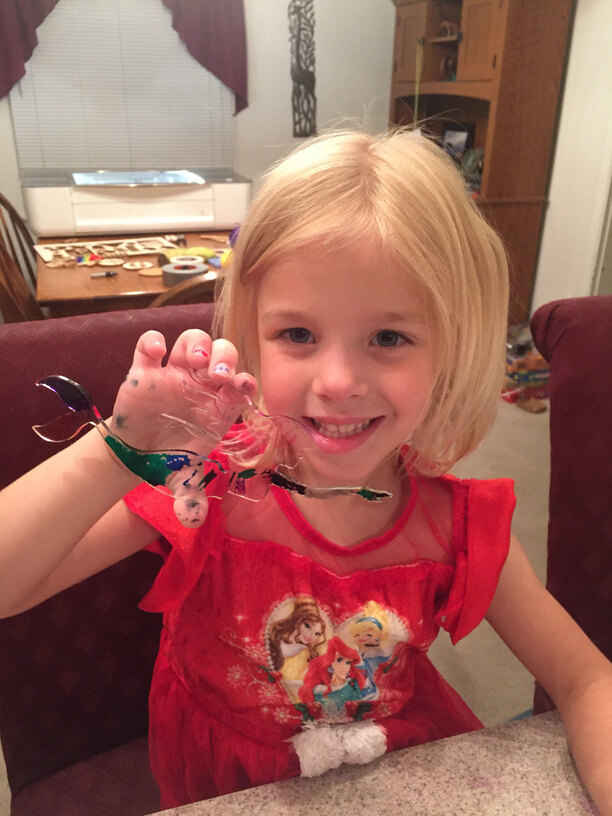
They turned out great—so crisp and clear! (that mermaid was the one causing me all of the problems I mentioned on the calibration issue post) My kids loved that they could color on them and change the designs anytime they wanted. We discovered that the crayola markers literally pool on the acrylic, so it’s easy to smudge all over your hands, clothes, and countertop. My wife suggested the kids user her fine-tip sharpies and it was much less messy, and it actually didn’t just wipe off or even come off with water. Luckily she had a magic eraser and it came right off (gonna have to invest in more of those I think).
My wife was quietly enjoying watching the kids during all of this, so after they went to bed I asked her what she wanted to make. She said, “Oh, I don’t know. I don’t need anything.” I told her that’s not what I asked and offered suggestions. She finally just said, “Why don’t you just go make me something. I don’t care what it is.” So after some digging around I thought I’d make her something she could put on a necklace. Even if she didn’t really like it, it would at least jumpstart some ideas for her figuring out other things I know she’d love to do. Here’s what I came up with:

State of Indiana with a heart cut out around the city we live in up near the top (lucked out I didn’t have to cut another hole for the chain that way), and engraved the word Home. I also managed to remember to reverse the image before I cut it, so that the word home would read correctly through the back and keep the funky texture where it engraved away from the front. She actually really liked it, and of course immediately started suggesting other charms she wanted: “A heart shape with a crochet hook and yarn engraved into it!” “A stethiscope in the shape of a heart with baby footprints in it!” (she’s a labor & delivery nurse who loves to crochet).
Then, last night I was in the basement and my son came down with his tangled earbuds. I immediately thought, “Hmmm… I can fix this.” I had earbud holder designs pinned in pinterest that I have thought would be cool and would like to create my own adapted versions, but knowing my son wants to be an inventor someday thought he’d love seeing the process of seeing a problem and quickly generating a solution.
I set straight to work: open Illustrator, started drawing some shapes, took a couple of quick guesstimates on sizes of things (since I didn’t have any calipers yet—just bought a digital caliper today though!), and in a matter of a couple of minutes came up with a design which took less than a minute to print.
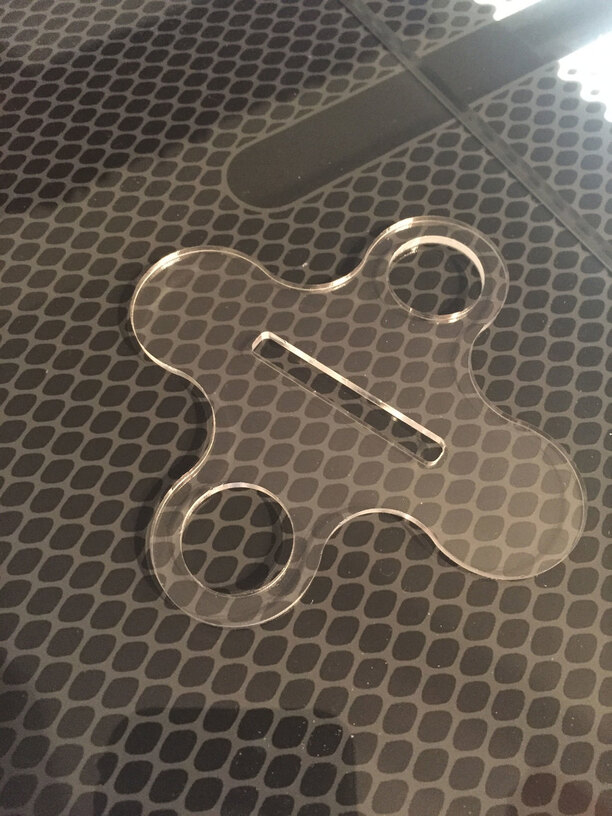
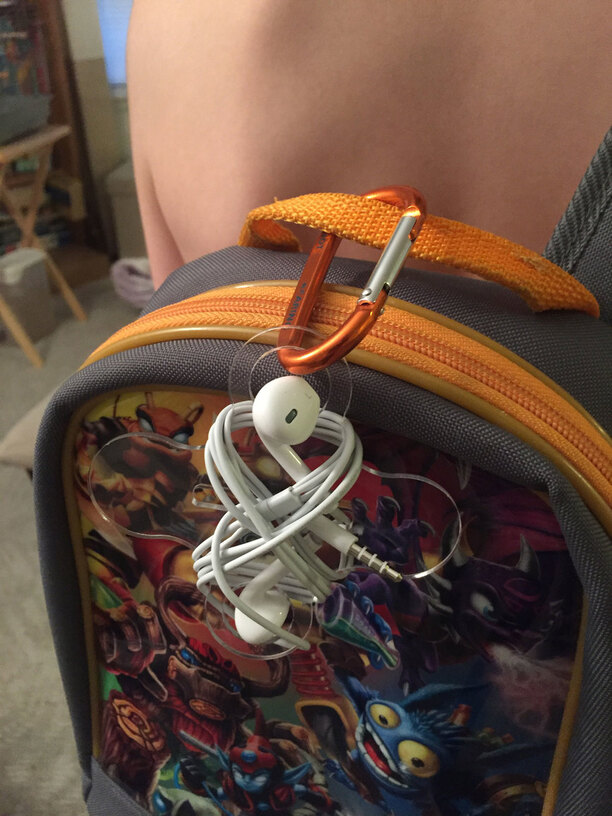
It turned out larger and bulkier than I imagined it, so as I showed him how to use it, I talked through ideas with him aloud for how we could improve the prototype by changing this or that in the design. He looked at me with wide eyes and said, “Daddy? You sound just like an inventor!”

It was late and close to bedtime, but I’m kicking myself for not taking the extra time before I started it to ask him questions, draw some ideas with him, and let HIM create the initial design to figure out how to test/prototype an invention. Also, this one project really gave me good reason to figure out settings for cutting cardboard because that stuff is cheap and I could REALLY use that to test several different types of earbud holder designs (as someone on the forums so helpfully suggested to me on a previous post) and come up with as slick design to engrave into it so it’s much more appealing.
Guess I have a reason now to start testing cardboard for our second prototype, and let my son stretch his inventing muscles.
P.S. I still have that cello bridge engrave I did to share with you guys; just have a few finishing touches to put on it hopefully in the next few days, then I can show you the finished product.


