It has been way too long since i have posted any of my recent work. To kick off 2019 I wanted to get in the habit of posting again, so over the next few days i will be posting some of my favorite projects of 2018.
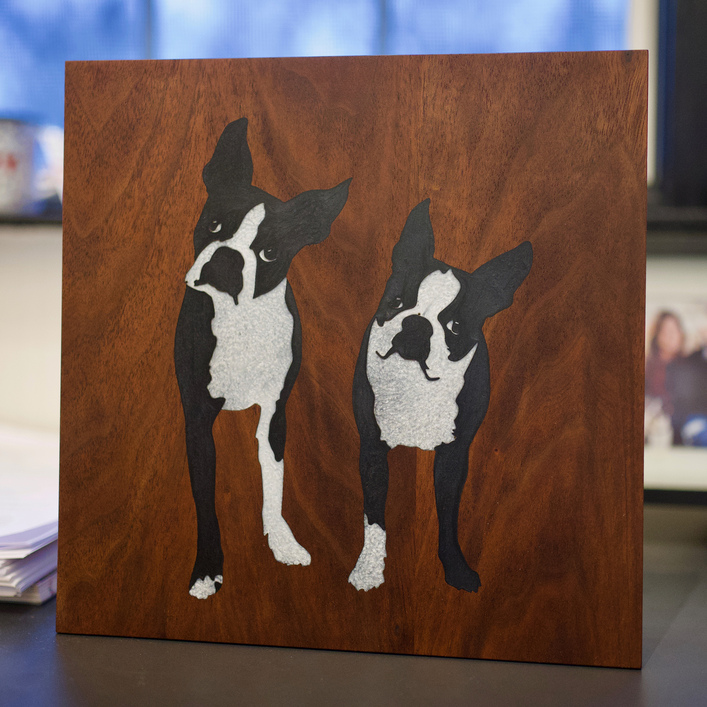
To start things off i wanted to share this engraving I made for some friends. I have been waiting for the right project to test out snapmark and this one was perfect.
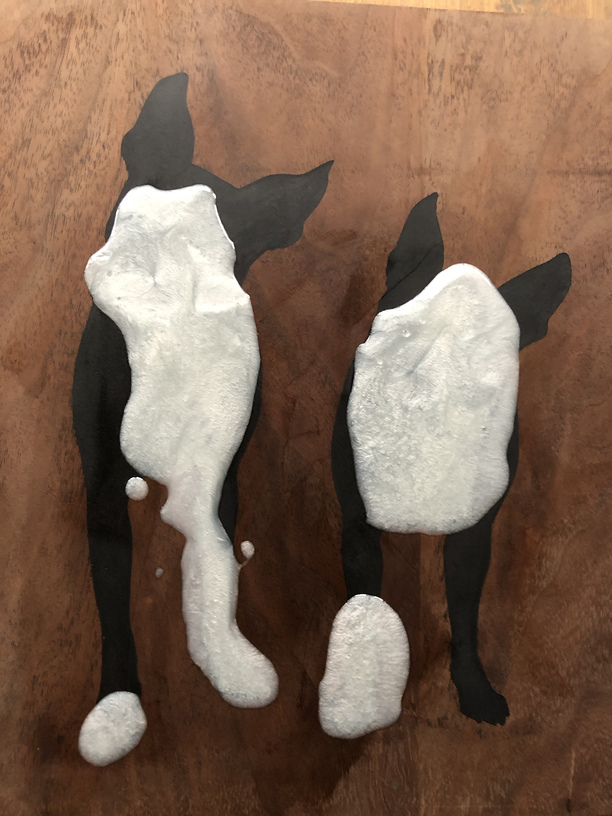
I will start off be saying that this could be potentially dangerous depending on the resin you use since there is a possibility that some resin will burned. That being said the resin I used does not fall in that category. But based on the fact that only alignment error would cause my to engrave the resin and the material sheet only listed carbon monoxide as the worst byproduct i decided to go forward with it. I am currently looking for a better option for any future projects.
Enough of the warnings, let get to the good stuff.
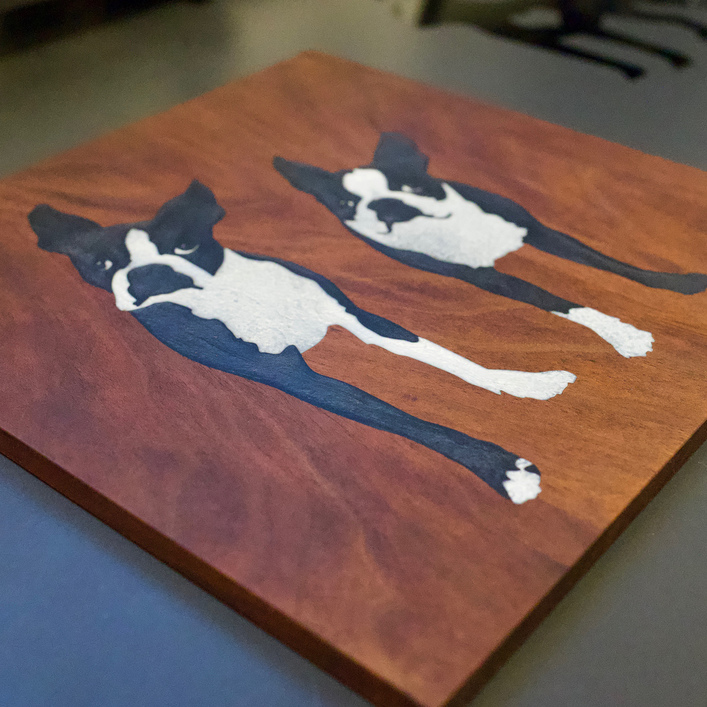
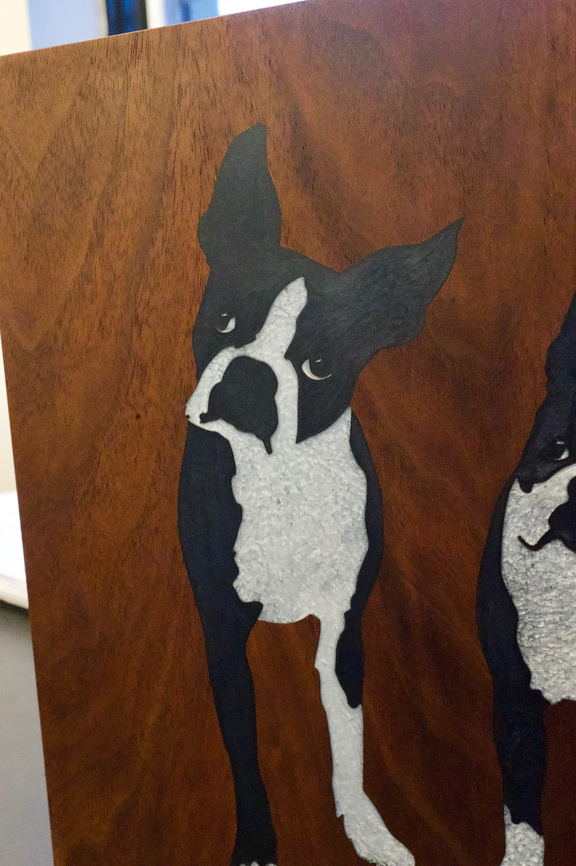
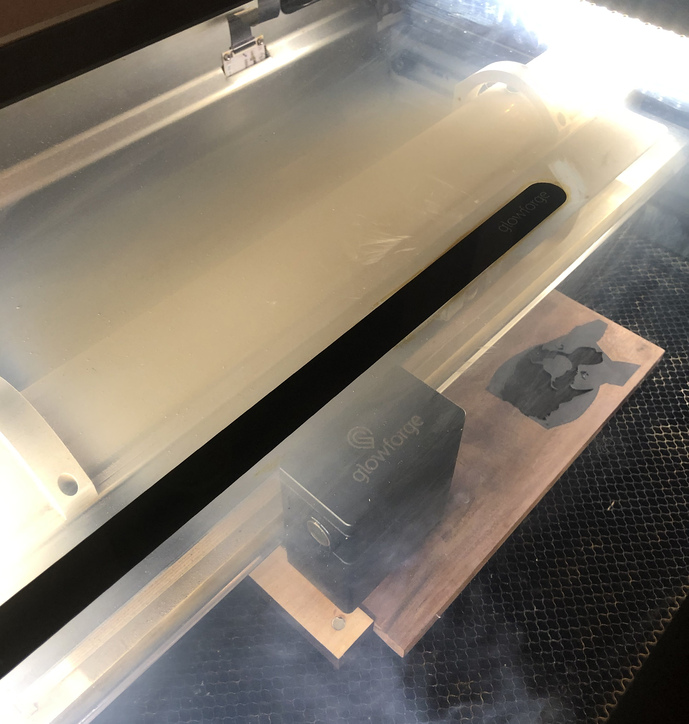
This was done in a 2-step process where I engraved the black section and filled it with resin. Then i sanded it down and re-aligned the block with a snapmark jig i made. The jig is based on@takitus’s jig. Then the white section is engraved and filled with the white resin.
Overall the process worked flawlessly. I was super impressed on how well snapmarks work for realigned. I will say that it is incredibly slow but dead on for my unit. I think it took roughly 2 minutes each time to align. So i wont be using it for any large repetitive runs do to the added time. But for small projects and one-off it was fantastic. Way to go @dan and team.
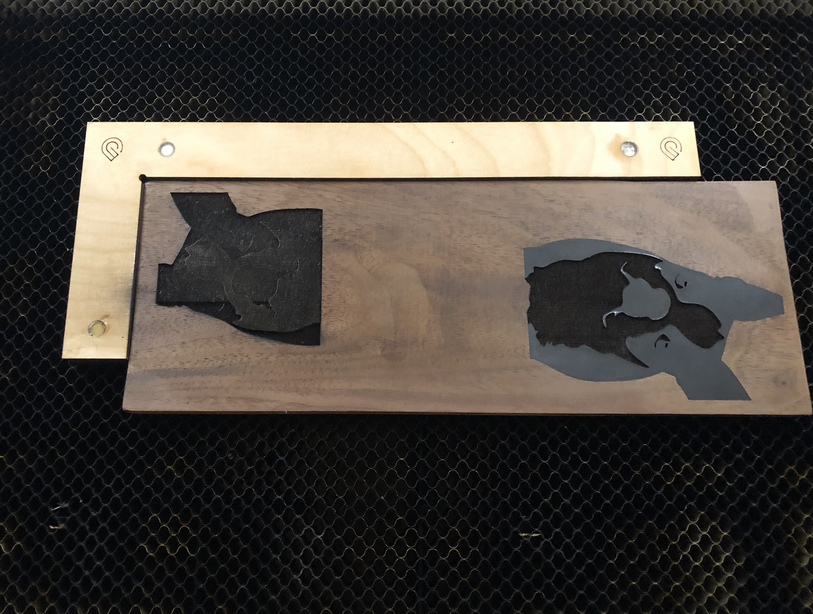
I forgot to document the whole process but here are a few from some testing i was working on.
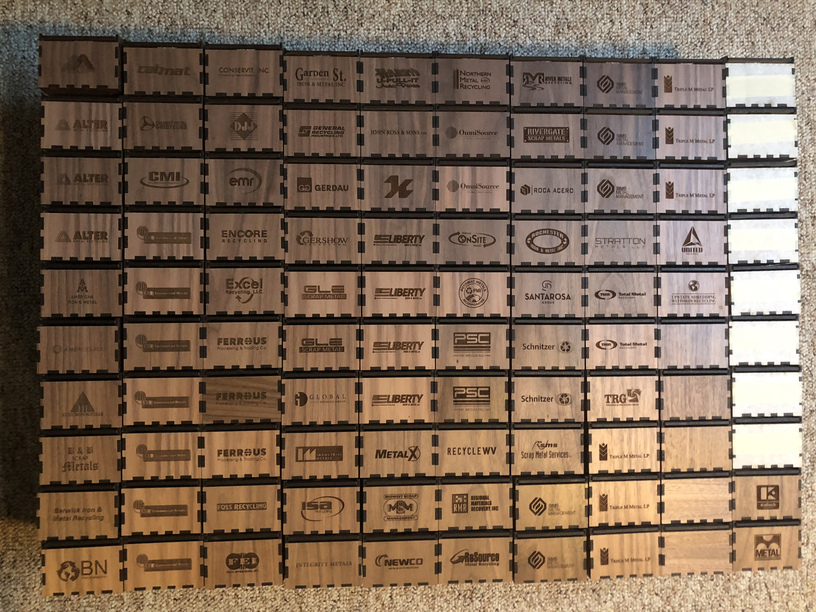
This one will drive people crazy on how dirty my machine got just before Christmas. This is what cutting 100 boxes of proofgrade walnut will do to your machine. I am planning a major cleaning soon since it is getting really back inside.
Ya, this was done on a piece of .5" walnut i had. It would not work well in any plywood.
I just happen to finish up a holiday box order for a client the night before so my machine was in bad shape.
Very lovely! Great use of the resin and putting those snapmarks to work.
How hard is the resin to get through with sanding? I’ve never worked with it, so I have no clue what kind of tools might be required for something like this.
Gorgeous! Thanks for sharing details on the process–and a great use for snapmarks (Snapmark Cloisonne!). And the boxes are wonderful, too. No wonder you’re busy–happy customers!
Yay—new technique! I’ve got all the supplies (except the orbit sander so it’ll have to be elbow grease) so I may try something like it. As always with your projects, this one is really amazing.
Great Project! As far as resins go you might want to contact these guys and make inquiries about their products and possible usage. I am not affiliated in any way. I just see some of the work done with their stuff on instagram.
Having sanded epoxy before and knowing a bit about how this would go in terms of getting a smooth, flat result, an orbit sander is a great investment. You’ll be amazed at how long it’ll take to do it manually, and the Wood vs epoxy will sand at different rates, leading to weird high/low spots.
I recently picked up a variable speed ridgid unit from Home Depot for around 60 bucks. Coupled with the new style of mesh sanding discs that don’t clog, it’s saved me so much time… already paid for itself just sanding Christmas gifts.
And
As with most sanding you definitely don’t want to use it where dust will be a problem. The catcher does reduce the dust but it’s not perfect. I always wear a mask and work outside when I can.
I’ve been playing with epoxy and just got to the point where I need to sand it. Which grit sandpaper did you use or was it multiple? Also do you wet or dry sand?
Totally new to sanding so I wanted to check before I buy anything.
Snapmarks are still available and functional to some that had them (like myself), for which I am grateful, but to be honest they lost most of their usefulness when the precision placement toolbox was implemented. If you use a lot of jigs, they would be very handy.