So last year if you recall I did this insanity for our Passover dinner for the name cards. It was beyond exhausting as I had just gotten my printer working that week, and cranking this stuff through, and hadn’t really mastered the art of merging meshes etc,
So this year, since I have been on nights, and frantically cranking out abscess simulators (I will post in my ongoing medical molding thread when they are ready) on both my printers which are humming 24x7 (going through 4kg/wk of PETg) I had given up, and was just going to do paper cards… But then @rita offered me a PRU, and wheels starting whirring.
Well first off had to pick something I could easily do 34 of (yeah we don’t do formal dinners small here - and yes we cook from scratch ourselves) in a theme. I figured ancient egypt is appropriate, and so had a cool photo of the sphinx and pyramid behind with a nice blue sky.
So in Photoshop CC 17 first selected the sky and filled it with white. Then chopped out the foreground in front of the pyramid as it is very busy (broken columns etc) and selected the inverse. Now I had my base image:
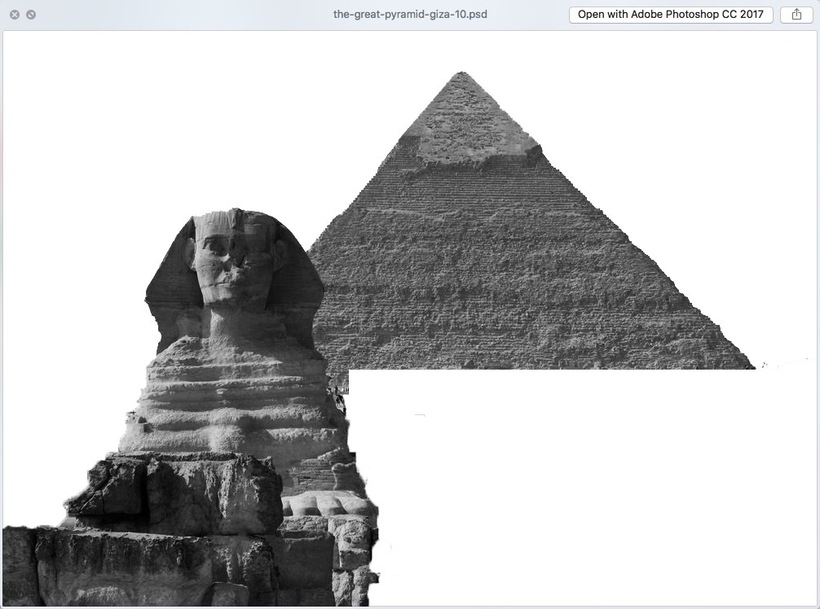
Then using the selection I grew it by 20px, so now I had that outline offset outside by 20px (I wanted a border around my engrave. Not sure if I was doing it again I would aesthetically, but hey it’s a style. I also at this point desaturated the image (cmd-shift-U) which crudely makes it black-and-white (no, if you are doing real photography that’s not exact, but we are engraving on plywood for goodness sake)
Now I saved that selection, and then opened the paths pallet and created a work-path from that selection (little button at bottom). Now under File, selected export paths to Illustrator.

Now if you aren’t an AI guy (I’m not really) you get confused because in fact the document appears to be blank, but that is because the path is exported with no stroke or fill. It’s there just empty. So highlight it (if you can’t find it, drag box or select all) and add a black stroke of some width. I made mine green. No idea why, but that’s what I did.
Then I placed the image onto the AI file, so now I have the cut line in green and the image in grayscale on a different layer.
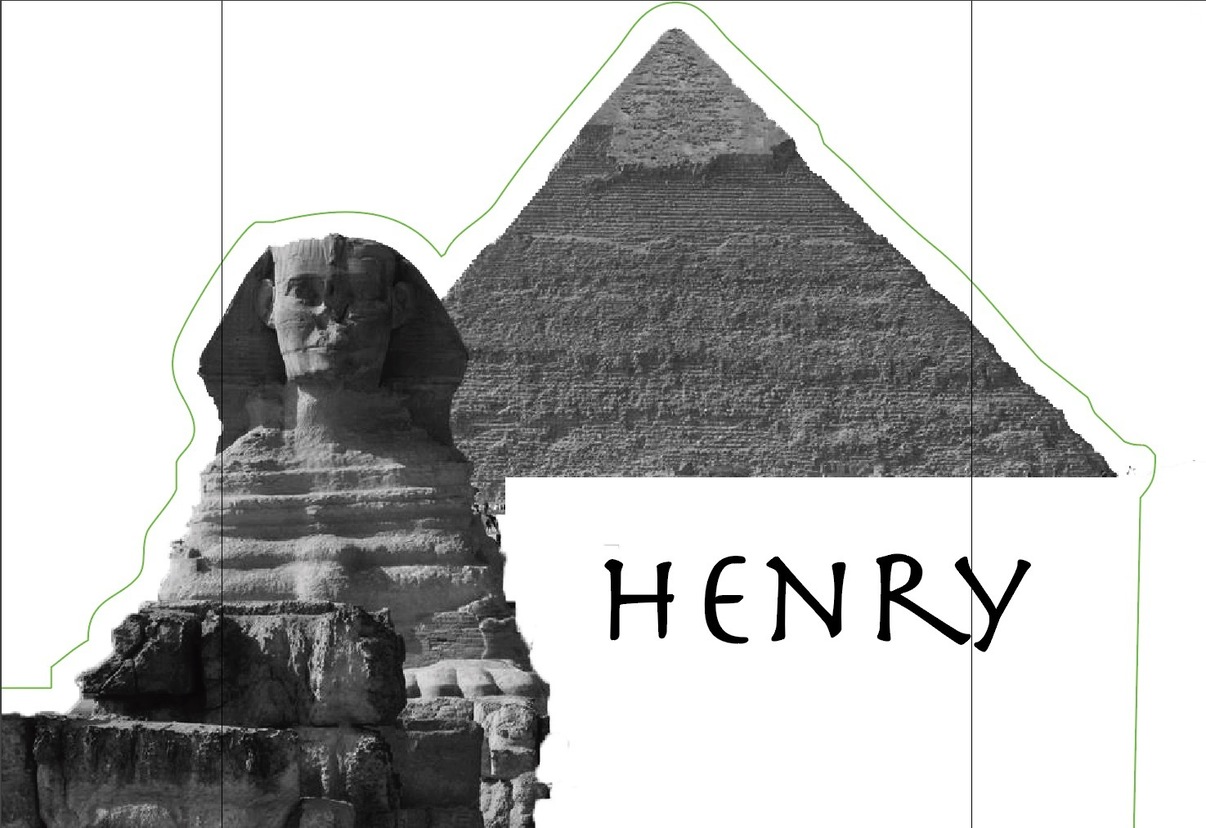
I also added my name as a test. Now before the Font-Police (![]()
![]() ) come after me, it’s ancient egypt. They literally wrote on papyrus.
) come after me, it’s ancient egypt. They literally wrote on papyrus.
Now at this point, I did what any sane person would do (this is before the GF arrived) which is of course immediately mail the insanely awesome @jules who was probably thinking “![]() step away from the adobe suite. Put the mouse down or we storm your office…” but helped out enormously in getting a file ready with a sheet of these for mass cutting all correctly set up as layers for cut and engrave.
step away from the adobe suite. Put the mouse down or we storm your office…” but helped out enormously in getting a file ready with a sheet of these for mass cutting all correctly set up as layers for cut and engrave.
And then the glow forge arrived.
So tonight have been working to perfect the name cards. While the magic proof grade settings aren’t quite there, they have some hand picked ones (it’s trivial to manually set, in reality if it never did proof grade automatic settings I wouldn’t care, since it adds 3 seconds - it’s 2 numbers). So I set “feed and speed” (well power and speed) to 100/27 for manual cut, but engrave is possible via the cool color feature:
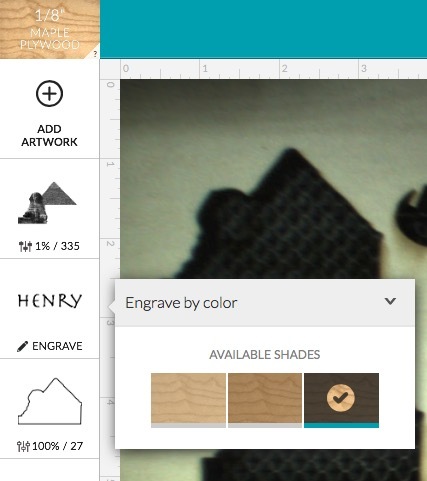
I set the name for super dark color (as those are solid and need to stand out). And then went to set the sphinx engrave.
I tried all 3 settings, . The top 2 baked the crap out of the engrave (the wood looks like it melted if that’s a thing) but the final one is so feint that up close it’s not great.
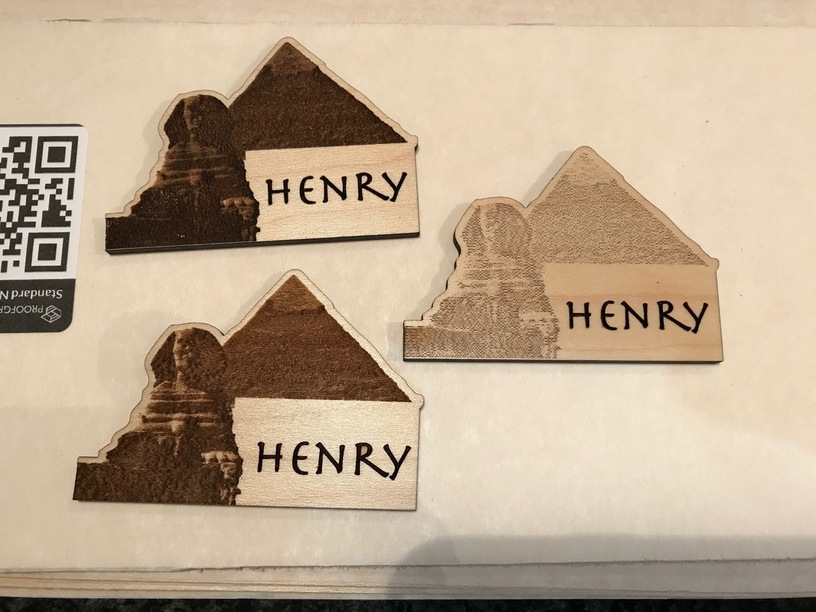
(note that is proof grade leather as a backdrop)
I tried messing with power and speed by switching to manual, without much improvement.
So like any sane person, I contacted @jules who helped me by suggesting I go to a higher LPi rather than feed/speed settings. So I upped from the default 75LPi of the lightest, to 125 (I tried the next up which is 195 which appears to be the medium dark setting). That nailed it (second from bottom)!
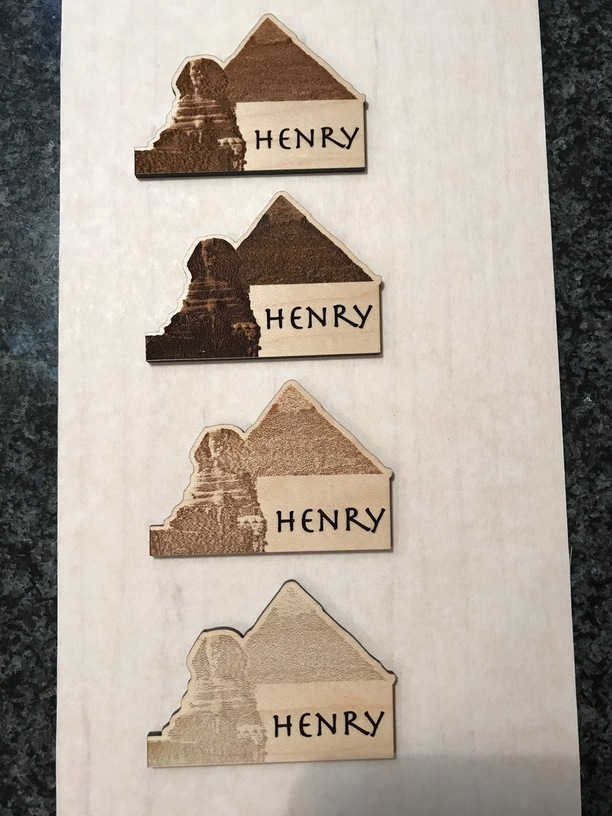
Note all of these photos are under VERY bright light, so the darker ones look slightly better, but under normal light, they look way, way too dark…
 Half of them done and filed now. Gonna pop out a little test using non-Proofgrade Baltic Birch & then head to bed.