So, I’m trying to figure out the settings for creating a silk screen with mylar. The settings have changed, so I’m re-working it. So far, the best option seems to be:
Upload as a raster engrave (used a jpg) 1000/24 at 75 lpi set to convert to dots at 70 at .01 height
This lets enough of the paint through to create the image, but it’s still a little blurry. Hoping someone here will help improve upon it. Also, the jpg image was set to 2 colors (black and white) but I guess when I saved it, it still creates jpg artifacts because the edges have artifacts in the engrave. I tried a bitmap, but couldn’t figure out how to do an ordered dither or to convert to dots. I use almost exclusively SVG files so I’m not totally familiar with these types of files in the laser.
Any help is greatly appreciated. I’ll upload photos once the next print is done.
These are the setting that worked best for me
Engrave Power 30
Engrave Speed 500
Engrave Resolution 75
convert to dots and set to 50, focus at material
It gives a very nice screen effect, I also made a frame from Medium acrylic that I taped the Mylar too, This kept it stretched tight and also got it up off the bed a bit.
this also helps as it keeps it up off your material you are printing so you can get a good amount of ink in the screen before pressing it down to the fabric. I am planning on doing a video tutorial, but it will be a few weeks before I can get to it.
There have been a few discussions.
Here is a tutorial, with updates further down in the conversation.
I’d trust the settings as described by @tom.
I haven’t run new tests.
Unless I’m mistaken, those are the settings from before the update. That’s exactly the result I’m looking for and I’m going to try Tom’s suggested settings. I will report back.
Edit - I misread your post. I thought you were suggesting there were updated settings in the No silk, no screen post. Cutting my screen now.
Though, I also misread your initial post. I thought you were presenting new settings. I didn’t read closely enough to see that you used the settings I originally recommended and were seeking an update.
I think this is the best it’s going to get for the present. I tried MANY variations. Almost every setting for 500/30 burned all the way through my mylar.
I eventually settled on the following, upload as png, dark gray (html #232323), no black, manual engrave 1000/24 at 75 lpi set to convert to dots at 60 at .01 height
I used speedball fabric screen printing paint and a brayer. I did tape the material (jersey fabric) and taped the mylar on top of it. I attempted an oil based gamblin etching ink first but really couldn’t get it through the screen. I think if I added some tack reducer to it, it would work and the pigment load would be heavier and it might look a little better. Overall, not bad for a vintage faded look, but not really screen printing quality.
I did have a typography frame around the words, but it had a straight line (in the same direction as the dot matrix style engraving) and it just cut all the way through and then taping the mylar didn’t hold it, so I deleted it.
Hmmm, I had good luck with those, had the same mylar too, May have to try again. I did find my squeegeeing had a big effect on it, and I never got “silk screen” quality, but close
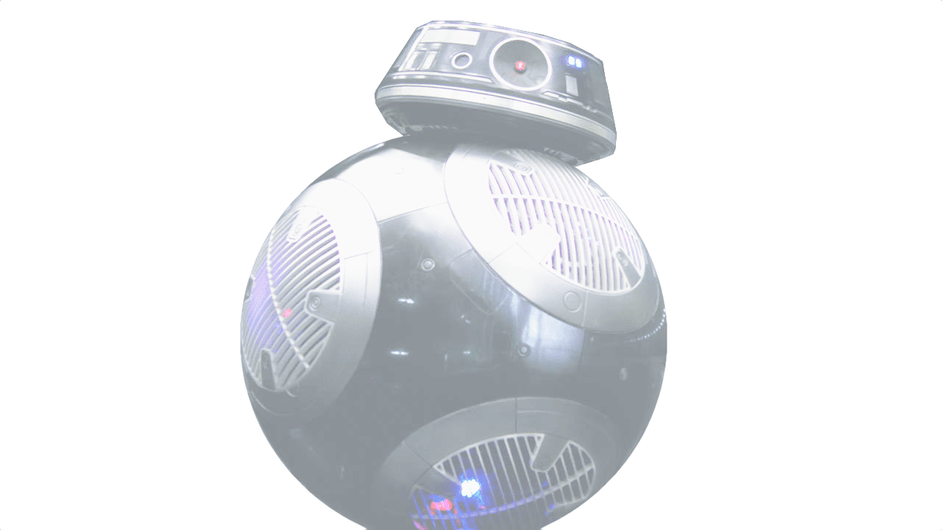
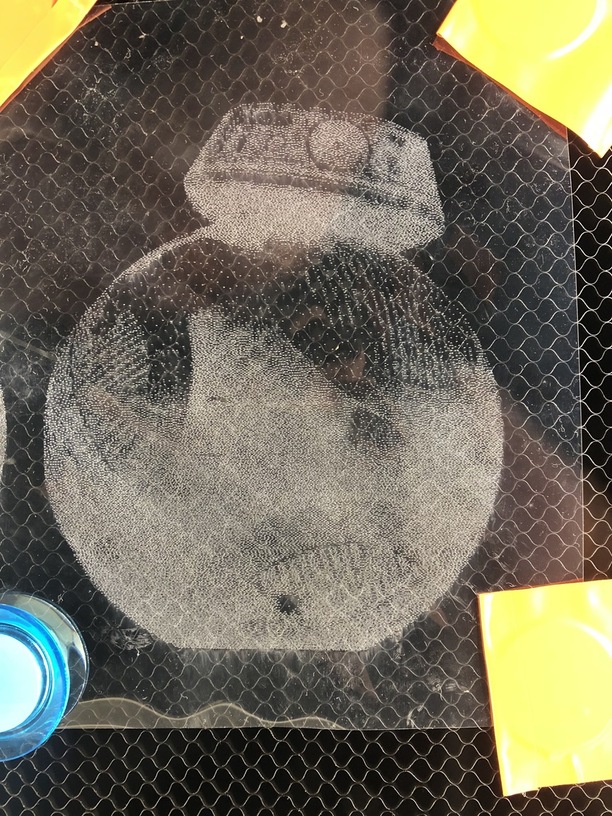
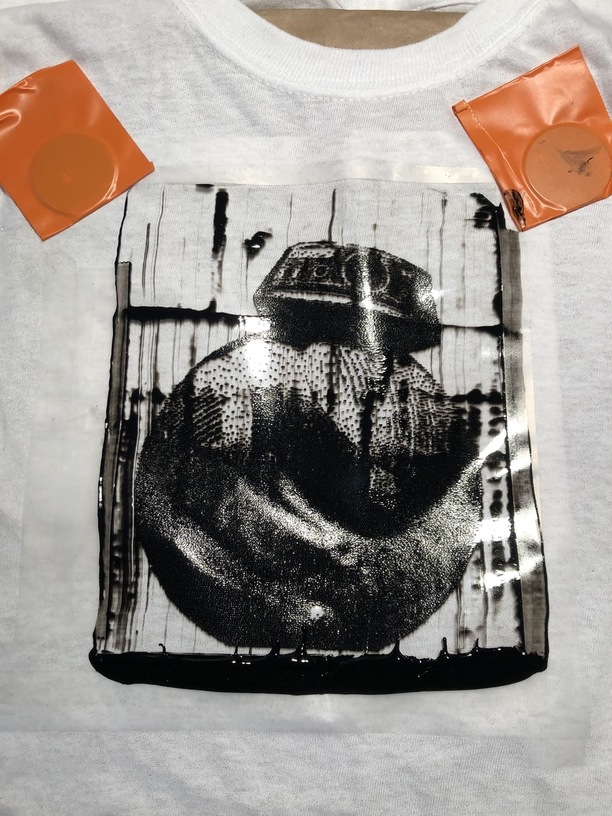
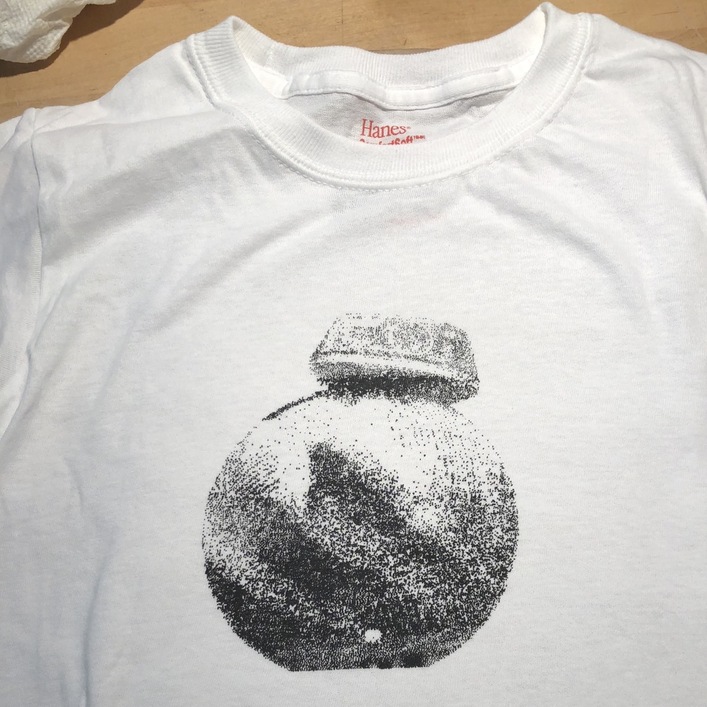
Took image from BB-9E | StarWars.com, masked the background and then compressed the dynamic range using pixelmator’s Curves filter (because I’m afraid true black would just shred the Mylar).
Doing the screen print: scotch tape the mylar onto a Haynes white kids t-shirt (purchased cheap in a multi-pack at Target) with a slice of clean cardboard inserted inside. Clamp with magnets front and back to reduce wiggling. Note that no frame was involved.
Then apply a nice bead of Speedball Screen Printing Dye to the top of the mylar, and using a plastic scraper as wide as the image, press firmly and slide down.
Looks great so far. Carefully remove the Mylar and chuck it in the sink for washing, and then blow dry the result for a few seconds before ironing it for 3 minutes on hot.
Conclusion: Pros: A fun first screen-print, with even tone, good focus and plenty of detail. This was quick, clean and easy to do, and didn’t require specialised equipment. Cons: unsatisfactory contrast. It’s clear that not all the dots let ink through : perhaps they are not large enough, or did not completely cut. Subject is only vaguely recognisable and identifying marks are poorly distinguished
Next steps:
try darker images with different dither settings to increase blackness.
consider emphasising iconic detail in the image (more contrast on the eye)
Ramp up the power a bit to make sure all the holes go through.
Practise pressing harder, perhaps use a rubber squeegee instead of a plastic one.
Next time go a little slower: test some settings, and try out the screens on paper or scrap cloth before hitting real shirts
They sell a wax that is water soluble unless it has been changed by us light. By painting over it and leaving it in the sun for a bit everywhere that you did not paint would be insoluble and the rest would wash out. It was some years ago so I am a bit hazy on the details but we did put the resulting screens on women frames.
I would think it easier to make the frames with the Glowforge forge and use the wax and fabric for the design.
With a material that would absorb the uv, it would not be hard to transfer the design.
Side note - by silkscreening cobalt blue on to paper towels and then putting the towels on the curved porcelain we were able to put silkscreen designs on the thrown vessels. I only did it the one time for a class but it was an interesting thing to know. With a different life it would have been fun to pursue it further.
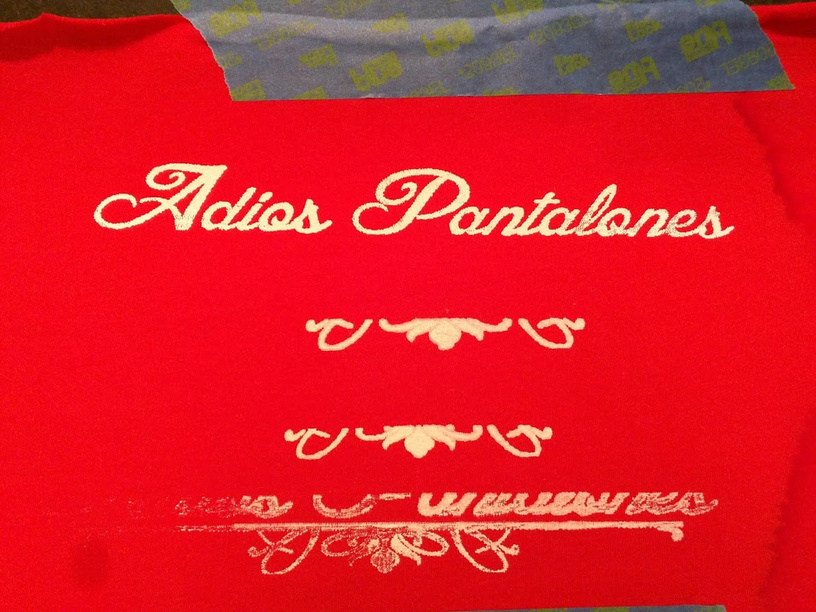
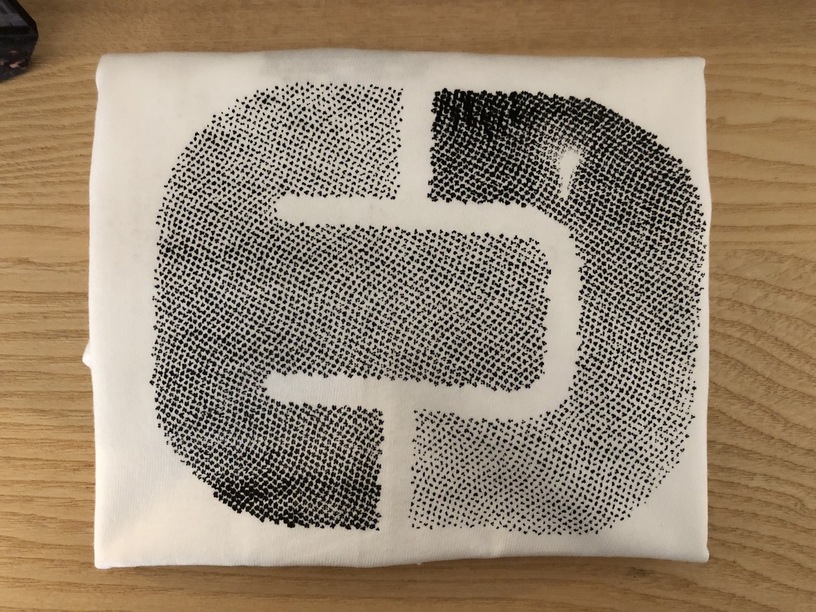
Generated a simple vector logo using Fusion 360 (but anything would do), added gradients and rasterised before sending to http://www.halftonepro.com. This produced a nice dot pattern in SVG.
I wanted to use vector all the way to the cut, but I have concluded that it’s too slow, and would probably end in a weeding nightmare. So Rasterised then sent to GFUI’s dot generator (clamped at 50%)
Speedball ink on a Haynes T-shirt again, let the kids operate the plastic scraper. Pretty nice output - upped the power a bit (to 30) and I think all the holes passed ink.
Notes
The original circular halftone dots are represented at a low level by a small number of dots generated by the GF dot generator. This makes the shapes irregular and non concave. I’m unsatisfied. I expect real silkscreening (using a waterproof light-sensitive agent on a fabric) has rather smaller holes. What is the densest non-continuous burn pattern I can achieve? preferably increase via horizontal modulation rather than additional scan lines?
The output is pretty noisy in terms of smooth tone gradients. This may be an inevitable result of a manual process of squeezing paint by hand on a pliable surface, or maybe I’m just using the wrong tools!