Slats for days

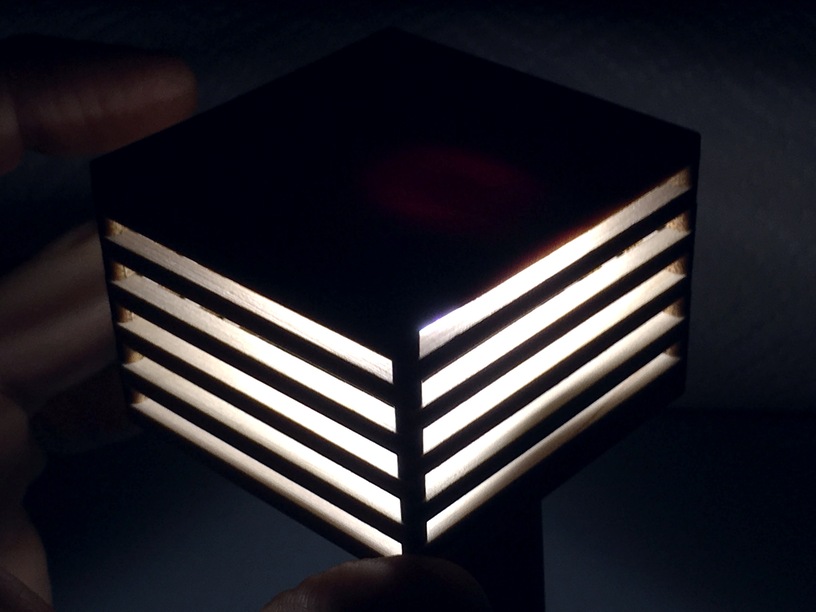
Hello, I apologize for my state of undress. I’m Slatbox.


Maple, 1/16" Brass pins

I started thinking about this idea recently, and this is a first prototype. Some notes.

  • The beauty of this design is that it’s really only three parts: a top solid piece, a bottom solid piece, and 20 copies of the side slats. It would scale up well.
  • I went for a tight friction fit on the brass. As such, getting it through the holes was a bit of a bear. Solution: put the brass pin in a drill chuck. Spinning the brass slowly made it much easier to slide the wood pieces on.
  • Cut the brass pins as close to the wood as you can, sanding them down is a pain, and messy. Metal dust wants to discolor your pretty maple.
  • Cut all your slats with the grain of your wood, they will be far too weak otherwise.
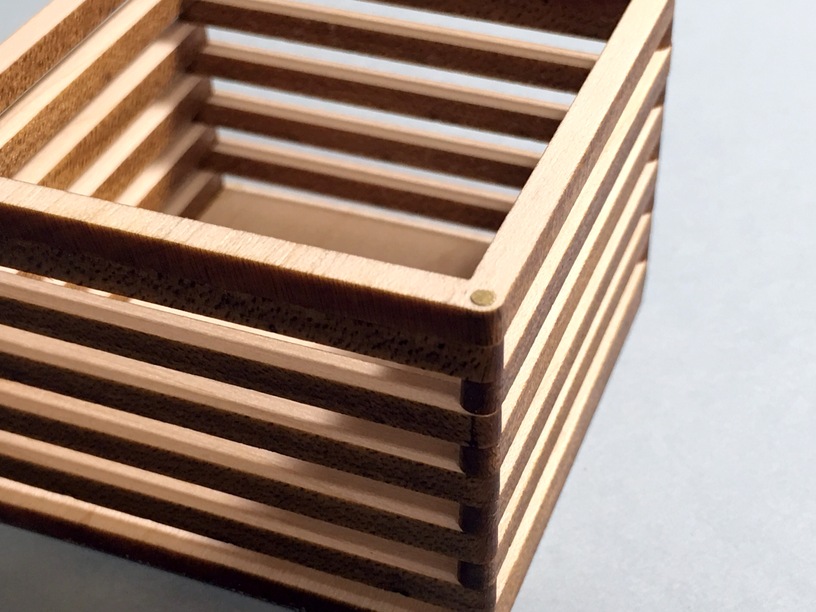
  • This is especially relevant with the top layer (a hollow square). The cross-grain sides must be supported by a slat directly below. I found this out the hard way.
  • I didn’t glue it up in general but I did glue the top layer to the support slats, and the bottom is glued to the first slats. The pins could be tapped loose (or you could yank the box apart), but they shouldn’t work themselves out on their own. As such, this is not as strong as a solid wood joint in some ways.
  • All wood is 1/8", non proofgrade solid hardwood.

The slats are cut to be 1/8" wide, with a 1/8" diameter round end. The end result is a pretty clean corner joint that feels natural.


Maple, 1/16" Brass pins

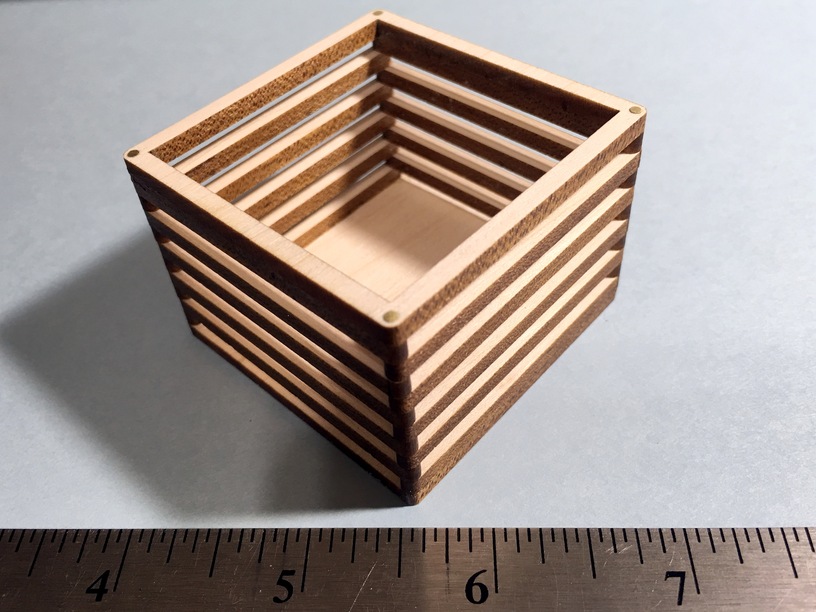
You can see how the bottom slats are glued to the base, on opposite sides from the support slats on the top layer. It was an aesthetic choice, I suppose there’s no wrong way to do it, but I wanted it to be equally “slatty” on each side. You could theoretically cut hollows on the bottom piece to make it even slattier, but I didn’t go that far.


Maple, 1/16" Brass pins

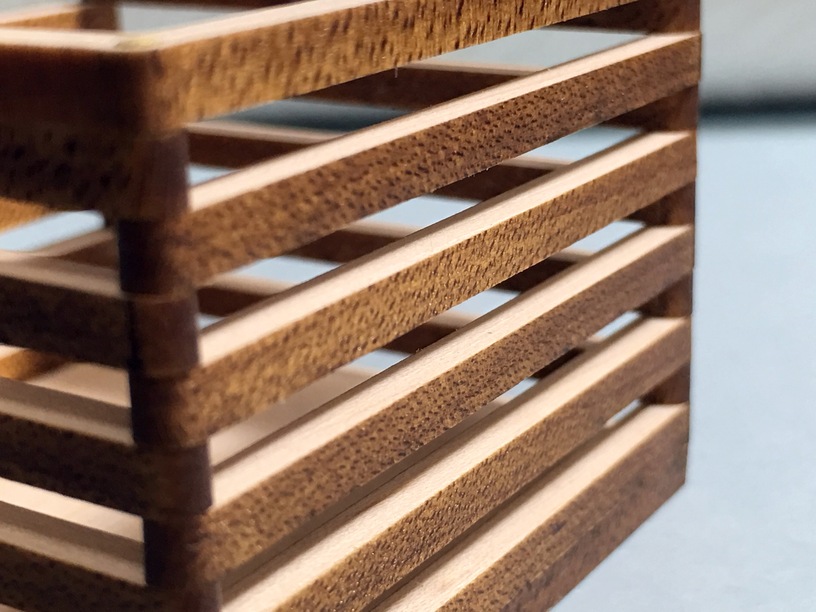
I decided to leave the edges of the slats “lasery”. I initially intended to sand the sides down and expose the bright maple, but in the end I liked the contrast so I went with it. Sometimes you choose the design, sometimes the design chooses you. That being said, I don’t like to oil/finish the lasered edges until the sticky residue has set – it can smear and make nasty discoloration. I will probably come back and oil this box in a few days.


Maple, 1/16" Brass pins

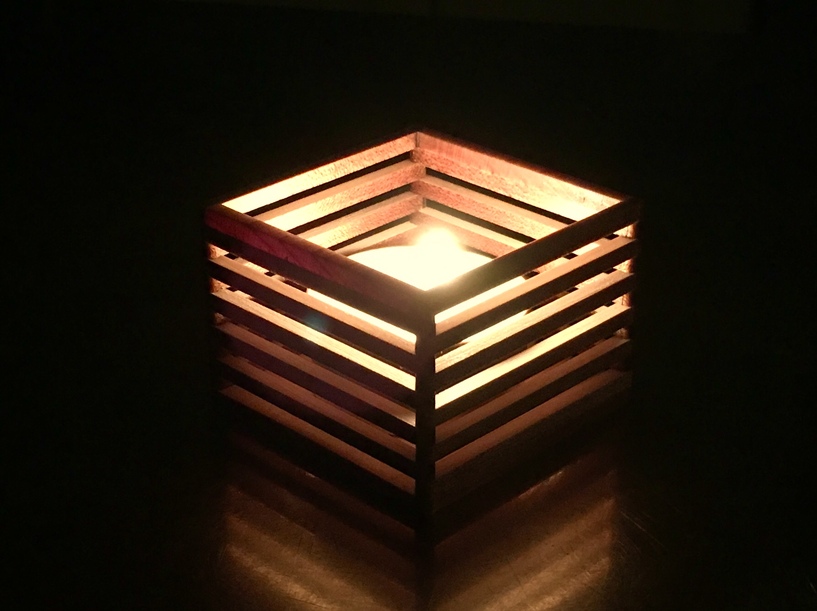
As for what kinds of applications there are for this, who knows. It’s kind of fun when you light it, so maybe it would make a good shade?

Final thoughts…

This technique could be used to make arbitrary overall shapes. Cut a star-shaped base and top, and voila star-shaped box. Cut an octagonal base and top, voila, octagonal box. Cut 2 sets of slats long, 2 sets short, voila, rectangular box. I think the only limit for this technique as is would be that the design would need to have an even number of sides.

With proper short pins, you could also make woven surfaces, or use pieces to make a sort of negative space design. With various length links, it would be easy to make a dimensionality or surface texture to things here. If I were to do that I would look for fixed-length pins that you could just slot into place. As a proof of concept, I think it worked pretty nicely.

Also, yes, “slattier” is now a word. Zip it, word nerds!

A quick bonus: scale of the slats.


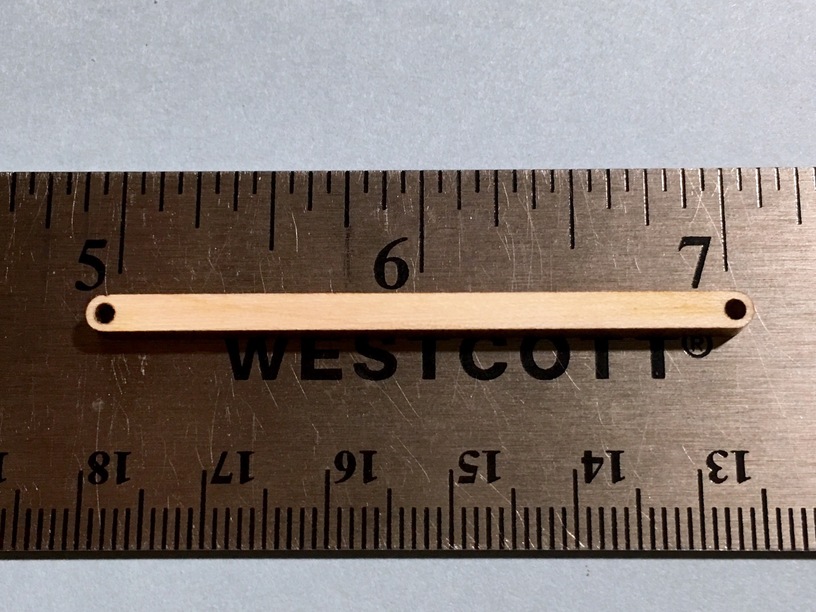
Maple, innovation? New to me anyway.

60 Likes

This is SO beautiful. I love the simplicity.

4 Likes

Make a fair tealight holder…

Just don’t leave it unattended. It’s flammable, you see :slight_smile:

12 Likes

lovely

2 Likes

And there you go again making things that make me jealous.

7 Likes

And a tea light holder.

Without more examples, I’ll have to assume this is a slatistical aberration …

6 Likes

Looks like it would make a wonderful crate for miscellaneous goods, as well! I’m getting serious crate vibes from it. The scale is interesting, as I had thought this to be at least 3x as big as it is. Pretty great concept!

4 Likes

Thanks!

The idea would scale up so easily, just make your slats longer., or make more of them. You could triple the length but the pieces would get pretty flexible after some point. Alternately you could do three lengths pinned in a straight line and get a woven effect on your longer side. There really are lots of ways you could go with this.

6 Likes

Thanks, but don’t be jealous! Steal it and improve on it! The beauty here is that this takes almost no skill, everything is lined up for you. The brass rods came from Michaels, inexpensive and easily sourced. (Even cheaper online).

Don’t like brass pins? Get copper or aluminum or even steel, Softer metals are easier to sand down (steel might be too much trouble). Don’t like metal? Use dowels. Want it to be 100% GF made? Cut pins.

Don’t like wood slats? This would be super cool in acrylic. Heck you could mix and match materials, different species of wood, different colors of acrylic, even a good stiff leather.

Straight sides? Literally for squares. Curve your links. Put sharp angles on them. Make them have inner cutouts. Engrave their surfaces. Paint them.

Locked in place is optional. Leave one side loose and now you have hinged slats. We have reinvented the hinge, we’re so clever! ;). Make your pin hole a slot, now you can slide the slats back and forth. Limitless.

This was only the proof of concept. I hope someone runs with it, it has a lot of potential.

9 Likes

And, a nice use of those little scraps of material that are really too narrow for just about anything else. A random mix of bits would make a pretty cool tea light or container. The design would make a cool pencil holder.

3 Likes

This one’s fun. Lot of possibilities. :sunglasses::+1:

2 Likes

I like it! It would make a great pencil, scissors, kitchen tools box. Graduate the lengths of the legs and make bowls or vases.

2 Likes

Really like the shape, the way the light passes through, and the building of it would be fun.

You could make a kit with slats and pins and then it would be a build-your-own-slatventure

2 Likes

Yeah, had to stop off at the HW store this morning for some brass rod. (Dang it!)

4 Likes

I also used the brass rods in my finger joint experiments. There’s one with small brass inserts.

2 Likes

When I get my machine out of storage and running, I think I’ll use this technique to make hexagon or octagon shapes for some ideas I have. Of course, now that I’ve mentioned it I doubt I’ll be the first to try it.

I’m totally good with that.

1 Like

From my OP:

So I think the cat was already out of the bag :slight_smile:

OMG where was this idea my whole life.

4 Likes

Where was it during the first three pins? I considered it early on but was like “naah, I got this”. When I finally tried it with the 4th, I was kicking myself. :slight_smile:

1 Like

Well you caught on faster than me. I’ve been using them for hinge pins for years and never thought to use a drill. I hammered things on with a rubber mallet, and as often as not BROKE what I was trying to attach.

3 Likes