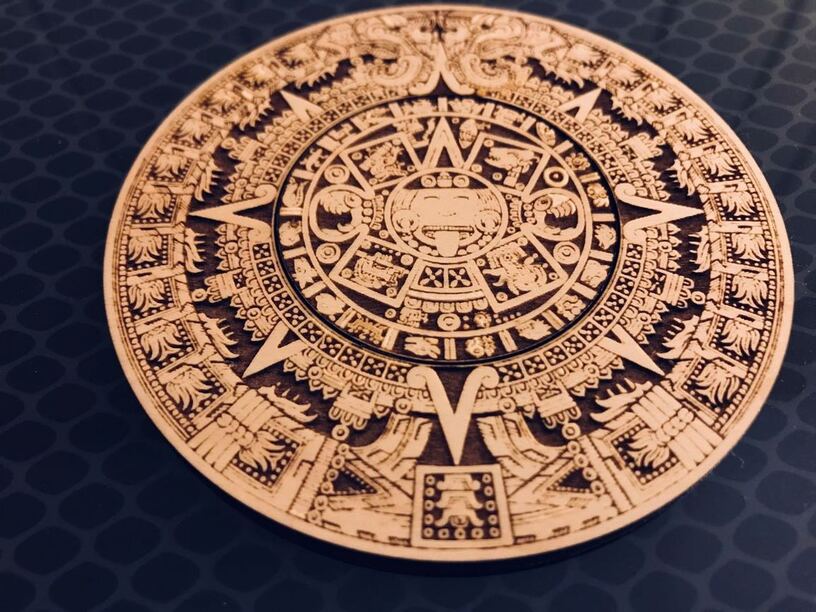
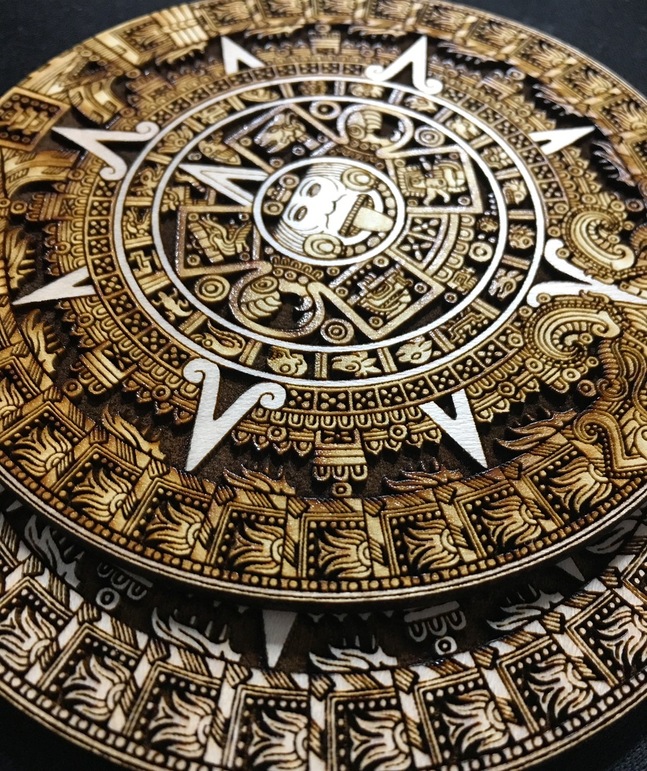
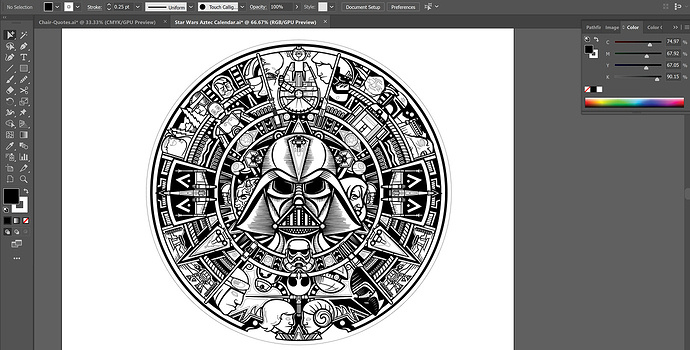
If you’ve been kind of a casual laser cutter fan as I have, you may have seen that really detailed aztec circle calendar floating around at maker fairs or pinterest pages etc. Well apparently that’s kind of a signature test print from Epilogue lasers for their high end equipment.
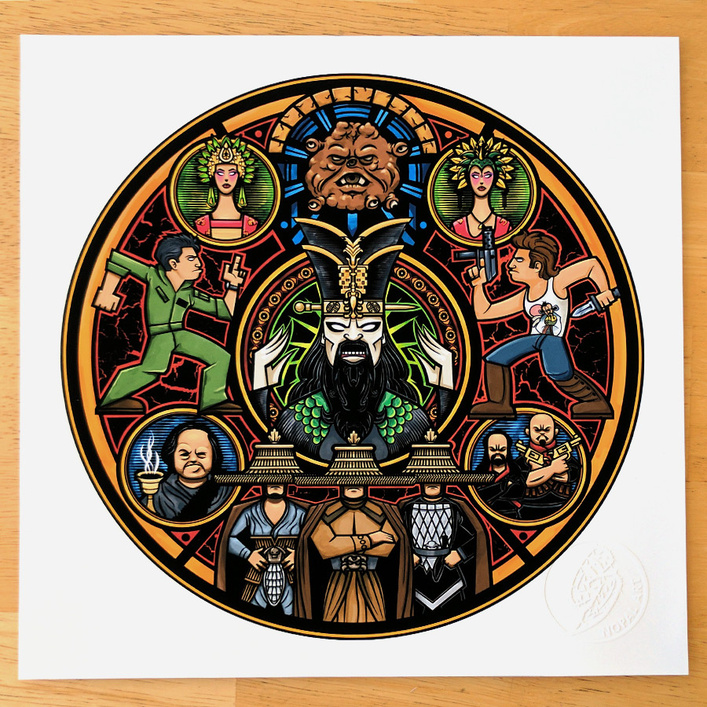
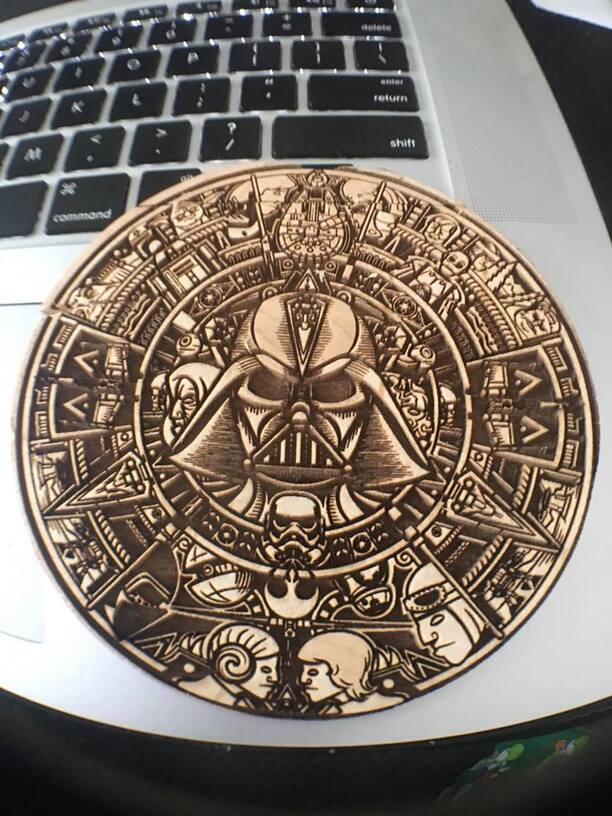
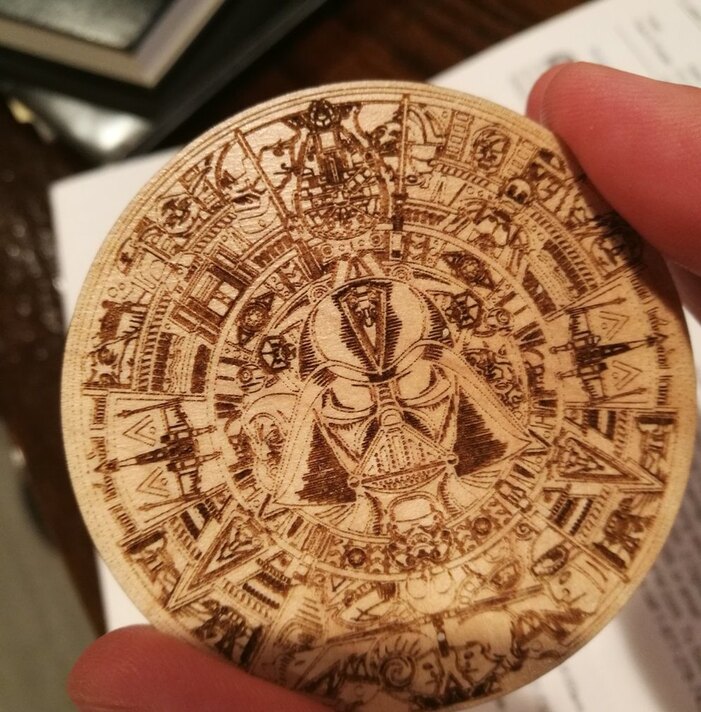
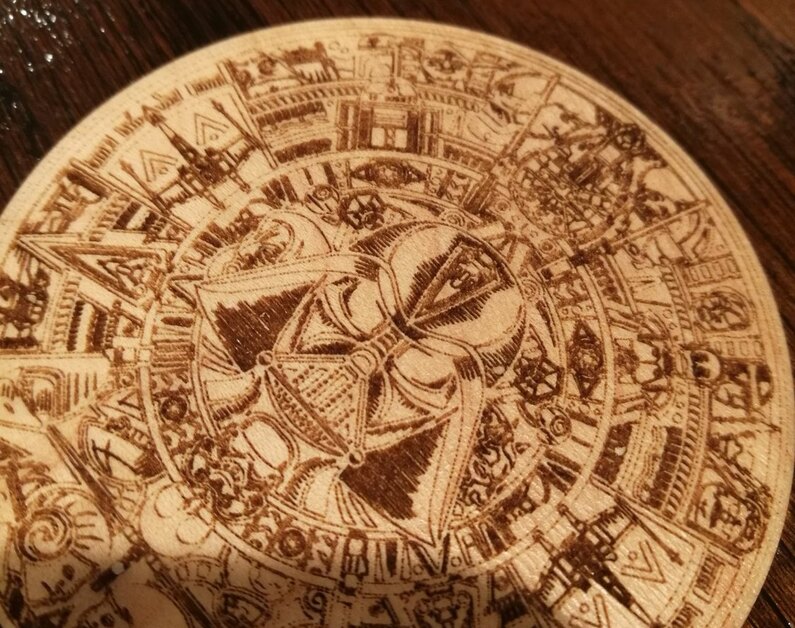
I’ve been wanting to show the Mrs. what this new glowforge pro can do. So I thought, the detail in the aztec calendar is pretty cool. After some digging I realized that there are a few aztec calendar svgs, but they were kinda meh. (don’t get me wrong some final cuts on pinterest look awesome but I couldn’t find those svg files) Then I ran across this Star Wars version / parody of the Aztec calendar that somebody had made for the vcarve in order to CNC it. They were making like 12 inch CNC prints of this. I thought that looked more fun. It’s only my 3rd print so far.
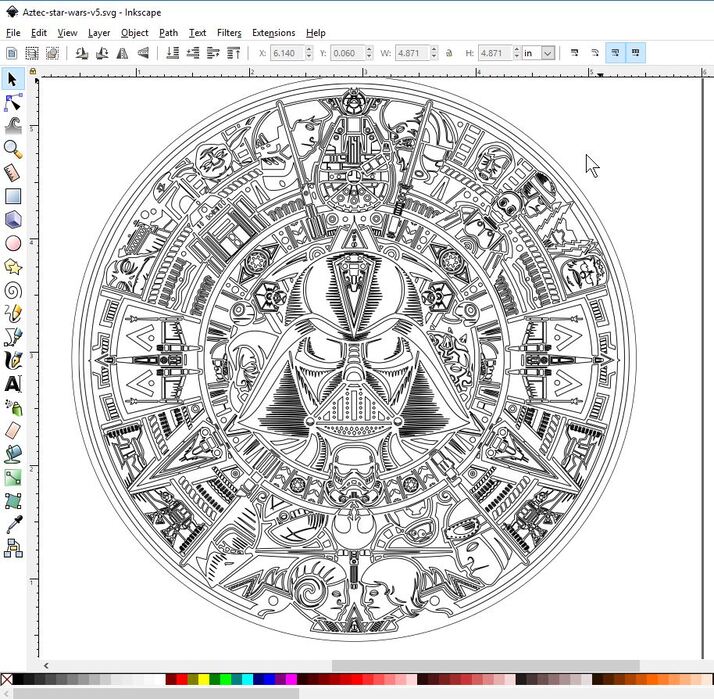
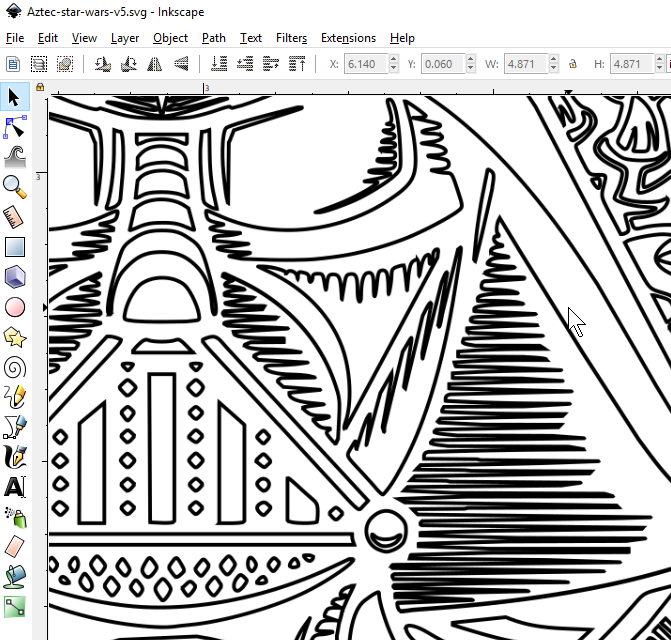
So what I did, I brought the svg into inkscape and it was just empty unstroked vector lines. I stroked the lines at maybe six-tenths of pixel width, created a 5x5 inch version on a 6x6 inch inkscape canvas. Once the lines were stroked solid black (yes black for depth I used medium gray on a test and it didn’t laser past the paper! YMMV obviously) I then selected just the center vectors and exported just that selected area to a high res PNG at like 3000x3000 pixels, leaving the outer circle as a vector circle to cut.
Then I deleted the inner vectors keeping than the outer ring, re-imported the png bitmap of those inner vectors and saved the entire thing as a plain svg with the image embedded.
Why did I do all this? Well if I wanted my glowforge to detect cutting vs engraving and to get a proper preview and decent engraving depth that’s what I had to do. Let me give you a couple bullet points.
when I imported the entire thing as vector SVG, glowforge wanted to cut it all of it, every line.
When I chose engrave instead of cut, the preview disappeared (I like my preview) - where did it go? I don’t know.
My first attempt with this bitmap / vector hybrid version I had stroked the lines as medium gray. My print, the detail was great, but it only burned the outer paper, the wood didn’t engrave (gray too light maybe?)
FYI Always embed the imported images in the SVG, don’t link them from the SVG otherwise your svg will upload to glowforge for render / conversion and that bitmap won’t be there. Also remember to save as plain SVG.
initially my glowforge wasn’t detecting the proofready material so I manually chose it, this combined with the gray stroke color could have been why it didn’t laser past the paper the first time. I don’t know.
Side note, Glowforge really should put the refresh bed button on the top bar rather than hiding it behind the gear icon.
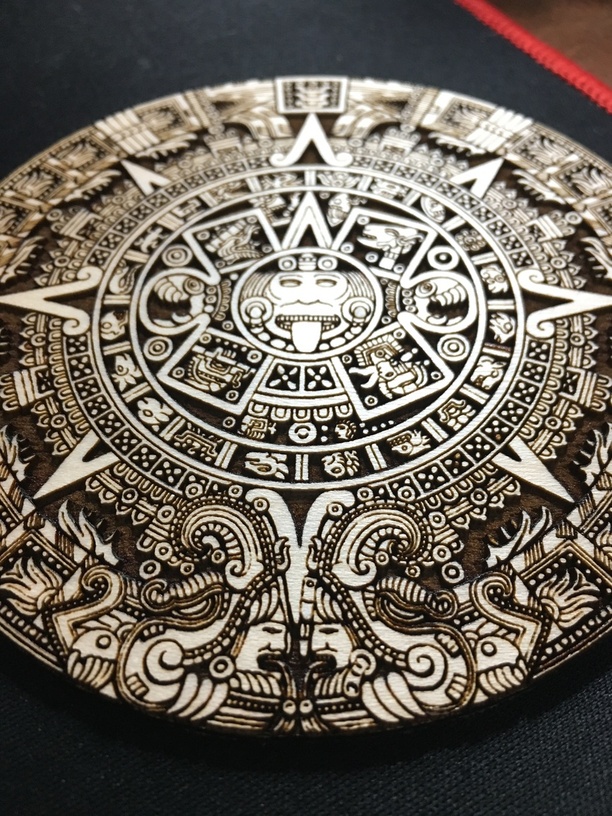
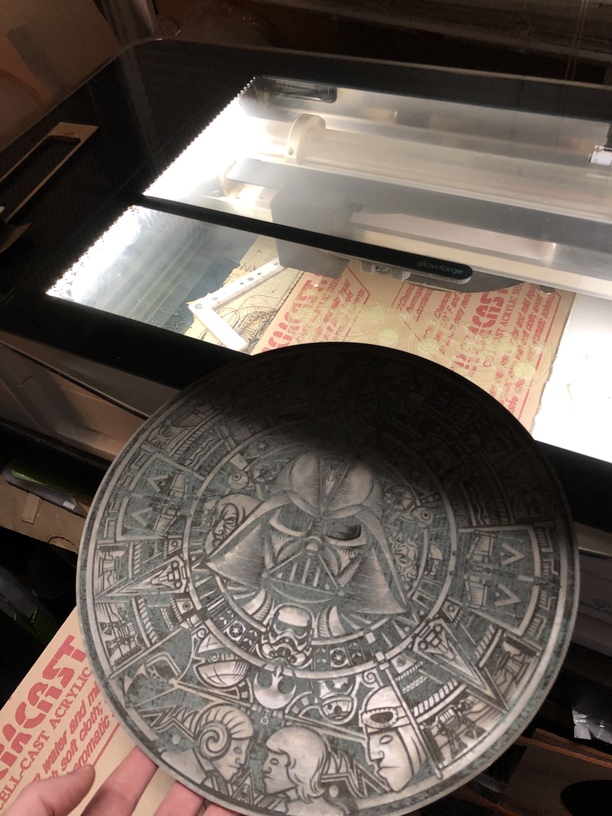
The scribbled striations in the final piece pictured below, that was actually the way the file was done, hatching scribbled lines rather than solid colors. Pretty cool how it turned out though I think if I was printing something like this to sell or I’d work on that file some create some solid areas and maybe some different depths. Not sure. I’m guessing there’s an art to depth of engrave and gray tone.
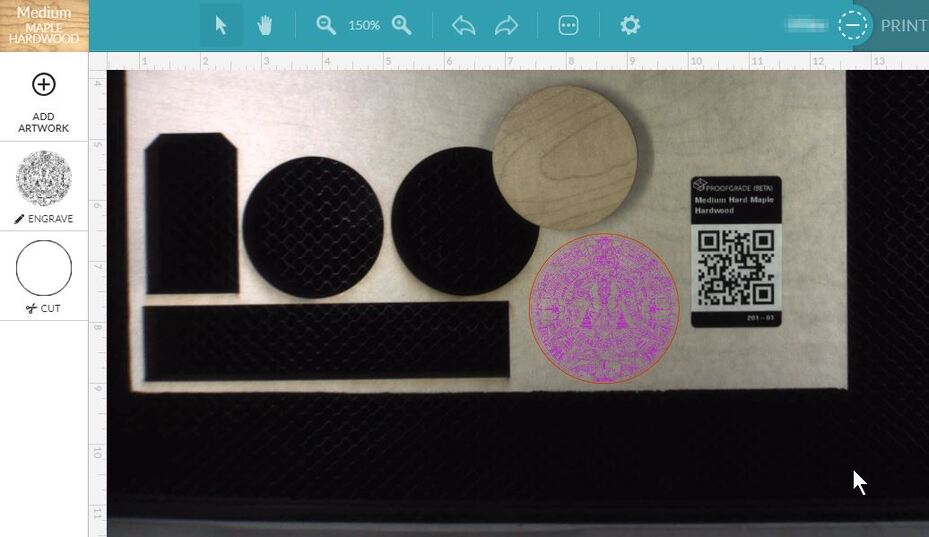
I shrunk the 5 inch svg image to about 2.5 inches diameter in the glowforge app preview and lasered it. The detail is very nice, some pixels on the thin lines were lost but, I’m pretty sure that’s because the lines, were 6/10ths of a pixel, and it was halved in size on the final print. This is highly detailed on a very small area. If you see artifacts, it might be some of the proofgrade material sticker stuff left over. For the most part it rubbed off easy but a little wasn’t coming loose and I wanted to show this, I’ll clean it up with tape or something later…
I don’t have my yet, but it’s my understanding that the GFUI ignores the stroke width on vectors. A non-closed vector is treated as a cut or score depending on the operation you select in the interface. That’s probably why the vectors disappeared when you selected engrave because there where no closed shapes with a fill.
I think there is an operation in Inkscape that will turn those strokes into the equivalent filled shapes. Others here can give more detail there.
When engraving from a bitmap, you have the option to vary the power with the shade of grey, or to have it convert to dots in a couple of ways.
When engraving vectors, the color of the fill defines the group to which you can assign operations to in the UI.
That engraving looks great for your 3rd print! I hope my 3rd is as good
Amazing detail! Yep, the amount of design time I do vs actual laser time is way, way higher. It will get better as you get more experience in how the design program output translates to Glowforge results.
Johnse is correct, strokes do nothing other than set the default operations order by color. Filling a vector causes it to be treated as an engrave. You can change what you want by clicking on the thumbnail then clicking on the down arrow.
Two passes, map power engrave. Original file is a vector, but has superimposed white paths over black so unsuitable for direct use. Needs to be “flattened.” I started running combine paths over everything but gave up when it showed no intention of finishing, converted to bitmap instead.
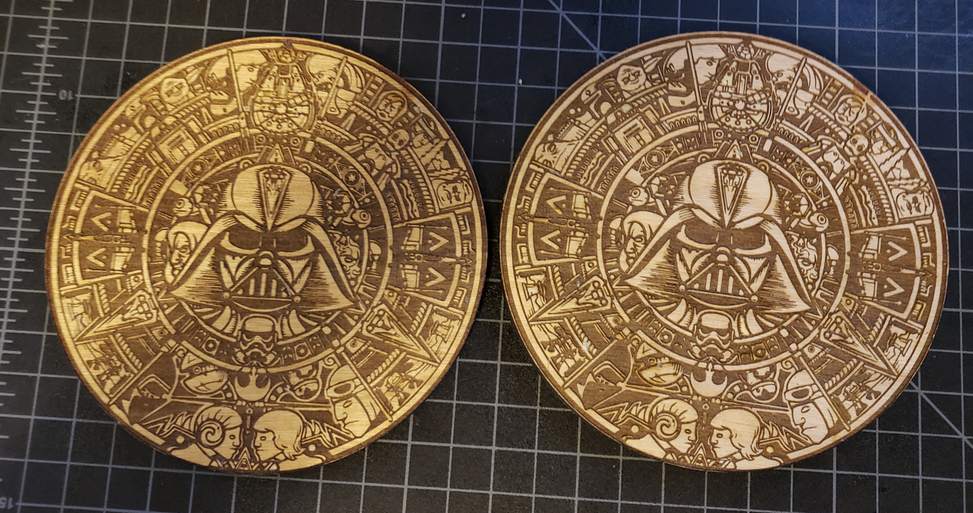
Bringing this back from the dead, I finally got around to making a few of these this morning and like the result. I did have an issue with the GUI not accepting embedded PNG’s or JPG’s to try to do a 3D engrave of this, so I settled on black and white. My died after these printed, but the plan was going to try and make a larger one.
I know this is an older thread, but I wanted to make this for a friend who is an absolute Star Wars addict but I am having a really big issue with trying to get the darker areas filled in from the SVG file. I have it in Illustrator and I thought it would be as easy as selecting the outer circles and adding a black or white fill so that it would not be all outlines and have the dark areas filled in. When I do that, it fills in most areas, but there are still a TON of details missing and are hidden under other objects. It’s impossible to select them all because they are all on different sublayers. Does anyone have an easy solution for this or do I have to go shape by shape and bring objects forward/back and fill them in all individually?
I would be ever so thankful if someone can help me with my current swiss cheese knowledge of Illustrator and show me a simple way. If there is no simple way, then I just want to know before I go ahead and spend hours on this filling in the shapes I need to engrave!
I have attached a screenshot of the current status my file is in after changing the fills of the outer circles…
 yet, but it’s my understanding that the GFUI ignores the stroke width on vectors. A non-closed vector is treated as a cut or score depending on the operation you select in the interface. That’s probably why the vectors disappeared when you selected engrave because there where no closed shapes with a fill.