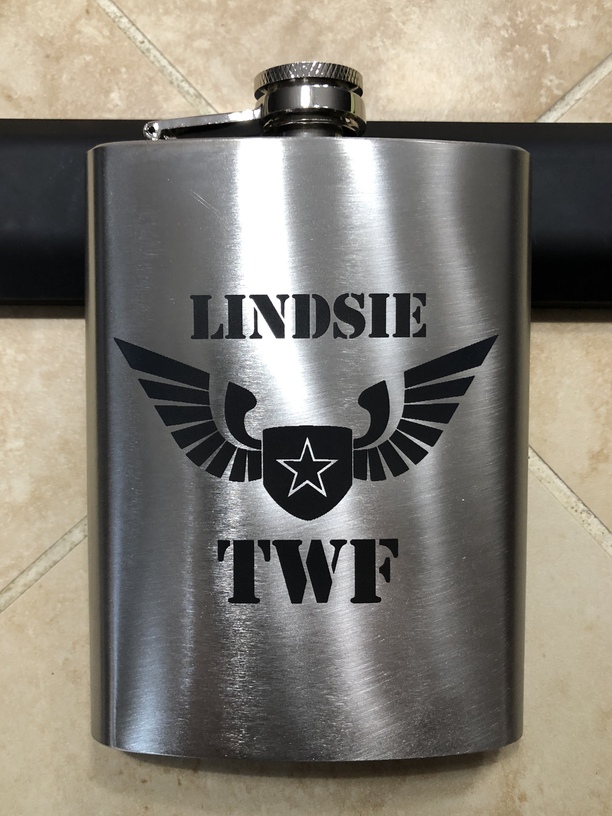
After a bit of trial and error, I was able to find the optimal settings and setup to mark on stainless steel flasks.
Wow! Amazing results! Care to share the details of your prep and settings?
14 Likes
Looks fabulous! (But please list the settings in the Beyond the Manual category, not here…legal reasons.) 
4 Likes
Absolutely! Im not sure what the legal reasons are as Jules below mentions but I will post them in the beyond manuel section. I took photos too. Thanks
1 Like
Thanks for the heads up Jules, I will post them over there now.
3 Likes
THANK YOU! ![]()
We’re supposed to keep any non-Proofgrade settings information in the BTM section because it has a warning up front to remind new users to be careful when they try new materials and processes, and it’s listed that way in the Forum Guidelines. (Basically we just do it for protection of complete beginners.)
Relevant section here:
" Safety First - Stay with the Manual
Your Glowforge is a powerful tool that could cause serious damage. We advise you to follow the instructions in the manual and the Glowforge app to ensure you use it safely. If you have questions about safe use, post in Problems and Support and you will get an answer from a staff member.
If you would like information on operation beyond what is covered by the manual, you may discuss it in the “Beyond the Manual” section, and only in that section. Note that that section of the forum may contain information that is incorrect and may violate your warranty, damage your Glowforge, and cause injury or death. That is the only place for discussion of topics like:
- Manual settings for materials
- Modifying your Glowforge unit
- Third party add-ons
2 Likes
Makes sense. I edited the post to reflect Beyond the manual, is that enough or should I just make a new post? Thanks again.
2 Likes
That will do it! Go ahead and post your settings if you like…I’ll admit to being curious myself! 
3 Likes
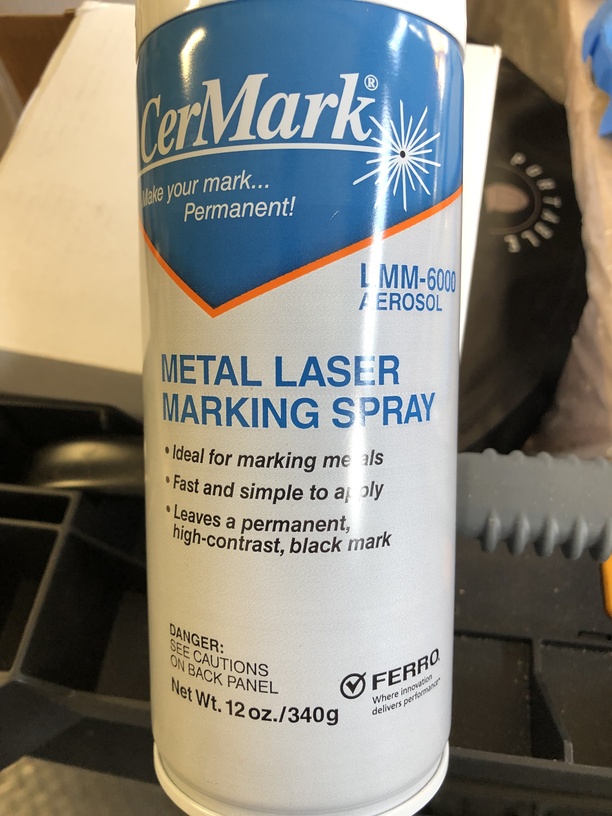
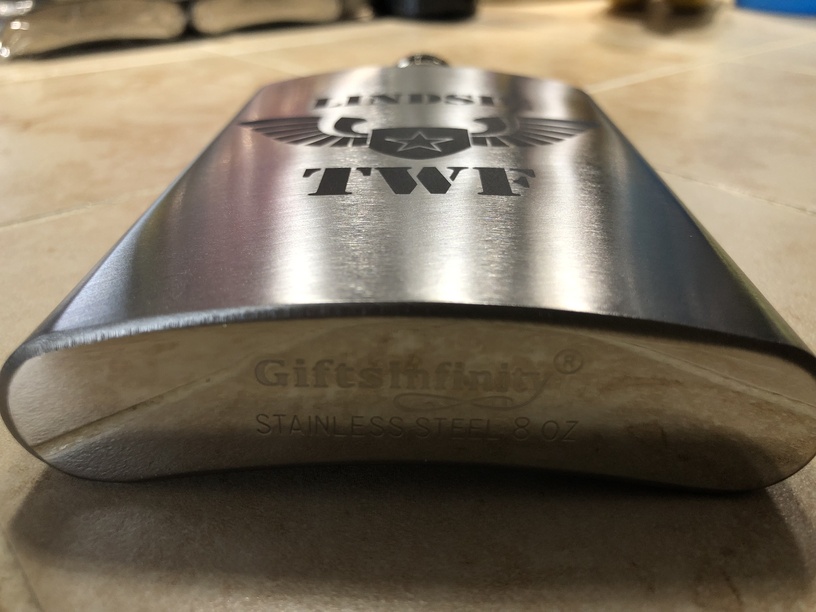
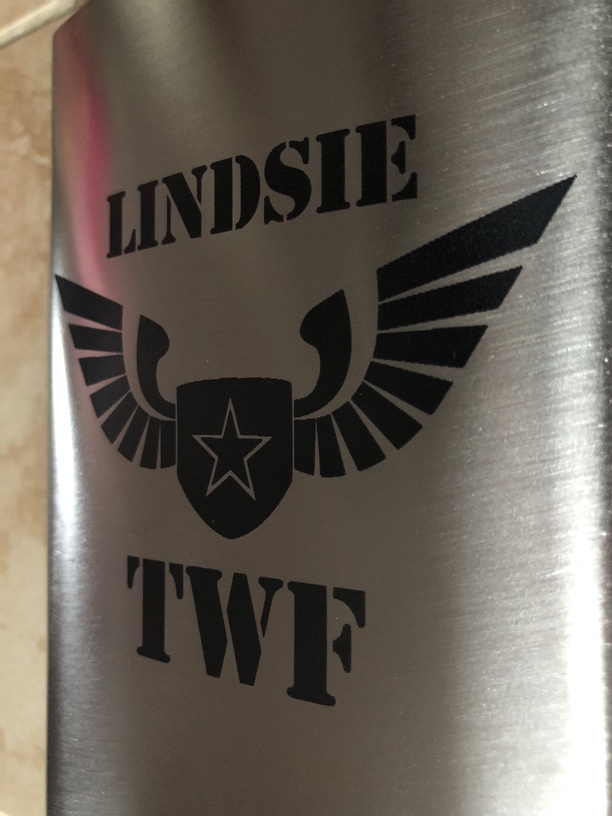
Used the Cermark LMM6000 as recommended, light even coats and then let them dry fully (I did 30mins).
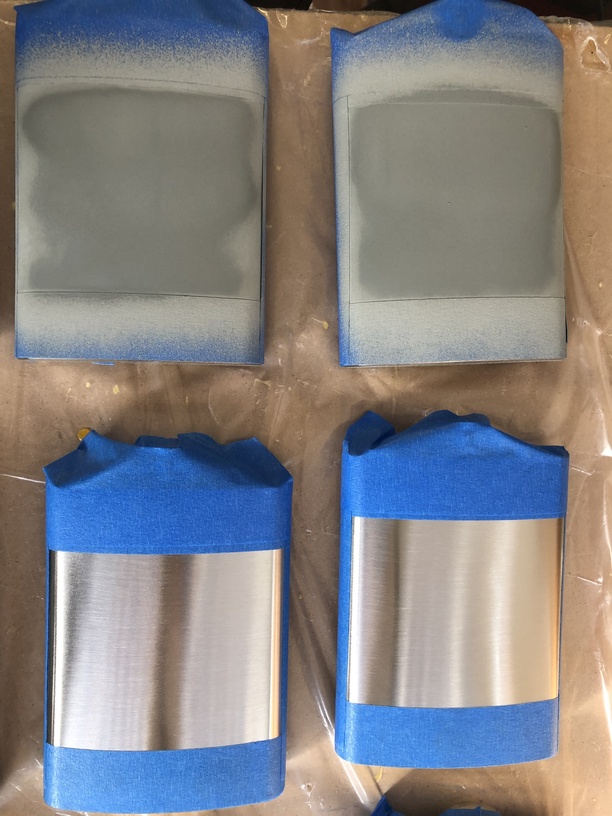
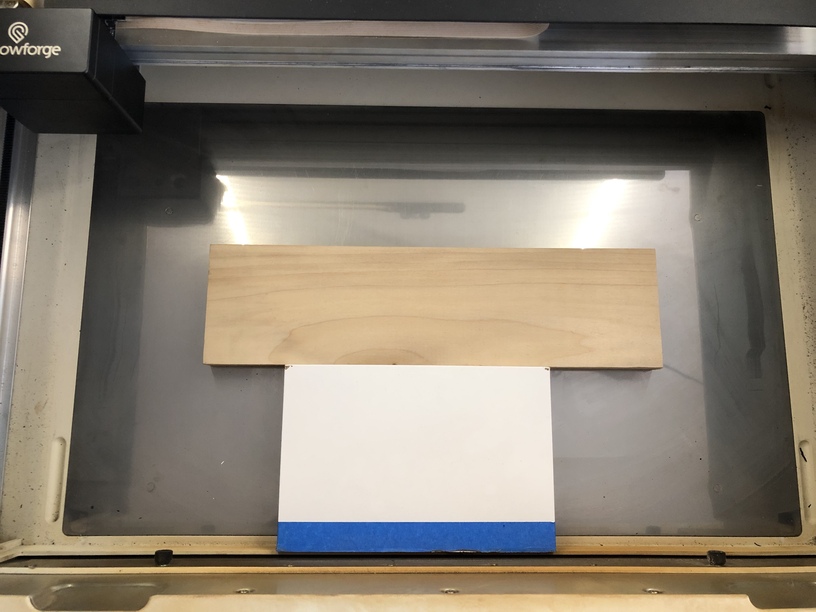
I removed the crumb tray and used one 1" thick melomine piece of wood and one 3/4" thick (both are pretty squared.
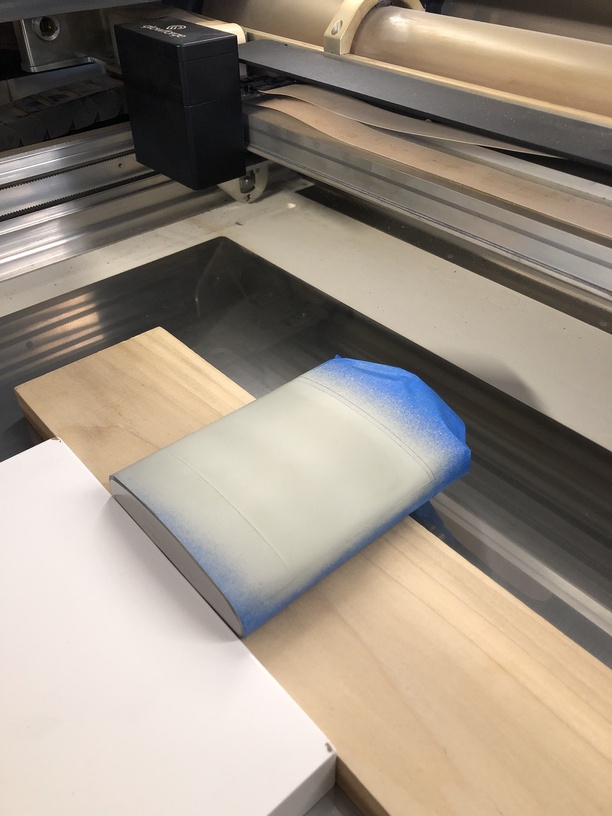
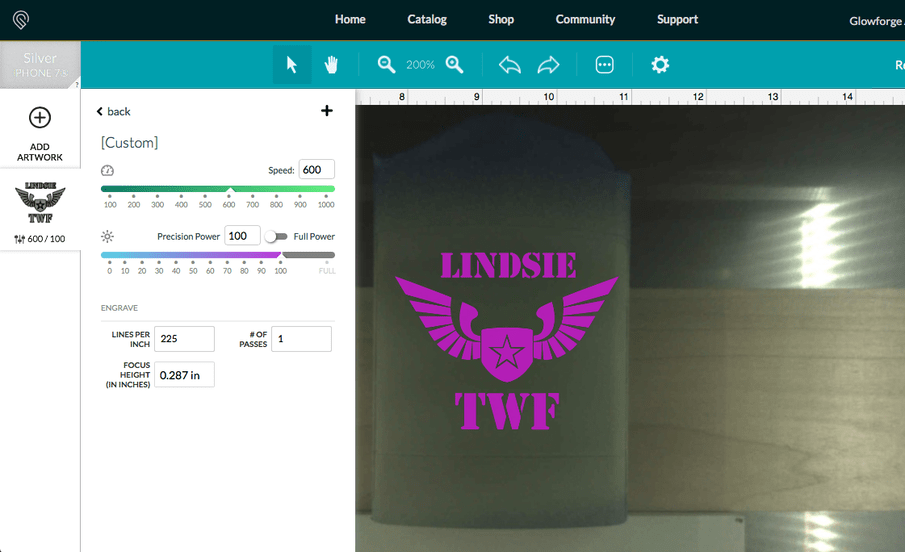
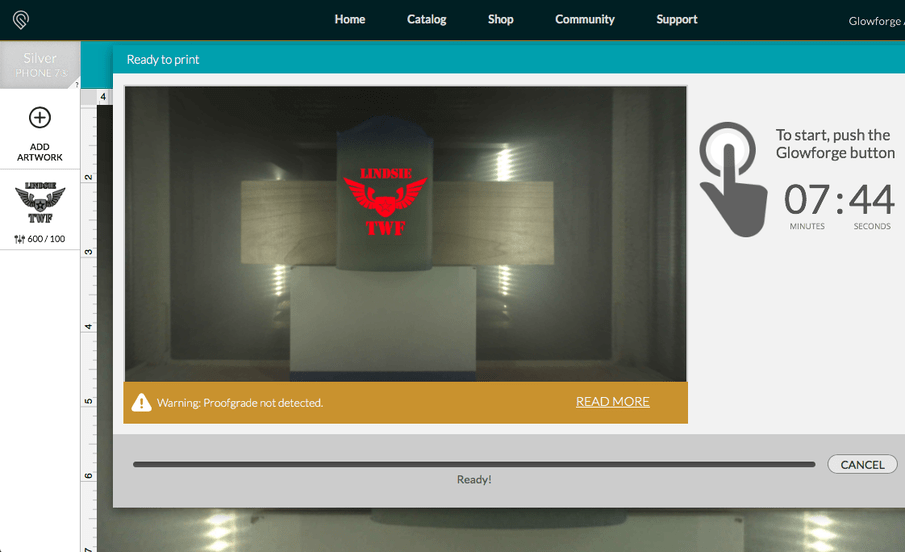
I set the material to the Iphone7 silver with a speed of 600 and a power of 100 as you can see in the photo.
Most of the flasks were 7.5 mins on average with the longest being at 7.59 mins. So all in all pretty quick prints. But after the 35th one… I was over it! Lol.
Once the print was finished I removed the masking tape, rinsed off the Cermark and dried with paper towels and finished them off with a quick buffing using a really soft micro fiber cloth.
56 Likes
Yeah, that’s a great writeup! (I haven’t been able to afford Cermark yet, but I’ll probably do it one day.)
Mind if I tag it with Settings tag so that others looking for how to mark stainless can find it easier? (Or you can do it…you seem to have figured out how the forum works.)
Good job!
7 Likes
Yeah absolutely. I must admit I was hesitant to buy it too. Its not a cheap product but the results are undeniable. And since it only requires a thin even coat, I still have quite a bit left after making 35 of those flasks. I bought it at Johnsons Plastics. I also bought other products like a liquid mask, laser foils and such for future testing.
7 Likes
Great job. Thanks for sharing.
3 Likes
Question that might seem dumb so I apologize in advance. But after you engraved it, did you paint the area over with black paint? Or what’s the rest of the process like after engraving is done?
1 Like
Thank you so much for posting your settings.
1 Like
Not dumb at all! The Cermark washes off incredibly easy under running water (I don’t believe it’s temperature specific either). So basically the final step after rinsing is a thorough drying with paper towel and I just used a super soft micro fiber towel to buff out the fingerprints/smudging. No added paint or detail work was needed. I did lose one flask as the sacrificial test piece but i feel it was worth it. Hope this helps.
3 Likes
Every project with new materials gets a sacrificial or test one included in my assessment of what it’ll cost to do. If I’m lucky and get it right from the start, I bring the test one to the local Makerspace I teach at to use as a sample. The ones I cover with tests gets a home on a shelf in my basement with Sharpie notations so that when I need to do something similar again I can pull it down for the settings.
I’m doing some Moleskine Art notebooks for my son to give his GF for Christmas and bought a smaller size that I expect I’ll cover with test patterns before doing hers. I don’t know that all of their different notebook series laser the same so I don’t want to risk the $30 watercolor art book ![]()
Everyone sees the final piece, no one sees what it took to get that ![]()
10 Likes
Wow. Excellent write up. Thank you for taking the time to share and explain.
4 Likes
Gotcha. So cernmark causes it to be black. I though it was some sort of protection spray. (So the laser doesn’t bounce back or makes the metal engraving better.) But I googled it and I understand now. Might have to pick up some to play with.
1 Like
Just think of it like the toner in a copier or laser printer. It fuses when the laser huts it just like a laser printer fuses the toner powder to the paper. The stuff not lased doesn’t get fused to the metal so it washes off.
2 Likes
Wow! Beautiful turnout!
1 Like