So the amazon reviews on these flasks say that they’re prone to chipping. Anyone seen that? Would hate to go down this path only to find out that the matte coat is barely hanging on.
I made a bunch but they have not seen much action. Thus far, no issues, but not a true test
I haven’t seen chipping, but they aren’t particularly high quality flasks. The 6 that I have worked with don’t really stand up. The bottom must be slightly bulbous.
If you don’t mind sharing, what you use to design and develop the print work. Thank you
Does it actually feel like engraving? Or is it smooth to the touch?
Quick question why are we removing the crumb tray?
Its not a smooth feeling but it doesn’t feel like a metal engraving either. It has a slight raised feel to it.
The flask are too thick to lay on the tray directly. The small fan housing would hit the flask while passing over it.
1 Like
so I would assume we need to lift it up so the camera can focus… whats a good height?
@kittski has a great diagram that explains it here:
4 Likes
I don’t remember at the moment, but I originally started this post and I believe I posted that somewhere in my mini tutorial if you will (for lack of a better term), Lol.
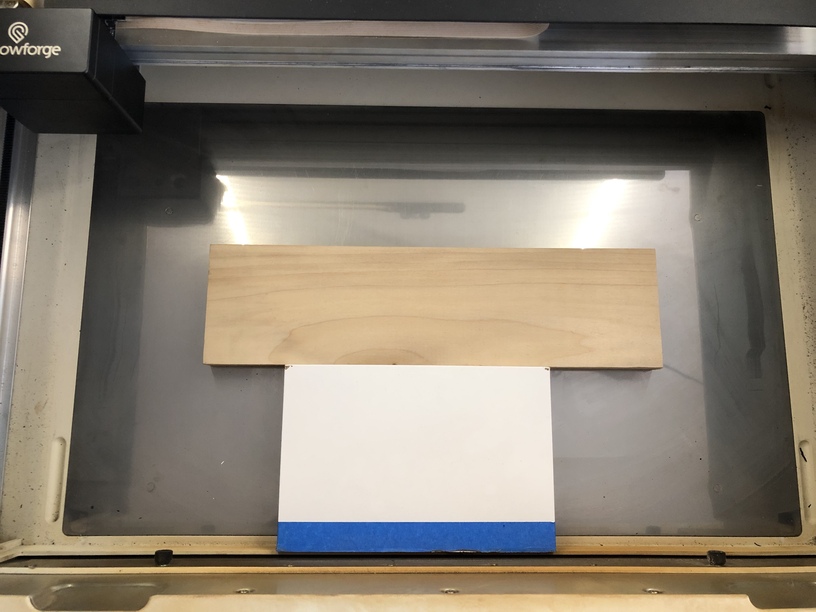
I removed the crumb tray and used one 1" thick melomine piece of wood and one 3/4" thick (both are pretty squared).
If you put your flask on top of those 2 pieces of wood, then you didn’t need to take the tray out. The tray is about 1.4" tall. If you had a 1" & 3/4" pieces of melamine then you’re already a qtr inch taller than the tray was.
When pulling the tray out, you only need to support the thing you’re engraving so its top is from 1.4 to 2.0" from the bottom of the machine.
That would be true if the two pieces were stacked. I used the melomine (since it is very square) as an edge level and laid the Flask on the 3/4" wood.
 /uploads/db6859/original/3X/1/a/1ab70b38dd16deb3008df979306b84d1002a29dd.jpeg
1 Like
Got it. Sounded like you used the two to build up to get within range of the laser.
The machined stuff (melamine, MDF, etc) are great for making squares and edge constraints like you did. The stuff is square and flat which isn’t always the case with real wood.
1 Like
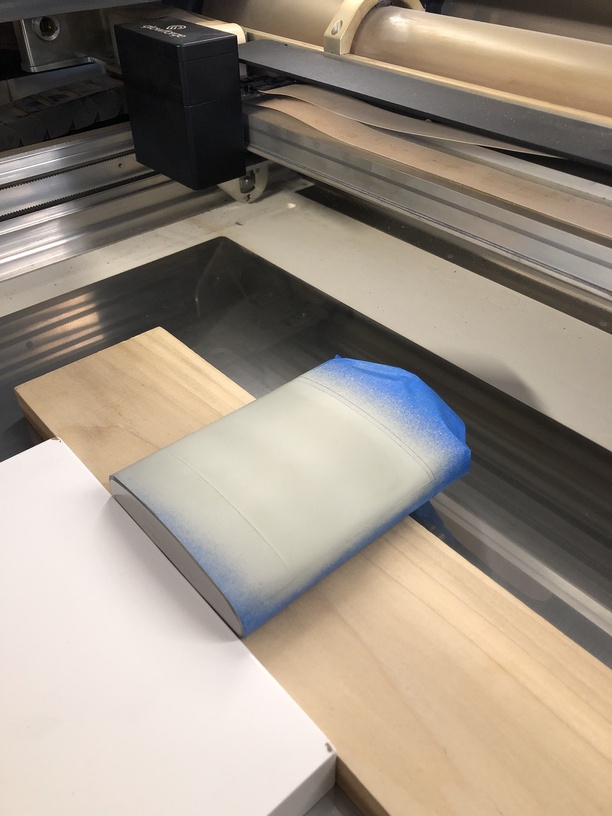
Question? Is that painters tape then ceremark/brilliance? Are we suppose to do that?
1 Like
i suspect the tape is to keep the ceremark or whatever out of the threads and other places where engraving will not be happening. less cleanup and at the end of the day, if one wants to drink out of this, less chance of tasting ceremark (which I hear is delicious).
3 Likes
Well you wash the ceremark off and the engraving is quite a bit of distance from the mouth so… thanks for your answer I wanted to hear from the OP 
1 Like
Mark14 is correct. You don’t have to do it, I just like the cleanup ease and it keeps everything in line for me too.
2 Likes
Thank you! Thank you! Thank you!
1 Like