Would like to hear from the community on this topic (sorry if it’s already discussed elsewhere).
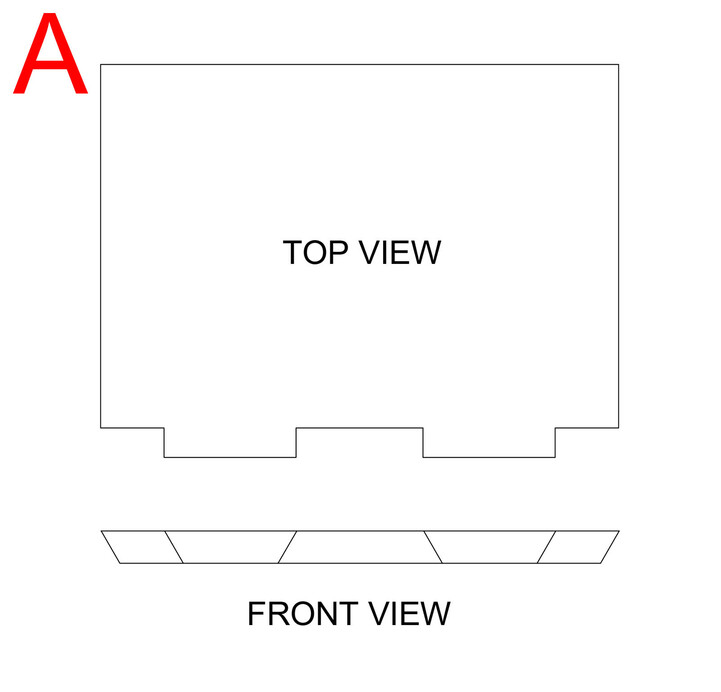
Picture “A” shows the panel of a dovetail box and the front view of what the finished cut looks like underneath (exaggerated to illustrate point)
You can see that it does not cut it straight but at an angle which adds in another variable to joinery.
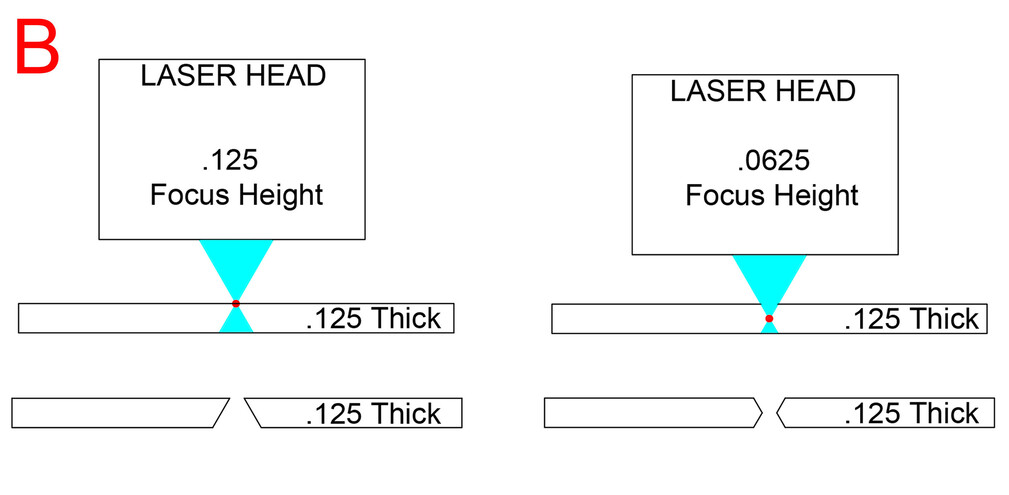
Picture “B” shows a diagram of how I understand the laser to cut with a specific focal height.
The image on the left shows how the laser cuts 1/8" material with an 1/8" focal height setting.
The image on the right shows how the laser cuts 1/8" material with a 1/16" focal height setting.
Or, investigated kerf compensation? You can get pretty darn tight if you set it up right, without “tricks.” (Yes, I know it’s not specifically kerf that you’re addressing - but you can get exceptionally tight fits without necessarily worrying about beam shape - especially on .125” wood).
I think the you are assuming that the Kerf distance is caused by the Laser only, I think however that the kerf will always be wider at the top as that will be under blast for longer than the bottom, just as digging in sand is wider at the top than the bottom, Different materials and cutting specifics will be different with the difference in width greater or less but I don’t think wider at the bottom would ever be the case.
Yes the laser beam itself has a focal point and an hourglass shape as such, however that is not how a cut will behave when going through actual material.
Setting the focal height halfway through the material means that the unfocused beam is the part making contact first and from that point, the energy from the beam has already been absorbed by the material. There will be less energy at the focal point and little to no energy density “below” the focal point since the beam is now diverging as well as having already had a good deal of energy absorbed from it through the material.
That’s a lot of words to say, basically, the kerf is always going to be wider at the top and narrow towards the bottom, pretty much regardless of what you do. However, we’re talking about thousands of an inch difference between the top and bottom kerf width.
Your cuts will never be perpendicular to the material, but as mpipes said, they won’t be like you would think they should be. Also, the laser is burning away material not mechanically removing it. In a hardwood you are burning away, dead, dried out tree cells. Some cells will take more energy to remove than others so at the microscopic level it’s not perfectly even in the Y or X direction. Don’t forget you are also leaving partially cooked cells behind and the surface is a mix of char and resin. Depending on the power and speed used, and the type of wood, the amount of energy you use can create a lot of char. That char is not a good surface for joining. Acrylic is a nice and uniform material, but by heating it you may be making it brittle and similar to the char in wood you may be melting and then “freezing” the edges. Every material has its special properties when laser cut.
Those of us who sat around here for the two years before the glowforge was delivered thought about this a lot. Pretty much wasted thought. It sounds like you are a traditional woodworker. I’d say just do some stuff and see what happens. With your experience you’ll learn pretty quick what is different, what is the same and what is new.
That about sums it up. On the one hand kerf is desperately important - on the other hand most things just squeaky fit anyway!!
And crucially, no matter what you thought, the material thickness will mysteriously vary - making everything either (a) be too tight to fit or (b) fall apart in your hands - usually on the same joint.
I’m no expert in these matters, but after reading many posts by those that are (some have contributed to this thread), I determined I would need to cut inlay pieces flipped over compared to the surround. With appropriate kerf offset (determined by a couple of test cuts), the pieces were a snug fit straight off the machine.
I appears to me that leveraging the V shape of the cut always make for a good looking fit on the material thickness we commonly work with.