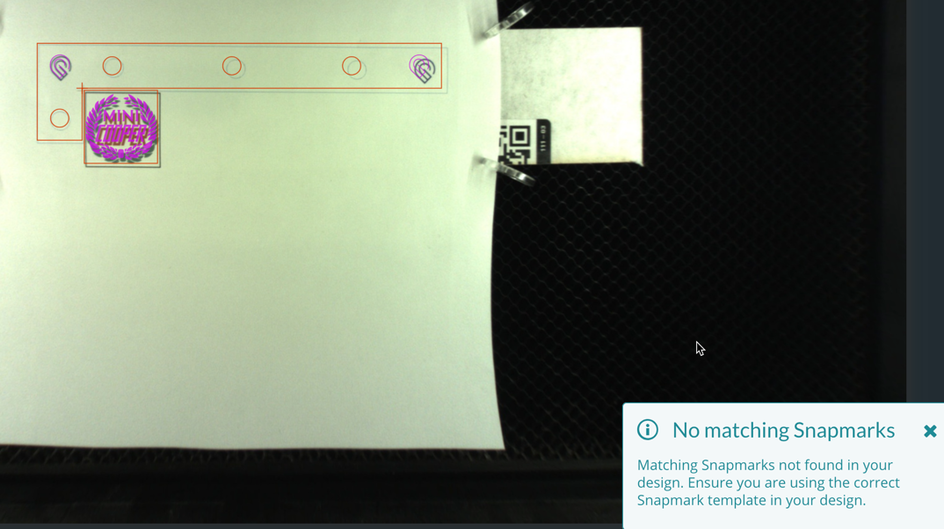
I can not make snapmarks work. “No matching snapmarks” is returned no matter what I do. I’ve tried printing a template/ijg ruler alignment tool multiple times - on acrylic, on draftboard, and finally the last attemp was just printing it on the printer and putting it ontop of a piece of acrylic to just try and get it to align once - to see it work once and then work back from that to more challenging things. It was a no go for me. It would find the left snapmark, scoot over and dawdle around near the right one then quit and say “No Matching Snapmarks”.
I went and looked at the tutorial, I verified:
100% I have the rights size marks in illustrator and on the physical pieces I have.
I am setting a height for the jig prior to pressing snapmark
I read the entire tutorial and repeated it over and over with no success.
I cleaned the lens of the camera on the head
I cleaned the camera on the lid
I tried 5-6 different pieces of art that I threw snapmarks on - no deal on all.
When this happens it’s almost always because your snapmarks are not the right size. Check out @jules posts on them - she’s done extensive research into the proper sizing of snapmarks.
Well that was explicitly the first thing I called out aws the exact thing I focused on as a result of reading the tutorial at Notes on Working with Snapmarks™ 🤔 - so given I made them exactly 0.332" x 0.405" ( 8.437 mm x 10.279 mm ) and measured them to the best of my ability in my print on paper and my jigs . that were etched and included a sample file that has them for verification, I’m gonna guess after 3 hours that might not be it. If it is I’ll be super sad because I don’t know what else I can do to try to . make them . that exact size any more than I have to date. And why does it find the first one on the left and fail on the second one on the right?
Anyway - I’m gonna put this one down to I’ve tried to the best of my ability to assure myself that this . explicitly is not the problem… but again - I’ve been wrong before so I won’t rule it out - but I don’t know of a way to do any better.
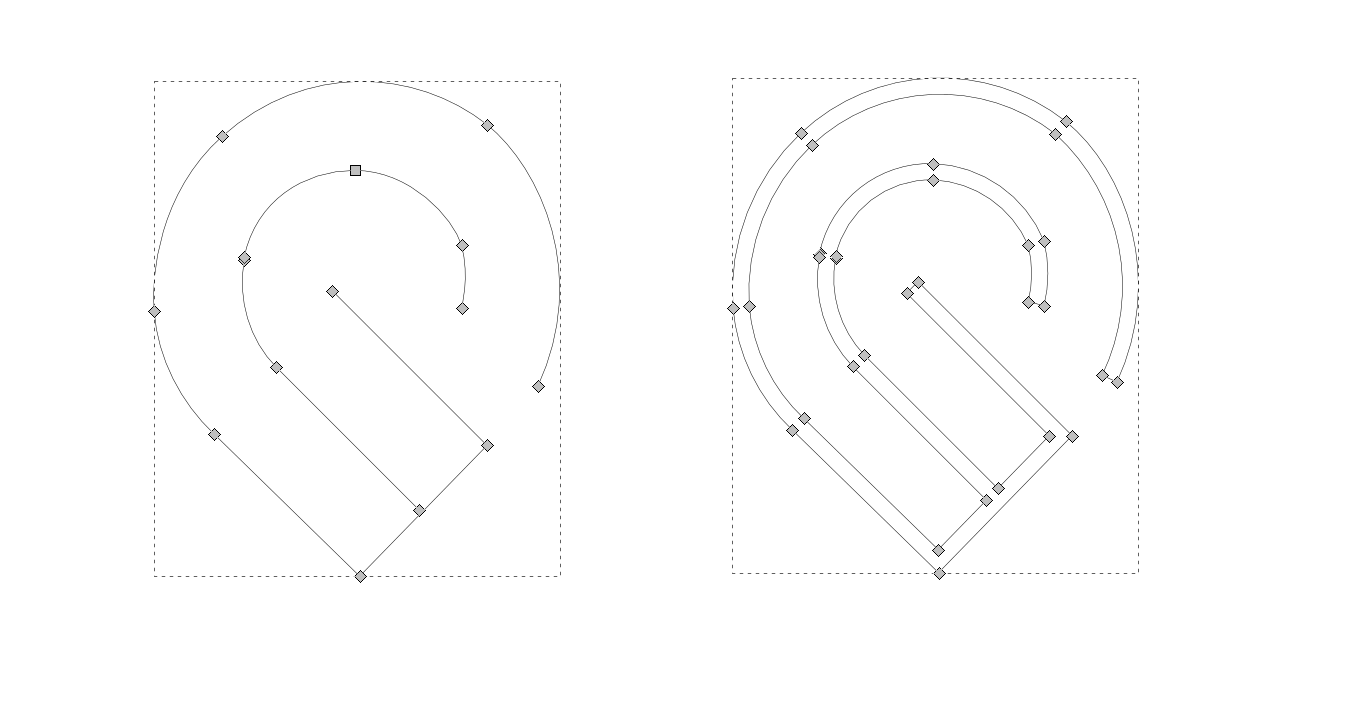
I don’t have snapmarks yet (hint hint to glowforge team) but just looking at the files the size does look correct. The only difference I see, but not sure how this would matter, is your snapmark is a single path while the snapmark in the template file is a compound path of 3 pieces. Not sure if the UI sees these two differently.
Oh that is interesting. When . I originally opened their template it failed due to open paths of some sort so I know when I combined them to one . path I was only thinking of it in the template burns and . never imagined that could be a difference. Hummmm… guess I’ll put that in the back of my head to try tomorrow (i.e. use theirs exactly - All I know is I couldn’t make it work before with what was on the site a month+ ago without modifying it to not break in Illustrator).
The other thing you might look at is their alignment - the one on the right looks a little lower. Early Snapmark testing had some issues with misalignment or twisting of one of the marks. I thought much of that had been resolved (I lost my Snapmarks when I had to get my machine replaced so I haven’t paid as much attention lately).
Thanks - I wasn’t sure how accurate I as a human need to be . with it - this was a quick shot to jut get a screen grab - some of the other times I spent considerable time trying to make it “exact”
I think YawString got it. The right would be a path that had a stroke that was converted using the “outline path” tool which is why I see it as a filled path rather than a stroke path. I think if you swap them you will be good to go.
Glad to hear that you’ve got things resolved. I’m going to close this topic. If you have any other questions, please don’t hesitate to open a new thread.
Please note: Snapmark is currently in Beta. If you have questions or problems with Snapmark, please post in the Snapmark thread here: Introducing Snapmark (September 2018) instead of in Problems and Support.