I’ve used Corel for many years, in screen printing and other arenas, but had never heard of, or had to worry about the even-odd and non-zero fill rules. After reading various sections of the Matrix, and a lot of @Jules tips and tricks, I finally started figuring out how to adapt Corel to the GFUI.
Let’s say you want to build a border
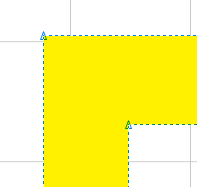
Step 1, you draw two rectangles, and then combine or weld them into a single curve.
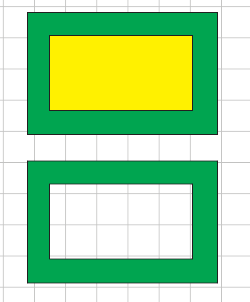
Both are created from the Rectangle tool and drawn from left to right.
Looking at the lower image in Corel, it would appear that the middle has been removed.
So far so good.
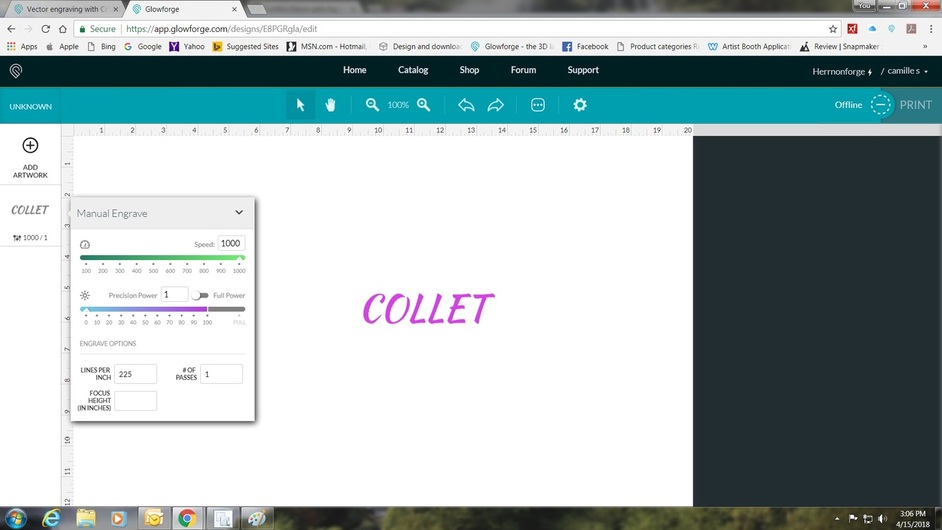
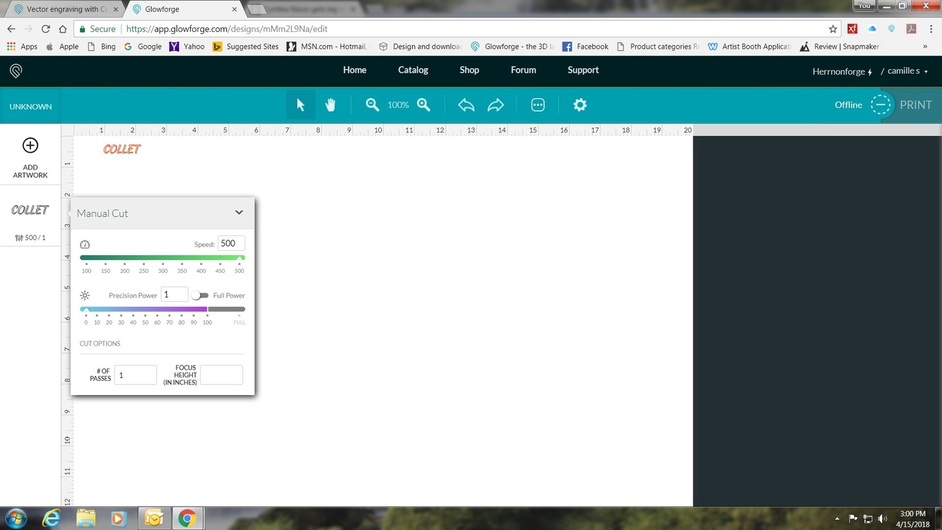
Save the file as an SVG and import into GFUI.
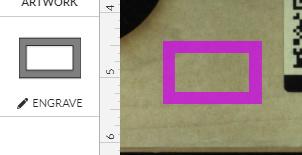
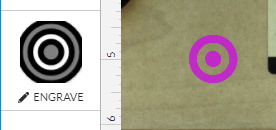
After changing from the cut operation to an engrave, you are presented with:
What happened? Both curves are there, but why is the null area selected as an engrave?
I followed the tips on dealing with island fills for AI, and the center is a hollow filled area.
Recall we built the rectangles in the same direction (from left to right). The Glowforge interface interprets each closed path (both are even or is it odd, I know I’m odd but that is not the question) and performs an engraved fill on each. Even though Corel shows the inner path as a null fill, GFUI did not.
Note: Vector engraves are treated as a 100% engrave regardless of its actual color. Since we created both paths in the same direction, the null fill area is still considered an engrave and is converted to a 100% engrave.
Which way did they go, or in this case what direction
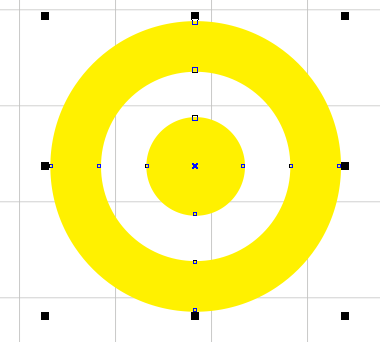
Let’s see how these curves were created in Corel. To view, click on the Shape Tool (F10) and select the border. If you look along the paths, you will see two small arrows.
Both arrows are in the same direction. This is where the even-odd rule comes into play.
To achieve the desired border engrave (island fill), they need to be in opposite directions.
If you right-click on the curve, the context menu has a selection called Reverse Subpaths (must be in the Shape Tool for this menu).
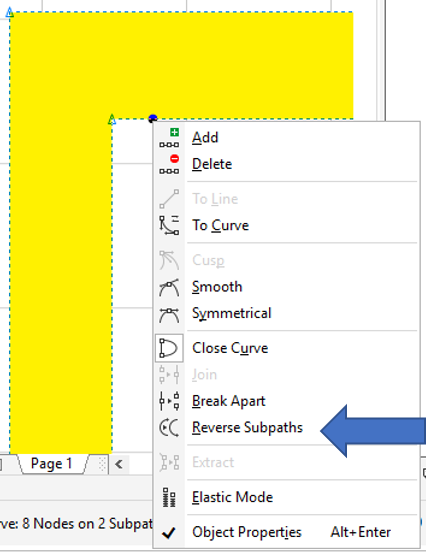
If you reverse the subpaths while the object is still single curve, you will get the same undesired result. Corel will change the direction of both paths, so they are still in the same direction.
To change directions on a combined/welded curve, you need to break the curve apart first (ctrl-K).
Click on the Shape Tool (F10), select only the inner curve, right-click and select Reverse Subpaths.
Select the curves, then Combine (ctrl-L), and two curves become one again. Save as an SVG and import to GFUI.
Here is the updated result
Building from scratch
Remember to alternate the direction in which you create objects.
Either alternate drawing objects left-right and then right-left, or change the subpath direction after you have created the curve.
Check that your directions are opposite before you Combine or Weld them into a single curve.
Recall: Rectangles and ellipses must be converted to curves first (ctrl-Q).
Then select the Shape Tool (F10), right-click on the curve and select Reverse Subpaths.
Multi-Level island fills
Same Opposite
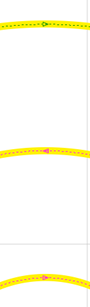
Once each row is opposing, you can Combine (ctrl-L), then fill:
Save as SVG and import to GFUI, and here is the result.
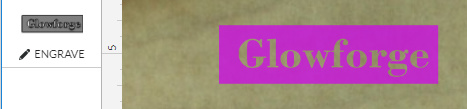
Text Borders
Text is always created with a left-right direction. If you want to create an engraved border around a piece of text, leaving the text unengraved, you need to build the border right-left or build then convert it first to a curve and then reverse subpath.
Convert the text to a curve (ctrl-Q), select both elements and Combine (ctrl-L). Apply the desired color fill and save as an SVG before importing the file into GFUI.
example:
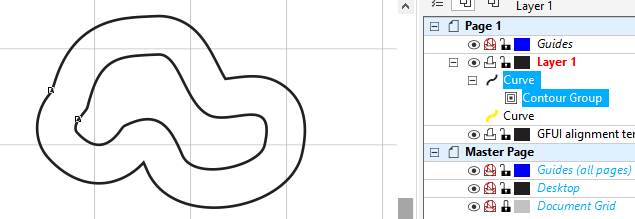
Offset curves (or Contour (ctrl+F9) in Corel)
Contours follow the same direction as their parent object. To reverse the subpaths, first you will need to break up the group. Select the entire group and then break apart (ctrl-K).
after
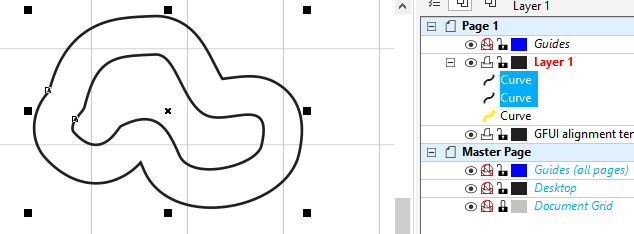
Select the inner path
if it is a rectangle or ellipse, it must be converted first to a curve (ctrl-Q)
From the Shape Tool, right-click and select Reverse Subpaths.
Select all objects and Combine (ctrl-L), and apply the desired fill color.