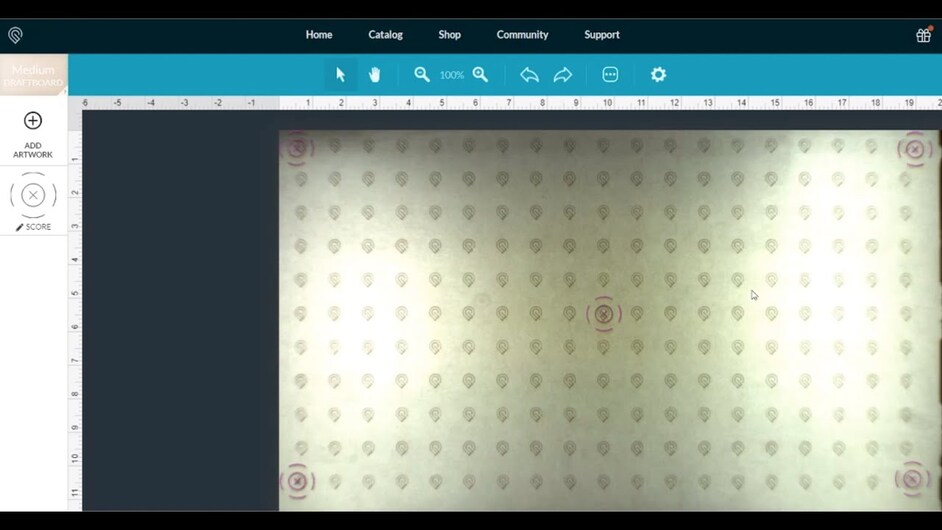
I know some people prefer video over reading and a seeing something done. Anyways I had a few people request this. I made a complete walkthrough of the new camera calibration test.
Hope it helps someone out that was nervous to run it before.
Nice video. I had considered making one myself, glad you beat me to it. Made an early video for connecting to the wifi and thought of plenty I could have added after it was done.
In the video you printed the “bullseye” pattern five times using a single focus measurement in the center. Dan has suggested that we print the bullseye pattern one at a time with a Set Focus measurement at each location to get the most accurate look at the results.
The S/W uses a single height measurement for the post calibration lid image dewarping. You selected the center to use as a material height for all five positions across the bed. That would definitely be a problem if the material had been changed, but the fact that you never opened the lid or moved the material might make it OK. Depends on how they used height across the bed in the original calibration process. Makes my brain hurt thinking about it.
Yea I understand that the height could show different in different areas, that’s why I said I was just going to go off the middle since most accurate which could affect the sides. It saved some time but you are totally correct technically you should just do one, set focus print do next set focus and print. I figured it might be slightly off but was a pretty flat sheet. I usually only refocus it each time I swap out sheets since I got it on my first machine with no issues so far. Good catch, I should have mentioned that in the video for the most accuracy. Thank you for taking time to watch it.
Have no idea myself. Just parroting back what Dan recommended in response to someone else that did multiple test circles.
Just ran mine and it stopped while doing the measuring portion and gave me a kickback of “Unable to measure material” any suggestions?
Make sure your material covers the entire usable area of the bed–it comes especially close to the front. Make sure there’s no light shining into the Glowforge that might interfere with the camera’s ability to “see” the bed. Make sure your cameras (on the lid and the bottom of the head) are clean.
Thank you!! Do you know if I would be able to use the same sheet or did that one go to waste?
You can re-mask it so it’s smooth again, and reuse it – or turn it over and use the other side (peel off the PG label if it has one).
Freakin’ awesome! Thanks so much for taking the time to film it and share it with us!
I tried again and it said the calibration failed… now it’s saying to clean the lid camera when I’ve already cleaned it 
Finally, the GlowForge will be able to accurately do the #1 thing I bought this laser for!!
Can’t wait to get out of the office to get this done.
Make sure there’s not too much light shining into the machine – try covering it with a towel or something, maybe.
Sorry for pinging you with so many updates/questions! Now I just checked the camera as I went to etch something and have noticed it is actually pretty foggy even after cleaning. Any recommendations on making is clearer? I’ve already used lens wipes…
That’s odd. Are you using Zeiss wipes, or something equivalent? If the lens wipes aren’t getting it clean, I’m not sure what would be going on. Try cleaning it again, and if it’s still foggy you should probably post a photo of it over in Problems and Support so they can look into it for you.
It uses the camera on the bottom of the head to take the macro pictures of the marks. Perhaps try cleaning that one. It worked for someone else who received that message, at least.
No problem I am glad I can help.
This maybe a stupid question. The first thing I have done after unpacking my new glowforge was to recalibrate it. I saw the question about reusing the board to do again sometime or reusing the board in general, but it is helpful to keep the board and use it to check or set focusing or do you just set focus on the new piece you are working on?
Set focus is always for the piece you are currently working on.  The calibration board is a one-time deal. You can remask it and reuse it, though, if you need to run calibration again.
Brand new GF user here. I’ve watched your video twice. I’ve manually typed in https://community.glowforge.com into my Safari browser. In the search field I typed in “Camera Cal” and everything but “Introducing Lid Camera Calibration” came up. So I tried just typing in the entire post title “Introducing Lid Camera Calibration” and I still cannot locate Dan’s original post with this title. Can someone just send me the direct link to Dan’s post? Thanks in advance!
Nevermind. I found it on one of eflyguy’s more updated post regarding this. Thanks eflyguy for actually linking to Dan’s post on this topic in your post…super helpful for us newbies when some of these posts are over a year old.
