Wall Pockets

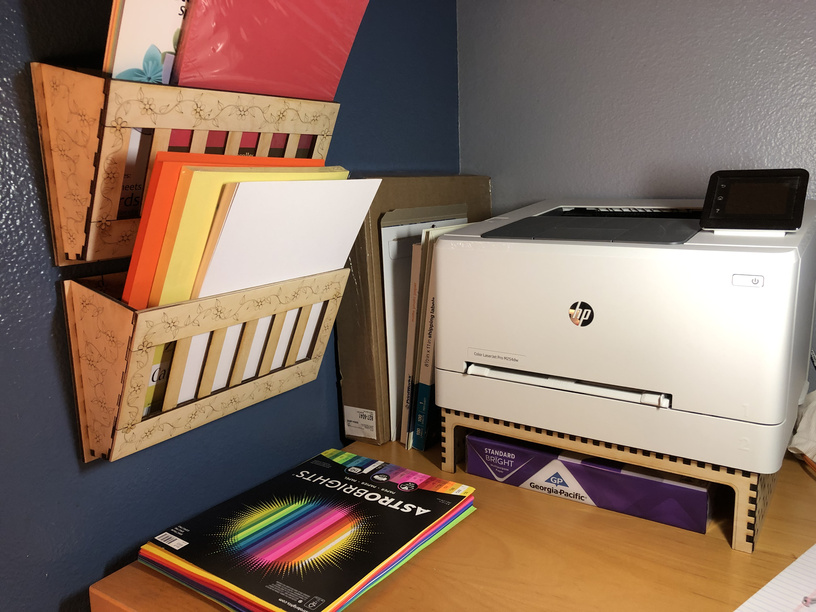
I posted about these over in the Practical Cuts thread. I came up with this design to help me organize my growing paper / cardstock / sticker / printable iron-on sheets collection since getting my Cricut. (Yes, I am probably the only person here who got a Glowforge first, and THEN a Cricut. Hush.)

The design isn’t perfect, but it’s functional. I’m even including my dorky flower/vine pattern for you to use, if you want it. :wink: (I’m having ankle surgery soon, and I figured that when I’m laid up and bored they will give me something to color, if I run out of other things I want to do!)

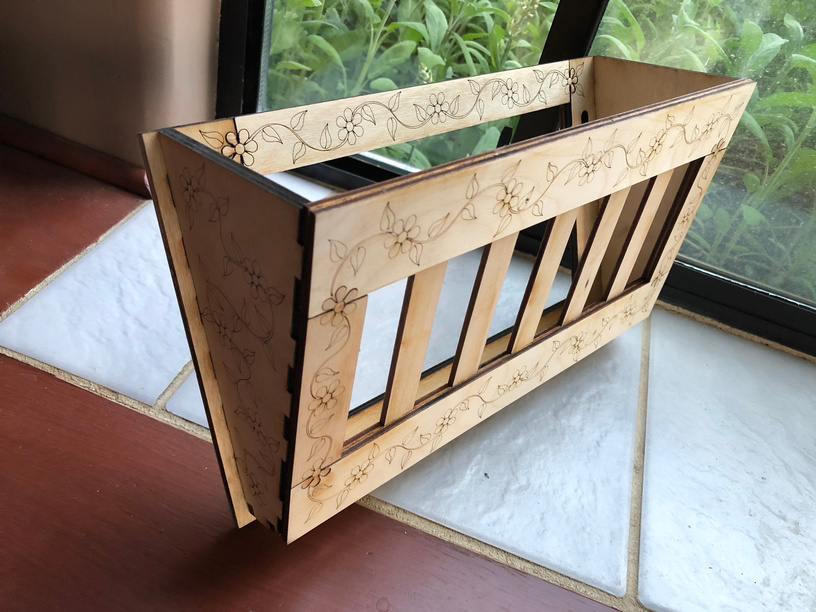
Here’s what they look like assembled (Baltic birch, no finish):

They’re made using frame construction rather than cutting out solid pieces, because I want to be able to make a lot of them without using up a ton of material. They’re wide enough to hold 11" stock horizontally, although I have it standing vertically in the photo, to keep the colors separate until I have time to make a few more.

Files:

These parts are cut from 1/8" material:
Wall%20Pocket%203mm

These parts are cut from 1/4" material:
Wall%20Pocket%206mm

Assembly:

The kerf is nice and tight on most of this, so make sure you’ve got your assembly hammer at hand, but have some glue available too, because there are places where you’ll probably want some. And clamps. Lots of clamps. :wink:

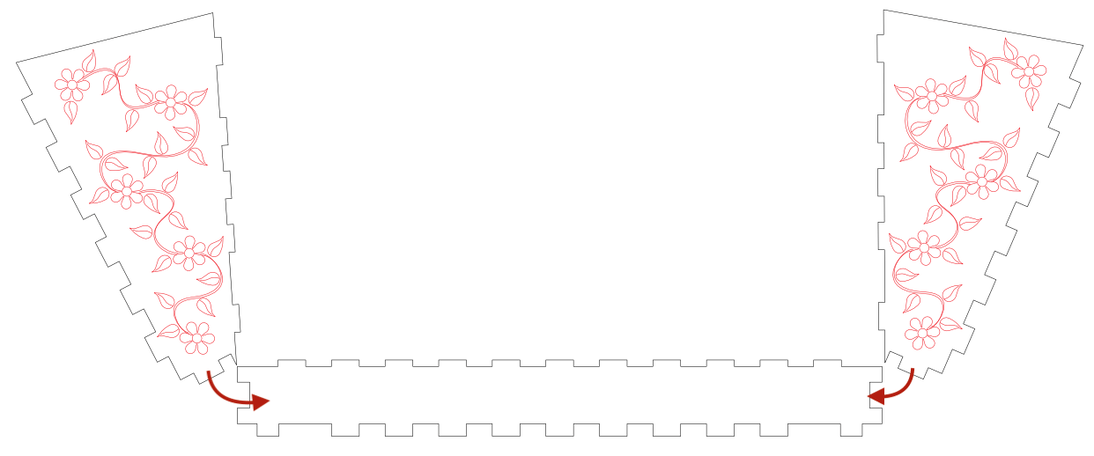
Start by attaching the two side pieces to the bottom, as shown. This will keep you from assembling yourself into any awkward “corners.” (The rest can pretty much happen in whatever order you prefer.)

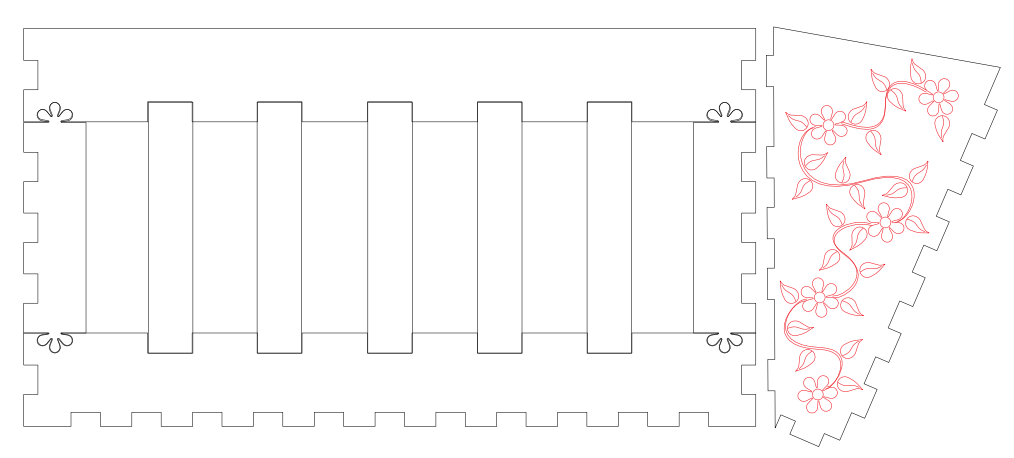
This is how the inner front goes together. The slats and side piece are shown here just for reference; you’ll add the slats later, because they glue on to the back side of the outer front. Just assemble the frame for now.

This is how the outer front goes together. Once it’s assembled, glue it onto the inner front. This is where those clamps will come in handy – the long narrow pieces will want to warp when you wet them with the glue! (And yes, I should have alternated the joins for more strength. The design sort of morphed as I was making it, and by the time I realized I would be making the front in layers, I didn’t have the patience to change that detail. I’ll do that next time!)

Now you can glue in the slats. Here’s an X-ray view of the inner and outer fronts stacked together, with the slats in place:

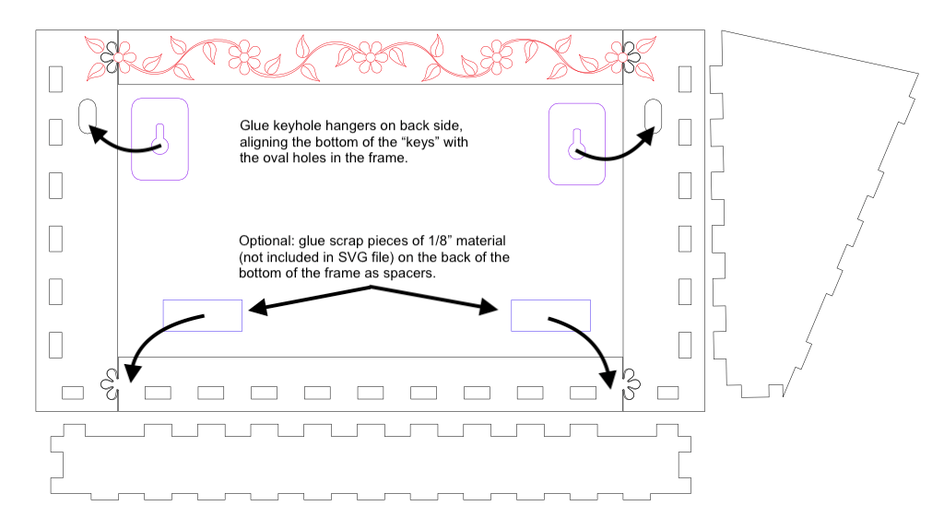
Assemble the back piece, and glue the keyhole hangers (based on @jbmanning5’s design) on the back, lining them up with the oval holes. You can add some spacers on the bottom of the frame if you like – I didn’t include any, since you’ve probably got plenty of 1/8" scraps in all shapes and sizes to choose from!

Now put the front, back, and sides together, and you’re ready to do some organizing!

178 Likes

Those look so pretty with all the interconnected flowers, and the flower tabs…:grinning:

6 Likes

oh thank you for these - I need to make some!!

3 Likes

I really like those flower pedal connections.:sunglasses:

3 Likes

Thank you so much. I love the flowers, they are so pretty.

2 Likes

I really like that you minimized the material needed for this.

Thanks for the design!

6 Likes

Very nice and very nice of you to share with the nice write up.

I think I’ll try to adapt this to pegboard. If I do I’ll post my derivative.

4 Likes

I hadn’t noticed the flower petal connections earlier, that is great. Thanks for sharing. :grinning:

4 Likes

Ha! Epic. (Cricut is stupid easy now though, amirite?)

3 Likes

I was debating between Cricut and Glowforge early on but I could not find if the Cricut could cut my 4oz soft copper sheet as cutting that is not possible with the GF, If I was sure it would do that I would get one now.

3 Likes

Adding a bookmark should give you a second “Like” as this is yet another post of yours hitting the bookmark list of things I want to get back to!

1 Like

Cool design, thanks so much! If you are thinking of coloring in the vines, give colored pencils (like Prismacolor) a try. They work great on Draftboard and I bet they’d work on BB as well.

4 Likes

I did buy a Cricut 5 yrs ago thinking it would be fun for my sister’s visit from France, and after we would sell it. She promptly took to it so she lugged it back to france 3 weeks later. We have joint access to the account, so I could create files (which I did in the beginning), but to coordinate pressing the button across the Atlantic and 6 timezones, is just more than getting your spouse to press the button on the Glowforge! She’s coming for her next visit in a few weeks and I’ll show her how to run the Glowforge while I stay put on the sofa in the next room. :smiley:

9 Likes

I think dealing with GF definitely cut down on the learning curve! I still stumble a little in the design interface trying to get it to do what I need, sometimes. :stuck_out_tongue_winking_eye:

3 Likes

A new Silhouette will be out in the fall (the 4) and it will have more cutting force then the Silhouette 3 or the current Circut. Something to think about if you are trying to cut soft copper sheeting. I recently gave my Silhouette 2 to one of my daughter’s friends as I wanted to upgrade to the 3 as I needed the bluetooth, but am glad I wasn’t in a hurry since I now know there is a new model coming out.

7 Likes

Thanks for the files. These are really nice. I don’t know if I have wall space left, but I have no shortage of paper!

@Pearl, I have an older Silhouette and a Curio, but I’m thinking of ditching them both in anticipation of the new machine!

3 Likes

ooooooh. Maybe I’ll finally upgrade my v1. Haven’t pulled the trigger on a Cricut Maker yet.

1 Like

Thanks for the detailed info. Best of luck with the surgery.

2 Likes

Thank you for the files, and the write-up.

2 Likes

Thanks for sharing! Love the design.

I have been thinking about a Cricut as well. My dad always told me get the right tool to do the job right. There are times where the Cricut makes more sense.

I hope you have a speedy recovery on your ankle surgery.

1 Like