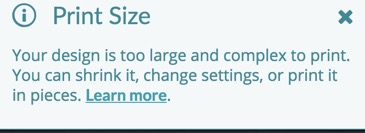
I have done way larger jobs than this in the past. So not sure why this trail sign is complaining:
At first it was a vector job and then when that failed to motion plan, I figured OK it’s too many nodes, so converted it to a PNG file and that failed too. This should not be too big to lase or the GF’s buffer is way too small. The whole image fits inside a 16x3.5" rectangle and is 13Kb in size for goodness sake!!! I mean that whole job will fit into the extra RAM board of a 1979 Apple ][+, so a $4000 laser should be able to handle it…
What he said. Time and complexity or a combo of.
Not overall size but how complex it is.
I have had some that I had to do in 5 or 6 steps, using ignore on other parts of the design to do the engraves one at a time until done.
Other times even that failed and had no choice but to lower the node count before it would print it.
Some have lowered lpi to pull the timer away from the cap also.
This isn’t exact (because the Glowforge is pretty good at only running as far as required to engrave - in that it it will stop at a non-engrave/white boundary rather than going to the edge of your image), but it’s pretty close…
If you have a 16.5x3.5 image, you end up with the following figures:
If I plug in something like the basswood HD graphic settings, 400 speed (equal to about 114 inches per minute) and 450LPI… it goes to 228 minutes.
This isn’t exact because it doesn’t factor accel and decel, and it assumes a 16.5x3.5 rectangle of travel, and it uses imperial rather than metric… but close enough for government work.
So… I just went in and subtracted the red dots from the background, noticed that the file was loading too far to the right and bumped it over a 1/2 inch to the left.
I also made the whole “black part” a compound path but that probably didn’t do anything.
Anyway, I didn’t hit print but this loaded fairly fast and should give you what you want.
Thank you for writing in. There’s a problem with our software in handling very large engraves and it looks like that what’s happening here. Your message will help us improve our software for everyone.
If your design includes a large engrave, you have two choices. You can reduce the size of your print in the app by signing in, selecting your file, clicking on your image, and then dragging a corner towards the center of the image to make it smaller. Or you can divide your image into pieces and print them one at a time, as shown below.
Click on the “SPLIT IMAGE” tab and enter the number of rows and columns you want to split your image into
Choose PNG
Click the blue “SPLIT IMAGE” button. The software will split your image into the number of rows and columns you specify and automatically download a zipped file of the pieces.
Create a single file with all the pieces
Locate the file on your computer (where your downloads go) and unzip it
Mac: Double click on the file to open it
Windows: Double click on the file to open it, then click “Extract All”
Open a new file in Inkscape (used for this example, although other software will work too)
Choose File > Import and select all the images from the zip file
Line up the images up so they are seamless. In Inkscape, when you drag the images near each other, they will snap together. (If they don’t, go to View > Show/Hide > Snap Controls Bar and adjust the settings.)
Select File > Save As and save the file as an Inkscape SVG file
Upload and Print
Sign in to app.glowforge.com, click “Upload” and choose the file you saved.
Each piece of artwork will import as a step in the app. Click on a step and choose “Ignore.” Ignore all the steps but one, and then press “Print.”
When that print finishes, leave your material in place
Set the step you printed to “Ignore” and print another step
Continue ignoring and printing until you’ve finished
SO the problem I think was that I set it to multiple passes (this was a very deep engrave to give it that CNC milled appearance). I set it to one pass and cranked the power up to full with speed 300 and got over 1/8" in depth and it had no problem. The error message could be more helpful and describe that the engrave is over X-hours or something since the time was really the problem not resolution or number of nodes in the SVG.