A BASORO (or a really cool sign)

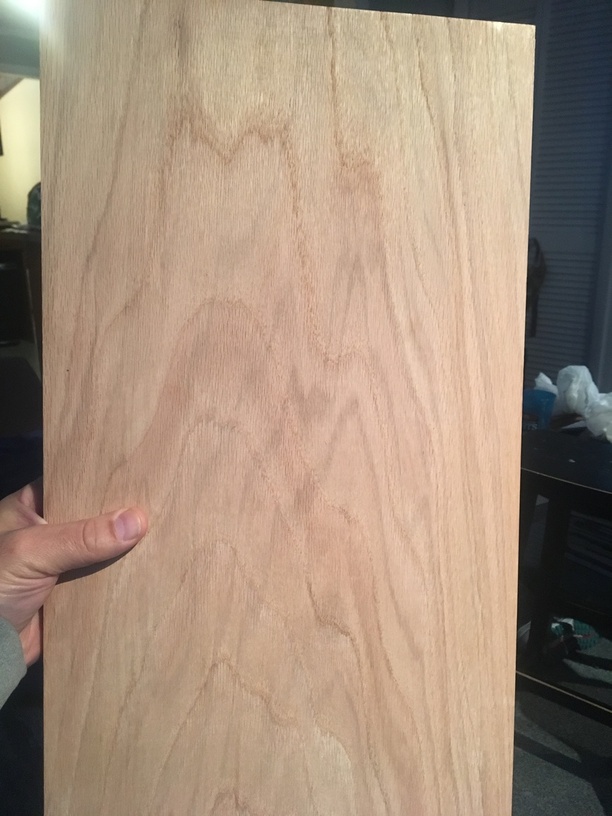
So one of the nurses at work, who runs our simulation center who I am building most of my simulators with, has a vacation house and wanted to make a sign. He came into a 3/4" BASORO (Big Assed Slab O’ Red Oak) from a friend as a waste from a project.

He showed me a bunch of samples from google:

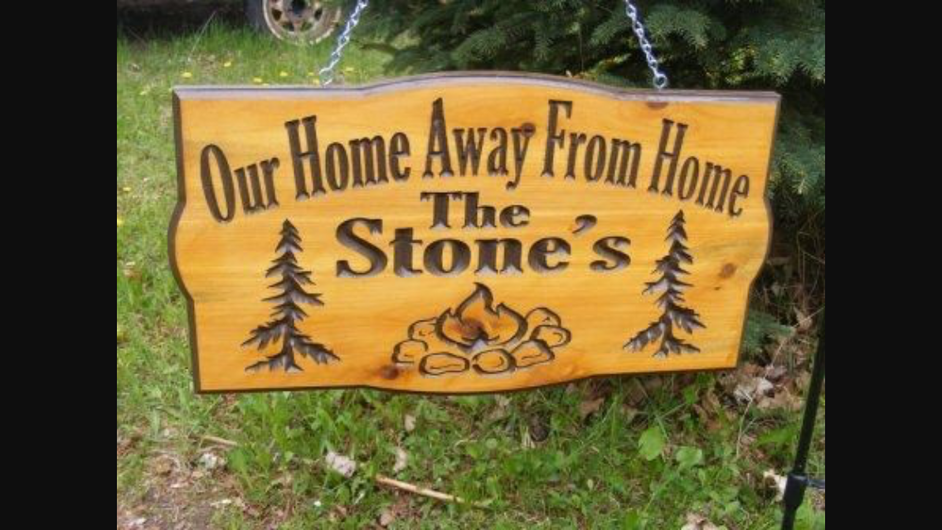
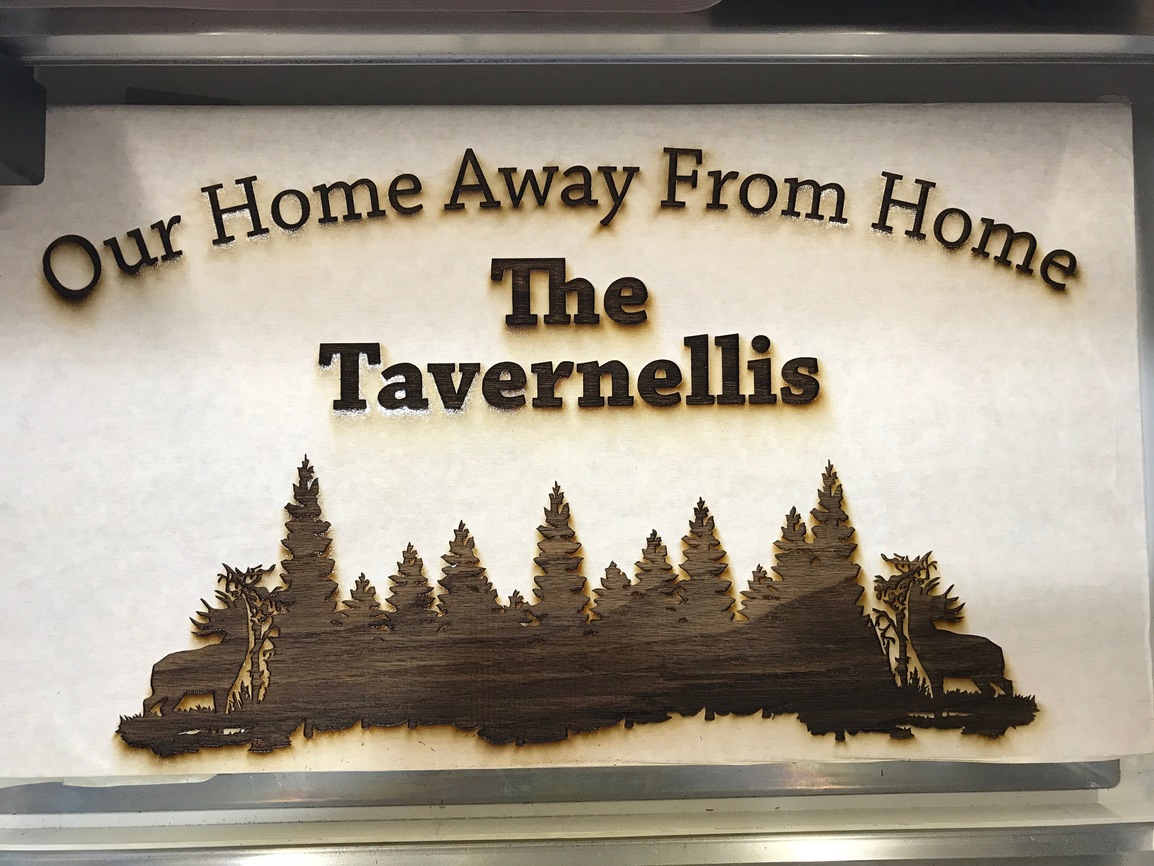
And so I set to work, he really wanted some trees and maybe a moose or elk. I looked around google and got some tree silhouettes and found a nice thing with some deer/elk (kind a low-res to tell) which would all make a neat composite bottom part. Looking at his sample sign, I kind of felt that was a bit like summer camp’ish and maybe we could go a tad more elegant. I also realized I would normally use my X-Carve CNC Mill for this, but hey, that’s all the way downstairs, and this thing is right near my chair!

So drew it up in Illustrator (auto traced the trees/elk), but given the size I was a bit worried about continuous operation of the basic, so broke the job up into 6 parts (which total a staggering 4.5 hours!!!).

Then I messaged @marmak3261 since I knew he had done some serious oak work, and got some settings that had worked for him (50%/335 (1-3x repeat) 340lpi. and decided the name in the middle would be 3x, the motto at the top 2x and the giant engrave at the bottom would be 1x (which was still 1.5 hours long!!!). I only paused long enough between sessions (varied 15m-1.5h each) for long enough to ignore the finished section and start the next - so maybe 1 minute between?

The slab is way bigger than the honeycomb (it does clear the rails!). So out came the honeycomb, and given it’s slightly over 3/4" thickness I used 4 of the Inventibles linoleum blocks I bought last week (similar to the one I used with @joe to make his stamp)

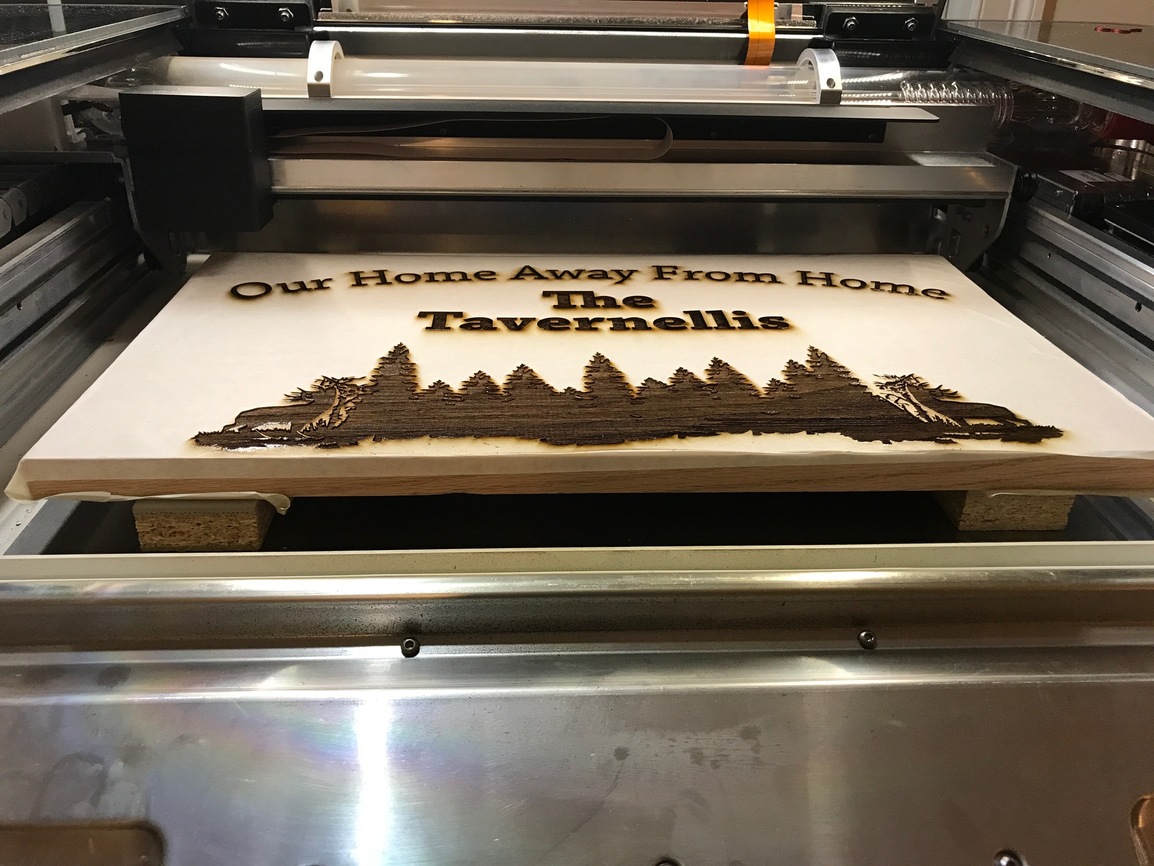
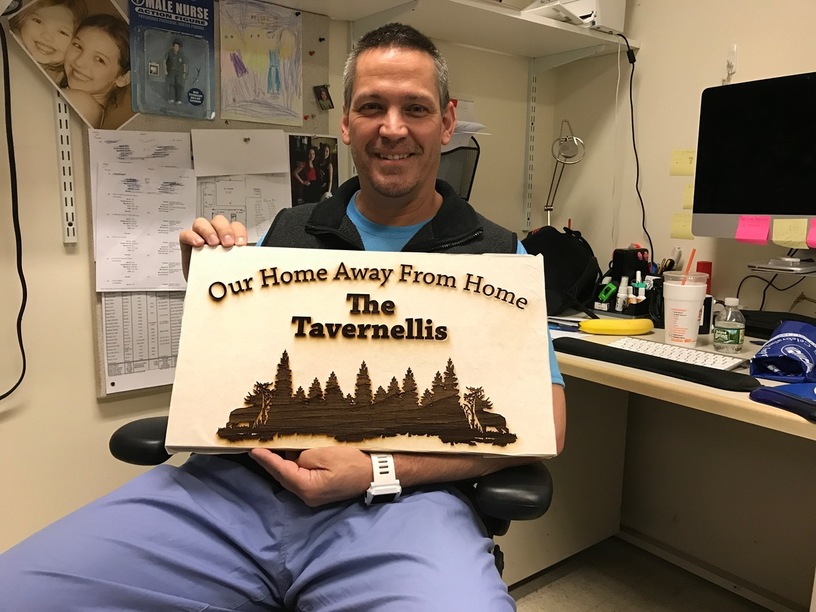
And here is the full engrave

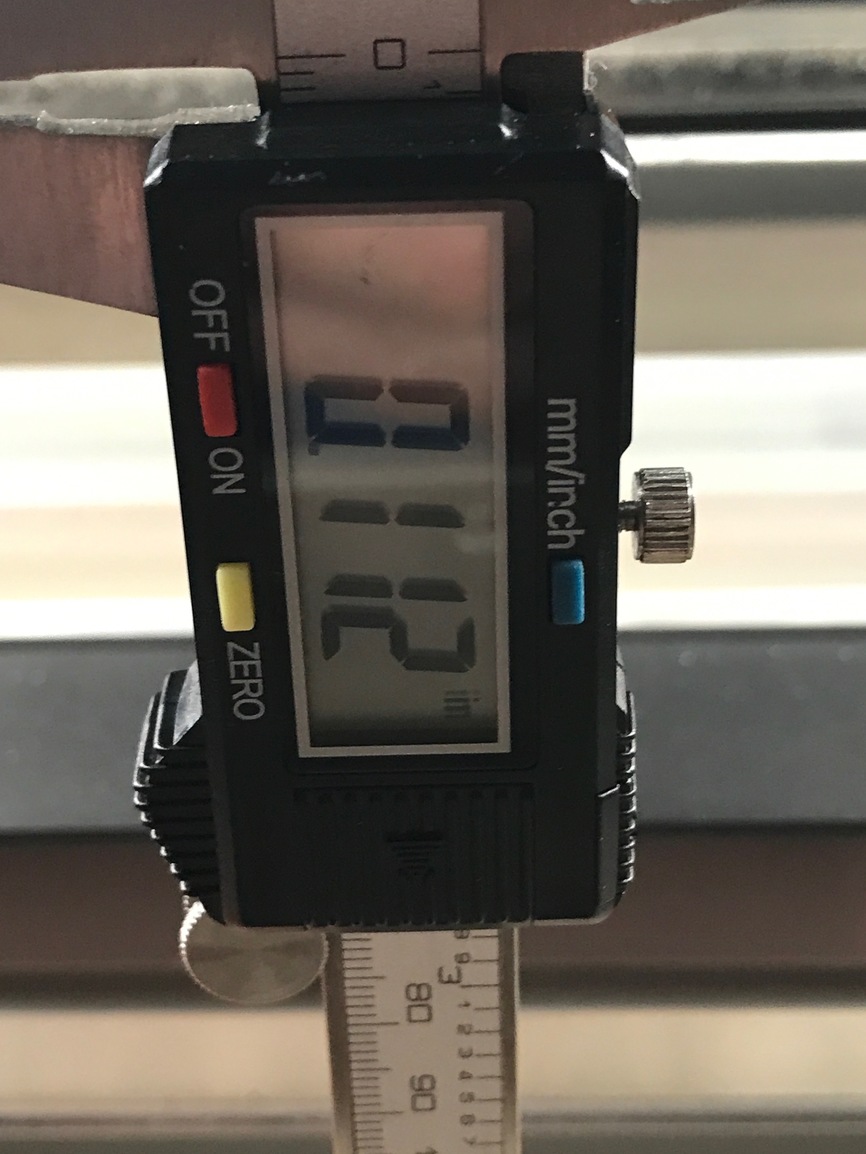
The great thing about 3/4" ok is you can absolutely whale on it with the laser. Nothing is going through that. So how deep was 3 passes?

Details on the 1x engrave of the bottom

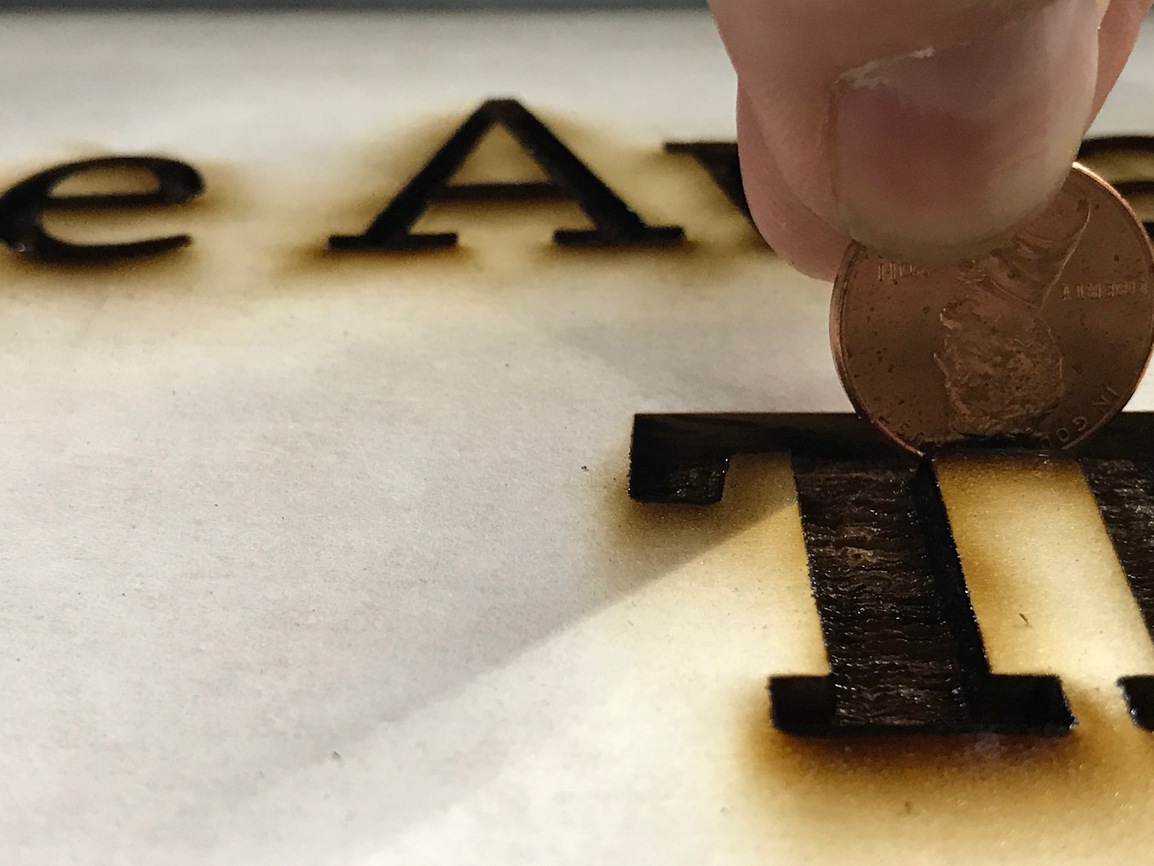
Detail of the 2X engrave at the top

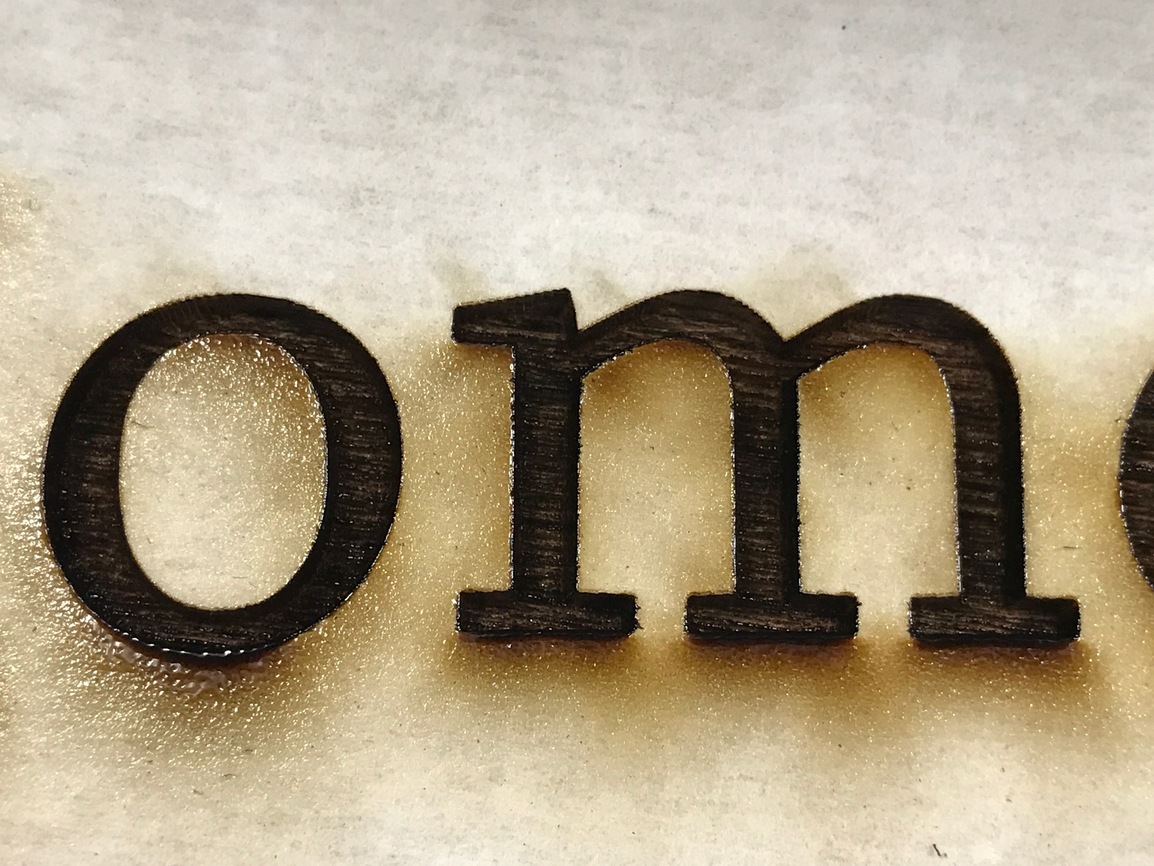
On 1x I will note that the grain shows through beautifully.

Note I have left the LaserBits masking paper I put on in case he wants to paint the engrave black before staining the Oak. I also engraved my maker’s mark on the back.

77 Likes

My handibot is out back at the shop and noisy enough that I can’t run it at night so yeah, if it is ever a toss up the Glowforge will win just due to being right there.

5 Likes

Beautiful!!

2 Likes

Yes. This is really cool. Glad to help. Lots of good ideas and possibilities here. He’ll love it, I’m sure.

Next time just go ahead and press print and curl up with a big book. I double dog dare you! I’ve not gone over three hours, but one of these days, especially if you aren’t at full power.

Love your pictures and the penny for perspective is good.

My idea would be to do a different resolution or depth for the trees and the elk. but why complicate it even more. Works great.

10 Likes

A really elegant sign–goal accomplished! I like to see operations without the crumb tray–need to see more of those sorts of nonstandard operations.

7 Likes

Beautiful as al your work is.
Love how the grain came out.
Thanks for sharing!

4 Likes

Good point. I should probably make a super quick tutorial on how to do that.

11 Likes

Oh, I couldn’t do that anyway, as I wanted the trees lower down than the current field would accept, so between all the words and bottom engrave I slid the whole piece up an inch so that I could get lower down. In the final version which allows full bed height, I could have.

7 Likes

Yes! Please do!

4 Likes

Looks great! I see a lot of signs in my future. I’m sure I’ll make a few on my Glowforge laser just because I can but, for a sign like this, after the novelty of having a laser wears off (if it ever does), I’d probably use my CNC router. There will be plenty of other signs that will lend themselves more the the strengths of a laser.

6 Likes

It produces a very different look. So you get the char of course along with square sides and bottoms. You can also pocket in for way tinier detail. But if you want smooth transition pockets or no char then milling is the way to go.

3 Likes

Yeah, whether to choose CNC or laser will depend on the desired look and the level of detail. For my personal design style, I think I’d like this type of sign cut on a CNC router. Everyone’s tastes differ.

One of my first projects will be to redo the sign I cut on my router for my wife’s office door 6 years ago. It’s OK but I was limited in the level of detail I could pull off with the router. I’ll get something a lot more refined with the laser.

2 Likes

This sign really is getting me thinking. Have the detailed photos and description of the process is so good. Thanks for taking the time.

It made me make a few more test squares with different power settings and adjusting the speed.

Many of my engraves I go for depth and burn away and not worry about the char and go for max speed. What is interesting that I learned last night is that you can get depth without much char with lighter power and higher resolution and slowing speed down. Balancing all these out will take a few more trials. But there are way more variables to explore and see results.

2 Likes

Also try following up a deep engrave with a lower power/faster speed which can burn off the charts leaving a lighter wood layer exposed.

6 Likes

And the most important photo of the project, successful delivery to a happy client! I actually got stopped as I walked over to that building by people asking who had made my amazing sign; pretty cool to say “oh I made it last night at home for a buddy”

29 Likes

The smile says it all! If you get a photo after he is done with whatever painting he does, I’d love to see it.

8 Likes

Once he has it hung off the signpost he is going to send me a photo, and I will post!

8 Likes

The text really looks good over the whole length of the curve. I am rarely satisfied with how Inkscape puts text to path when I am doing it. It often takes some tweaking. I know it can do it well, but I haven’t gotten the routine down.

4 Likes

Has anyone tried CNCing a project and then lasering some of the design to increase/add detail to the engraved area(s)? For example in the above, if you CNCed the trees deeper (to appear more in the background) and then lasered… Just thinking at the keyboard…:thinking:

…soooooo many ideas popping up - I still need to start to assemble my X-carve one of these weekends…)

6 Likes

Illustrator CC has extensive text on a curve controls

1 Like