The Adafruit design (or something very much like it) was in Make magazine recently and caught my eye. I had a stack of cheapo 8 x 8 led matrix boards on hand and a host of arduino based controllers. So, game on. I did not like the look of the original case nor the hardware required, so a new case was in order. Also, the cheap matrix was a bit bigger than the Adafruit version so some scaling had to be done to the letter grid and the filter grid. I decide to use a Teensy 3.2 that can be configured to have a built in RTC ( by adding a crystal oscillator) in place of the suggested external rtc board. Lastly, the cheapo matrix appears to be a zigzag matrix while the code from the make project was written for a progressive matrix. This twist plus the change in RTC led to a bunch of software changes. In other words, similar design but not really as there were changes to all the parts.
The case need not be this thick as the components all fit in a fraction of the space.
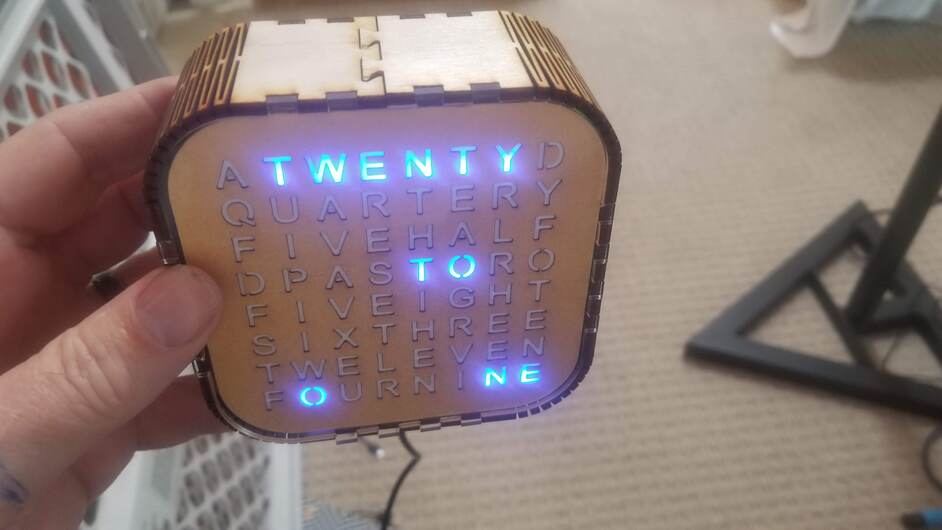
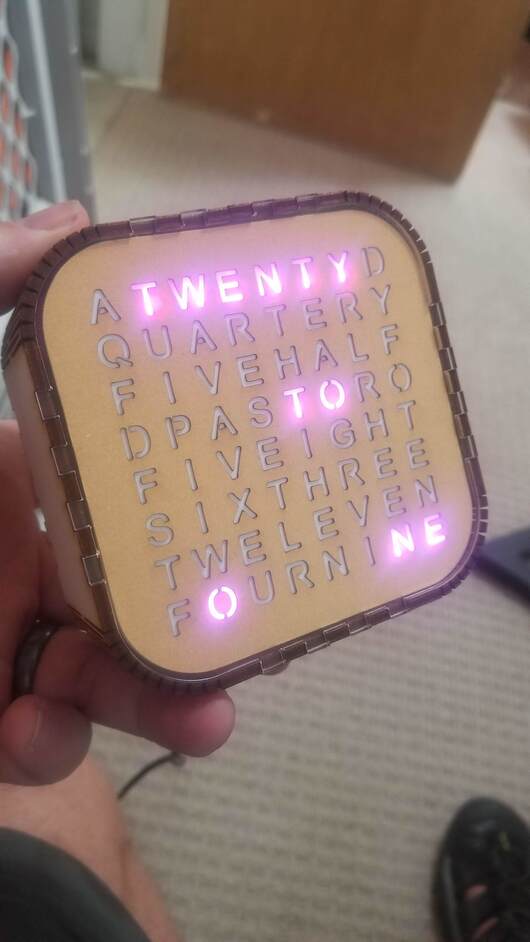
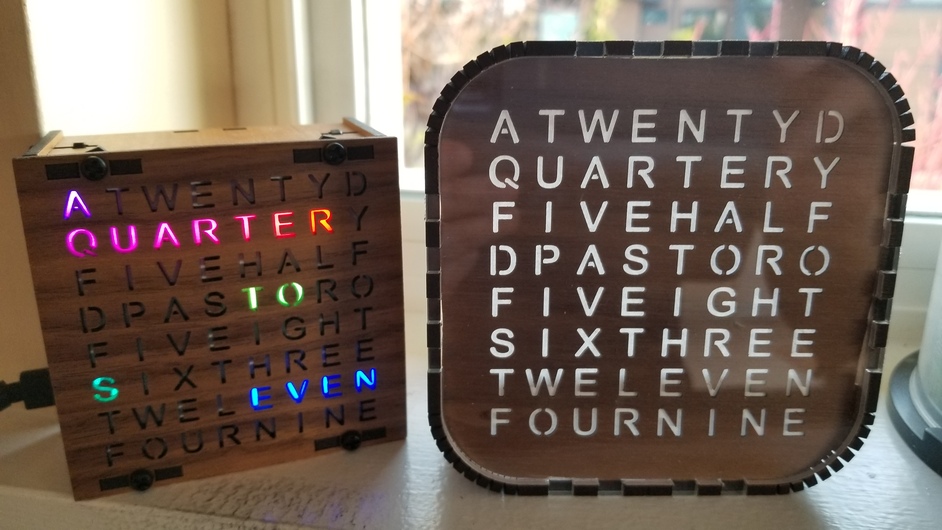
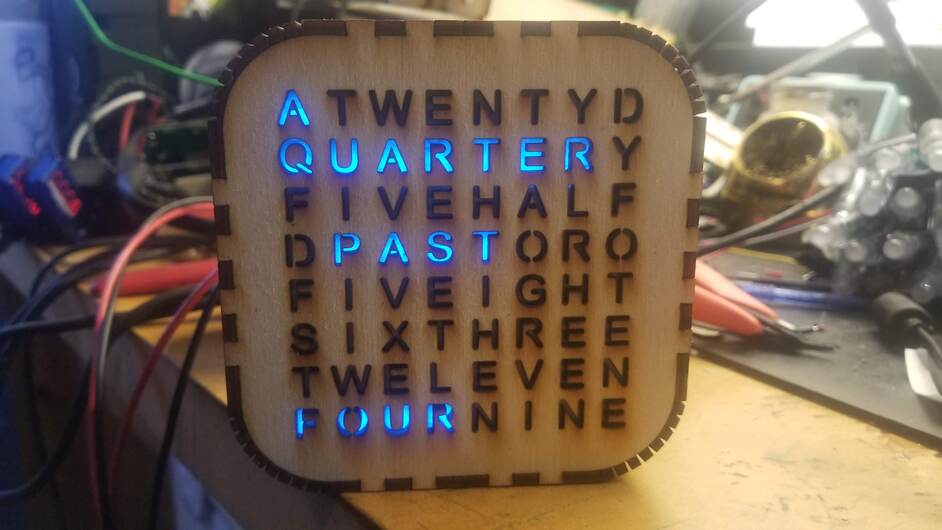
The last tweak I added was to use the color of the words to show how many minutes to add to the displayed time (since it only shows in 5 minute increments) red = +0, yellow =+1, green = +2, blue = +3, purple = +4
the choice of the teensy 3.2 was made because I had already mastered getting the RTC up and running on that beast. I recommend you stick with a more traditional controller and an external rtc as described int he adafruit project writeup.
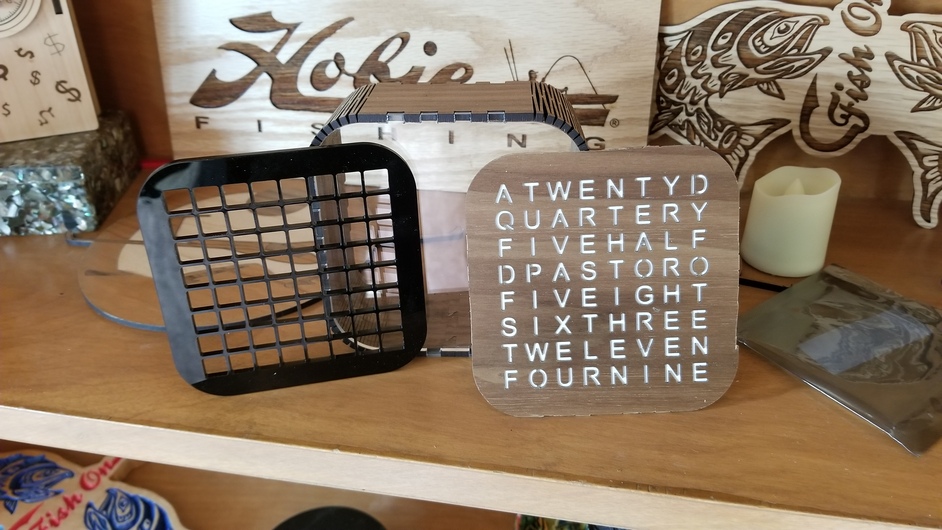
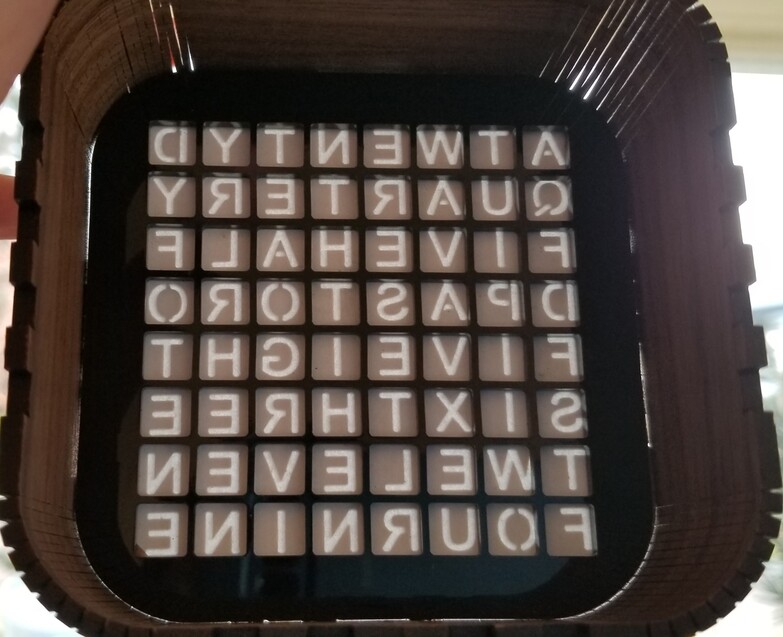
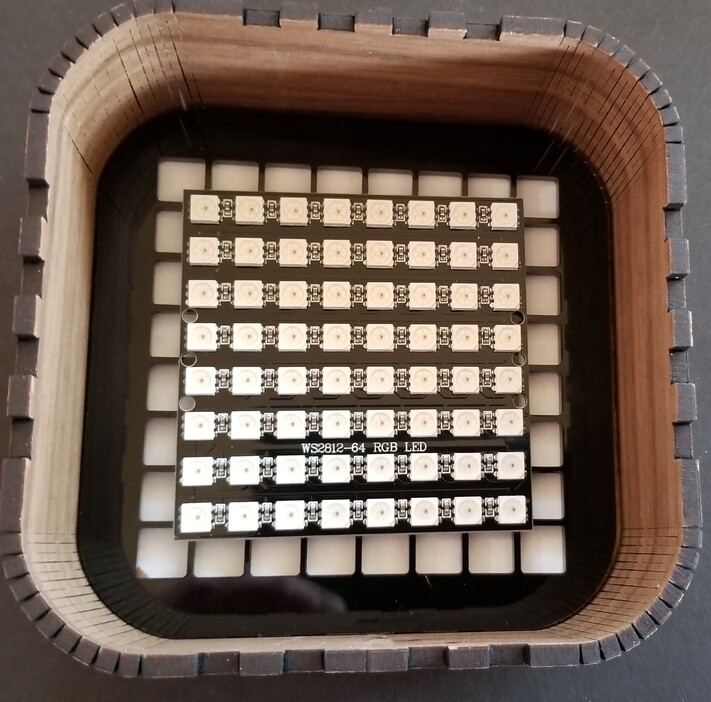
I had to tweak the table of word definitions to make the cheap matrix work with the adafruit code. I will share for those who seek to follow this path. Use this is every odd row of text appears to be reversed. (it is).
#define MFIVE mask |= 0x0F0000000000 // these are in hexadecimal #define HALF mask |= 0xF00000000000 #define MTEN mask |= 0x1A00000000000000 #define AQUARTER mask |= 0x01FE000000000000 #define TWENTY mask |= 0x7E00000000000000
#define PAST mask |= 0x7800000000 #define TO mask |= 0xC00000000 #define ONE mask |= 0x43 #define TWO mask |= 0x0340 #define THREE mask |= 0x1F0000 #define FOUR mask |= 0xF0 #define FIVE mask |= 0x0F000000 #define SIX mask |= 0xE00000 #define SEVEN mask |= 0x80F000 #define EIGHT mask |= 0xF8000000 #define NINE mask |= 0xF #define TEN mask |= 0x80018000 #define ELEVEN mask |= 0xFC00 #define TWELVE mask |= 0x7F00
also, in applyMask(), you may want to replace the switch case with this if you want the word color to change by minute
switch (masker) {
case 0:
matrix.setPixelColor(i, 0, 0, 0);
break;
case 1:
matrix.setPixelColor(i, Wheel(((minutz % 5) * 50) + 4 ));//note replace “minutz” with what serves as the minutes function in your version of code
break;
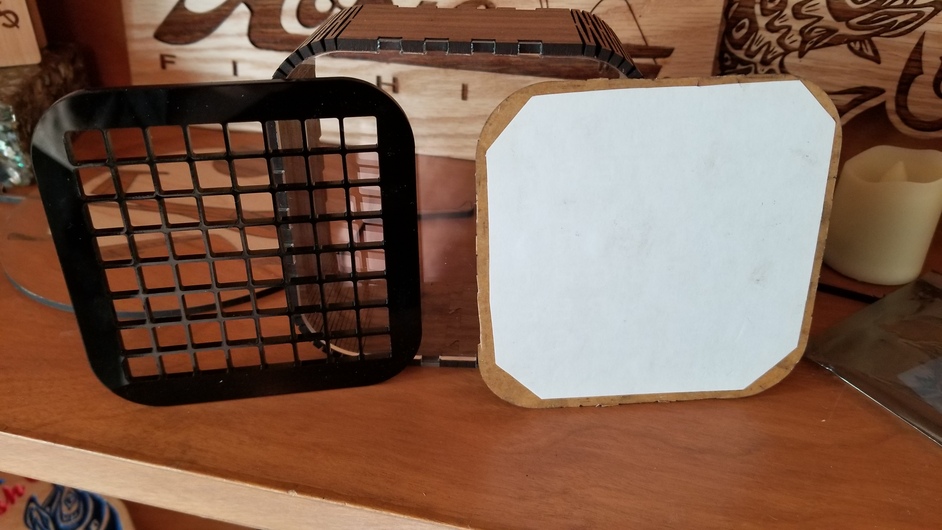
Also to make the diffuser, use the grid shape with out the grid holes.
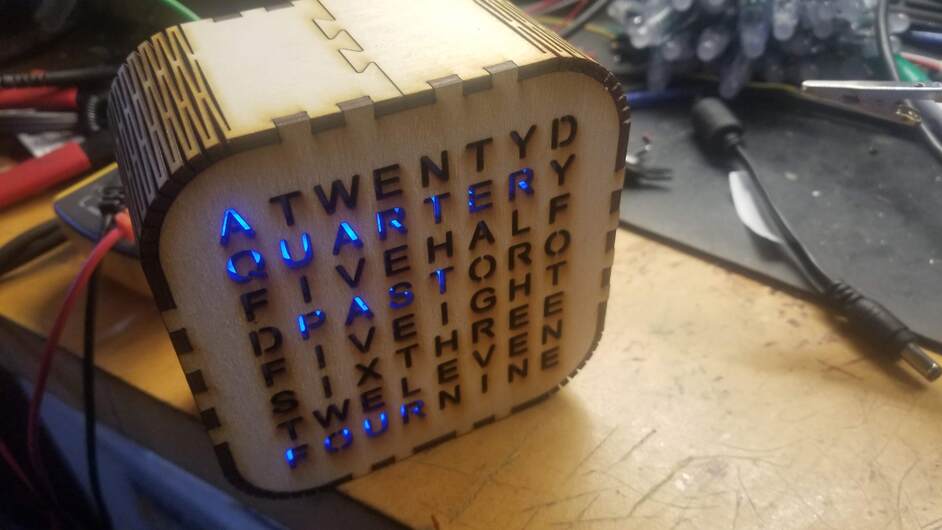
I’m usually pretty good at finding the 3 legged horse in a page of horses, or the “V” in a page of "W"s that show up every so often on FaceBook. But I’ll be darned if I can find “ONE,” “TWO,” “SEVEN,” or “TEN” using consecutive letters on that device, either vertical, horizontal or diagonal.
I guess I’m just too short.
those particular words are not continuous, the have spaces or run across 2 lines. FOR EXAMPLE, two is made by taking TW , the first 2 letters in row 7 and then the O in the next row.
I liked my first clock but it was difficult to read if not directly in front of it. This is due to using a the 1/8th ply as the letter layer.
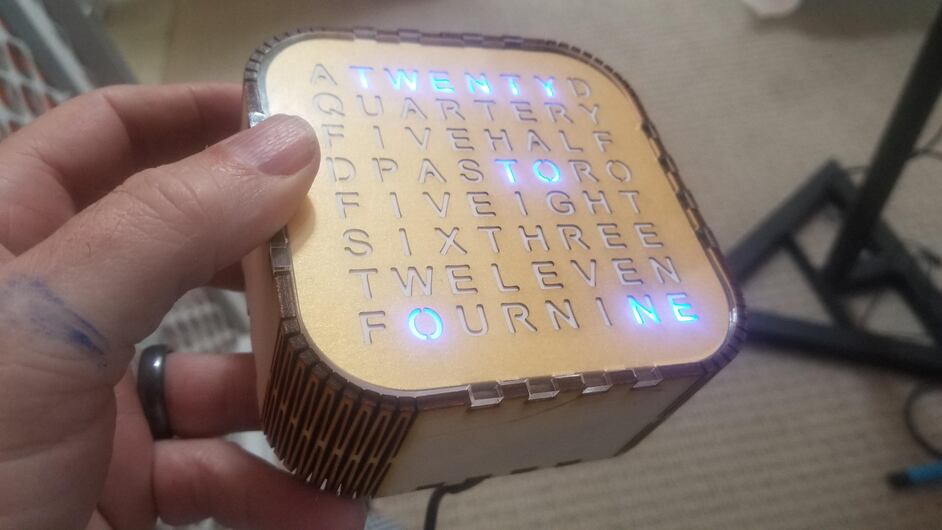
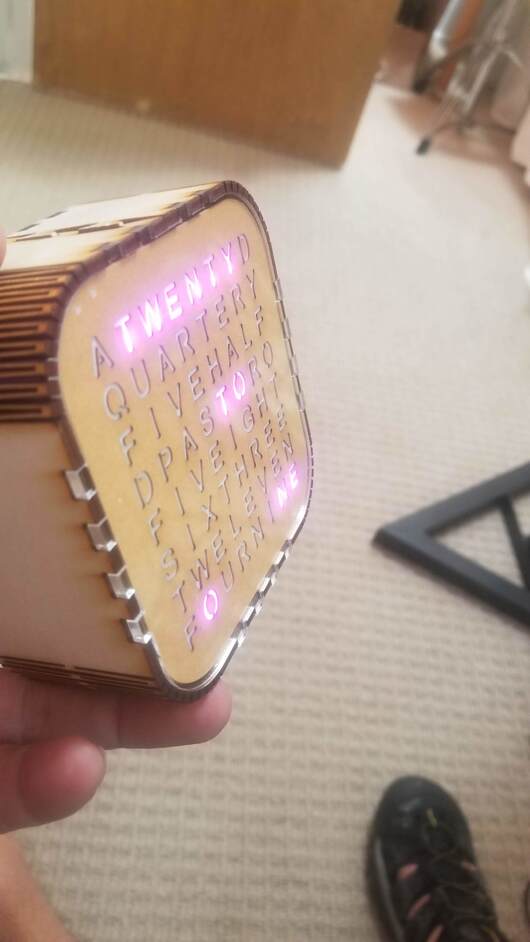
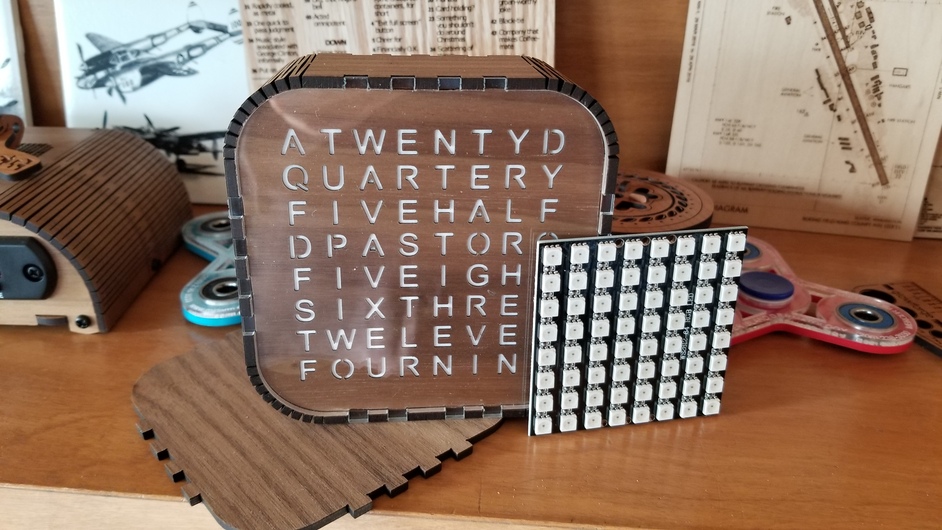
So, rev 2. All the same basic shapes but now using a clear front and a letter layer printed on thick paper (in this case gold colored, although I am thinking about purple or green). Now, it is much easier to read from off axis. Up next? adding hour and minute adjustment buttons.
No glue. The clear acrylic is is the face. I just placed the paper with the letter cut-outs behind that, them the white paper acting as a diffuse-r behind that, and then the Grid with the LED matrix taped to the back of it. No glue. I have made 2 this way. On one, the wires connecting the matrix to the other circuit bits were sufficient to hold all of that against the clear face. The other, being the 2nd, had much tidier wiring. Thus it needed a bit of foam to push the stack against the face. I guess tape would work as well. the actual finger joints are so tight no glue was needed.
I love this updated design, thank you very much for sharing. The modification to improve the viewing angle is great, as that is one of the things that bugged me about the Adafruit design. I haven’t forged in a bit, been going down other rabbit holes ( SDR Play / RSPduo and Davinci Resolve video editing - for any rabbit seeking geeks out there ). But today I said, let’s build this, so I jumped right in!
I decided to use PG veneer for the lettering. I figured that would give me enough extra viewing angle and allow for something for the copy paper diffuser to adhere to.
You may notice some rough edges on the veneer – that’s because I cut them out with the tabs and found out that would not work when putting things together. So out came some scissors to solve the problem.
Now I went back and pulled out the cheap matrix I bought back when I first made the Adafruit clock…and was reminded on how those were slightly smaller and not bigger.
Thanks for the write up. What I really love is looking beyond the clock to all the other cool things on your work space which hint at all sorts of wonderful projects.


 Thank you.