I’m sorry, but I have to call out dan and glowforge on this one. No ![]() tortillas?!?! The fact you can laser guacamole is a long established fact (thanks to @henryhbk ) so no one thought to stock the
tortillas?!?! The fact you can laser guacamole is a long established fact (thanks to @henryhbk ) so no one thought to stock the ![]() store with tortillas? Epic fail.
store with tortillas? Epic fail.
Sadly my local grocery doesn’t carry blue corn tortillas, but then again the engrave probably wouldn’t show up as well. This was wicked simple to create. In Inkscape I made a circle of the approximate diameter of a tortilla and made it green. Then I snapped a vertical line slightly large than the circle (made it blue), did a ctrl+d and rotated it 60 degrees and then did it again. With the template made I went to the noun project and downloaded six icons. Imported them into Inkscape, resized and placed.
The burro is public domain
Agave by Erick Miranda Vazquez from the Noun Project
Cactus by Valeriy from the Noun Project
Pinata by Yazmin Alanis from the Noun Project
Sombrero by Made by Made from the Noun Project
tequila by corpus delicti from the Noun Project
A print of a single tortilla takes 16:02 minutes using the following settings:
icons (engraved) - 480 speed, 60 power, 255 lpi, 0.06 focus & 1 pass
3 score lines (cut) - 400 speed, 50 power, 0.06 focus & 1 pass
Outside circle - ignore (this is why it is a different color)
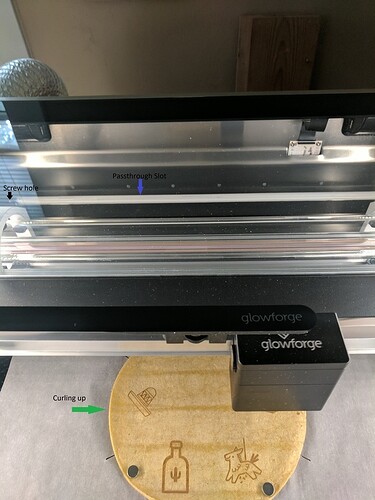
A few things to note. I used parchment paper as a backer mainly because I was more concerned with leaving masa in my glowforge than getting glowforge on my chips. The edges of the corn tortillas start out laying down flat, but slowly start to bend up until they are almost at the height of the laser head. After the first tortilla I held the edges down with magnets. You can see this uplifting if you look closely at the left side of the tortilla. Which leads me to my next point: the magnets. These are nickel plated. The manual specifically warns against placing copper and chrome in the glowforge as they are reflective to the laser’s wavelength. I don’t know about the reflectivity of nickel, but it is probably a bad idea to run over it with the laser. So I was careful to keep them out of the laser path. They sell epoxy coated magnets which may not be a bad safety idea. And finally, in the photo you can see the rear passthrough slot from the inside. It’s not very clear but I think the pre-tapped hole to the left of the passthrough slot is for the guards they are making. There is an identical hole to the right of the slot.
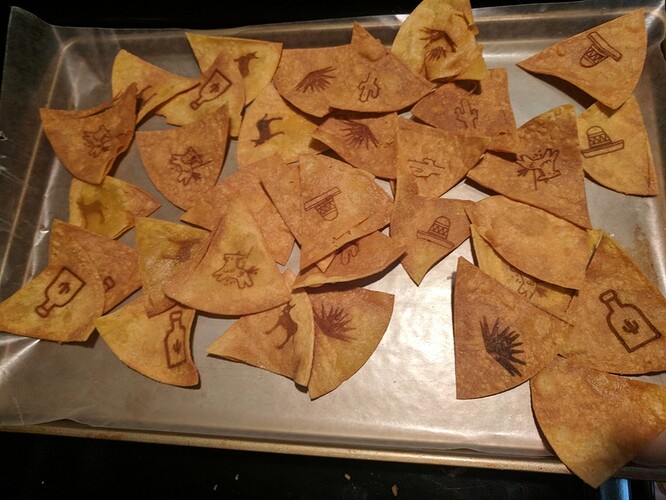
I’ve never personally fried up my own tortilla chips, and while the second batch isn’t as well done as the first, I could have lifted them out of the oil sooner. They taste fine and the engrave held up well (note the unengraved ones I used as a control group.) Considering the amount of time it takes per tortilla, I’m thinking this is more a novelty thing to do unless you are really desperate to win the party.
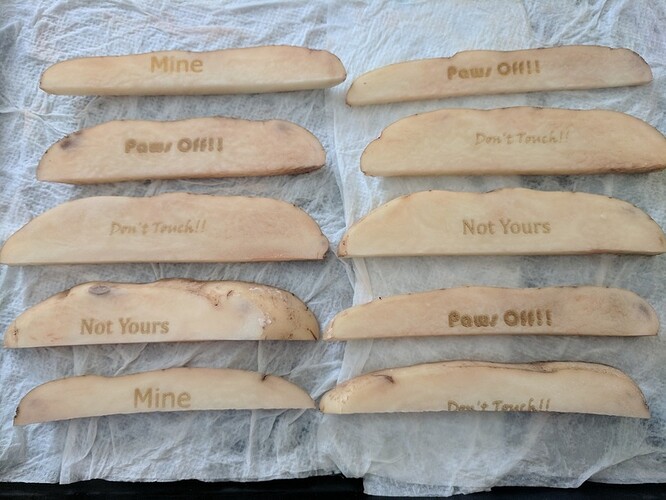
Thursday’s second experiment is in tribute to my friend Dino and because I got a cheese burger and steak fries out of the deal for lunch. Way back when (after the dinosaurs died out but before cell phones) we were eating lunch in the high school cafeteria when our friend Z— thought he could steal something off of Dino’s tray. Z— wound up with a fork in his hand. That it didn’t break the skin was more a factor of the bluntness of the washable plastic silverware they used than a comment on the down force applied. Here is a photo of engraved potatoes fresh out of the ![]() .
.
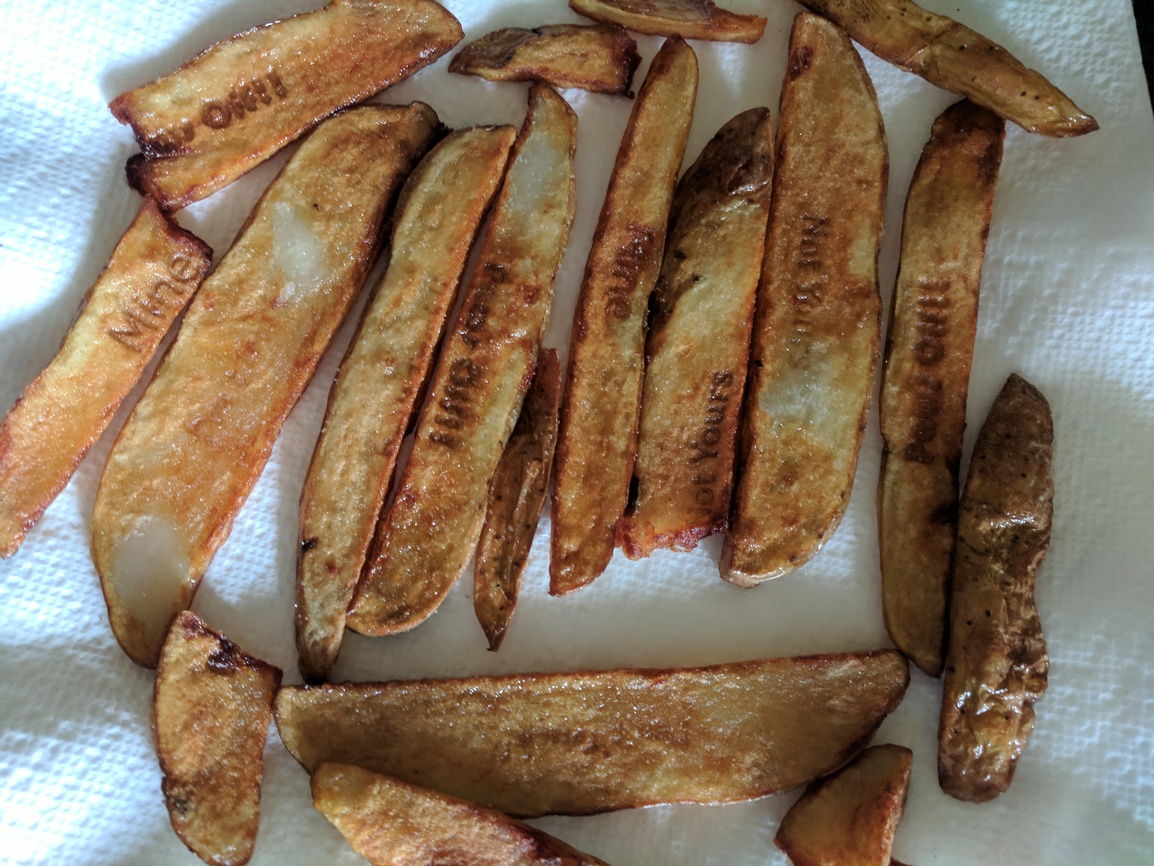
I cut the potato about an hour before engraving so they were already starting to oxidize (turn brown.) Ten minutes in the cyclonic conditions of the glowforge did them no favors. Another lesson learned is that the Don’t Touch slice at the bottom-right of the photo was well centered, like all of the others, before I pressed the print button. None of the slices were the exact same thickness, and that one was on the thinner side, so it could be the focus length provided resulted in the misplacement. I’m sure it will become clear in time if the alignment near the center-front of my pro is off a bit or if it was the user providing GIGO. Also, a double thick layer of paper towels well wetted is no match for the following potato engrave settings: 400 speed, 60 power, 255 lpi & 1 pass. It took about a minute per slice. Below is what they looked like after frying. It appears engraved potatoes do not hold up as well as corn chips to deep frying, but if you are going to do it a font like Bauhaus works best. Again, they tasted fine.

I cooked them as per the America’s Test Kitchen technique for crispy outside and pillowy tender inside. Place the potato slices in a bowl, toss with a small amount of oil, cover with cling wrap and microwave for about 4 minutes on high. Give them a toss and zap for another 4 minutes. Let cool on paper towels for a few minutes before frying. At this point they are soft so be careful removing them from the bowl and again from the paper towels. As you can see I tore a couple.
My final takeaway from today is that it is just wickedly simple to create really silly things. I’m not sure if this is a good thing or not. I was going to do some potato chips as well, but decided to make my own version of polarbrainfreeze’s tea light holder in the Free Designs category instead.


