Bubeenga

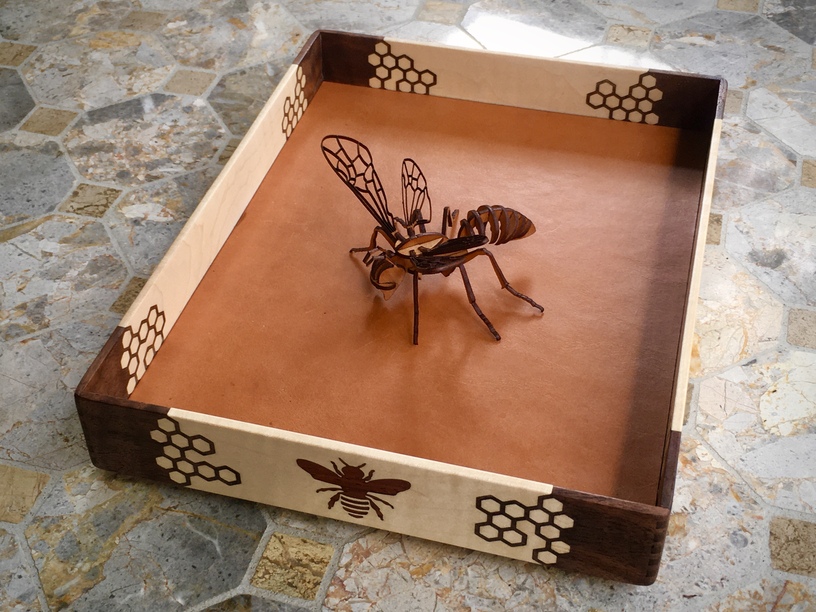
I am the keeper of the comb. You may look, but do not touch.

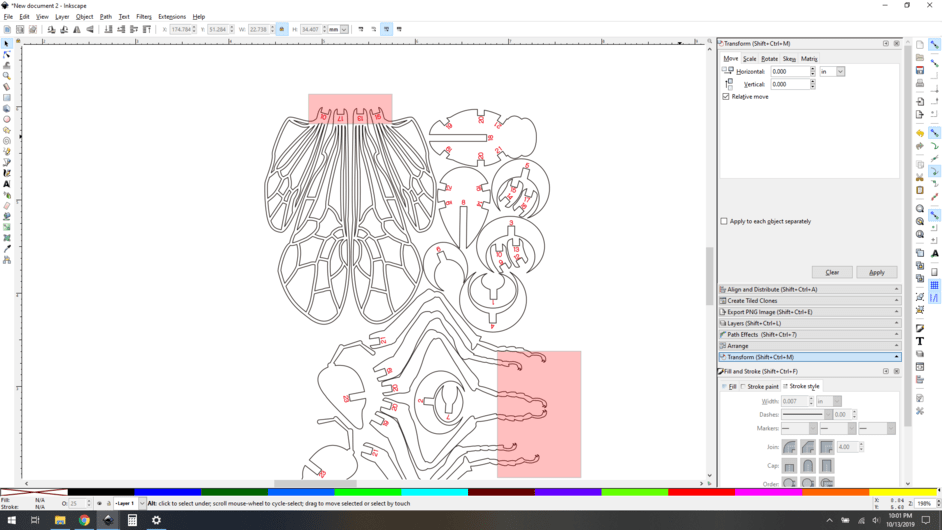
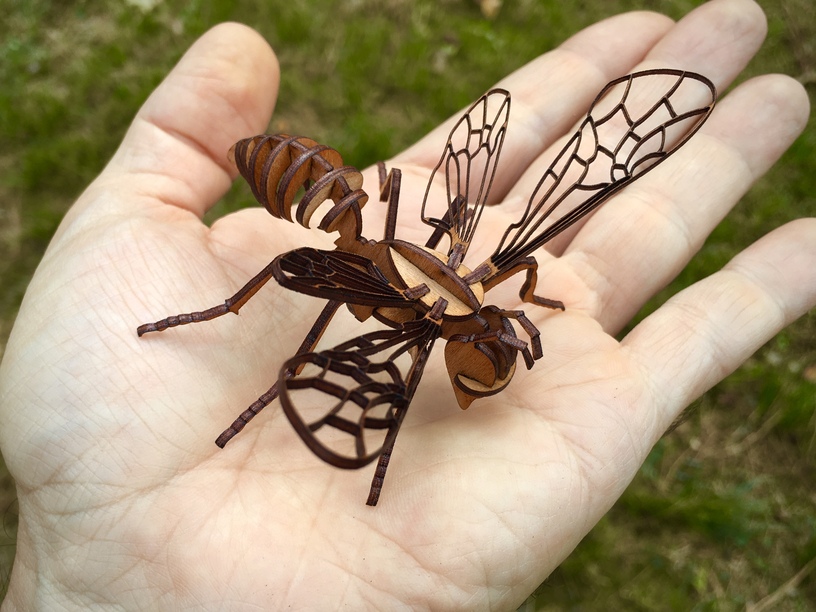
I’d seen the bee model kicking around on the forum for a while and always thought it looked fun, so I decided to take a crack at it. I had seen other people’s takes on it, but I decided that smaller was where I wanted to be.

Notes:

  • Two Three layers of bubinga veneer, glued up cross-grain. Total thickness 0.063"
  • Unmasked. This is unusual for me, so thought I’d mention it.
  • I made the slots intentionally looser than my usual, and glued the model up. The slots have barely enough friction to hold the pieces in place, glue is necessary.
  • The entire model fits in 4" x 2.25" space, it uses very little material.

If this were my model I would redesign the head. I don't like the angle of the face planes.


(Bubinga veneer)

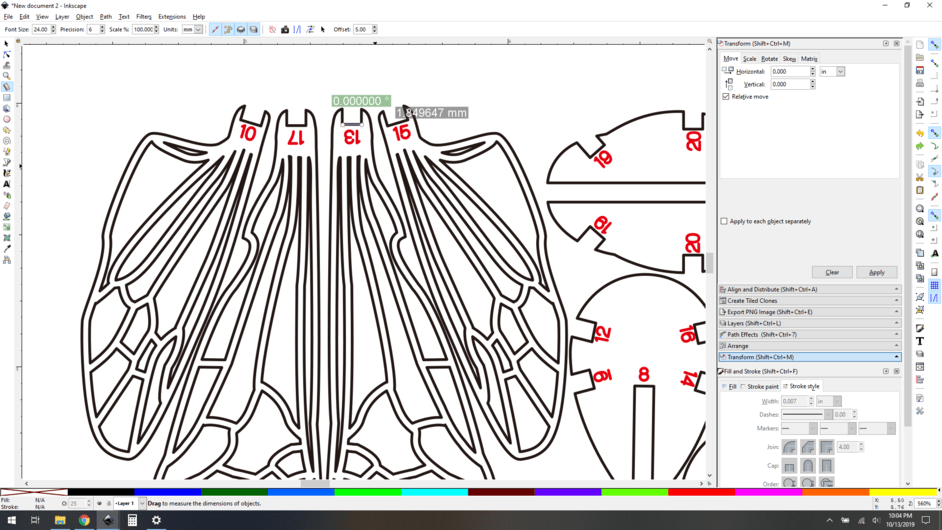
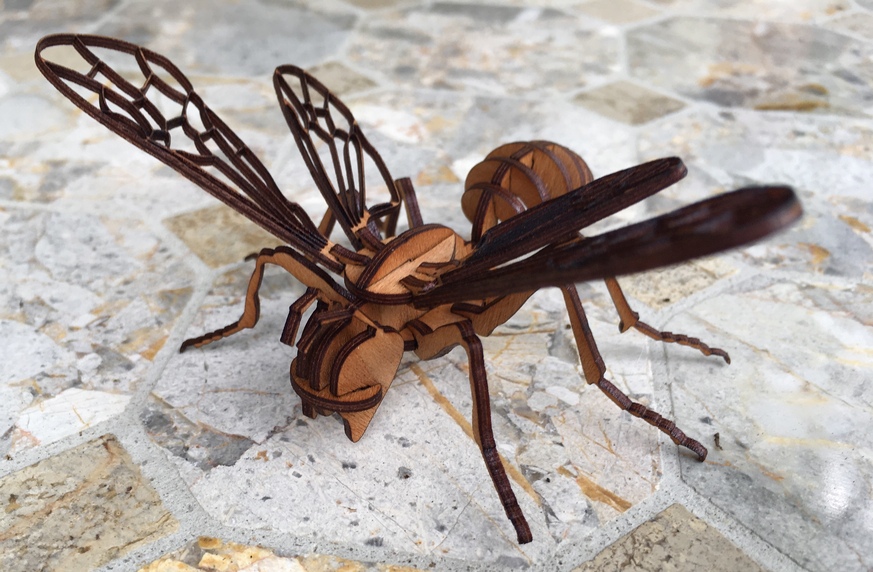
I actually realized that the cutout in the long front wing section is still stuck in there. You can see it in the upper right wing here. I need to use a dental pick to get it out of there… The hazards of moving quickly and working at really small scale.


(Bubinga veneer)

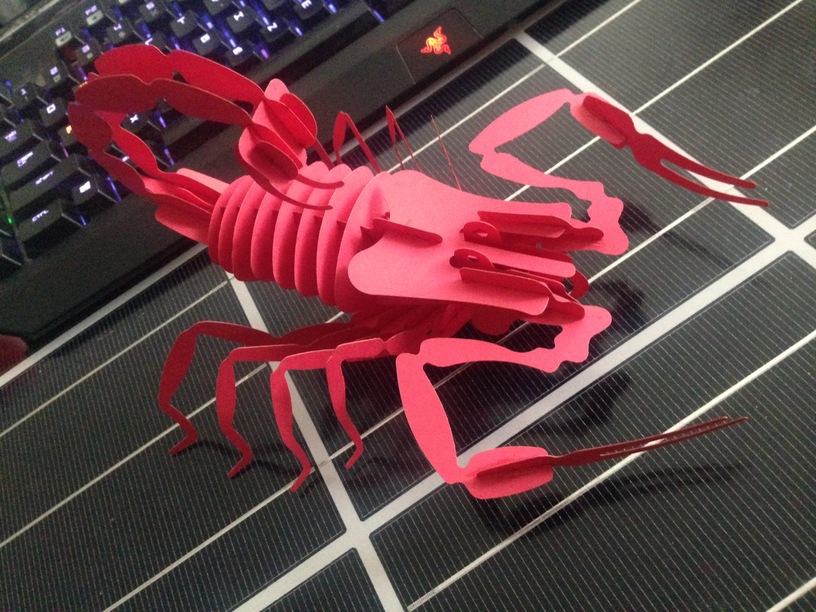
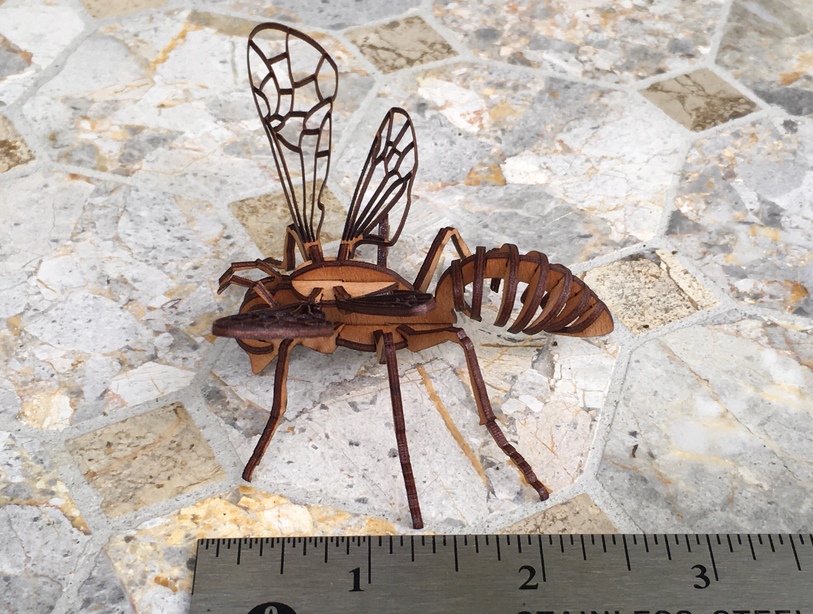
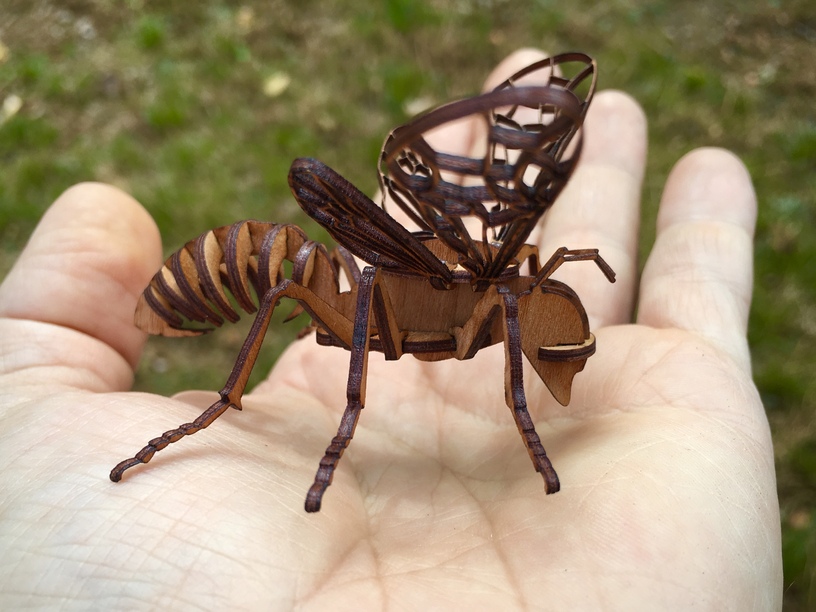
A… uh… scale for scale. I was out of bananas.


(Bubinga veneer)

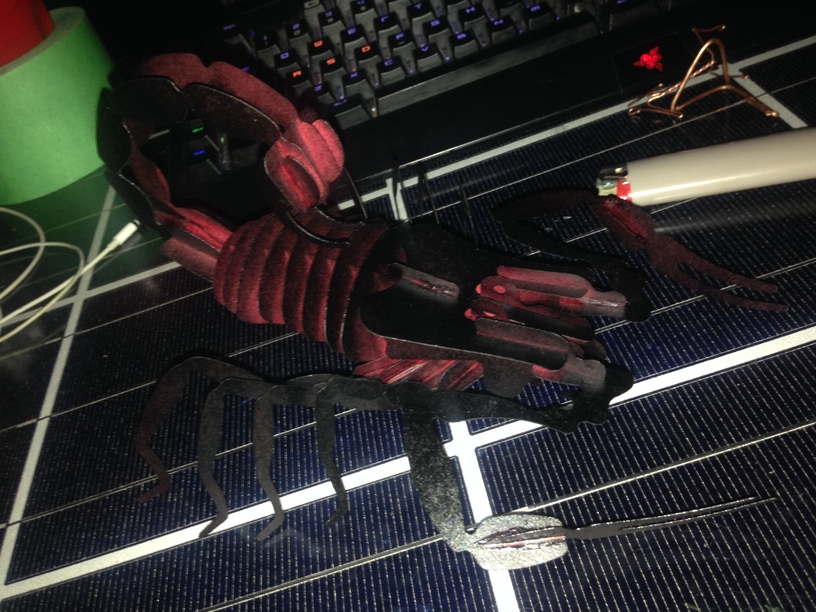
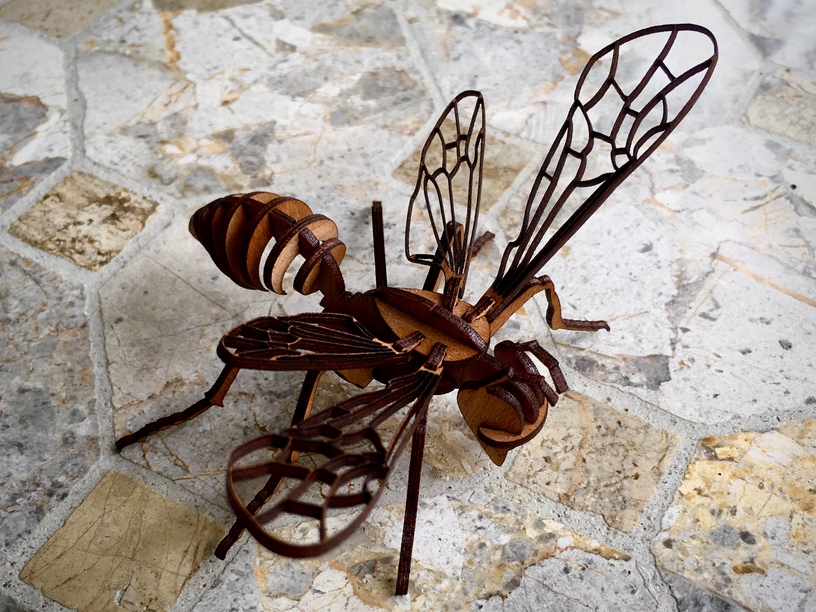
Should I be concerned?


(Bubinga veneer)

I should definitely be concerned.


(Bubinga veneer)

CONCERN INTENSIFIES

58 Likes

Very nice. I don’t know why I am so reluctant to use the real woods I have purchased. Always saving them for something I’ll never get around to!

12 Likes

I bought a multipack of veneers that are about 4x6. This was an almost ideal project size for the material.

All I know is that the wood in the storage shelves isn’t impressing anyone :slight_smile:

8 Likes

Very cool! Now make it flat pack, credit card size.

4 Likes

It’s just a bit too big for that. I’m up against some serious physical limits, so I am not likely to remix this to be any smaller. It could be done, but time-consuming compromises would have to be made, and I’m not inclined to put more time into it :slight_smile:

Beautiful and AMAZING box, love the comb motif!

1 Like

If you want more of that, click the link at the top of the post, it has its own thread.

2 Likes

Wonderful. You always take things to another level :slight_smile:

2 Likes

Cool looking wasp :). you might like the scorpion i made out of card stock a lil while ago.

16 Likes

I’m the same way. I also do it with paper. Trying to break that mindset this year.

The bee is so delicate. The GF really shines with applications like this.

3 Likes

Very cool. The honeycomb tray is still one of my favorites too.

2 Likes

A good thing too. Many beekeepers don’t eat bananas before opening a hive. It is said that banana breath smells like attack pheromone.

Nice version of this 3D bee. It’s one of the first things I tried on my laser. Loved the bee, not so happy with putting all the little pieces together. However, you are the zillion-little-pieces-of-assembly champ!! I am guessing this was a snap for you.

9 Likes

Did not know this…what a fun fact to hang on to! :grinning:

Great looking bumble bubee @evansd2! :smile:

2 Likes

How did you handle the resizing impacting the joints? I tried a coasters with toaster holder and resized it and nothing fit properly then (valuable lesson for a newby)

On a design with few joints like this, it doesn’t take too long to resize them manually. Don’t know if that’s how it was done here, though.

Lovely little bee.

2 Likes

So cute - I love the delicacy of the wings.

2 Likes

A perfect addition to your gorgeous tray!

1 Like

It’s fairly simple using any vector editor. I’ll give the example using Inkscape. A quick note: There are a lot of words here, but in reality this process should literally only take about a minute to do the scaling, then however much time you take to do any manual adjustments (described below) is up to you.

The steps:

First, measure your material and decide how thick you want your slots to be. Let’s assume our theoretical new material is 2mm thick. You’ll need to kerf adjust the cut line, so you need your slots to be 2mm minus some kerf adjustment, let’s assume you’ve worked all this out and you decide that your slots need to be 1.85mm. (that’s about a kerf of 0.006" It should end up snug but not a pure friction fit… you’ll have to figure out what kind of adjustment you want to use on your material, Acrylic for example, unforgiving… woods, a bit moreso.)

OK now you have your desired slot width in mind.

Open your model file.

Measure the existing slot width. It’s 3.050 mm as is.

Now select all and let’s modify the overall size. To scale it you want to multiply by the desired slot width and divide by the existing slot width. So first lock your aspect ratio and then you add “*1.85/3.050” to the width (or height) field. The entire model will resize.

Now measure your slot width to be sure it’s right and you didn’t typo anything.

Perfect. Now you have to sanity check the model. Did you size anything out of existence? See if anything looks super thin. A good way to gut check this is to set the stroke width to be about a kerf (0.007" usually works), and you can eyeball a lot of it. Look in particular at the red areas highlighted here.


Here's my thought process for this theoretical example:

The hooks on the feet are vanishingly small, you could consider modifying the path to remove them, and the tabs where the wings connect are pretty skinny, you might want to modify those to be a bit wider. Those are judgment calls, and completely up to you.

The wing filaments are about 0.7mm thick, those should be ok… almost everything else is even thicker. The antennae are going to be delicate, but they also look like they’ll hold up, just be careful.


So anyway, assuming you tested your slot width and got that right the first time, this should work fine. My bee worked on the first go.

5 Likes

The bee is awesome! The box is incredible!!! I love the joints! This is indeed a stunning work of art. I need to learn how to do those joint patterns. Thanks for sharing this one with us!

1 Like