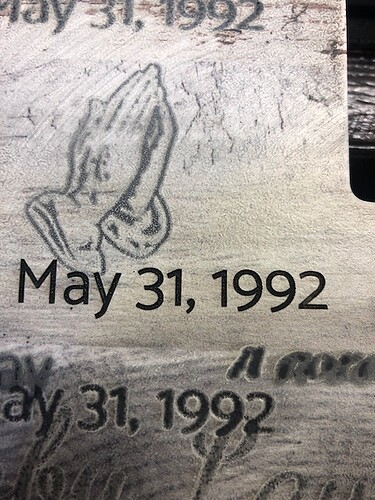
Simple question, but I’m SO NEW!!! When i am done with a print and wipe it, the coloring goes away…what am i doing wrong???
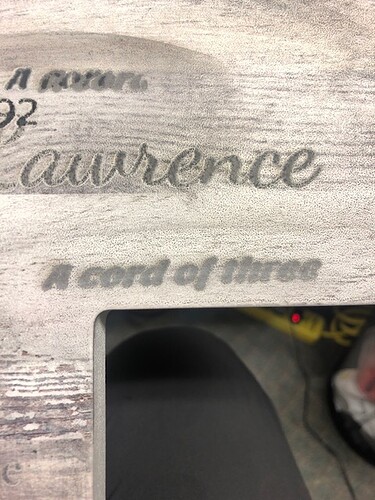
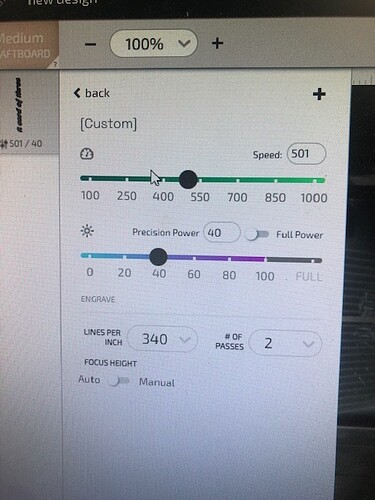
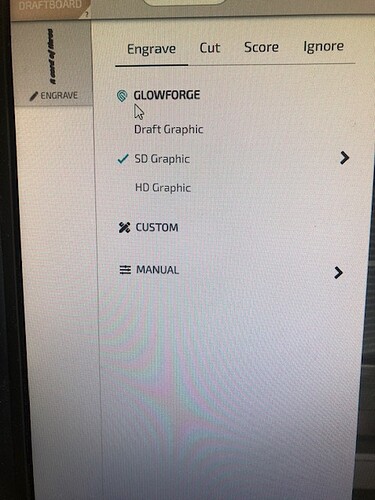
Hi and welcome to the community. If you could attach some photos, it might help us help you. A photo of the settings along the left side of the GF app…tell us what kind of wood or whatever other kind of material you’re using…proofgrade? or other?..and lastly, a photo of your print so we can see what you’re describing.
Is this a cutting board that you sat on the floor of the machine and then tried to engrave on it?
That’s what it looks like to me. And the resulting engraves look as they do because the board is sitting outside the focal range of the machine: it’s too far below the print head.
The Glowforge can only focus its laser beam on objects up to about 1/2" below the print head – which is the surface of the crumb tray or up to 1/2" above that. If you remove the crumb tray, you have to raise your object up to at least as high as where the top of the crumb tray was.
An out of focus engrave will come out looking blurred and shallow, exactly like your photos. Once you raise it up to the right height, your engraves will be crisp and deep and won’t wipe away.
You can print out one of these rulers to help with raising material to the correct height when the crumb tray is removed: No-Math Focus Ruler
The process of engraving involves burning away layers of material. When you wipe an engraved area, you are cleaning the debris and residue left behind off of your item and exposing the remaining material.
What material is in your photo?
The basic problem is that while charcoal is black and scorched wood is usually brown, every different species will do that differently, and some will be charcoal before another is scorched and the temperature range that it happens is very small part of the total. Also as the wood is heated it creates a crud that can also be different colors of brown, and as you have seen, when you have cleaned that off you are left with just normal wood.
Generally that scorching can add some depth if the setting is exactly right depending on the species of wood, but if you use masking and a light coat of clear after to plug the fibers from soaking up the color and then the color you want you will have a much more controlled result that can even be brighter than brown.
Ok so product is about 3/4 inch thick which if I add the crumb tray, it’s to thick, isn’t it?
It’s like a pressed wood.
Yes, it’s too thick to sit on the crumb tray, but also not thick enough to sit on the bottom of the machine. You need to raise it up with something underneath it so that it’s at least as high as the crumb tray was (about 1.5" off the floor). The ruler I linked above will help you do that visually; you can cut it out of a spare piece of wood/acrylic/draftboard.
The steps to engrave on a thick item are:
-
Remove the crumb tray
-
Put something under your material to raise it up to within the focal range
(like stacking two of your boards on top of each other to engrave on the top one) -
Close the lid
-
Click the 3 dots icon in the GF app, and choose “Set Focus” in the dropdown menu, then click anywhere on your pressed wood
(this will have the machine measure the distance to the material to set its focus height correctly) -
Line up your design with the updated photo on your screen and hit print
Make sure not to skip steps 2 or 4 to get a good quality engrave.
So, any idea on settings…or can I raise it some other way besides crumb tray. Sorry, totally new at this. I had bought a Pgraham Dunn machine used and it turned out to be a lemon. Before realizing this, I bought a 1000 dollars of product. I NEED to use this and it’ s a pallet colored cross. Any help would be MUCH apprciated.
1000 speed, 100 power, 225 LPI, one pass, and automatic focus are my usual settings for engraving on cutting boards or similar thick wooden items. Maybe 270 LPI if there’s a lot of fine detail in the design.
The “SD Graphic” for “draftboard” you had selected would have also worked fine (albeit a bit slower) if you had the board raised up. You can raise it with anything – stack some other wood or scraps underneath your board. Only the surface of your board at the top is going to be engraved.
You need to experiment to what works for you… This was an experiment done at full power and 1200 speed and 1355LPI. You have to find what works for you.
Yes, will do. Thanks for your help today.
I am glad you got the result you desired. For future reference, the surface to be engraved must be within the 1/2" focus range of the Glowforge. This means that the surface must be between 1.5" and 2" from the floor of the Glowforge. There are files available to produce risers to elevate material, or you can just stack things under your material to elevate it.
Here’s one:
Is there a way to import a picture from dashboard onto an already existing text on the tray? I typed text onto a cross and need to put a pic on it from dashboard.
| eflyguy
June 30 |
- | - |
Here’s one:
If you open both designs in two different tabs of your browser, you should be able to copy and paste between them using CTRL+C and CTRL+V.
This topic was automatically closed 30 days after the last reply. New replies are no longer allowed.
