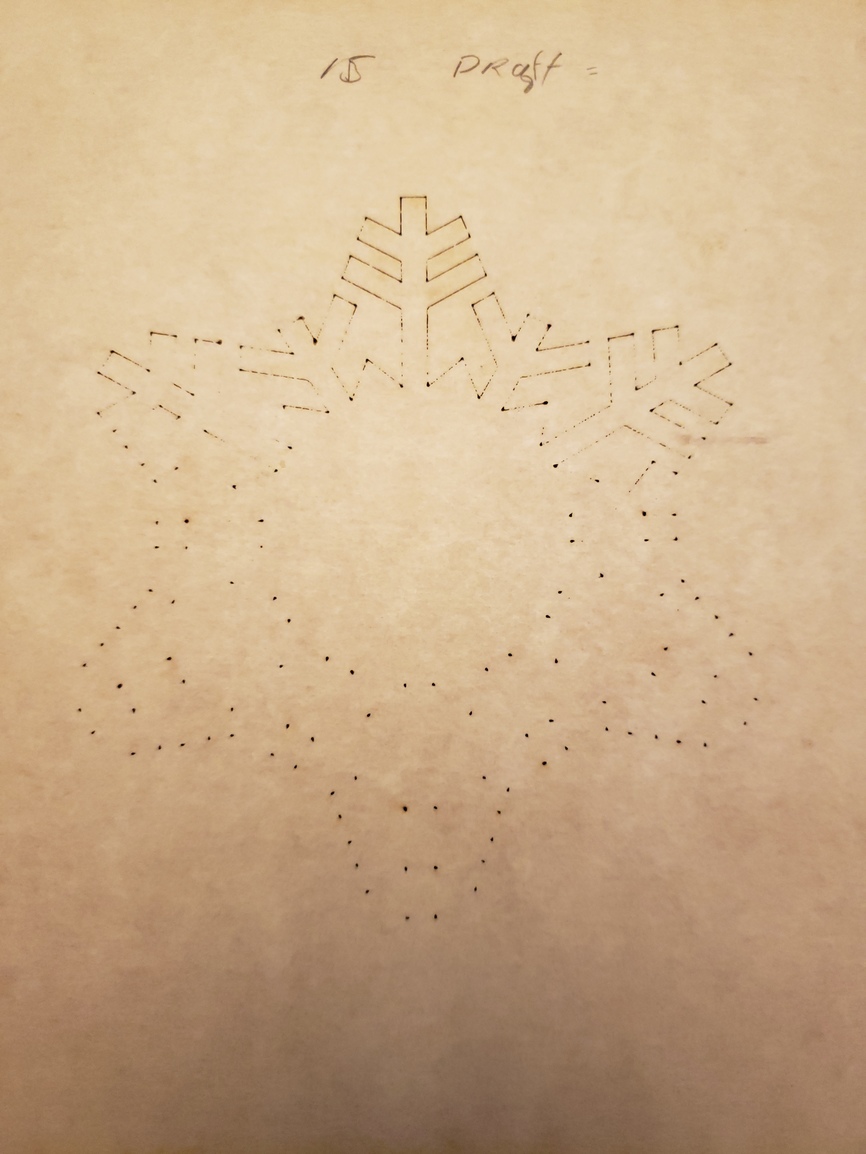
I was going to run it through again - but you can’t tell it hasn’t cut through without moving the board. Moving the board loses all sense of alignment.
You may already have done some of this, but if you haven’t wiped the lens and both windows with a Zeiss wipe, give that a go. Make sure not to drop the lens or the tool, and make sure to reinsert the lens right-side up.
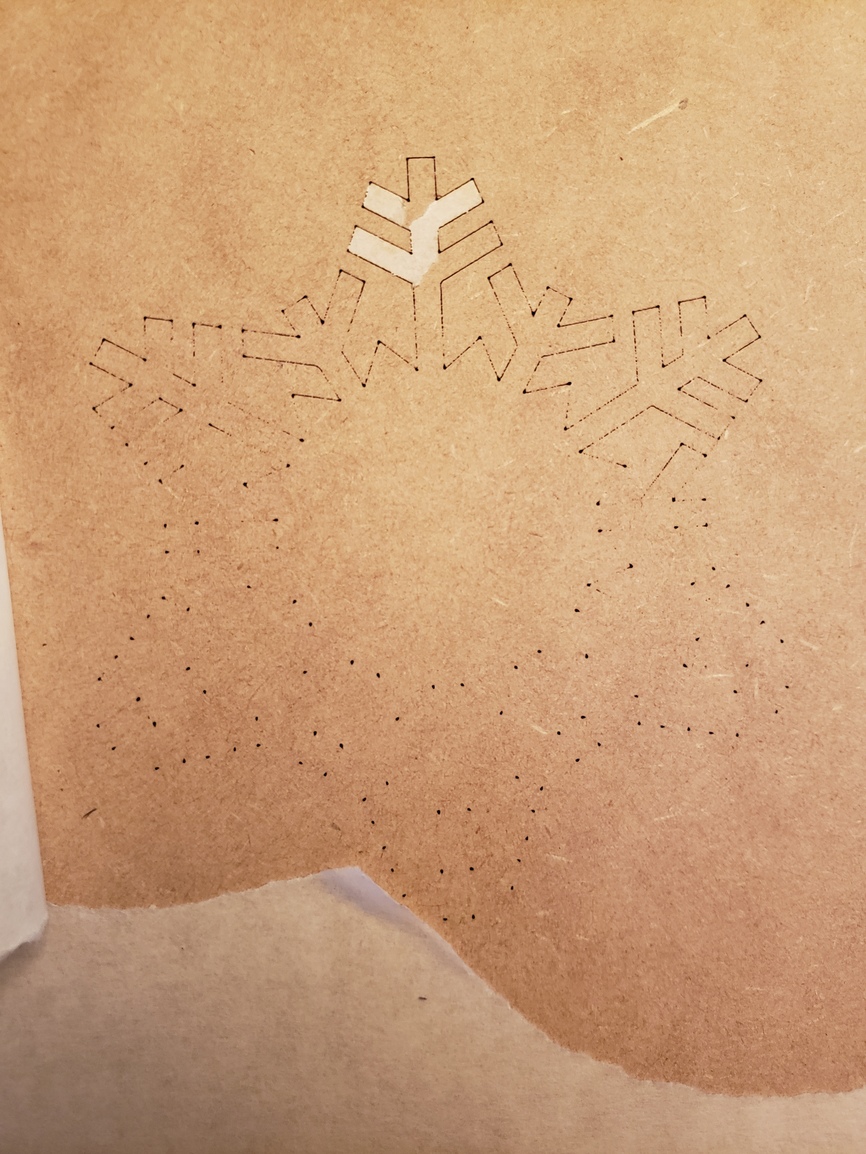
Next, try decreasing your speed or increasing your power a bit until you get an official response. Before moving your material, test for cut-through in case you need another pass. I always remove the cutout with painter’s tape before the remainders, just in case.
Thanks for the help!
I am using proof grade draft. The system sets all of the settings - and I can’t seem to find the settings such that I can tweak them. How do I find those settings?
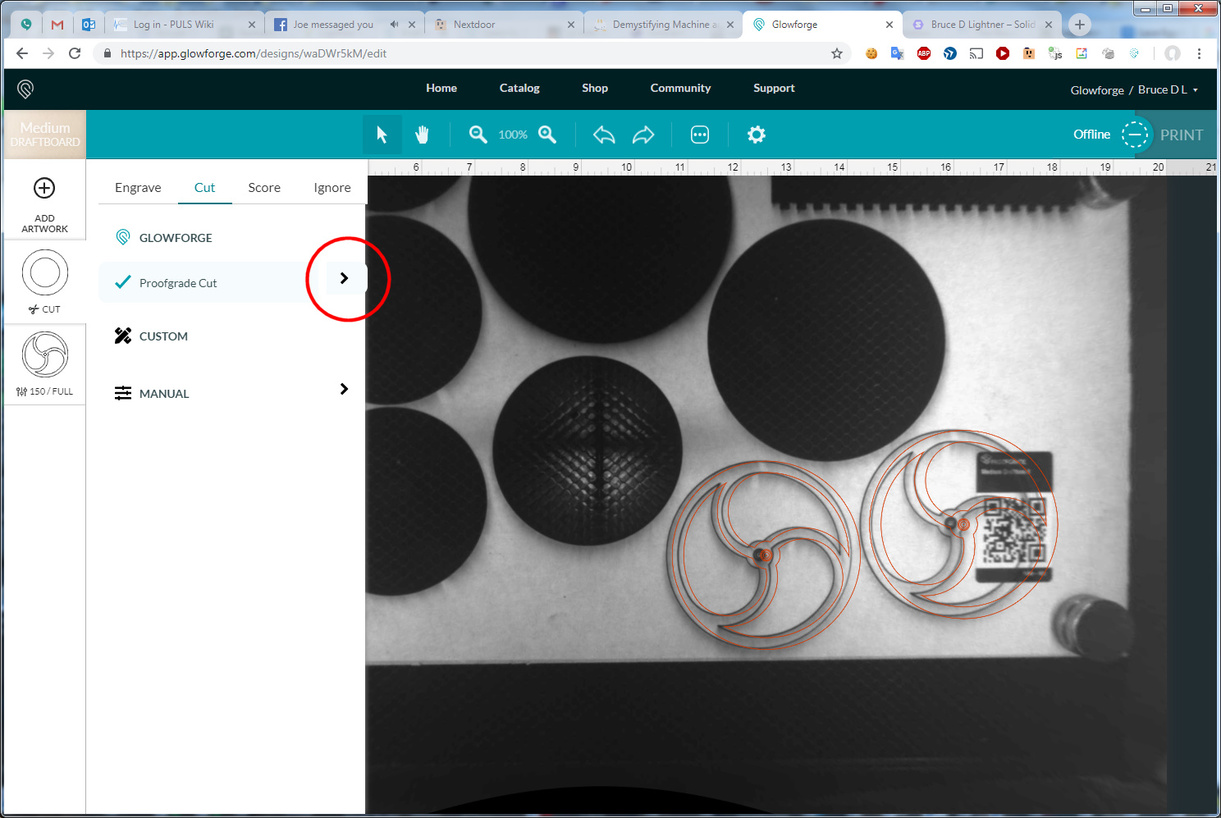
I figured out how to alter the settings of the proofgrade stuff.
Started clicking on whatever I could and found it. (the > isn’t real intuitive IMHO)
(I need to have a talk with the UI designer - there are, in my opinion, too many settings buried underneath icons that don’t suggest their purpose very well. I am looking at you … icon next to the settings icon (that only has one setting in it)).
I use 15 less of what the Glowforge settings are, because I have a similar issue. I also get it on some of my other proofgrade plywood, but it’s inconsistent, which I take for the inconsistent material thickness throughout the span of the sheet. It’ll burn through some parts, but not all. My draft board almost never goes all the way through, usually the tape on the back is what doesn’t get cut so if I cut that manually it will release, but that’s only if I don’t change the settings (which I’ve formed a habit of doing already).
I’ve never found a consistent method to fix this outside of changing the settings manually, but I hope it’s simpler than that for you
This might be a stupid suggestion, but have you got some digital calipers and can you check your material thickness? I’m wondering if your draftboard is perhaps a little thicker than it is supposed to be.
I have calipers - but there’s a barcode on the sheet of wood. One of the expectations is that you buy this wood, and it works. The fact that I have to figure out the “right” settings on my own and burn through material - I find that problematic.
I totally hear you and agree. I have heard of a couple boards being thicker than spec - I am hoping that it’s your proofgrade out of spec and not your laser.
Also - since it is proofgrade I believe you can ask support to replace.
I place magnets on the crumb tray butted up against the material on three sides of the material so that I can get the material back into place exactly where it was.
I pin the board or put magnets to hold it firmly in place. Then I use a pointy tool (dental pick) after it runs the job to see if I can lift just the cutout piece. If I can I pull it out and then pull off the magnets and remove the rest of the sheet. If I can’t remove it with the pick I set everything but the cuts to ignore and run another pass. The material won’t move when it’s held in place with the magnets so the second cut pass lands dead on top of the first.
But as you said you shouldn’t need to do this so I’d toss in a problem report to see if they might need to tweak your machine’s power profile.
Can you guys share what magnets you are using (ideally on Amazon)? I have several but none of them seem big enough. I did find this one in another thread that looks kind of interesting.