Looking for some help from the Corel Draw group.
I have been exporting svg’s and cutting and engraving no probs. That is until I tried to do a cut out.
I have a circle, and need to engrave just the outer bit. The circle is 7mm and I want to engrave the outer 1.5mm then cut a circle that is 4.5mm out of the middle. The gap between the two should not be engraved.
Here is what I did.
Made a circle, (for ease of mesuring in corel I did it 70mm). No outline, file is pink.
Made a circle, 55mm. No outline, no fill.
Select them both then use the “back minus front”. This gives me a pink loop.
Made a third circle 45mm. hairline outline no fill.
Upload to GF.
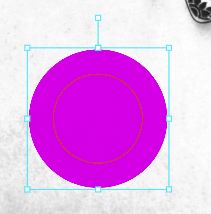
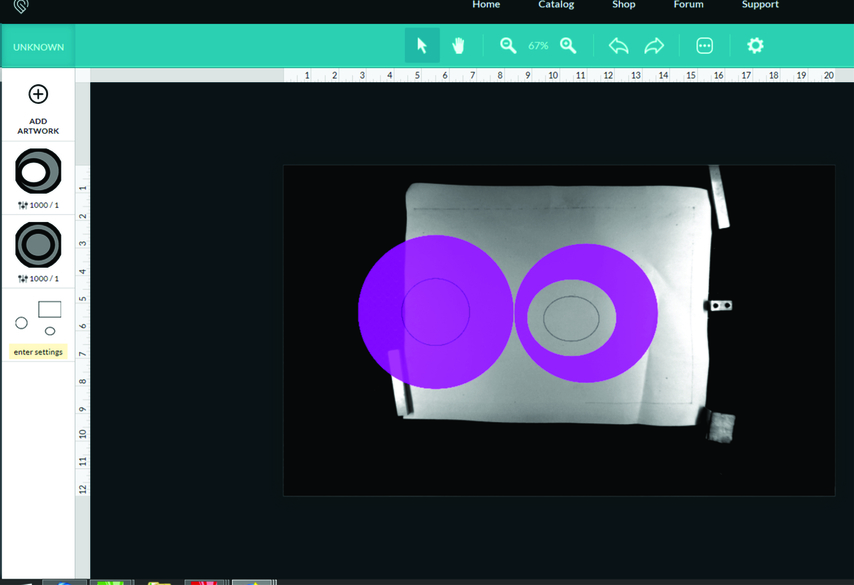
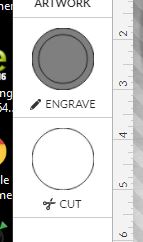
What I get is a full circle that wants to engrave and a circle to cut.
For the time being my work arounds have been to pull it into corel paint and take out the center to make a loop, or to use it as a .jpg in the svg file.
Attached are the corel file, the svg file and two captures showing what I get in the GF screen.
Have you checked out the basic Corel Tips and Tricks on Vectors in the matrix of help filex? It has some explanations on how to knock out the centers of things.
There are some links to Corel Draw videos, but it doesn’t seem that there is a specific tutorial for CD regarding this.
There is a link in this topic by @johnwills to explain how to make the donut in CD.
You will have to have two objects on top of each other. The outer circle will just be a cut, stroke but no fill. Then another circle that is fill, no stroke that would be your engraved donut with the center knocked out.
It seems like you are doing the right thing here, but somehow you aren’t getting that complete donut.
There is a known issue with how Corel Draw (and Affinity Designer) SVG files are created that has to do with winding order. It prevents SVG files created in those programs from subtracting island centers out correctly under the Even-Odd fill rule. (And that is what the Glowforge interface currently has to see in order to render the engrave correctly.)
Glowforge is working on modifying their coding to address that, but in the meantime, you’d need to use a non-zero fill rule, or just save the file as a PDF if you have a subtraction in it. (Those should render and engrave correctly.)
I looked at your CorelDraw file. Looks like it should work. As I was typing my reply, @Jules said what I was going to suggest: save the file as PDF. I have been doing all my design work in CorelDraw and saving to PDF and have not had any issues like this.
This was a new one for me and I’ve been using Corel Draw for 20 years, but have finally figured out how to work out the even/odd problem.
I guess I’ve always constructed (rectangles & ellipses) left to right. I stack the objects and combine (crtl-L) or weld them to create an object similar to yours. This method makes the subpaths clockwise, so when I save out to SVG I get your result.
Option 1, draw the first shape as you would normally, and then create the second shape in the opposite direction. Combine or weld them and you should get the intended result. Or as @Jules has described in all of the matrix notes as an island fill.
Option 2, draw as normal, convert the ellipses or rectangles to curves (ctrl-Q). Click on the shape tool (F10) and right-click on the inner curve, then select Reverse Subpaths. (If you look, you may see a very small arrow head and it will change directions). Now you can select and combine (ctrl-L) the objects. Fill as normal and only the filled portion will be selected for engraving not the entire object.
Sure, I just got home so I just quickly replied. If you would like, give me a little time and I can put together some screen shots to help with the visuals.
That would be fantastic! If you want to start a new Thread for it here in the Everything Else category, I can move it for you to Tips and Tricks when it’s done and make it a full blown tutorial.
You can just copy the writeup from this one - I can’t move a post, just the new Topics, and we could use it in the Tips and Tricks section.
Sorry I didnt get back to this sooner. I haven’t been on the GF due to high winds in the area (I vent out a window). Anyway, HUGE THANKS to Jules and Kennyb. The change direction was exactly what I needed. Also, thanks for the short cut keys.
omg, i’m so glad I found this thread. I spent about 2 hours making various test svg files from Corel and it didn’t make sense why it wouldn’t work. There was one random circle in a square that worked and I couldn’t figure out why it did. I must have created it from right to left. This is a crazy bug! Thx for posting the various workarounds.
 screw hole 2.cdr (24.0 KB)