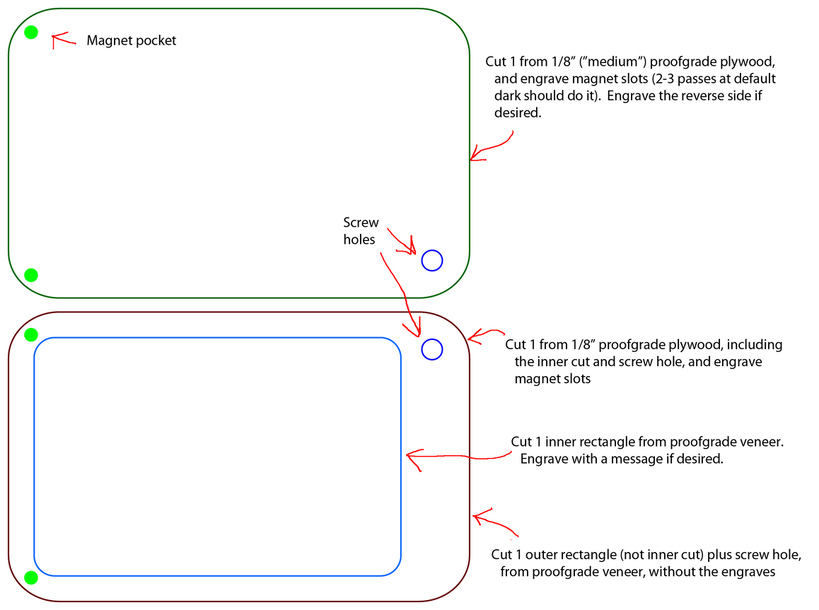
Hey folks, here is the design I created for the gift card holder I recently uploaded.
Requirements: approx 1/8" (“medium”) Proofgrade plywood or Draftboard, Proofgrade veneer, four 3mmx1.5mm neodymium magnets, one 1/4" screw post (Chicago screw).
Thank you so much for sharing this. Anyone who doesn’t get a major project from me and thus a gift card will still get a small wood project from me in the form of one of these customized just for them.
I’s really beautiful, but I have one question. Are we sure that this design will play nicely with magstripe gift cards, or don’t they make those any more?
that looks great. if i had a suggestion, it would be to use a screw post for the corner instead of a nut/bolt. would give you a smooth surface on both sides.
so I would look at some different screw posts. all of the ones I have at work are flat on the top, not rounded, and would look neater. you could also put the screw side on the back and the front would have a smooth, flat surface.
If you just put the one set of magnets in the lower left corner it should still close & hold and be far enough away from the magstripe not to affect it.
I’m pretty certain it wouldn’t be enough to affect them. But you could always use Apple iTunes or Amazon cards (which only use the “revealed” code number printed on back when you redeem them online !
I have a question about how you dealt with the sticky backing of the veneer. The larger veneer piece should be the bottom of the stack (1/8 plywood on top, 1/8 plywood with cutout in the middle, veneer on the bottom). How did you orient the sticky backing? If it faced outside, then you would have to have cleaned it off somehow, and also had to glue the veneer to the plywood. If it faced inside, then you would have to have cleaned off the sticky stuff in the pocket.
Similar question for the smaller veneer insert. Did you clean off the sticky backing, or just leave the paper covering?
So there are two pieces of veneer to cut: one larger rectangle with the Chicago screw hole (no inner rectangle cut), and one of the inner rectangle.
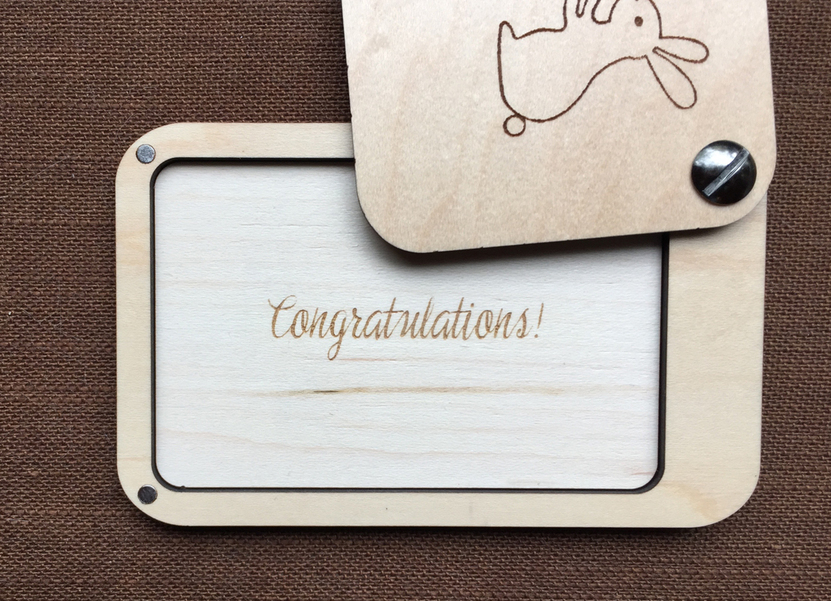
Assembly is as follows: Peel off all masking from all pieces. Place the larger veneer down, sticky side up, and place the piece of plywood that has the Chicago screw hole, the engraved magnet pockets, and the inner rectangle cut out, down onto the sticky veneer with the Chicago screw holes lined up. Now stick the smaller rectangle of veneer (engraved or not; you could also use thin leather here, looks nice) sticky side down onto the sticky veneer showing through the small rectangle cutout. This is your bottom half of the gift card holder. The top half is just attached with the Chicago screw. Glue magnets in (don’t forget to orient them properly so they don’t repel each other!) and you’re done.
I get it now. I thought the small veneer piece was lying on top of the gift card. Now I see that it is attached to larger piece of veneer, sticky side to sticky side, and the gift card lies on top of the doubled veneer. Great idea.
Question and/or update: I don’t believe this step will work if the veneer is cut as described in the first post. The holes for the chicago screws will not line up. I believe you need to use mirror image cut for the larger piece of veneer (i.e. the outline for the top piece that does not have the inner cutout). That way, when the veneer is flipped over so the sticky side is up, the holes will line up.
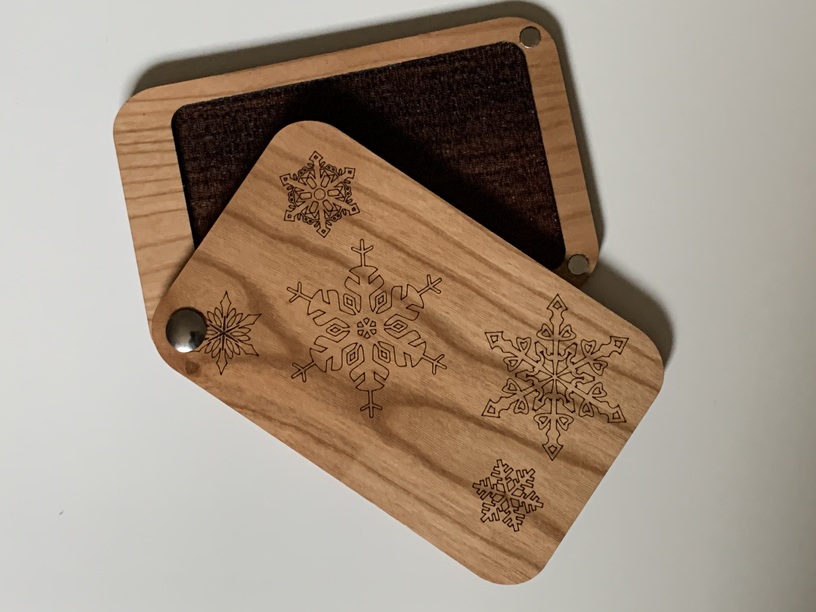
I made a couple of these for Christmas. Everyone loved them!
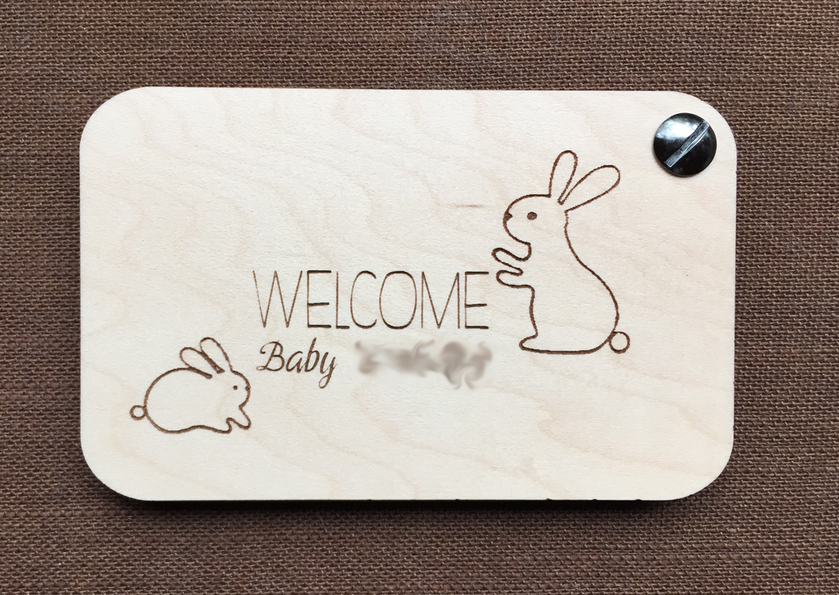
I didn’t use any veneer. I just engraved the card pocket (and then attacked it with sandpaper until it was no longer smokey). For obvious reasons I used hardwood rather than plywood or Draftboard. I also only had 5mm magnets on hand, so I had to modify the magnet pockets accordingly.
The first was snowflakes on Proofgrade cherry. It would have been much better on maple or another wood with fainter grain, but this is ok. I took this picture before I sanded the card pocket, so it’s still rather charred in this photo. It looked a lot nicer after sanding it.
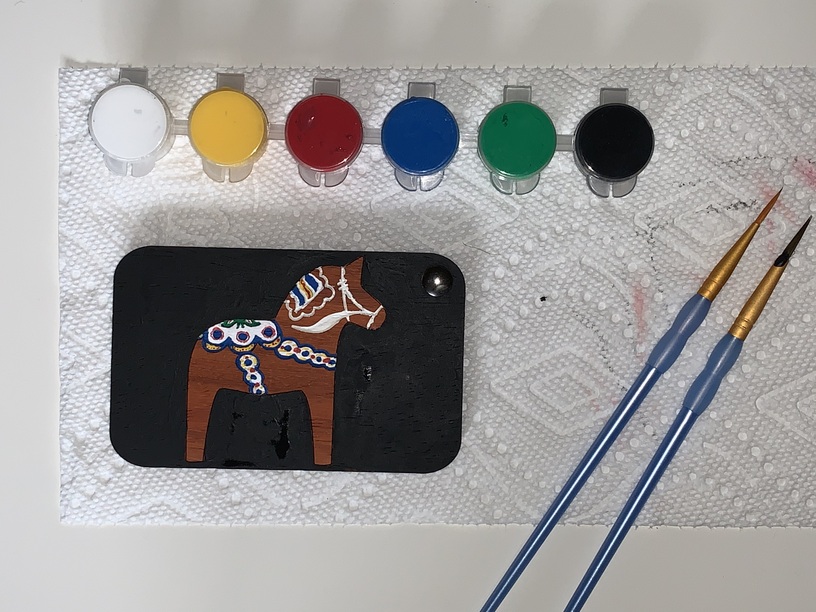
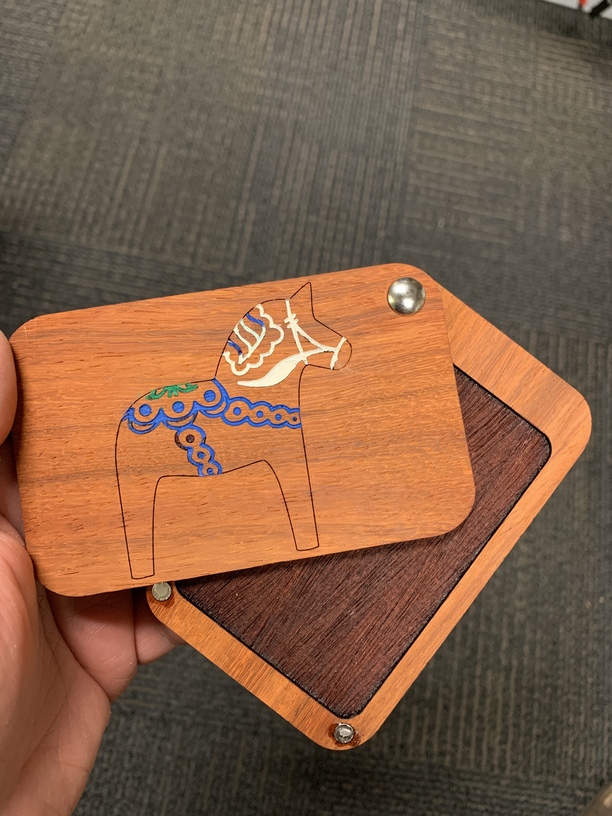
The second one is a Dalecarlian horse on padauk. My mom’s family is Swedish and loves them. I left the body of the horse unpainted, to let the natural reddish orange of the padauk show through.
Here it is when it was still only half painted, but opened up so you can see the card pocket. (This photo is also from before I sanded them to remove all the char. I also cleaned up the area around the magnets, sanding down some of the excess super glue that looks so messy in this photo.)