Hey community, hoping someone here has seen this before.
The issue: My Glowforge Pro has never reliably cut through material — this isn’t a recent regression, it has been this way since we got it. Running the Gift of Good Measure on Proofgrade Medium Draftboard with default Proofgrade settings — engraves fine, won’t cut through.
I’ll be honest, I assumed for years that I was doing something wrong. Only recently did I dig in and realize this might be a hardware problem that was never right from the start.
What I’ve done:
Cleaned all optics (both windows, lens, mirror inside head)
Verified lens orientation (cup side up)
Crumb tray properly seated
Using Proofgrade material with Proofgrade settings
Ran multiple GOGM test prints
What Glowforge support found:
After reviewing logs, they confirmed the machine was “moving too fast to cut through correctly”
They made 3 separate remote configuration adjustments
None resolved the issue
On the final test after the 3rd adjustment, it errored out mid-print entirely
The machine is about 10 years old but again — this has never worked correctly, so I don’t think this is tube degradation from age/use.
My questions:
Could a machine ship from the factory miscalibrated and just… stay that way for 10 years?
Has anyone had Glowforge’s remote calibration actually fix a chronic under-cutting issue?
At this point, is a tube replacement/refurb worth it, or is there something else to try first?
Thanks in advance — really hoping someone here has seen this pattern before!
Belts and pulleys look right? I’ve heard of pulleys being inside out.
In theory if your belts aren’t seated correctly on a wheel it could lead to a sort of “gear ratio” thing where the head moves faster than expected.
Also in theory if your motor pulley wheels are too big your head would move more quickly than expected. (no idea how that would happen, you’d have to have an incorrect part. I don’t know how large they’re supposed to be, maybe someone can measure theirs and report back)
These are shots in the dark though; I’d be surprised if any of this panned out.
Are you able to do material tests and get reliable cuts with custom settings? #6 on my faq talks about setting up a material test if you’ve never tried it.
Update: I went deeper on this and found the actual root cause.
Put the machine in setup mode (hold button until teal) and pulled the device logs directly from http://192.168.192.1:3000/logs/zip. Found this in the glowforge app log:
ERROR: hw: laser supply current of 17 exceeds maximum of 12
INFO: hw: error flag set: fault:hv_current_alert:set
INFO: print: cut failed due to hardware error(s): hv_current_alert
The HVPS is failing. Looking at the full log history, the fault first appeared May 24, 2025 — which was the exact session where it errored out mid-print during my Glowforge support ticket. By November 2025 the current readings were spiking to 116-163 (max is 12). Today they’re hitting 188. It’s completely gone.
The pre-2025 logs don’t show hard faults, but the HVPS was clearly marginal for years — enough to engrave but never enough to sustain a cut. That explains why this machine has never worked right since day one.
I’m looking at replacing the HVPS — eyeing the Etsy seller (Ken) who pulls tested units from donor machines. A few questions for anyone who’s done this repair:
Pro-specific HVPS or interchangeable with Plus/Basic?
Could hv_current_alert ever be a connector/wiring issue rather than the HVPS itself?
Any gotchas on the physical swap for the Pro?
Happy to share the full log if useful — tip for anyone debugging: setup mode exposes a local web server at 192.168.192.1:3000 with a /logs/zip endpoint that gives you the raw device logs without needing Glowforge support to pull them.
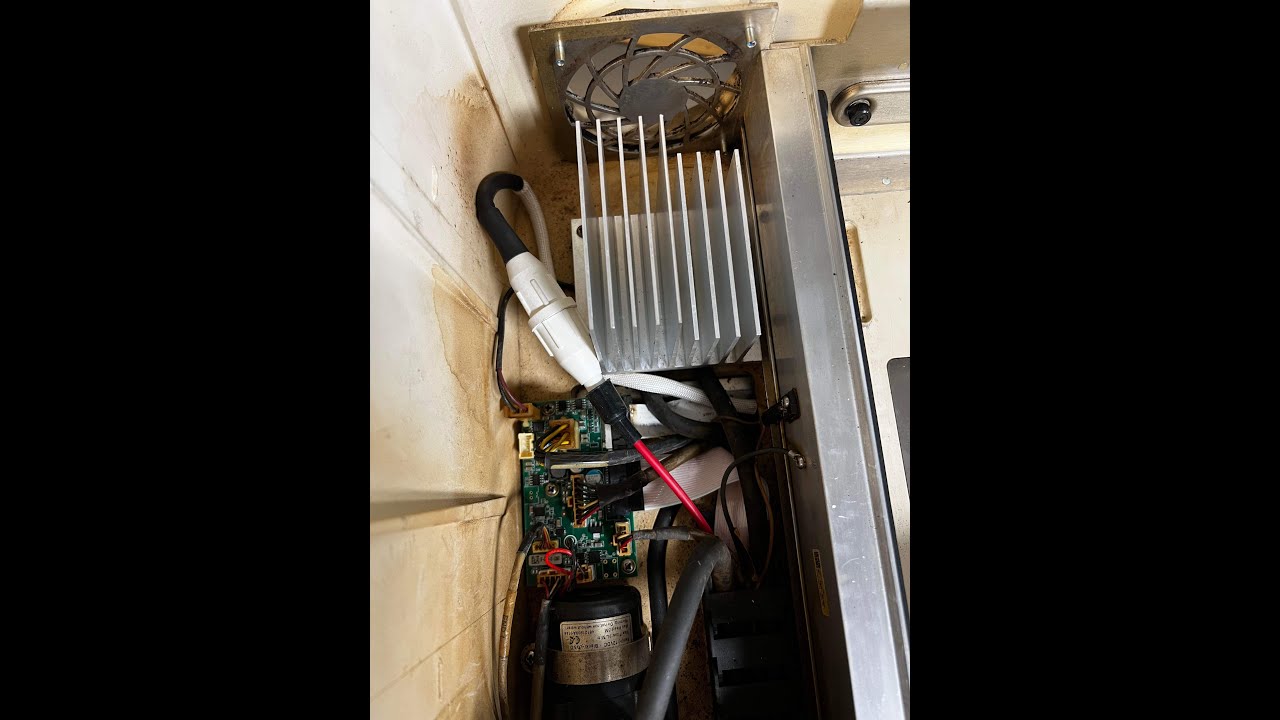
This is super helpful! Is there a typical place these shorts usually happen? I’m trying to visually inspect it without completely disassembling it if possible, but that might not be…
That video shows the most common location. It’s in the red wire are usually right somewhere in the middle of the tube as far as I know. In any case you’ll need to inspect the entire length of the red wire to see if that’s your issue and it’s not always 100% visible like it is in that example.
I’m not sure if Wiregrass still sells a kit to repair this, they used to… But in the end all you need to do is get a high voltage wire that’s well insulated and replace that length of wire.
If that’s your problem. It’s not clear that that is your problem but you are getting a warning about too much current which seems to indicate a short circuit of some sort.