If you are lucky enough to have your Glowforge already, you have probably already run across issues trying to laser objects that are thicker than 0.5"
Removing the crumb tray to fit the work-piece is the easy part.
The hard part is:
Finding something that is the right thickness so that the top surface of your work-piece ends up between the top of where your crumb tray would have been and 0.5" from where the top of your original crumb tray would have been
Calculating the correct focus height based on your original crumb tray height, the thickness of the riser you use and the thickness of the work-piece you are lasering
There are forum members out there that have written posts that make it somewhat straightforward to do all of this. I am going to attempt to make your life A WHOLE LOT EASIER.
How?
I present to you a set of 3x different sized Risers, which are intended to be 3D printed.
These risers are the perfect heights to make your life EASY.
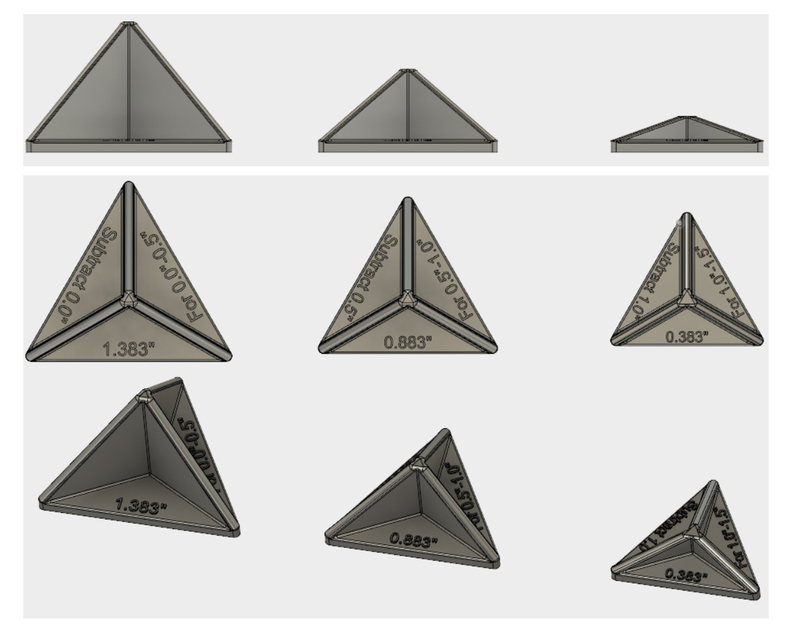
This is what they look like on my computer:
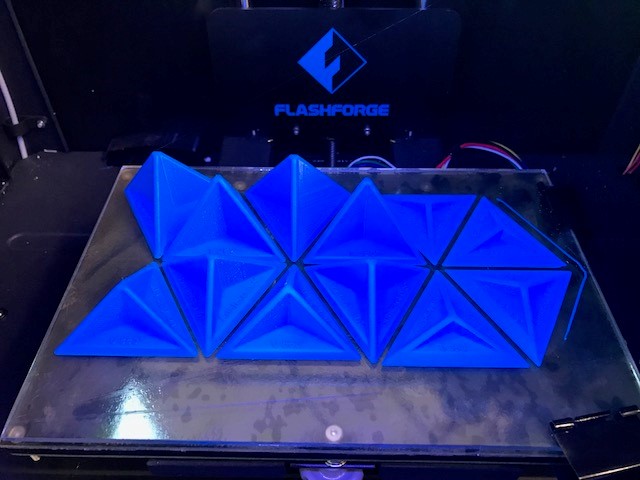
This is what they look like when you 3D print them:
The largest riser is the exact same height as my crumb tray. It is intended for materials between 0" - 0.5" thick, just like when you use the crumb tray itself. When you use the largest risers, the focus height is simply the thickness of the work-piece.
The medium riser is the exact same height as my crumb tray minus 0.5". It is intended for materials between 0.5" - 1.0" thick. When you use the medium risers, the focus height is simply the thickness of the work-piece minus 0.5".
The small riser is the exact same height as my crumb tray minus 1.0". It is intended for materials between 1.0" - 1.5" thick. When you use the medium risers, the focus height is simply the thickness of the work-piece minus 1.0".
A few notes:
These risers are intended to be 3D printed. I made a set of 4x of each size for myself. You can 3D print them in any color you like and in any material. I printed them out of PLA. if you don’t have your own 3D printer or access to one, you can order 3D prints online via several different websites.
Each riser is well marked. It shows the riser height, the work-piece size range and how much to subtract from your work-piece height to get to your focus height.
I created the file for these risers using Fusion 360. If you don’t already use Fusion 360 for your 3D modeling, I HIGHLY recommend it.
I am making my file available to you. You can download the file in any format that you wish, including native Fusion 360 format if you would like to edit the file yourself.
I used a crumb tray height of 1.383", but you can adjust this value to whatever your crumb tray measures. Tip: this value is located in the file’s “Parameters Table”. If you do modify this value, don’t forget to modify the text as well.
My file is set to millimeters. I am American and love America, but the metric system is clearly the best unit system.
@marmak3261,
I’m glad you like them. I chose this shape because it allows for minimal material while still providing a strong and stable base. It doesn’t need any support material for 3D printing and it even provides enough surface area for readable text. I tried a few other options before settling on this.
Jason
Please don’t forget that the crumb tray height isn’t exactly the same for each unit – the beauty of this design is that it can be easily be adjusted to each one. You’ll be close, though…
Great idea! I’d been thinking about milling my own blocks, but this is much easier. And why didn’t I even think about using the Glowforge to make a version? I’m still not used to the possibilities of this tool.
I think that would work fine as well. My background is more in 3D printing than it is in laser cutting, so I naturally gravitated to 3D printing for this application. You can certainly make something similar using the Glowforge itself. Only issues I see are:
The result would be multiple pieces that require assembly
The multi-piece result might not be as stable as a single part.
You would have to play around with kerf adjustment until the parts fit together well. Ideally without glue.
Regarding print time: my print took about 3 hours. However, I only ever attend the first few minutes of a 3D print. I set it to run and check on it 5 minutes later. If all is well, I leave my office and therefore the 3D printer for the night. I show up the next morning and my print is done. So, I don’t think the print time really matters. In the case of laser cut parts, I am certainly have to be around and paying attention. In that case, I think print time matters much more.
I love my Glowforge and am not trying to say otherwise. I just don’t think that because I have a Glowforge I should make EVERYTHING using the Glowforge. In this case, I think the 3D printed parts were quick to design and quick to print. It really was painless.
I am a big believer in having options. So, I encourage you to design something similar intended to be laser cut. Perhaps you can provide the results to the group. I will not be offended whatsoever. If you would like to design it in Fusion 360 and need help, I would be happy to assist.