I did all the cutting in the office before I left. Otherwise I would have needed to travel with full sheets of  to use a Glowforge at my destination and the last time I hand delivered a bunch of as part of a business trip I got one of those nifty notes from TSA in my luggage saying that they’d opened and searched my luggage… More hassle than it’s worth.
6 Likes
I got your back on this one.
18 Likes
wait, did @dan just say he’d cover the damage to hotel carpets…
4 Likes
Nope, that doesn’t do the same thing as Pattern Brush in Illustrator. That video describes how to make Textured Brushes in Affinity Designer. A textured brush is a bitmapped image stretched and/or repeated along a vector path. It’s a pretty cool feature but it’s useless for making cuts.
AD doesn’t yet have a method to distribute arbitrary vector shapes along a path the way you can with a Pattern Brush in Illustrator. However in this case one could draw a line, set it to use a dotted stroke, then “Expand Stroke” on the result.
Like this:
-
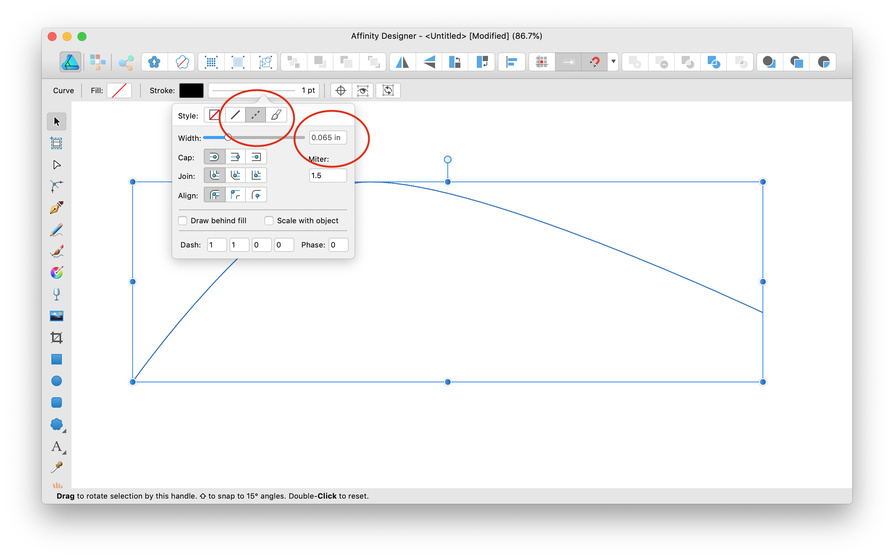
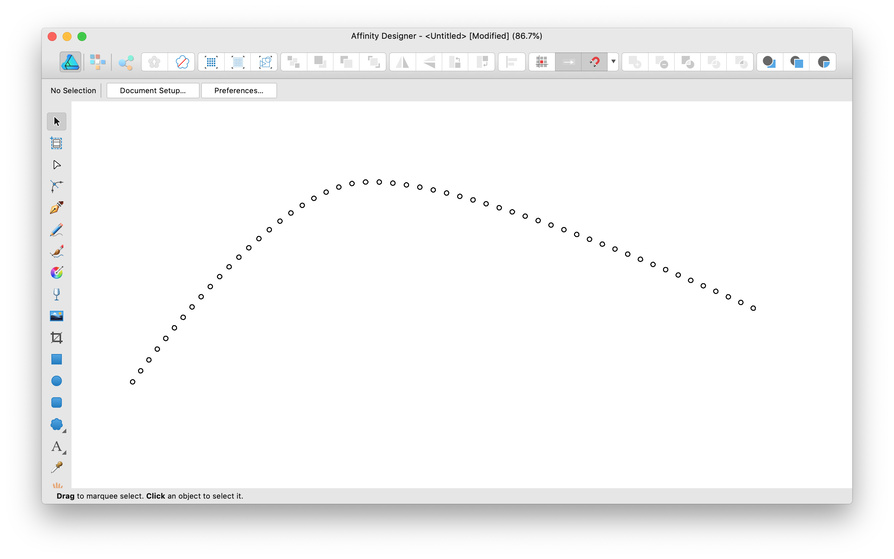
Draw a path where you want your cut holes to go:
-
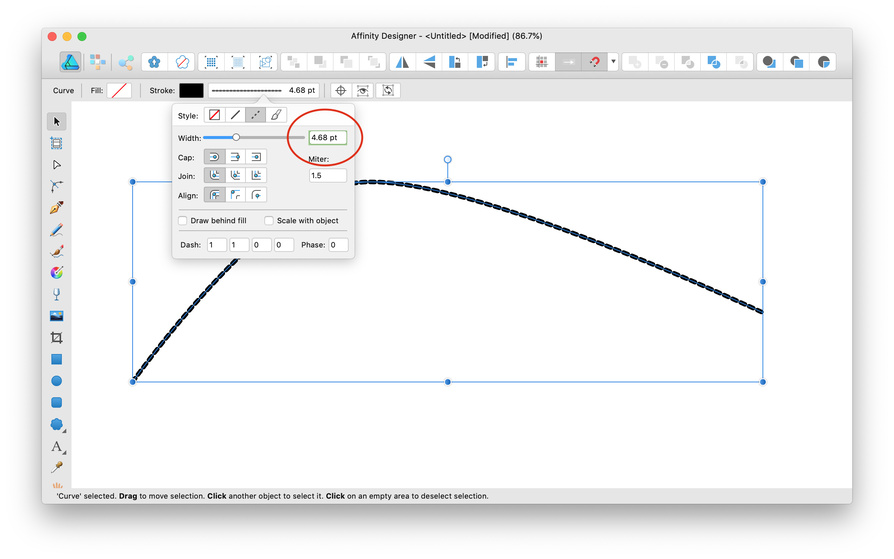
Change the stroke style to dashed and set the stroke width to 0.065 inches:
-
Note that the stroke width will automatically be converted to points. This is fine.
-
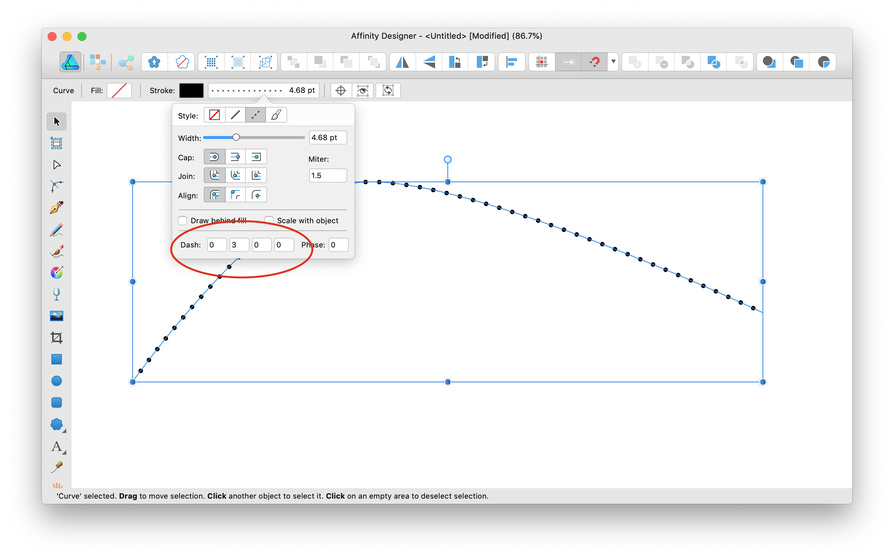
Now edit the dash settings to 0 3 0 0:
Dash settings are a bit arcane. You can find the details in either the Postscript or SVG specifications. But for our purposes the first 0 means to make the dash zero length, resulting in a dot (circle) rather than a dash. The 3 is the amount of space between the dots (again scaled up to reflect the stroke width). You could make it smaller (e.g., 2.5) to put the dots closer together or bigger to make them farther apart. The final two numbers are ignored if they’re both left at zero as shown here. (If nonzero they allow for more complicated dashed lines.) You can alter the Phase to shift the position of the circles; if left at zero the first circle will be centered on the first vertex in the path. If you are getting squares rather than circles then make sure the Cap setting is set to the rounded option, as shown. -
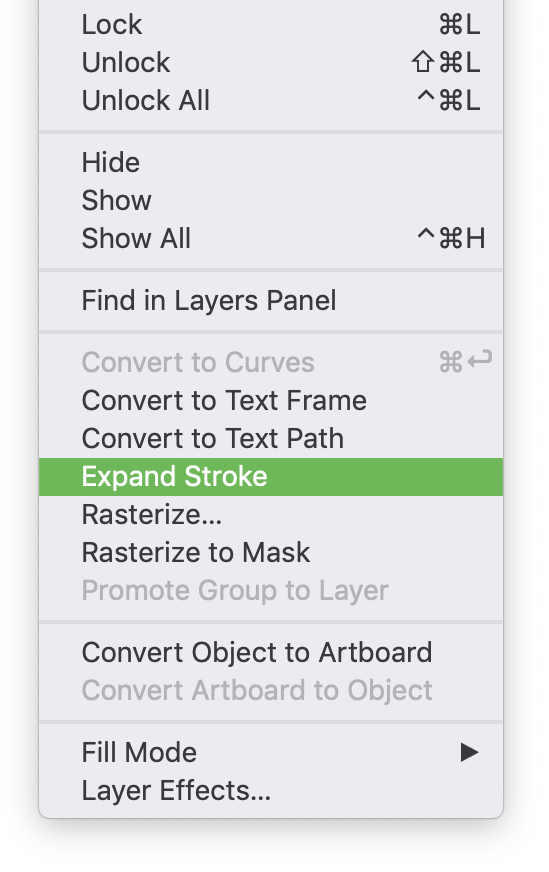
Now you need to perform an Expand Stroke operation on the path to turn all those dots into actual circles that the Glowforge can see. You’ll find it in the Layer menu.
-
And now you probably want to clear the fill on those dots and give them a stroke so they show up as a cut operation on the Glowforge:

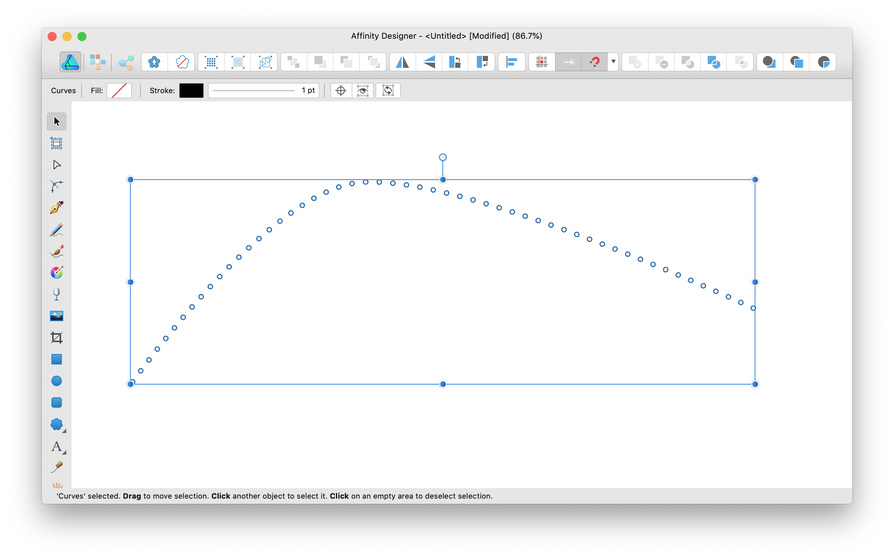
All done! Lots of little circles! Unfortunately they’re actually little polygons not actual circles, but I think they should be good enough for this purpose.
15 Likes
My People-fu is even stronger. 
(The quickest path to the correct answer is to post something incorrect on the internet.)
Thanks for the tutorial…I’ll stick it in the Matrix with the other ones from @jae and @mike10. 
14 Likes
And the quickest path to 100 incorrect answers is to post something correct ![]()
11 Likes
Thanks, that’s the one thing I wish more people would do when posting. It’s hard first starting out not knowing which materials were used or just how much material went into a project, especially when you want to try it on your own.
2 Likes
I really love the elegant curves in the design, with the reveal colors. Very elegant in person, totally worth the extra 2 hours of stitching!
4 Likes
It’s. Just. So. Wonderful. And. Fantastic!
3 Likes
If it helps to add more detail, the dye colors used were Fiebing’s Medium Brown and British Tan, finished with Neatsfoot oil. The rivets, buckles and O-rings were all cheap finds on Amazon.
Good luck in your projects!
4 Likes
So you have 0.065 holes @ 0.15 OC 0.2 inches from the edge? That would be the info I needed as I have no trouble doing that in Inkscape . I had bigger holes closer together, after cutting holes too small . the leather was also I think old so not so strong and tore too easily.
2 Likes
Damn! You are really good with this leather stuff!
Is there a way I could pick your brain for a project I’m working on? I would prefer a private message, if one such system exists on these forums.
Cheers!
Great stuff! Project, end result and contributions in the post!
Many, many thanks for sharing.
Cheers,
Marc
1 Like
You might miss out on some great input by not picking the brains of the forum as a whole. There’s some great knowledge to be had here, and lots of people willing to help!
4 Likes
You’re not wrong. I’m mostly interested in methods to get a squared shape to make a hinged lid, but with minimal excess from the seams.
Oh, wow, I’d lose so much blood on a project like that.
3 Likes
I havent run stitching holes yet but I was thinking a light score line between the holes would make embedding the thread in a groove look nice… smooth flat appearance.
3 Likes
I tried experimenting with scoring leather a bit last year… I never found the results to be positive. Too much char / surface damage. I found myself going back to traditional tools instead of scoring. YMMV, my testing was hardly exhaustive, but the early results were discouraging ![]()
2 Likes
did you use any adhesive to help put this together? if so what kind?
No adhesives
1 Like