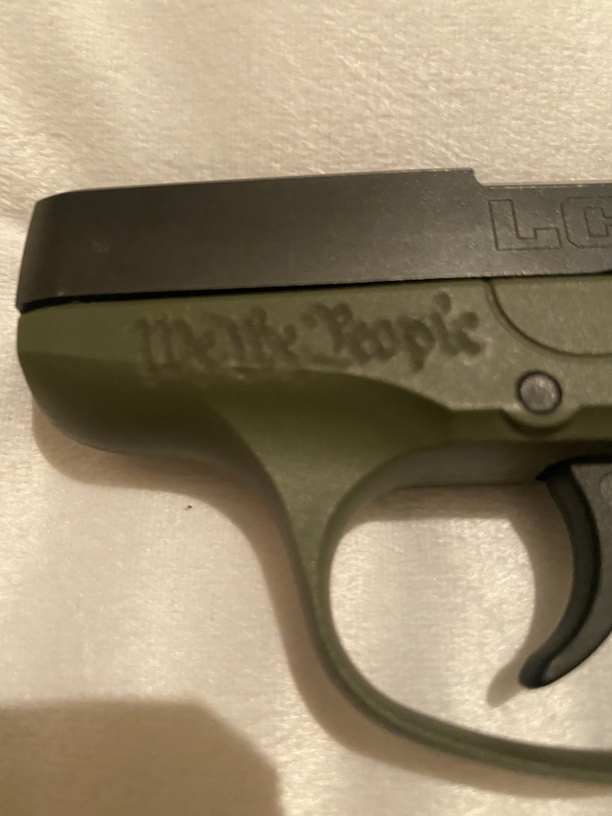
I have a cheap gun I decided to practice on and it engraved way below the space I put it at! Help!! Why did it do this and how can I ensure it won’t do this again on a customers?

1 Like
Most likely the focus was off. I don’t know how familiar you are with the ![]() but as this is your first time here I’m going to guess you’re pretty new - if I cover stuff you know then just skip those parts
but as this is your first time here I’m going to guess you’re pretty new - if I cover stuff you know then just skip those parts ![]()
First - the ![]() has a 1/2" focus area, so anything you’re working on needs to be within 1/2" of the laser window. It’s likely that your material is more than 1" thick so this project is presumably being done with the tray removed.
has a 1/2" focus area, so anything you’re working on needs to be within 1/2" of the laser window. It’s likely that your material is more than 1" thick so this project is presumably being done with the tray removed.
Follow these instructions to understand how to get the item to within the focal range with the tray removed:
or these if you want something faster, but not quite as precise
Once you’ve got your material in place you need to make sure that the auto-focus laser dot hits where you want to engrave. If your computer is right next to your machine, then once you aimed and hit the Set Focus button watch the head, it’ll shine a red dot on your material. If it’s where you want it, GREAT - if it’s not, adjust your aim until it is.
That your material is black means that sometimes it has a hard time focusing - you may want to put a piece of masking there for it to aim at.
Once you’ve successfully Set Focus, then place your art work and hit print. The machine will auto-focus one more time which may make your art look like it’s in the wrong place, but if you don’t change anything you should be good - if you’re very worried and want it to be 100% perfect even with the auto-focus then you should build a jig that’s the same height as your material - you can put in layers of cardboard and cut out the shape of your material so that when you lay it in the part you’re working on is the same height as the cardboard surrounding it.
Let us know if that helps!
11 Likes
There is a difference between what the camera sees and what happens in real life, because the camera has a fisheye lens that uses a short focal range, and the further away from the center of the cutting area (the area directly below the camera) the greater the difference. The shift increases as you get farther away from the bed center.
If you want to ensure exact placement, start by placing your material directly under the camera, and always run a test using masking tape with the laser power set to 1.
4 Likes
It also helps to place your project directly under the camera.
4 Likes
Thank you all so much!!!
2 Likes
Hi @bnwilsey. I’m sorry to hear that you ran into some trouble getting your prints to align with the placement of the design in the Glowforge app. It sounds like you got some great advice from fellow owners. Can you let me know if their suggestions were able to help? Let me know and I’ll be happy to with any troubleshooting if you’re continuing to run into any trouble. Thank you!
1 Like
Since this problem is being seen on materials that were purchased from another company, we can’t offer support for prints that don’t come out as expected. Materials may vary widely from piece to piece, even if they’re created by the same manufacturer. I’m going to move it to Beyond the Manual so other folks here can help. Should this happen with a print on Proofgrade materials, please open a new ticket in Problems and Support and we’ll help you right away!
I know your pain! I posted a tutorial to the free design section that might help. It resolved all my issues to switch to a coordinates based system on things that are more complex. By having your GF make a grid it tells you what the GF sees.
https://community.glowforge.com/t/reinsertable-grid-file-and-tutorial/
2 Likes
This topic was automatically closed 30 days after the last reply. New replies are no longer allowed.