I imagine no news on this thread, but… from time to time I’ll give a look ![]()
2 Likes
Me too (from the Netherlands) … I don’t use my Glowforge often enough for it to be worth the investment, but with everything I hear online and from friends with other machines, I’m tempted to “upgrade” to an xtool.
Wish I had the skills to whip up a 3D-printed bracket and nozzle (and find a place to hide a compressor or sneak a hose into the GF body.
4 Likes
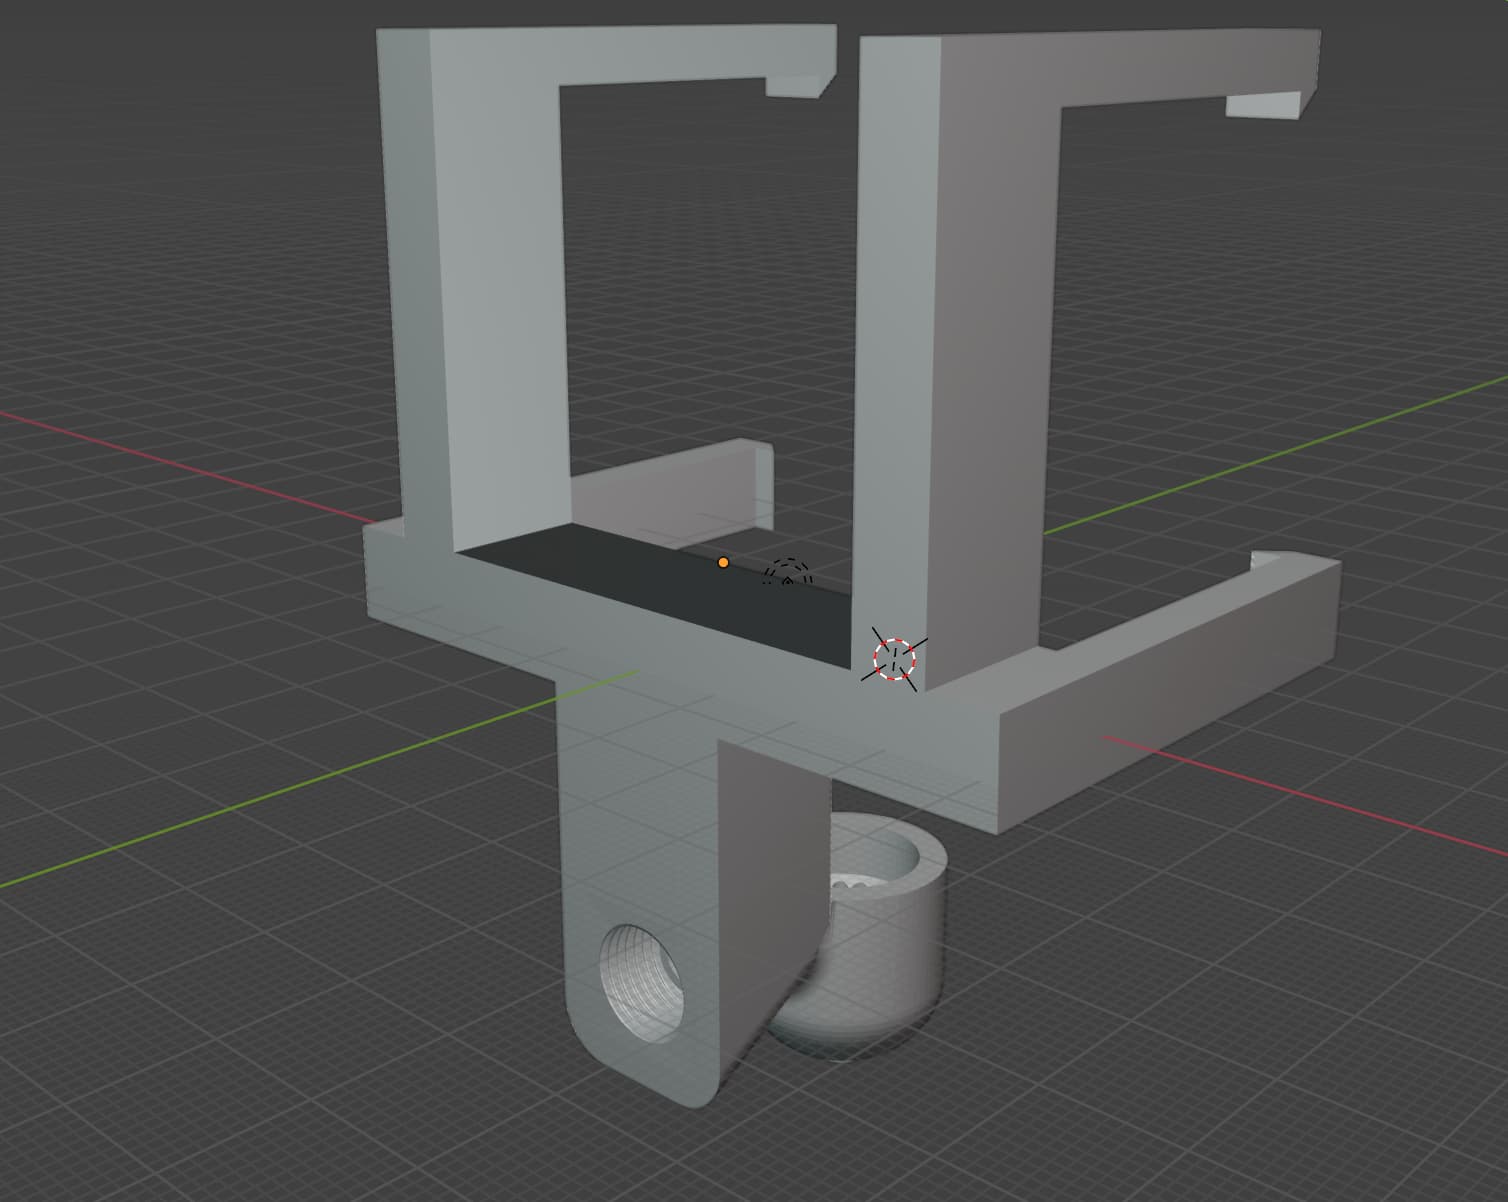
Guys, I did it. I made a custom 3D air assist nozzle that will hold a 6mm air tube so you can hook up an air compressor. I used laminar flow and I’m so close to having this thing finished. I’m running a few more tests and it will likely take 2-3 more 3D prints, but I’m close. I’ll share all the files once I dial it in.
7 Likes
Looking forward to it. I love it when people improve their machines.
6 Likes
Wow, impressive!
2 Likes
Thanks guys. I tried a cut last night and it didn’t work. I realized my error and I did a redesign last night. I’ve got it 3D printing in PETG right now and I hope it works tonight. I will say that I did have to add another custom piece that I can show you all. Some of the modifications I made might take some of you out of your comfort zone so my solution may not work for everyone.
5 Likes
Hi Glowforge Community, I finished the laser head air assist nozzle to a point where I feel comfortable sharing it with you now. I have added the files and a link to an informational video.
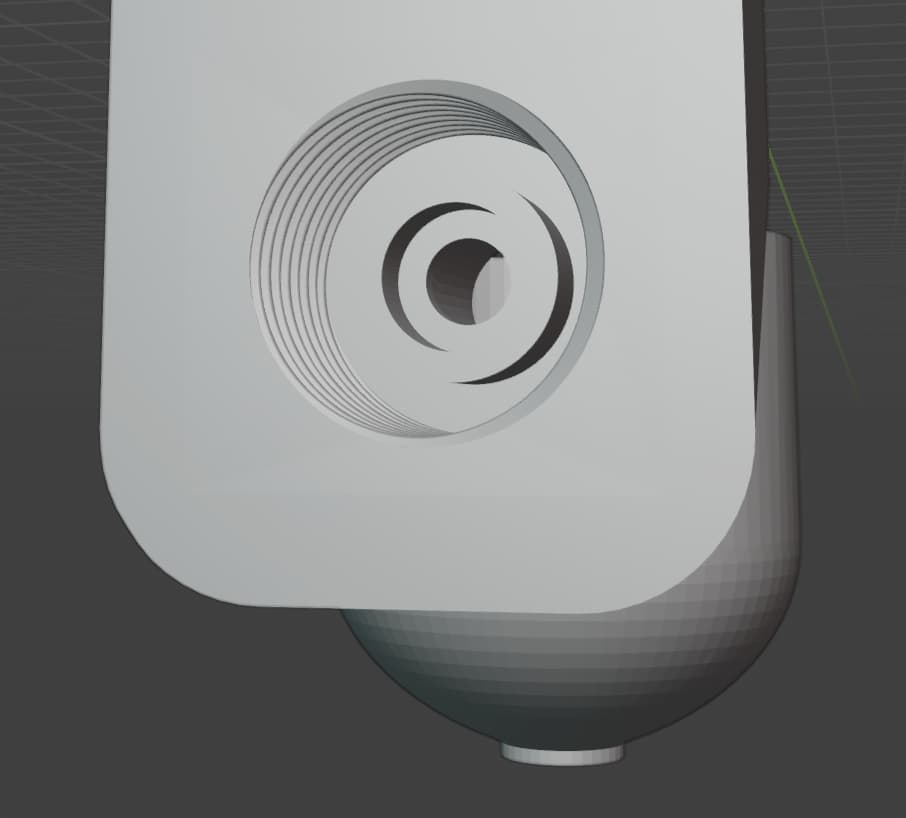
Using super glue or some safe adhesive, you must attach a small rubber washer to the bottom funnel where I leave a lip. This gives it a nice tight seal and it’s totally worth it.
For the 3D Print:
- Use at least 20% Infill
- Use PETG, not PLA
- Use 3D Honeycomb for the infill pattern
- Use Organic for support style and use honeycomb for support pattern
- Do not put supports in the inner tube or bottom chamber or it will get stuck. I recommend painting on the supports.
8 Likes
Great work @zgriset! I have a similar (but official) mod of my second laser, the old Xtool M1, and the difference is night and day.
I still do not understand why Glowforge does not design and provide an official air assist update. I would buy it for sure, for my Pro. Probably - if doing a similar mod like yours, I would reuse the same little “air pump” that I’ve used for the M1 and works perfectly: sure less powerful than your air compressor, but… probably easier to manage. Are you aware of other mods? (I’ve some 3d printers as well, no probs)
Compliments for yours, meanwhile.
4 Likes
I went the other way entirely and wanted to reduce the air assist:
Then I wanted to overpower the air assist to keep light materials from moving:
I also devised a way to focus below the height of the crumb tray:
@timjedwards did two great projects, tray boots and replacement lens tools:
@taylor.a.jenkins designed a rotary system to engrave round objects:
@JINTEC posted an outstanding cooling mod:
Beyond that there are many other common mods. I’ll be generous with the term:
- Magnet brackets for bypassing the front door safety
- Material hold down pins that plug into your crumb tray
- External exhaust fans
- Related: cutting out your internal exhaust fan to improve airflow for the external fan that you’ve now added
- Cutting out the bottom of your machine so it can be lifted and accommodate taller objects
- Related: using insulated duct to reduce noise
- Externally mounted adjustable/positioning lamps to improve camera performance
- Using a switch bot to automatically press the button on the machine
- Using a dedicated video camera to watch the machine from a remote location in real time
Then there’s the world of software modifications:
- Using a plug-in in your browser to add sound cues to when your Glowforge is ready
- Using style bot plugin to suppress the chat Sidebar
- Using a redirector plugin to avoid the ad-filled main page of the dash
- Alternately using a content blocker to suppress parts of the main dash
- Various plugins for inkscape to improve laser designs (a few made by me and posted here)
The list goes on, I’m sure I’ve missed many… But this is a good start.
PS: this would be an excellent time to go back and tag some of these posts as mods. If you want to help and find a good modification post using the search, go ahead and tag it as “mod”, it’ll make it easier to search for them in the future.
10 Likes
Thanks so much! I’m going to keep improving the design so you only have to drill a small hole or maybe even just put a tube through the pass through slot. I think using the chains is the way to go but I haven’t figured it out yet.
I imagine glowforge will add something soon. It seems inevitable that they will improve the air assist.
Also using a pump is totally fine and will help considerably. My oil free air compressor is probably a little overkill. Although I will say that when I cranked up the PSI, the cuts got even cleaner. No matter what, any extra cool air flow in there is going to help.
4 Likes
It’s coming up on eight years, no movement yet.
5 Likes
I’m going to try and contact the company and offer to design it for them. I’m confident that I could design a clean solution. I was thinking about my design more this morning and I think I had another breakthrough.
5 Likes
i have been loving how xtool does this on my p2 for a while now. this is no small part of why that laser seems to do a better job.
4 Likes
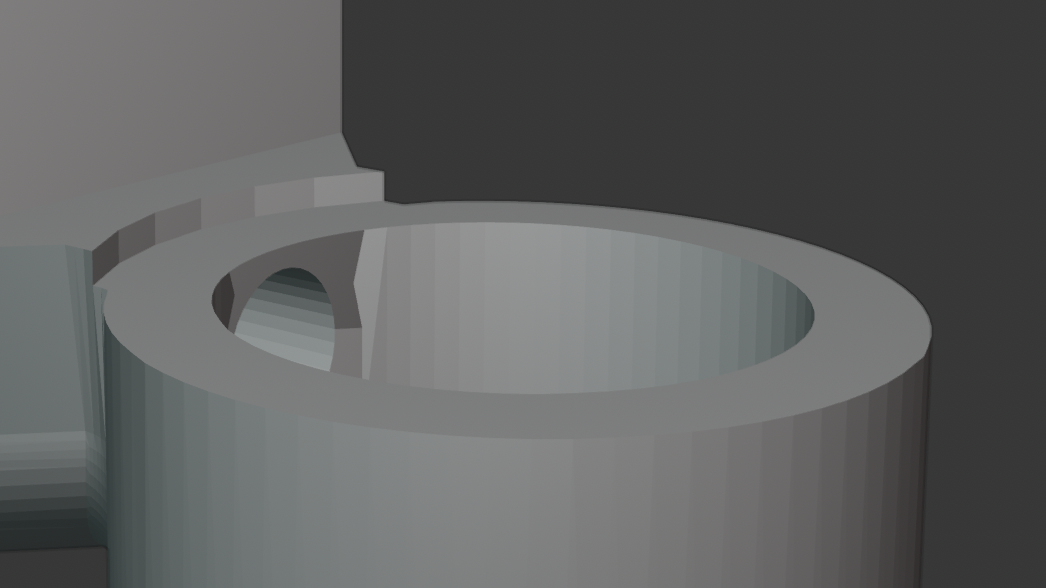
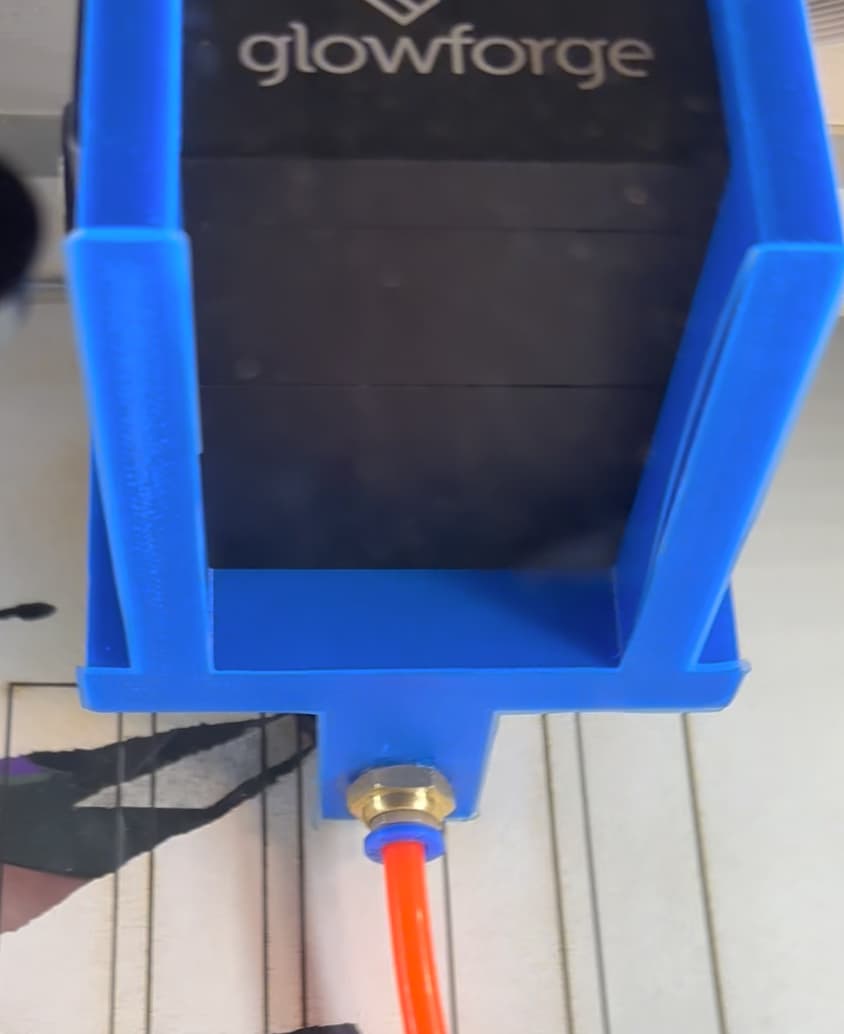
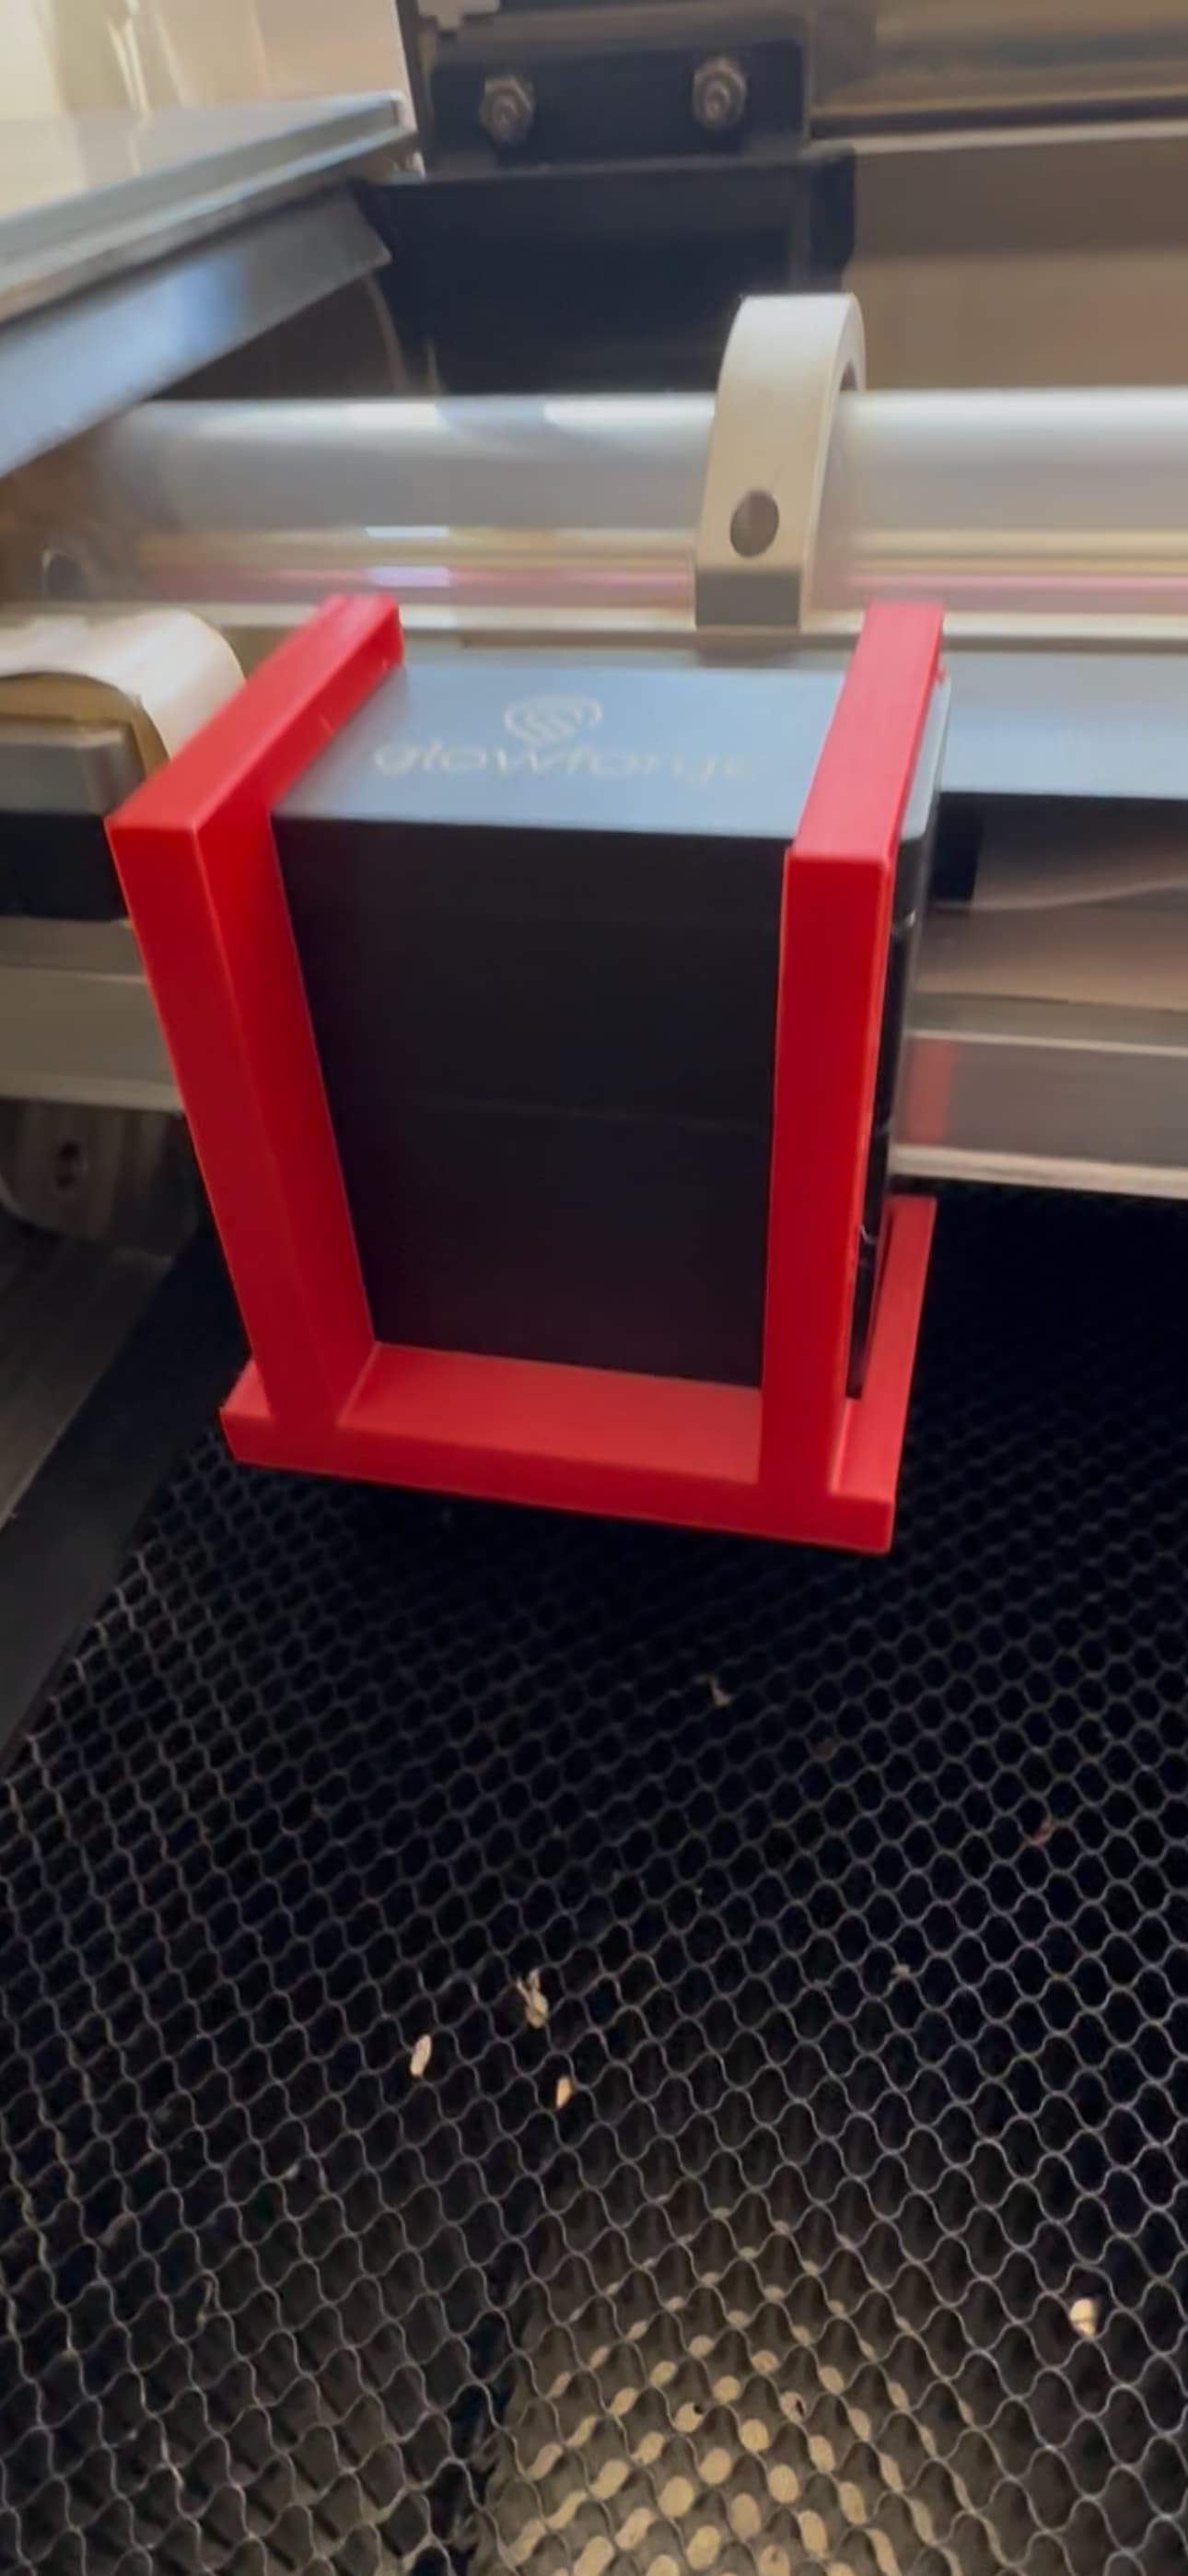
I had an idea to do a threaded slot at the bottom so you can put a bite type 6mm air tube fitting and have a nice tight fit. It also goes straight to the funnel now with no obstruction. Then, you can remove the flap from the passthrough slot in the front of your Glowforge and put the air tube in through there. If you support the tube correctly from up above, it should slide in and out with ease I believe. This would enable people to make this enhancement without having to do any permanent modifications or cut any holes at all. You can just add this attachment, hook up your air pump or air compressor, remove the passthrough flap, and support the tube from above and you should be good to go. I also added a little ridge where you can attach a rubber washer for an extra tight fit, I am testing everything tomorrow.
8 Likes
made a new model where the air tube enters from the front with the air tube support from above so it’s not just dragging on the floor. I realize now that I need to design it so that the air tube comes from the passthrough slot in the back. Then this thing will really be great.
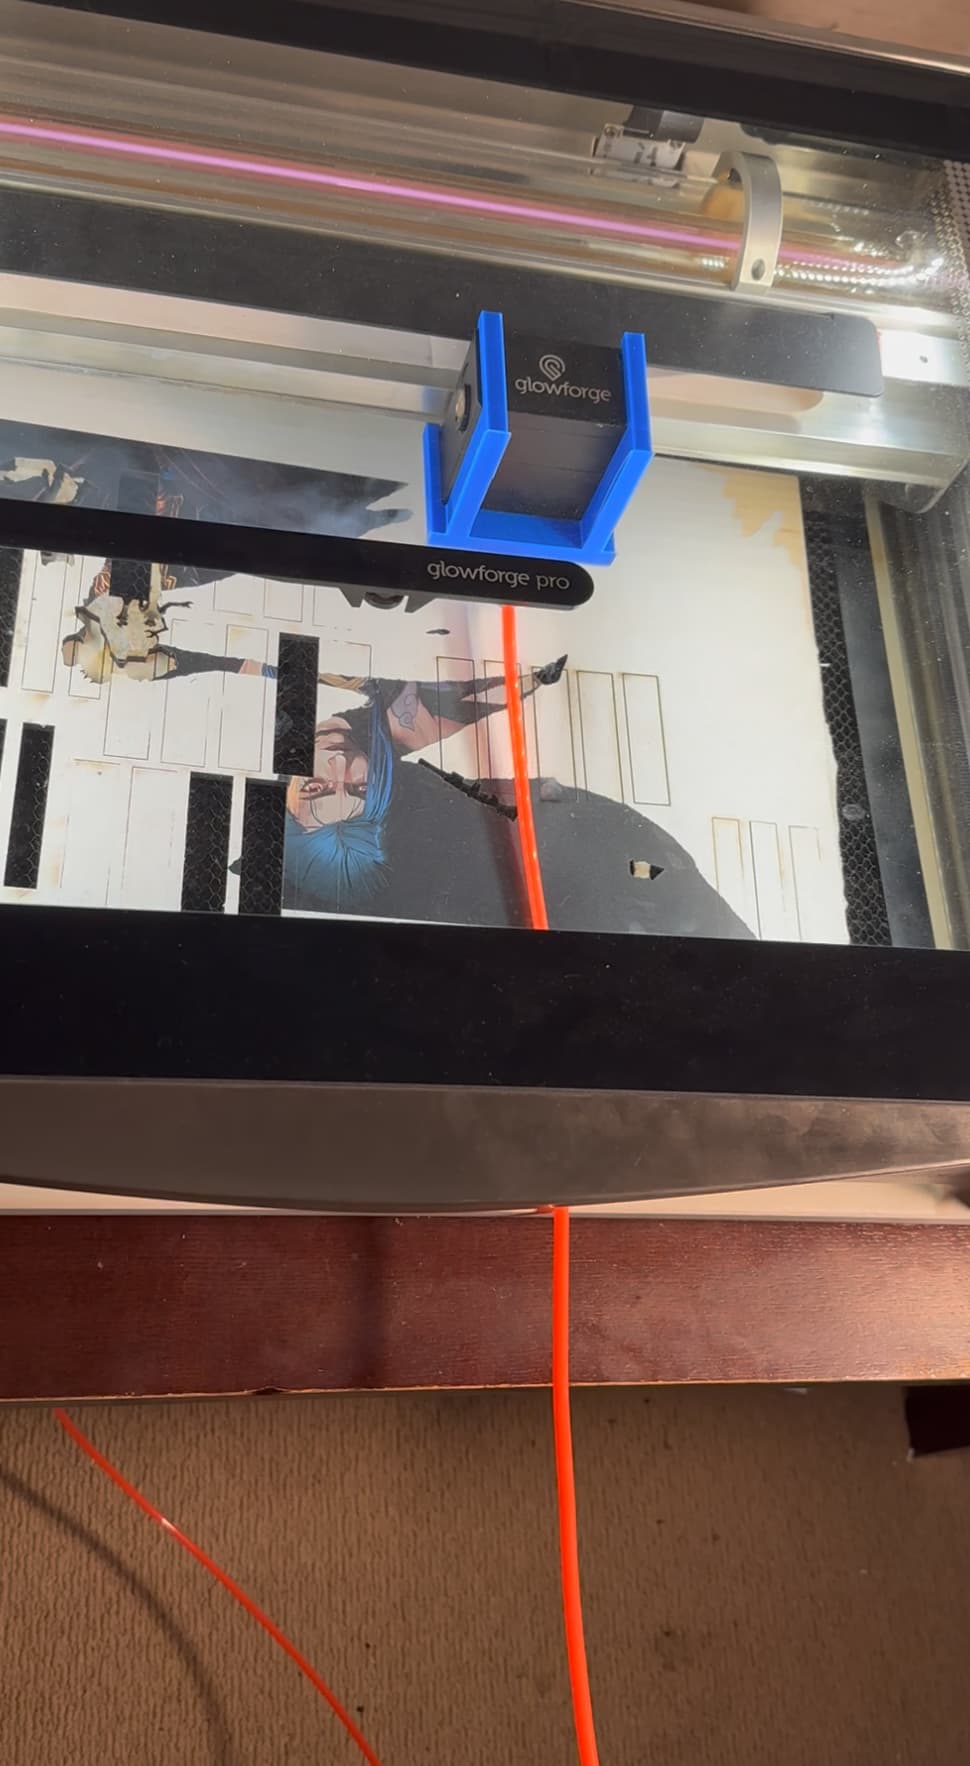
The air tube slides just fine as long as you support it from above and also remove the guard flap covering the passthrough hole. It has only 4 little screws.
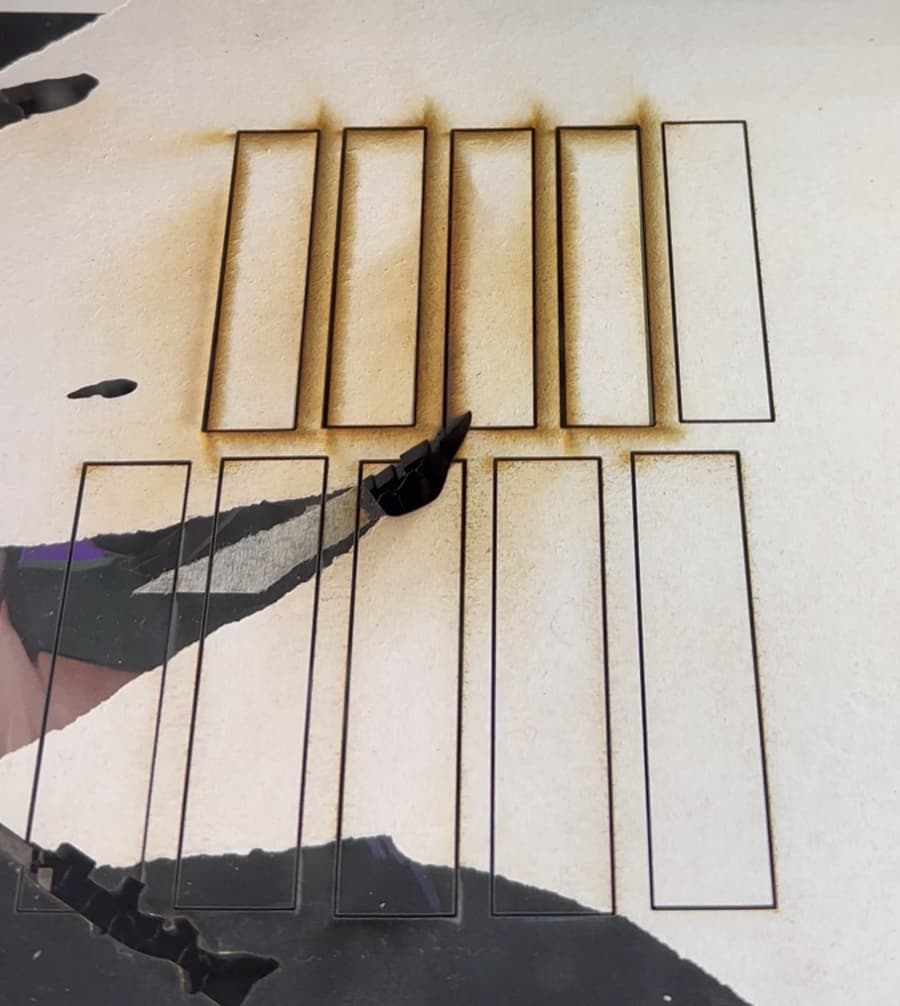
You can see from the photo below an example of 4 cuts with no air assist and then one with air assist.
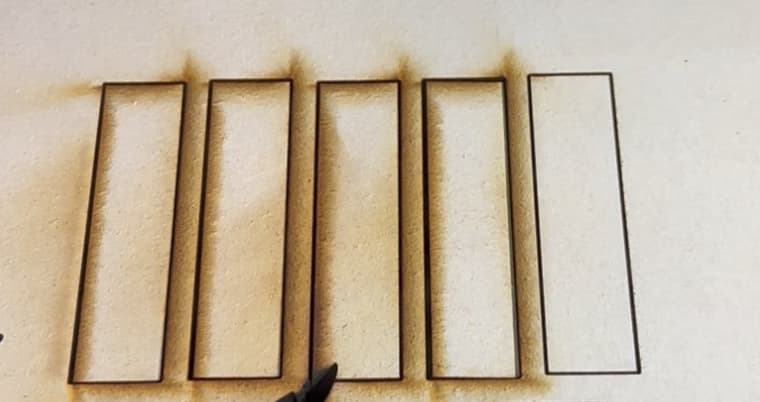
I also did a few more cuts with air assist below that row. It makes a world of difference and it’s very clean on the other side as well.
I’ll be sharing the next design soon so it enters from the back so everyone can just plug and play this sucker. Also I created a threaded hole so you can put a push to connect fitting in there and it fits air tight.
10 Likes
Hey Guys! Here’s my update! I think I am happy with this version and I feel comfortable recommending this now.
Please watch this video for the full view: https://drive.google.com/file/d/1Fzh7_SR-3cl7CBphEl2J7pdcfcZC3Dj1/view?usp=sharing
Here is the OBJ file so you can edit it and 3D print it.
Glowforge Pro Air Assist Nozzle 2.0.obj.zip (1.3 MB)
does anyone need one shipped out?
9 Likes
Wow. Just wow!
Would this make a difference for the air assist fan error? I HATE taking the carriage plate off to clean the air assist fan. Correction, I actually hate putting it back on.
8 Likes
Thank you!
Yes I have not had to clean my air assist fan once since I added an inline fan and my new air assist attachment.
This was totally worth it. The difference is impressive. Saves me soooo much time not having to take the masking tape off 500 puzzle pieces.
7 Likes
I have a GF Plus, so no passthrough slot. Would you still suggest routing it through the back of the machine?
Celeste
2 Likes
You have a slot in the front right? I can give you my design where I went through the front slot at first. Works just fine!
2 Likes