How to manually control the air assist fan power

Disclaimer: If you are unsure of either of the following:

  • “why would you want to do this?”
  • “what problems could this cause?”

… then turn around and walk away, this isn’t for you :slight_smile: (I am only half kidding!)

The bottom line is that this may elevate your fire risk, reduce your air assist fan life, or cause a change to the fumes generated by your cuts. It may not do these things too, there’s just not enough data to say for sure either way. I’ve been using them for some time without any apparent ill effects, but that’s just one person with one machine.

This is on the very edge of “beyond the manual” and should not be tried without abundant caution.


Now that that’s out of the way: I’m clearing out my list of ancient projects I’d been meaning to try. Here’s one:

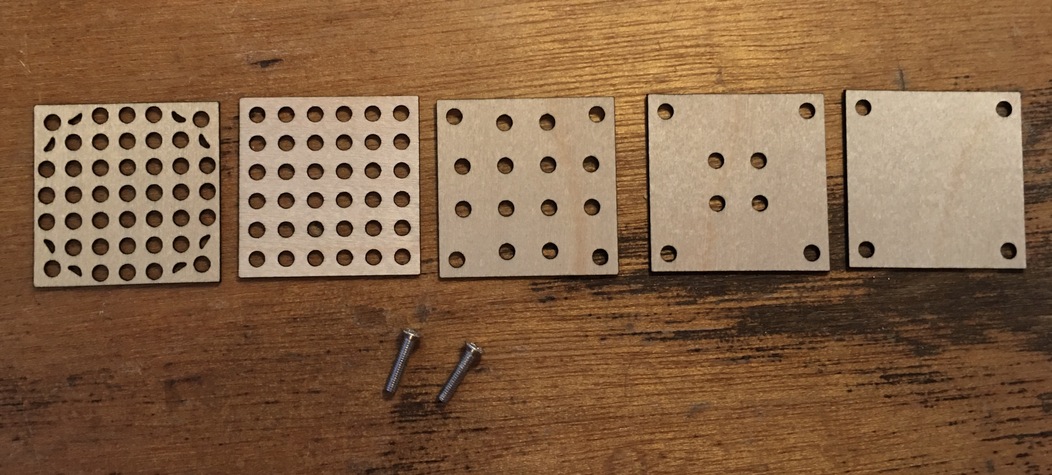
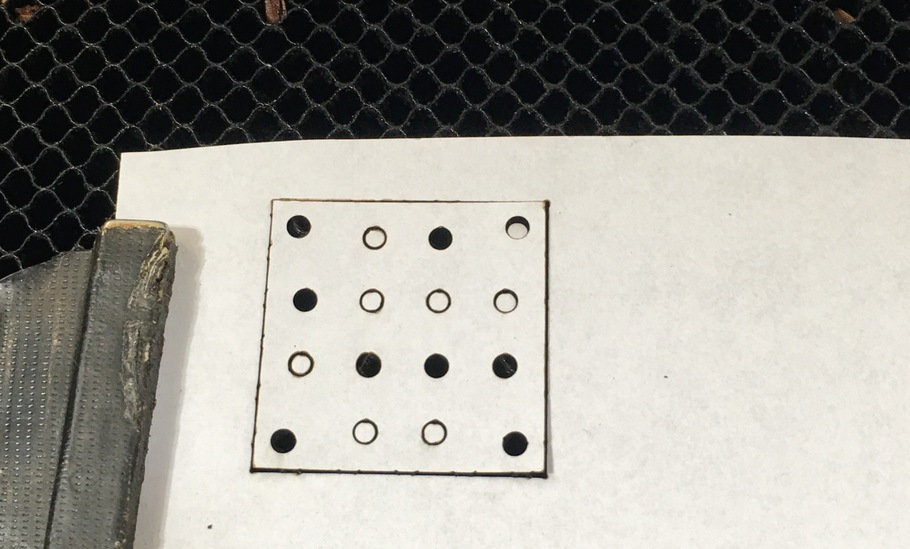
This may be all that an enterprising Glowforger needs to get the idea. These are plates that you affix to the intake of the air assist fan to reduce the airflow. Left to right, they range from “slightly reduced” to “no airflow at all”. I feel the need to reiterate: the air assist fan is very important for lots of reasons, not the least of which is to prevent fires… so, basically don’t do this!

But, I know you pack of maniacs… so in the name of science, I tried them all out, and it works very well.

To attach the fan reducer, you take a small screw and insert it in a corner hole, and slip it into the fan case. (when you look closely at your fan it’s obvious how it works) The caveat is that you need a rigid thin material, I used 1/32" plywood, it’s possible that a nice heavy cardstock would work too. 1/8" material will not fit, the clearance behind the assist fan is very tight.

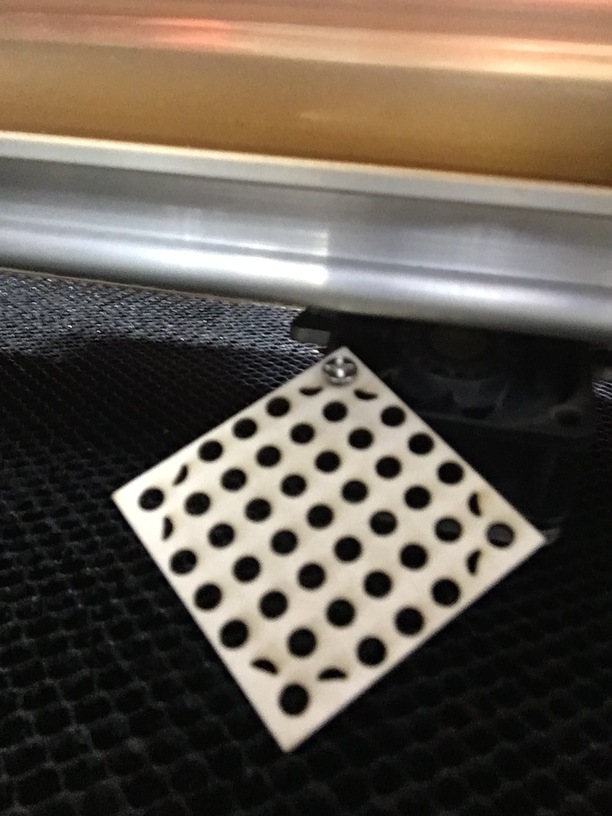
Detail, terrible photo quality, but here you go. The red arrow points to one of the corner holes in question:

Now, rotate your fan reducer into position and place the other screw.

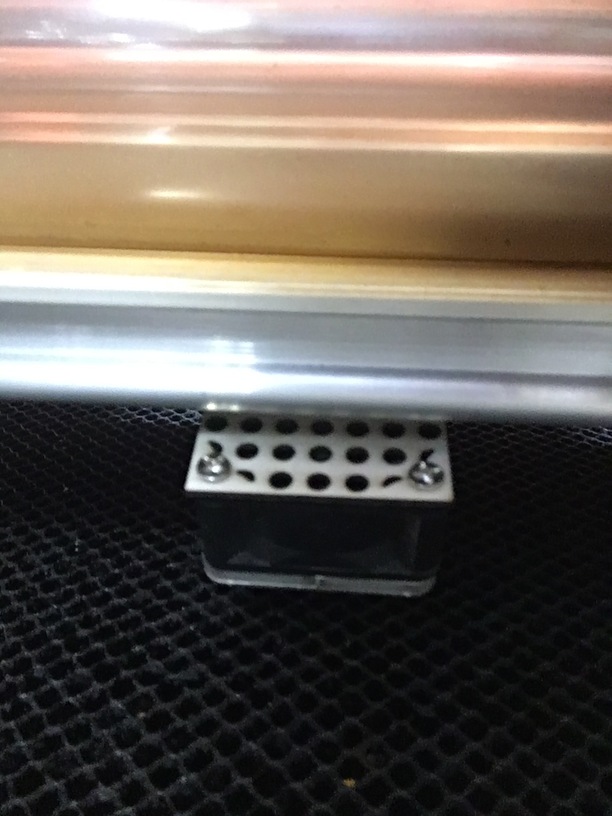
I just slipped the screws into place, they don’t need to actually screw in, they just need to fit the holes. The suction from the assist fan will keep everything firmly in place.

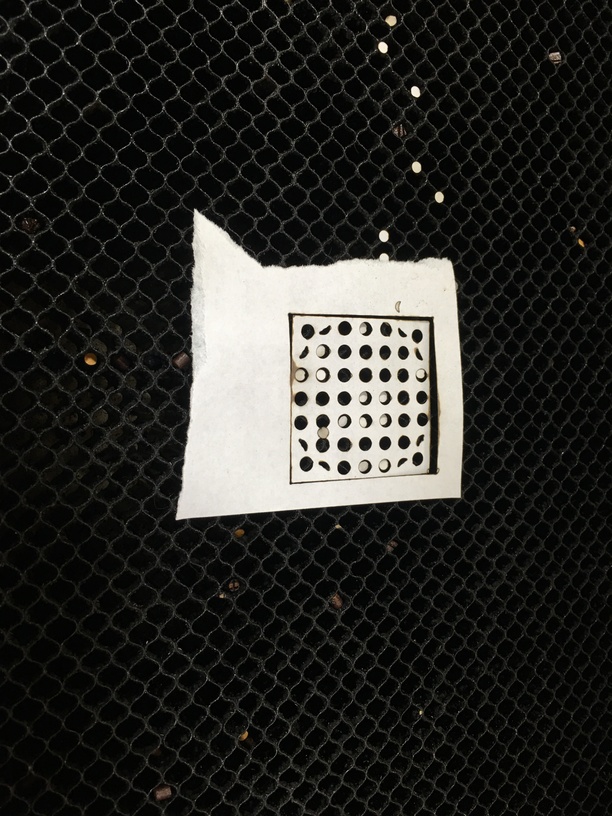
Here are the results, I cut these shapes out of standard printer paper with no mats or anything.

Some of the small holes fell through the tray, none blew away. This cut was made with the middle reducer above:
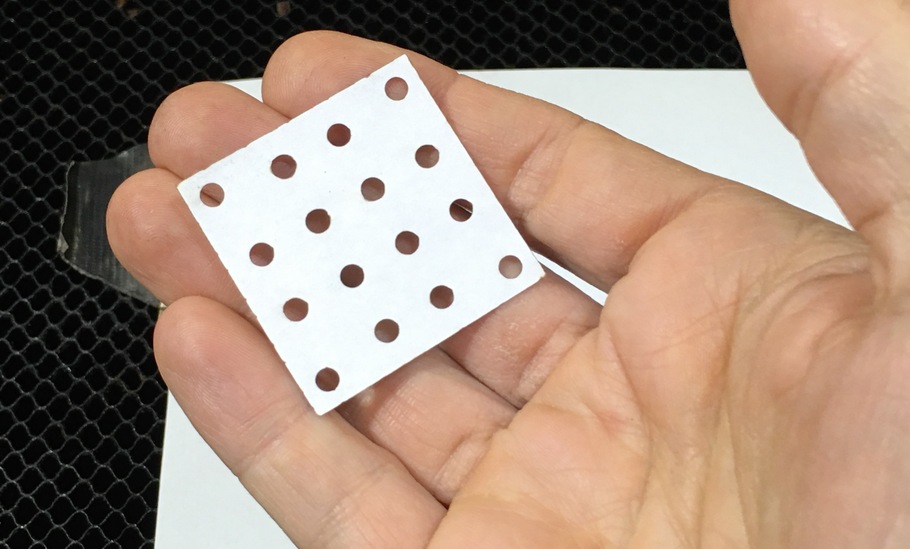
Hand for scale:

I then went and tried the rightmost reducer. This solid plate should prevent all air assist airflow. I made no attempt to hold my small scrap of paper in place, this was the result:

The paper stayed put but the heat did bow it up some, which was not the best result. It’s probably a good idea to hold the paper down regardless, keep it flat. The point is that it didn’t blow away.


So. If you want to try this, here’s the file. But, one last time, click here to confirm that you understand what you’re doing:

I am crazy enough to try this and understand there may be risks, yet here we are, and I'm clicking anyway:

… ahh, I knew at least someone would want to try this. :slight_smile:

Be sure that your reference square is 1" per side if you want to modify this.

assistadjust

Click to download

22 Likes

Love it. Lazy man’s vacuum table :wink:

3 Likes

Well that’s the thing. This plus vacuum table is perfect.

The second reducer takes just enough edge off that even small pieces don’t fly away on the vacuum table, and the paper/cloth/whatever is held flat and secure. They really work together well. I like that even with the second reducer in place airflow is still fairly high because of all the reasons that the air assist is a good thing, and it will probably prevent fan overheating.

The more aggressive reduction was mostly to see if it would work, or if the Glowforge would throw a fan error. It didn’t.

The vacuum table is still my favorite new thing lately, this is phase two of my “let’s cut light materials” solution.

Still, this is totally ill-advised, I know it. I feel ok with the risk, but that’s my call… YMMV.

If Glowforge would just release an update to the UI that lets us slow the fan down, this wouldn’t even be an issue. Mystifying and slightly annoying that they haven’t done that, they’ve had enough time to get to it.

9 Likes

You are on a roll.

2 Likes

i think there’s one caveat missing. especially if you use the full blocker, it could reduce the life of the air assist fan (as it struggles to pull it’s normal CFM through the blockage).

2 Likes

It wasn’t missing but it’s a good one to repeat.

I think this is all a terrible idea :slight_smile:

1 Like

DON’T TRY TO CONFUSE ME WITH FACTS OR THE TRUTH!!!

(a)

6 Likes

More GF hacking, what’s not to love?

2 Likes

Lol you just have fun with that one.

1 Like

I remember this was supposed to be a thing. Does anyone remember if it was an original feature they backed out of, or just pre-release talk and speculation?

Well, i understand where your coming from, but this is one mod that I’m not going to be trying…

1 Like

So my opinion on this has changed a bit, as far as the risk to the fan life goes. The fan is rated for performance while totally obstructed, the datasheet specifically calls out static pressure at given airflow, even zero. I think the risk to the fan is minimal. The risk of fire etc, that’s a little less clear. Cutting cardstock on my vacuum tray last night for a total of about 1.5 hours yielded zero flareups or excess scorching, so I feel pretty confident in that use case.

As always, this is a terrible idea, don’t do it. :slight_smile:

3 Likes

paper is probably one of the better use-cases for this. you can run high speed / low power, which generates the least fire risk.

1 Like

Yeah and given the nature of this, you want the reduced air assist to prevent things from blowing away, it’ll naturally trend toward thinner and lighter materials, which simply have less fuel even if there is a flare up. A piece of tissue catching fire is not nearly as bad as acrylic, there’s just so much more energy in acrylic or thicker woods.

So far, zero flare ups in any test, even at level 5 reduction (total blockage) cutting printer paper.

1 Like

I have to be honest with myself about this sort of mod, sooner or later I would get distracted while my GF slowly caught fire :slight_smile: That’s why its not a mod for me.

3 Likes

I’d like to see this on an engrave. As long as the exhaust is adequate and the purge air on the head is doing it’s job, the optics should stay clean, and this should reduce a lot of the build up from the system going bottom up and blowing soot into the freshly engraved areas.

1 Like

Oh that’s a good idea. I’ll do one in a bit.

OK so the bottom line: reducing the air assist does reduce engraving residue.

All of these are engraves in solid maple, 750/full/vary power/270 lpi

No reduction. This is a deep engrave, so you expect a lot of residue.

Level 4 reduction, still a bit of airflow but severely reduced. Noticeably less residue.

Level 5 reduction, completely blocked. Even less than level 4.

Side by side comparisons of the full power/no airflow engraves. Notice the reflection on the tarry residue.

Full air assist power:

No air flow:

The residue is still present but it’s far less thick. My optics seem fine, not excessively dirty at all. There was no flareup, the smoke was quickly evacuated just via normal exhaust airflow. Of course flareup and other properties may be different depending on the material, but hardwood maple presented no problem. A cleaner-engraving wood like walnut might have even better performance.

5 Likes

One of the things I’ve found from going through so many lasers is that exhaust is a very significant factor in improving lots of laser processing qualities (this is why I went with dual 850 cfm fans on the Trotec). The quicker you can get that stuff out of there, the cleaner your processing will be.

The Glowforge has an advantage here with having the separate purge air on the head. A lot of systems merge the functionality of the air assist with the purge air system — the air assist provides both an area of clean air around the optics as well as directing air towards the cut. So running without air gets the lens and final mirror dirty quicker. You run with just enough air to provide that curtain.

I’d love to see someone put a significant fan on the Glowforge that would really suck. The Penn blower might suck the glass out though lol (I can feel the suction when I open the lid on the 400). But the inline Cloudline everyone goes with (which I think I was the first or one of the first to buy), stops performing as well with any introduction of static pressure.

I could almost envision someone utilizing a y-fitting off of a big fan, and running it to both the 4” outlet and making an adapter for the rear passthrough slot. The exhaust port has an area of around 12.5 sq inches. If you could utilize the pass through slot to exhaust out of, that would be another 7.5 square inches, or 160% more area to exhaust from. Plus it would be a more direct route.

One thing that your vacuum table might help with (yes, merging your topics) is pulling the smoke down and through the cut. Or, it may not have enough suction for that… hard to say. But I’ve also found that being able to pull that smoke through the cut helps with processing also. It really helps with processing acrylic.

3 Likes

i did notice that the universal will pull both around the honeycomb as well as through the honeycomb, which probably does help exhaust the smoke quicker for cuts.