Alignment of irregular objects (Coasters)

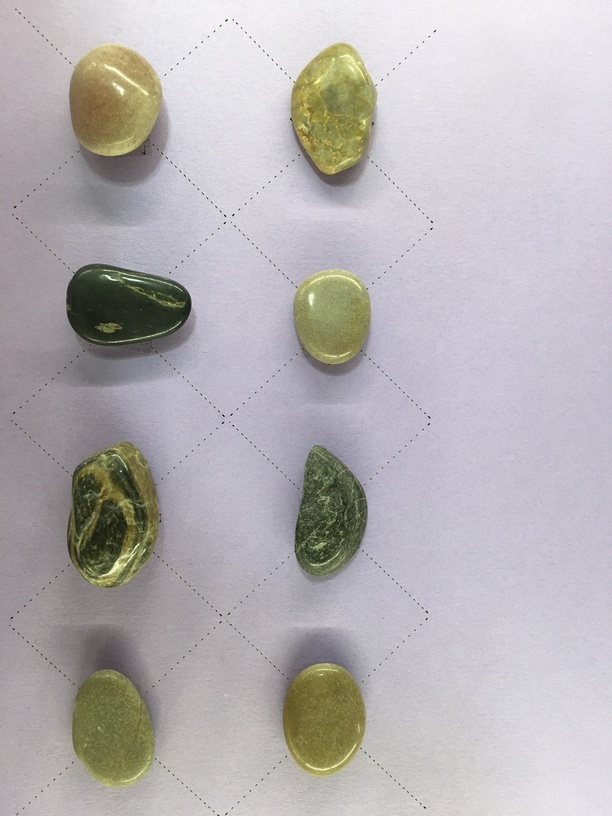
I got a set of slate coasters. Unfortunately slate’s a pretty analog material, and each square was very slightly different. Under normal circumstances, this would not be an issue, as the differences were very small… but these are to be a matched tiling set, and so alignment was crucial.

The way I solved for it was to make a “consumable” jig.

Carefully measure your coaster: length, width and height. Be sure to mark the bottom somehow so you know your orientation later.

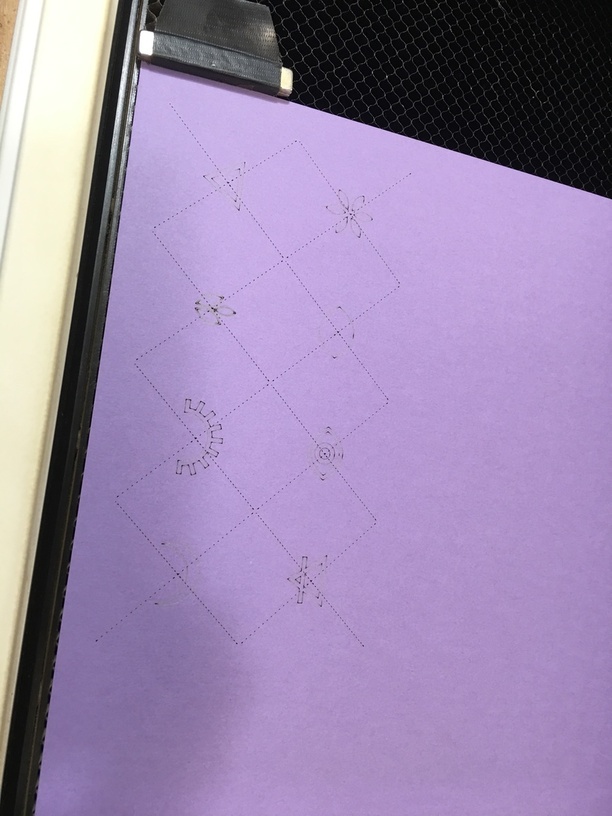
Go to your favorite SVG editor, and assemble your coaster design. In my case, it was an engraving with a score line around it. Then, as a last step, make a rectangle in exactly the size of your coaster, (even adjust for kerf if you really want to get into it. Keep in mind with inkscape that you have to elimiate stroke width from your alignment rectangle, the easiest way to do this is to set the geometric bounding box preference. Align the elements properly – this was a pure center for my case.

Now, remove two of the enclosing rectangle’s sides. You should end up with something like this, Dark blue outer outline, light blue score line, and engraving:

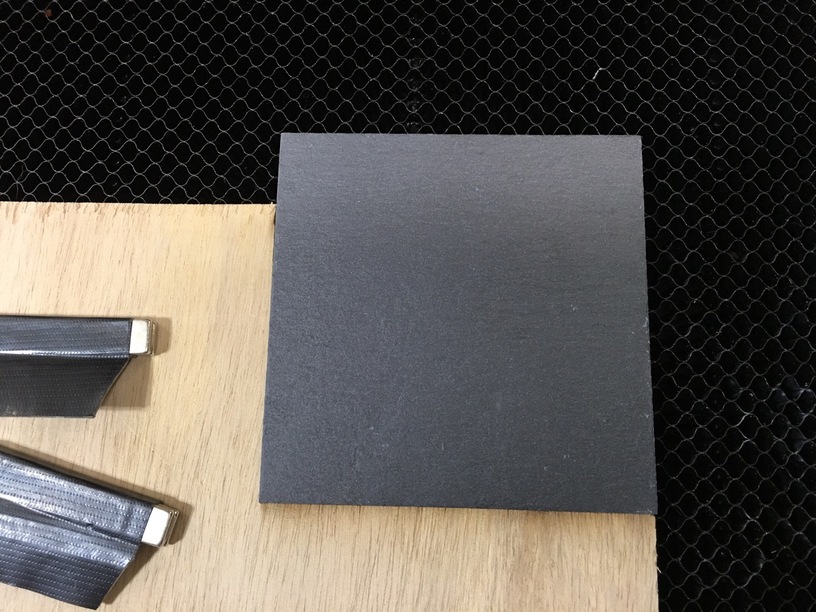
Send that to your Glowforge. Ignore the engrave and score for now, but set the dark blue “L” to cut. Insert your consumable jig material and cut out a corner, like so:

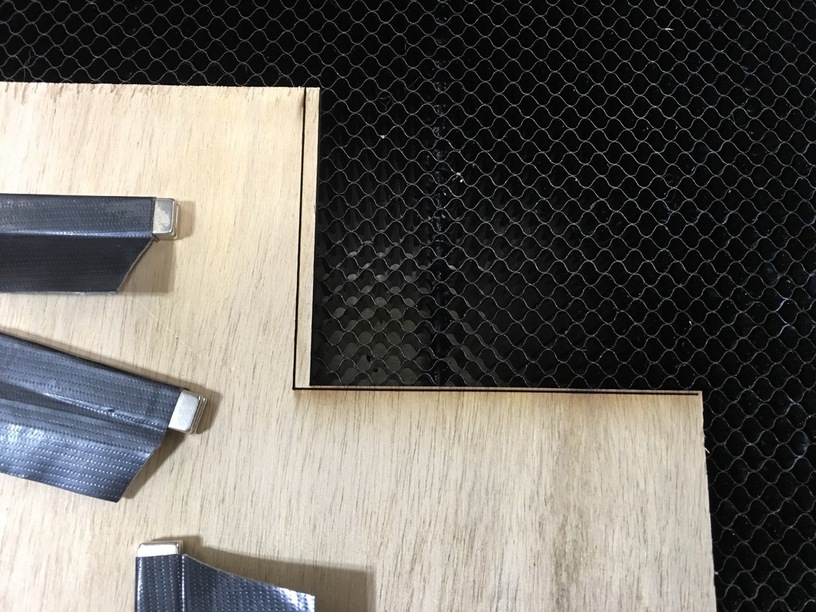
Be careful not to move the jig material at this point, remove your waste cut and carefully align your target material…

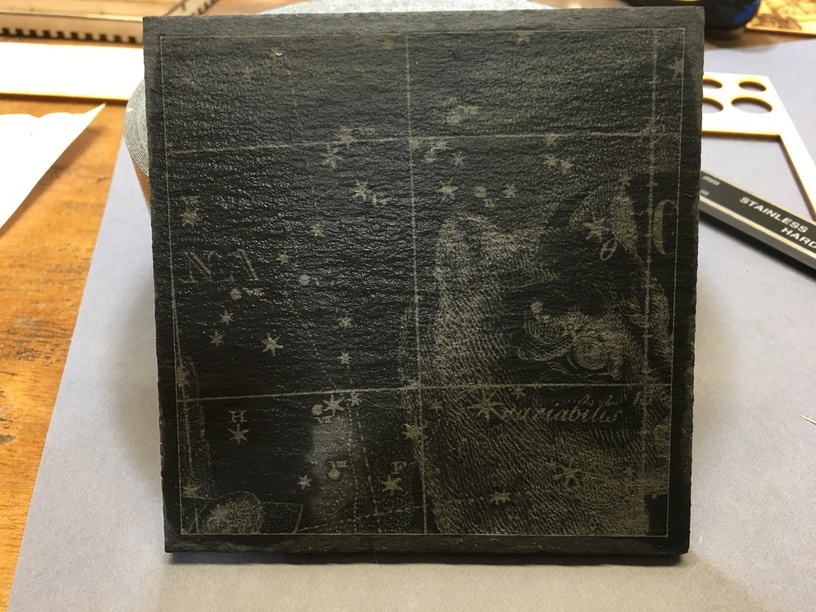
Now, ignore the dark blue L-cut, set your engrave/score parameters, and enjoy the alignment! It’s as perfect as I think you can get with irregular and possibly not even square materials for which you can’t cut your own outline.

You can repeat this procedure for each coaster, just shave off a bit of the consumable jig each time.

If you want to do multiples at a time, this technique can be adapted to work with cutout rectangles, but I liked how little jig material this required, and since each coaster is a different size and is inherently fiddly, doing them one at a time suited me perfectly.

28 Likes

I do something similar by just marking copier paper with an outline of the work piece.

2 Likes

I did the same with cardstock, but again alignment was crucial. The scores were obviously misaligned no matter how careful I was. Backing it up against a hard corner seems bulletproof so far as long as you secure the wasteboard

2 Likes

Yeah, I guess nothing is as good as a solid jig. For what I have been doing visual alignment with the help of a 'forged outline has been good 'nuff.

Thanks for the technique. Your coaster came out great!

3 Likes

I know this is an old thread but I’m hoping someone will see this…!
So, did you need to account for the height of the jig material? Does it need to match your coaster material? I’m thinking that if you used cardstock (which would be so cheap and easy!) it might not end up being that perfect when I put in a leather wallet to engrave - they’re very different in thickness (height). The thickness of the material has been what people are saying I need to be very aware of with my alignment issues. I guess I’m wondering if you saw a difference in accuracy when you used cardstock vs. plywood jig material?

Sure, you can use cardstock and will have to alter the thickness (and other settings) of the material in your cut when you do the jig step versus the material. With cardstock it’s more of an eyeball alignment than a proper jig, as you can’t really “seat” the material up against it too reliably. If I didn’t have any spare ply around I’d use cardboard, myself, but yeah cardstock can work.

I actually used cardstock with scores to draw targets to place super irregular items on (rocks). It looked like this:

I scored the x’es then used double sided tape to stick the rocks in place. Alignment wasn’t too important but I did want them well centered.

9 Likes

Very nice, ok that’s helpful. I think that should do the trick for what I’m wanting to do. Cardstock is much easier on the wallet to waste than wood or other materials!

Cardboard can be gotten free at most big stores…

1 Like

Yes and no.

If you have a wallet, and you just drop it onto the bed of your glowforge, and you want to engrave a logo on to it, then entering the correct focus height is very critical to a good alignment using the bed image in the GFUI (the browser window.) Even with the exact right height your machine could be off by as much as 0.25 inches and still be “in spec.” My machine has mostly been dead on, but other machines are not. I’m told it has steadily been getting better.

This up to a 0.25" alignment issue is why sometimes you want a jig. As long as the art board in your svg file is set to 12x20 inches the laser will always cut in the same exact spot every time no matter what it looks like in the GFUI. So say you’re engraving a 0.25" coaster and want to use .01" card stock for a jig. Your first svg would be a rectangle the size of a coaster at coordinates x,y. You cut out that rectangle from the card stock. Your second svg is what you want to engrave and is at coordinates x,y as well. So you drop your coaster into the card stock cutout and hit print. No matter what you see on the screen (and it can be off quite a bit, making you very nervous) the glowforge will laser in exactly the correct place.

The second reason focus height is important is that it determines the width of the laser beam at the top of the material. If you have something 0.25" tall and you tell the glowforge it is 0.35" tall, the laser will be aimed .1" above the top of your material. It will be in the right spot left to right and top to bottom, but not up and down. Generally, this will result in needing more power or a slower speed to cut through something and a wider strip of material vaporized by the laser. Normally this is bad, but in advanced lasering it may be a desirable effect. If you’re interested search the forums for defocus.

2 Likes

This is what I’m seeing I think. I’ve been working with a jig all day today and had perfect results. I’m so glad for the advice I’ve found on here. What I really hope is that the callibration can be fixed through the software or something soon because a .25" misalignment is pretty huge and not an end result I am hoping for as a customer. BUT I have to say the ease of use of the Glowforge is fantastic compared to the machine I was using before! I wonder why yours has been mostly dead on while others (like mine) are not even close? What’s the magic sauce in yours??! Just pondering here…

2 Likes

Mine is fairly accurate too, I am usually within a mm or 2. Always assumed dumb luck?

1 Like

I’d say you’re pretty lucky!

1 Like